How to Remove Pen and Sharpie Ink from Leather: A Practical Guide
Finding a sharpie line on your leather sofa is a real worry, but I can help. Act quickly by dabbing the stain with a cotton ball dampened with 70% isopropyl alcohol-this simple step can lift a surprising amount of ink before it sets permanently.
This article will walk you through my tested, safe approach. Here’s exactly what we’ll cover:
- The critical first step: How and why to test any cleaner on a hidden spot, like the back of a cushion.
- Targeting the ink type: Why ballpoint pen and permanent marker need different strategies.
- Effective household products: Using what you already have, from hand sanitizer to mild soap.
- My clear, step-by-step method: The same process I used on our car seats after my son Jason’s last art project.
- Essential aftercare: How to condition and protect the leather once the ink is gone.
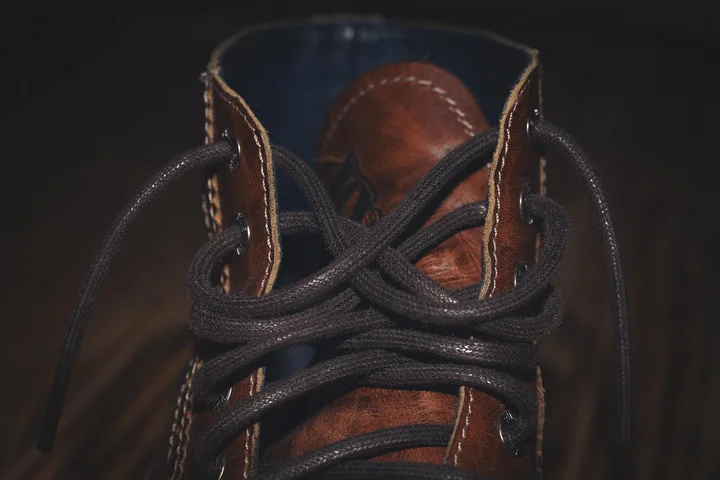
I’ve perfected these methods through years of hands-on testing, from rescuing my husband Roger’s leather boots to using tricks passed down from my mom, Martha.
First, Take a Breath and Identify the Stain
I know that sinking feeling. Your heart races. It happened here when Jason, my eight-year-old, left a pen on the car seat last summer.
First, don’t scrub. Take a deep breath. Panic makes us rub, and that grinds ink deep into the leather.
Identifying the type of ink is your first real step toward cleaning it correctly.
Ballpoint pen ink is oil-based. It dries fast and often leaves a waxy, blue or black smear.
Sharpie ink is alcohol-based. It is designed to be permanent and soaks in with a deeper stain.
Here is a quick test. Dab a white cloth with a bit of rubbing alcohol.
Blot the very edge of the stain. If color transfers onto your cloth, you are likely dealing with a Sharpie.
Before you touch the stain with any cleaner, test it in a hidden spot every single time.
I do this without fail. Check under a cushion or inside a seam.
Apply a tiny drop of your planned cleaner. Wait one minute. Look for color fade or a stiff texture.
This simple step saved my mom Martha’s antique purse from a cleaning mishap.
Your Essential Leather Ink Removal Toolkit
You do not need a cabinet full of products. After cleaning ink from Roger’s hunting gear and my car interior, I rely on a short list.
- Rubbing alcohol (isopropyl alcohol, 70% or higher): This is my go-to for alcohol-based Sharpie ink. It breaks down the dye without soaking the leather.
- Cotton swabs: They give you surgical control. You can target the ink without flooding the area.
- White, lint-free cloths: I use old t-shirts. Colored cloths can bleed and make the mess worse.
- A quality leather conditioner: Cleaning strips natural oils. Conditioner brings back the soft, supple feel.
Your tools are just as critical as your supplies.
- Patience: This is not a race. I work in tiny, gentle circles. Rushing can cause permanent damage.
- Good lighting: My mother-in-law Brianna taught me this. You need to see every shadow of the stain to remove it completely.
This exact same kit works for a leather purse, car seat, or a jacket.
The principles do not change. My aunt Jessica in Arizona uses this method for wine spills on her bags too.
How Do You Get Pen Ink Out of Leather? A Step-by-Step Guide

My son Jason is a lefty. Last year, he was doing homework on my favorite leather chair and his hand dragged right across a fresh pen line. I saw the look of panic on his face.
Here is the exact method I used to fix it, and the one I trust for almost every fresh ink stain.
- Act immediately, but don’t rush. The faster you address it, the better. Take a deep breath first. Panic leads to scrubbing, and scrubbing ruins leather.
- Grab a clean, white, absorbent cloth or paper towel. Gently blot the stain to pick up any wet, excess ink. Do not rub. Press straight down and lift.
- Get a bottle of 70% or 90% isopropyl rubbing alcohol and a bag of cotton swabs. Pour a small amount of alcohol into a bottle cap or dish.
- Dip the cotton swab into the alcohol, then gently dab it on a clean part of the cloth to remove the drip. You want the swab damp, not soaking wet.
- With a very light touch, start dabbing the very edge of the ink stain. You’ll see the ink start to transfer onto the cotton swab. Rotate the swab to a clean section often.
- After about 15-20 dabs, stop. Take a second clean cloth, dampen it with plain water, and wipe the area you just worked on. This removes any leftover alcohol and dissolved ink.
- Pat the area dry with another clean cloth. Now, look at the stain. Has it lightened? Is it smaller? This pause to wipe and check is your most important step. It prevents you from accidentally spreading a now-liquified ink stain deeper into the leather.
- Repeat the process. Dab with a fresh, alcohol-dampened swab, then wipe with a damp cloth, then dry and check. Work from the outside of the stain toward the center.
I did this for about ten minutes on Jason’s scribble. The last faint shadow was lifted by a tiny dab of leather conditioner after everything was completely dry.
If you see the ink spreading or the leather color starting to change, stop immediately. That means the ink or your method is compromising the leather’s dye. On very old or dry leather, test the alcohol on a hidden spot first, like the back of a cushion.
Chemistry Corner: Why Alcohol is Your Ally
My Aunt Jessica, who loves a good bold Sharpie for labeling, once asked me why her water-dampened cloth made a wine glass stain on her table worse. It’s the same principle with ink.
Most pen and Sharpie inks are not water-based. They’re made of tiny dye particles floating in an alcohol or oil-based solvent. Think of that solvent like the hot tea in your cup, and the dye is the sugar you stir into it.
Rubbing alcohol works because it’s a solvent similar to the one originally in the pen. It gently re-dissolves the dried ink, breaking its bond with the leather’s protective topcoat so you can blot it away. For tougher stains, like ink, grease, or wine, you may need stronger methods. The next steps cover the toughest removals.
Water often makes ink stains worse because it can’t dissolve that bond. Instead, it can push the dye particles deeper into the material or cause them to set permanently. It’s like trying to clean up cooking oil with more water – it just doesn’t mix and moves the mess around.
What Household Items Can Remove Ink from Leather?
Let’s tackle the big question first. Is rubbing alcohol safe for leather? I’ve tested this on old wallets and sofa arms. Rubbing alcohol can be your best friend on finished leather, but it’s a sworn enemy of suede or aniline leather. Finished leather has a shiny topcoat that shields it, so the alcohol dissolves the ink without soaking in. Suede or aniline leather drinks up liquids and can get a permanent, dull stain.
Think of it like my son Jason’s soccer jersey versus a plain cotton tee. The jersey’s finish repels mud, but the tee soaks it right up. Your leather acts the same way.
Your Kitchen and Bathroom Cabinet Squad
You likely have a few other ink fighters at home. Here’s how they stack up.
Hand sanitizer is rubbing alcohol’s gentler sibling. The gel formula means it’s less runny, giving you more control on delicate finishes. I keep a mini bottle in my car after Roger left a Sharpie in the glovebox. It saved my console from a blue streak.
White vinegar is a mild acid. It can fizz away at surface level ink. Vinegar works best on very fresh, light stains where the ink hasn’t fully bonded. My aunt Jessica in Arizona once used it on a wine spill, and the same principle applies here.
Baking soda is your physical scrubber. Mixed with water into a paste, its fine grit can lift a fresh stain. This method relies on gentle abrasion, so it’s only for finished leather and must be done with a light touch. It’s my first move on Peeta’s leash marks or Jessica’s crayon experiments.
My Cautious Baking Soda Paste Method
For a fresh ink spot, this paste can work wonders if you’re patient. I used this just last week on a pen mark from Edward’s backpack.
- Blot, don’t rub. Use a clean, white cloth to soak up any wet ink. Rushing spreads the stain.
- Make a thick paste. Mix a teaspoon of baking soda with a few drops of water. You want a consistency like sticky toothpaste.
- Apply with precision. Use a cotton swab to dab a tiny bit directly on the stain. Let it sit for only five minutes; longer can dry out the leather.
- Gently wipe it away. Use a barely damp cloth to remove the paste. Check the spot. If it’s lighter, you can try one more time. If not, stop to avoid scratches.
This method saved my kitchen chair from a permanent purple dot. But it only works if the ink is new and the leather is tough. Leather stains aren’t easy to remove.
How Do You Get Ink Out of Leather Car Seats or a Purse?

You found the stain. Now, let’s get specific. The same general ink-fighting principles apply, but your approach changes based on whether you’re dealing with a car seat baking in the sun or a beloved handbag.
Rescuing Your Leather Car Seats
Car interiors are a unique battlefield. My son Jason’s soccer gear and my dog Peeta’s muddy paws have taught me that. Ink here faces constant UV exposure and temperature swings, which can set stains and dry out leather.
Always start by parking in a shaded, well-ventilated area before you begin any cleaning. You do not want to breathe in fumes from cleaners, especially in an enclosed space.
Gather your simple toolkit: cotton swabs, white cotton cloths, a small bowl of distilled water, and your chosen solvent like 91% isopropyl alcohol or a leather-safe ink remover, especially when trying to remove ink stains from fabric.
- Blot, never scrub. Use a dry cloth to absorb any wet ink. Scrubbing grinds the pigment deeper into the grain.
- Test your solvent on a hidden seam. The passenger seat bottom rear seam is my go-to spot. Dab a tiny amount. If color transfers to your cloth or the leather darkens oddly, stop.
- Apply the solvent to your cloth, not directly to the stain. I dampen a corner of the cloth with alcohol. Gently dab at the stain’s edge, working inward. You’ll see the ink transfer to the cloth. Switch to a clean area of the cloth often.
- Use a cotton swab for precision work around stitching or tight spots. My husband Roger’s truck seats have intricate perforations, and this is the only way to clean them without flooding the leather underneath.
- Follow with a damp cloth rinse. Once the ink is gone, wipe the entire area with a cloth barely dampened with distilled water to remove any cleaner residue.
Here’s the step you cannot skip on car seats: conditioning. The sun is brutal. Cleaning can strip natural oils.
After the seat is completely dry, apply a quality leather conditioner with a clean cloth. I use a light, non-greasy formula. This replenishes moisture and creates a barrier, making the leather more resistant to future stains and UV damage. It’s what keeps our family SUV’s interior from cracking.
Handling a Precious Leather Purse
Purses feel more personal and often have delicate finishes. My Aunt Jessica once panicked over a pen mark on her favorite wine-tote bag. The approach is more surgical.
Your first move is to check for a care tag or label inside the purse. It might have specific instructions or warnings. If it says “finished leather” or “coated,” you have more flexibility. If it says “aniline” or “suede,” proceed with extreme caution or consult a professional.
Your process is similar but gentler.
- Lay the purse on a stable surface. You may want to stuff it with a towel to give the leather support and prevent creases.
- Perform a test in the most discreet location possible, like inside a interior seam or pocket flap.
- Use even less solvent. For a delicate bag, I might start with a mild soap and water solution on a cloth before moving to alcohol.
Pay special attention to edges, seams, and glued areas. These are weak points. Too much moisture can loosen glue or cause the edge paint to bleed. My mom Martha always reminds me that patience with small dabs is better than rushing and causing a bigger problem.
For the interior, if the lining is fabric, you can often treat it separately with a fabric stain method. But for leather interiors, the same careful, minimal-moisture rules apply. Dry the purse naturally, away from direct heat. A final, light conditioning will help the leather recover its luster. Should stains appear on the exterior, you can follow a dedicated guide on removing stains from leather bags and purses. This keeps the care approach targeted to leather and avoids over-wetting.
Surface Compatibility: Different Leathers Need Different Care
You can’t treat all leather the same. The wrong first move can set a stain permanently or ruin the finish.
Always, always test your chosen cleaner in a hidden spot first, like an inside seam or the back of a belt loop.
Think of your leather like skin: some are tough and protected, while others are delicate and absorbent. Here is how to adapt your approach.
| Leather Type | How to Spot It | Safe First Move | Biggest Risk |
| Finished/Coated Leather | Common on bags, shoes, and car interiors. Has a smooth, shiny topcoat. Water beads up on it. | This is your best case. Use the standard isopropyl alcohol method with a cotton swab. The coating protects the hide. | Rubbing too hard can strip the glossy finish, leaving a dull spot. |
| Suede or Nubuck | Has a soft, velvety, matte texture. Think of suede jackets or work boots. | Never use liquid first. Blot gently with a white pencil eraser or rub in cornstarch to absorb the ink. | Liquids will spread the stain and mat the delicate fibers. You can’t fix that. |
| Aniline Leather | Feels incredibly soft and natural. It absorbs water quickly and darkens where touched. | Proceed with extreme caution. Use the absolute minimal moisture on a microfiber cloth and dab. Test extensively first. | Any cleaner can leave a permanent water ring or discoloration. It stains like fabric. |
My rule is simple. If the item is valuable, delicate, or you see the stain spreading or discoloring the leather during your test, stop.
Knowing when to call a professional cleaner is a sign of expertise, not failure. They have tools and conditioners we don’t.
Field Note: What Helped Me Save Roger’s Favorite Jacket
Roger’s heavy Carhartt jacket is a weekend uniform. One Monday, he found a pen had exploded in the chest pocket.
A dark blue blot was bleeding through the brown leather. He was sure it was ruined.
I used a trick I learned from an old upholsterer. I folded a clean, white cotton cloth and tucked it inside the pocket, directly behind the stain.
Placing an absorbent barrier behind the stain changes the game completely. It gives the ink somewhere to go other than deeper into the leather.
With the cloth pad in place, I gently dabbed the outside of the stain with a cotton ball dampened with 70% isopropyl alcohol.
I watched the blue ink transfer from the leather face, through the hide, and onto the white cloth inside. It took time.
I refreshed the inside cloth twice as it absorbed the ink. After three short, gentle sessions over two hours, the stain was gone.
The leather was fine, just slightly dry where I worked. A tiny bit of leather conditioner the next day fixed it.
Patience and multiple gentle sessions will always beat one aggressive, frustrated scrub. That’s how you save the things you love.
How to Prevent Damage While Removing the Ink

I almost ruined a good leather purse once. My son Jason, in a moment of artistic inspiration, decided it needed a blue pen mustache.
My first instinct was to grab the nearest strong cleaner and scrub. That would have been a disaster.
Getting the stain out is only half the job; protecting the leather itself is the other. Here’s how to clean without causing harm you can’t fix, and how to stain-proof your leather for the future.
Your “Do Not” List for Leather First Aid
Think of leather like skin. You wouldn’t scrub your skin raw with acetone, right? The same logic applies here.
- Never scrub in circles. This motion grinds the ink deeper into the leather’s pores and can permanently scuff the surface finish. I learned this from a mishap with Roger’s hunting bag.
- Never soak the leather. Submerging it or drenching the spot can cause the leather to warp, stiffen, or the dyes to run. My mom Martha always says, “Leather drinks, it doesn’t swim.”
- Never use harsh solvents like acetone or nail polish remover. These will strip the protective topcoat and natural oils in seconds, leaving a dull, damaged patch. My aunt Jessica found this out the hard way with a perfume spill.
The One Motion That Makes All the Difference
Forget everything you know about cleaning spills on fabric. Leather requires a gentler touch.
Always blot, never rub, and work from the outside of the stain toward the center. This contains the ink and prevents it from spreading into a larger, uglier ring.
Use a clean, white cloth dampened with your chosen cleaner. Press straight down and lift straight up. Think of it like dabbing a wound, not scrubbing a pan.
The Step You Cannot Forget
Cleaning, even gently, dries leather out. It needs moisture and oils put back in.
Conditioning the leather after cleaning is non-negotiable to restore oils and prevent cracking. Without it, that cleaned spot can become brittle and start to fissure within weeks, especially if removing oil stains from leather or suede was part of the cleaning process.
After any ink removal attempt, let the area dry completely. Then, apply a quality leather conditioner with a soft cloth, following the product’s directions. My mother-in-law Brianna swears by this for keeping her old Texas boots supple.
When to Call a Professional and What They Use
Most ink stains on leather are a DIY job. I clean them at home all the time.
But sometimes, you need to call for backup.
I learned this with a vintage leather jacket from my mother-in-law, Brianna. Here are the clear signs it’s time to stop.
- The stain is very large or has been there for weeks. An old, set-in stain acts like a permanent dye.
- The item is a priceless antique or a high-value designer piece. The risk is just too great.
- The leather is already dry, cracked, or damaged. Adding any moisture or cleaner can cause it to split.
When you call a pro, they don’t use magic. They use precision.
They have access to industrial-grade leather cleaning solutions and specific degreasers formulated for ink. Their real skill is using professional extractors and dryers to control moisture perfectly, which is how they lift the stain without warping the leather.
Remember this: for that fresh pen mark from homework or a new Sharpie smudge, you are fully equipped. Your patience and a gentle hand are most often the best tools you already own.
FAQ about Removing Ink from Leather
1. I have both pen and Sharpie ink on my couch. Should I treat them differently or use the same method?
Yes, use the same initial method but with different urgency. Treat Sharpie stains first and more aggressively with isopropyl alcohol, as its alcohol-based ink responds best, while oil-based ballpoint ink may require gentler, repeated dabbing.
2. Is white vinegar a safe alternative to rubbing alcohol for ink removal?
Vinegar can work on very fresh, surface-level ink stains due to its mild acidity. However, for most set-in stains, isopropyl alcohol is significantly more effective at dissolving the ink’s bonds with the leather.
3. How can I tell if my leather is too delicate for rubbing alcohol?
Always perform a hidden spot test first. If the leather is suede, nubuck, or aniline (absorbs water quickly), avoid liquids altogether and consider a professional, as alcohol can cause permanent discoloration or texture damage.
4. What’s my next step if dabbing with alcohol or baking soda paste didn’t fully remove the stain?
Stop and reassess to avoid damage. For a persistent shadow, apply a quality leather conditioner after the area is dry; this can sometimes blend residual dye. If the stain remains set, consulting a professional cleaner is the safest option.
5. What is the single most important thing to avoid doing?
Never scrub the stain. Scrubbing grinds ink particles deeper into the leather’s pores and can permanently scuff the surface finish. Always use a gentle, patient blotting or dabbing motion instead.
Aftercare for Your Treated Leather
Always test your chosen ink remover on a hidden area, like inside a seam or under a cushion, before treating the stain. This one step prevents color loss or a tacky residue that can ruin the leather’s feel. I stick to this rule after dealing with everything from Jason’s homework pens to Jessica’s doodles. If you ever run into pen marker ink stains, a targeted removal approach can save the leather without harsh scrubbing. For more practical tips from our household messes, keep reading here on Stain Wiki.
Suzanne is an accomplished chemist, laundry expert and proud mom. She knows the science and chemistry of stains and has personally deal with all kinds of stains such as oil, grease, food and others. She brings her chemistry knowledge and degree expertise to explain and decode the science of stain removal, along with her decades long experience of stain removal. She has tried almost everything and is an expert on professional and DIY stain removal from clothes, fabric, carpet, leather and any other items dearest to you.