How to Remove Pen Ink, Permanent Marker, and Sharpie Stains from Fabric, Plastic, and Jeans?
That moment of panic when you see ink where it shouldn’t be is real, but I’m here to help. For a quick start, grab some rubbing alcohol or hairspray-applied carefully, they can break down many fresh ink stains on the spot.
In this guide, I’ll share my hands-on methods for tackling these stubborn marks without ruining your stuff:
- Fabric-friendly techniques that work on clothes, upholstery, and more.
- Safe ways to clean plastic surfaces, from toys to lunchboxes.
- Special steps for denim jeans to avoid fading or stiffening.
- Why the type of ink matters and how to adjust your approach.
I’ve spent years perfecting these methods on stains from my kids’ art projects to my husband’s work gear, so you’re getting proven advice.
Assess the Panic: Your First-Aid Plan for Ink Stains
Not all ink is created equal. The moment you see that blot, take a deep breath and assess your panic level. Here’s my quick rating system, based on years of intercepting pens and markers headed for disaster.
- Ballpoint Pen Ink (Panic Level: 6/10): This is oil-based. It soaks in fast but can sometimes be lifted if you act immediately. Jason’s school uniform pocket is a frequent victim.
- Permanent Marker or Sharpie (Panic Level: 9/10): These are solvent-based and designed to bond. They require a specific counter-solvent, like rubbing alcohol, and some patience.
- Dry Erase Marker (Panic Level: 2/10): This is a temporary, alcohol-based ink. It usually wipes off non-porous surfaces easily, but on fabric, it can stain if left to dry.
The Golden Window for Action
You have a short, precious time between the spill and the stain setting for good. I call this the “Golden Window.” It’s about 10-15 minutes for most inks.
Last Tuesday, I saw this in action. Jason came in from doing homework, and a blue pen had leaked a perfect circle in his khaki shorts pocket. Because he told me right away and the ink was still wet, I had it 90% gone before the washing machine even started. If he’d worn them all day, that blue circle would be part of the fabric’s story now.
Immediate First-Aid Steps (Do This Now!)
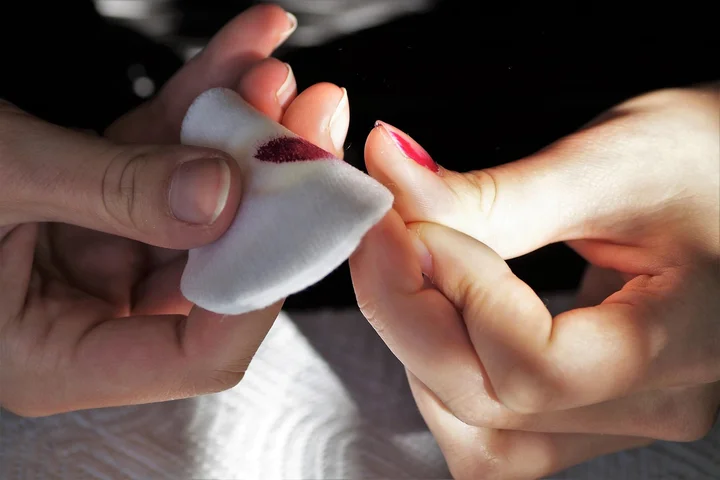
- Blot, Never Rub. Grab a clean, white cloth or paper towel. Gently press down on the stain to soak up as much wet ink as possible. Rubbing is the enemy, it grinds the ink deeper into the fibers.
- Isolate the Item. Don’t throw it in the hamper. The ink can transfer to other clothes. Lay it flat, stain-side up, on an old towel or a surface you don’t mind protecting.
- Check the Care Label. A quick glance tells you if you’re dealing with cotton (forgiving) or something like silk (handle with extreme care).
Critical Warnings Before You Start
Some materials are too delicate for the usual ink-fighting tactics. If the care label says “Dry Clean Only” or you’re dealing with these fabrics, pause and consider professional help.
- Silk and Wool: These natural proteins are easily damaged by strong solvents like alcohol.
- Acetate or Rayon: These synthetic fibers can dissolve or distort with certain chemicals.
- Antique or Irreplaceable Items: When in doubt, call a pro. My rule is: if you’d cry if it was ruined, don’t experiment.
Your non-negotiable first step for any treatment is a test patch. Find a hidden seam, inside pocket, or hem. Apply a tiny drop of your chosen cleaner, blot it, and let it dry. Check for color bleeding, fading, or fabric damage. This two-minute test saves hours of regret.
Ink Stain Chemistry: Why Alcohol Works and Milk Might Too
Chemistry Corner: Solvents vs. Pigments
Think of ink like a tiny delivery system. The color (pigment) is the passenger. The liquid (vehicle or solvent) is the car that drives it into the fabric. To remove the stain, you need to break up that “car” or dissolve the bond it created.
Most common inks fall into two camps: solvent-based (the car is a chemical like alcohol or xylene) and oil-based (the car is, well, oil). Water doesn’t work because it’s a different type of “car” that can’t break the bond.
Why Rubbing Alcohol is the MVP
Isopropyl alcohol (rubbing alcohol, 70% or higher) is a champion solvent. At a molecular level, it’s similar enough to the solvent in many inks to break its grip on fabric fibers, dissolving the stain so you can blot it away.
It works on ballpoint ink (oil-based) by breaking down the oils. It works on permanent markers (alcohol-based) because it’s essentially a stronger version of the ink’s own vehicle. I keep a spray bottle of it in my laundry room right next to the detergent.
The Curious Case of Household Remedies
You might have heard about using milk or vinegar on ink. Do they work? Sometimes, on fresh stains.
Milk contains fats and proteins that can surround and lift some oil-based inks, kind of like how it can cut through the tannins in a wine stain. My Aunt Jessica, a red wine enthusiast, taught me that trick years ago. It’s a gentle, first-attempt option for a fresh ballpoint mark on cotton.
White vinegar is a mild acid that can help break down some dye structures. It’s not a powerful solvent like alcohol, but its acidity can sometimes help loosen a stain’s hold, making the next step (like applying soap) more effective.
Ink Breakdown: Know Your Enemy
- Ballpoint Pen: Oil-based paste. Sticky, slow-drying, soaks in. Fights: Solvents (alcohol, hand sanitizer), sometimes fats (milk, hairspray).
- Permanent Marker/Sharpie: Solvent-based (usually xylene, toluene, or alcohol) with strong pigment. Designed to permanently bind to surfaces. Fights: A stronger, matching solvent. For xylene-based, you often need a specific product like a dry-erase marker (sounds crazy, but it works) or commercial stain remover.
- Dry Erase Marker: Alcohol-based with a release agent. It’s meant to be wiped away. On fabric, the alcohol evaporates, leaving a stain. Fights: More alcohol usually takes it right out.
So why are ink stains so difficult? It all comes back to chemistry. You’re not just washing away dirt, you’re trying to dissolve a substance engineered to stay put. The right solvent breaks that engineering. The wrong one, or waiting too long, lets the ink’s “car” park permanently in the fibers of your favorite shirt.
How to Remove Pen Ink from Fabric
Can you get pen ink out of fabric? Absolutely. The key is acting fast and using the right solvent to break down the stain without grinding it deeper into the fibers. My approach is always to start simple and escalate gently. For most pen ink stains on common fabrics like cotton, polyester, or denim, rubbing alcohol is your most reliable first line of defense. However, it’s essential to distinguish between stains on fabric and inks that have stained skin or delicate clothing materials.
The Rubbing Alcohol Method (My Go-To)
I keep a bottle of 70% or 91% isopropyl alcohol in my laundry cupboard for exactly this reason. It dissolves the oils and dyes in ballpoint pen ink beautifully. I learned its power firsthand when Roger came home with a blue ink streak across the pocket of his favorite work shirt-he’d been sketching a project idea during lunch.
- Place a clean, absorbent cloth or paper towel under the stain. This catches the ink as it lifts, preventing it from just moving to another part of the fabric.
- Dampen a cotton swab or a corner of a white cloth with the rubbing alcohol. Using a white cloth lets you see the ink transferring.
- Blot the stain from the outside edge toward the center. Do not rub in a circular motion, as this spreads the stain. Just press and lift. You’ll see the ink start to bleed onto your swab and the towel underneath.
- Switch to a clean part of your cloth or a new swab as it gets dirty. Keep blotting until no more ink transfers.
- Rinse the area thoroughly with cool water to flush out any remaining alcohol and ink residue.
- Finally, wash the garment as you normally would, using your regular detergent. Check the stain is gone before you put it in the dryer, as heat can set any lingering traces.
This same method works wonders if you’re wondering how to get permanent marker out of fabric. Sharpies and other permanent markers often respond to the same alcohol treatment, though they can be more stubborn.
Hairspray or Hand Sanitizer as an Emergency Fix
Stuck at the office or out somewhere without your stain-removal kit? Check a bathroom or a coworker’s desk. Many hairsprays and all hand sanitizers contain a high concentration of alcohol, making them perfect for an on-the-go ink attack. I used my aunt Jessica’s hairspray once to tackle a pen mark on a tablecloth right before a dinner party. It worked in a pinch.
- For hairspray, look for an old-fashioned aerosol kind that lists “alcohol” or “SD alcohol” as one of the first ingredients. Hold the fabric taut and spray directly onto the stain from a few inches away.
- For hand sanitizer, squeeze a dollop directly onto the ink blot.
Let the product sit for a minute to break down the ink, then blot firmly with a paper towel or napkin. You’ll need to wash the item properly later, as hairspray can leave a stiff, sticky residue. A word of caution: test a hidden seam first on colored fabrics, as the alcohol can sometimes lift the fabric dye along with the ink.
The Surprising Milk Method (A Gentler Option)
My mother-in-law, Brianna, swears by this for fresh ink stains on white cotton, like a school uniform. It’s a much gentler, non-toxic approach. The proteins and fats in whole milk can help suspend the ink particles. I tried it on one of Jason’s white polo shirts after a pen exploded in his backpack, and it lightened the stain significantly before I finished it with alcohol.
- Pour enough whole milk into a shallow bowl to completely submerge the stained section of the fabric.
- Soak the stain for several hours, or even overnight.
- Remove the fabric and rinse the milk away thoroughly under cool running water.
- Launder as usual.
This method is slow and works best on fresh stains. Don’t expect miracles on set-in ink or on synthetic fabrics, but for a safe, first attempt on a kid’s white cotton shirt, it’s worth a shot.
When NOT to Try This: If the fabric is delicate silk, dry-clean-only wool, acetate, or has a special finish, skip the home remedies. The alcohol can damage the fibers or dissolve the fabric’s coating. For those “Material Red Flag” items, your best bet is to point out the stain to a professional dry cleaner immediately, especially when dealing with wool stains.
How to Remove Permanent Marker from Plastic
I get this question a lot: “How do you remove permanent marker from plastic?” The good news is, plastic is one of the easier surfaces to clean because it’s non-porous. The ink mostly sits on top, giving you a fighting chance. This is very different from trying to get permanent marker out of clothes, where the ink wicks deep into the fibers and often requires a full chemical assault. It’s even trickier when dealing with permanent ink on leather, which demands special care.
My favorite starting point, especially on kids’ toys and storage bins, is a trick I learned after Jason turned a perfectly good toy bin into his “secret treasure map.”
The Magic Dry-Erase Marker Trick
This feels like a cleaning hack from a movie, but it genuinely works. The solvent in a dry-erase marker is designed to keep its own ink wet and erasable, and it turns out that solvent is also great at dissolving permanent marker ink. If you’re dealing with ink on carpet, this approach can be adapted with care. For carpet ink stains specifically, our carpet ink stain removal guide covers safe, step-by-step methods.
- Grab a standard black or blue dry-erase marker. The color doesn’t matter.
- Simply scribble directly over the permanent marker stain. You want to completely cover it with fresh dry-erase ink.
- Let it sit for just 10-15 seconds. Don’t let it dry.
- Immediately wipe the area clean with a dry microfiber cloth or paper towel. The permanent ink should lift right off with the wet dry-erase ink.
- You might see a slight blue or black haze left behind. Wipe this with a cloth dampened with a little water or rubbing alcohol to finish.
This trick saved the lid of our LEGO storage bin and has worked on countless action figures and plastic plates. It’s my first line of defense because it’s gentle and uses something I already have in the junk drawer.
Rubbing Alcohol: The Heavy Hitter
When the dry-erase trick isn’t enough, or for older, set-in stains, isopropyl alcohol (rubbing alcohol) is my go-to. It’s a powerful solvent that breaks down the ink’s bonds.
Always test on a hidden spot first, as some plastics can become discolored or tacky with alcohol.
- Dampen a clean white cloth or cotton ball with 70% or higher isopropyl alcohol. You don’t need to soak it, just make it wet.
- Gently dab and rub the stain. You should see the ink start to transfer onto your cloth.
- Use a clean section of the cloth as it gets dirty. Rubbing too hard can sometimes smear the ink, so use gentle, circular motions.
- Once the ink is gone, wipe the area with a cloth dampened with plain water to remove any alcohol residue.
For detailed grooves or textured plastic, use an old toothbrush dipped in alcohol to scrub the solvent into the crevices. This is how I cleaned Sharpie off the textured remote control buttons after a “decorating session” I didn’t authorize.
Baking Soda Paste for Stubborn Stains or Scents
If you’re dealing with a very stubborn mark or a plastic item that held markers and now has that chemical smell, a mild abrasive paste can help. This is also a great option if you prefer to avoid stronger solvents.
- Mix a small amount of baking soda with just enough water to form a thick, spreadable paste.
- Using a soft cloth or your finger, gently rub the paste onto the stain in a circular motion. The baking soda provides mild abrasion to help lift the ink.
- Let it sit for 5-10 minutes.
- Wipe the paste away with a damp cloth and check your progress. You may need to repeat the process.
- Finish by washing the plastic with warm, soapy water to remove all paste residue.
This method takes a bit more elbow grease, but it’s effective and safe for almost all hard plastics. I used this on a vintage plastic lunchbox that had a faded but persistent marker name on the bottom, and it worked without damaging the finish.
Recommended Products for the Job
You don’t need a cabinet full of specialty cleaners. These two household staples will handle 95% of plastic marker stains.
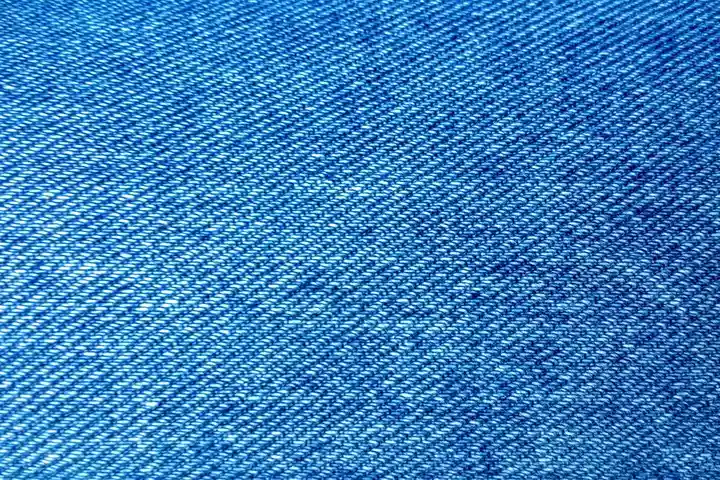
How to Remove Sharpie Stains from Jeans
Yes, you can get Sharpie out of jeans. Denim is a tough, durable cotton fabric, which means we can use more aggressive methods that might be too harsh for a delicate silk blouse. I learned this firsthand when my son’s friend, Edward, decided his new jeans needed some “custom artwork” before a soccer game. The panic on his face was real, but denim gave us options.
For colored or black jeans, always test your chosen method on an inside seam first to check for color fading. Set realistic expectations, a deep, set-in stain might lighten significantly but not vanish completely.
Rubbing Alcohol Soak for Stubborn Stains
Isopropyl alcohol (rubbing alcohol) is my first line of defense against permanent marker. It breaks down the ink’s binders without harming the strong cotton fibers of denim.
- Turn the jeans inside out. Place a folded white towel or a few paper towels underneath the stain to catch the ink.
- Saturate a clean white cloth or cotton ball with 70-90% isopropyl alcohol.
- Press the cloth onto the stain, don’t rub. Hold it there for 30 seconds to let the alcohol penetrate.
- Gently blot and dab the stain from the outside edges toward the center. You’ll see the ink transfer to your cloth.
- Rinse the area thoroughly with cold water from the back of the fabric to push the ink residue out.
- If the stain persists, you can pour a small pool of alcohol directly on the spot and let it soak for up to 15 minutes before repeating the blot and rinse. Denim can handle this soak where other fabrics cannot.
This method works because the alcohol dissolves the ink pigments, allowing you to lift them away from the fabric.
Vinegar and Baking Soda
When I’m out of rubbing alcohol, I use this pantry duo. The vinegar helps break down the stain, and the baking soda acts as a gentle abrasive and deodorizer. My Aunt Jessica swears by this for wine spills, and it works on ink, too. They’re not as effective as rubbing alcohol for some stains, but they can still do wonders, especially for certain types of stains.
- Mix white distilled vinegar and baking soda into a thick, grainy paste.
- Using a spoon or your finger (wear gloves if you like), spread a thick layer of the paste completely over the stain.
- Let it sit and work for at least 30 minutes. You might see it bubble slightly.
- Scrub the paste gently into the fabric with a soft-bristled toothbrush.
- Rinse thoroughly with cold water. You may need to repeat the application for a very dark stain.
The slight sour scent of vinegar will disappear once the jeans are completely dry.
Commercial Stain Remover
For the toughest marks, a product designed for the job is sometimes the easiest path. I keep a gel-based stain stick in my laundry room for emergencies like Edward’s art project.
Look for a stain remover labeled for “grease” or “ink” and follow the package directions precisely. Apply it directly to the stain, work it in with your fingers or a soft brush, and let it sit for the full recommended time, often 5-15 minutes. Grease stains on pants or jeans can be stubborn, so try a grease-focused pre-treatment before the main remover. Pre-treatment helps ensure the grease comes out before washing, especially on denim. Launder the jeans as usual, but check the stain is gone before you put them in the dryer, as heat will set any leftover ink.
What Helped Me (Pro-Tip)
After treating Edward’s jeans, I found using a soft, clean toothbrush was the key. I gently agitated the treated stain from the outside edges toward the center. This “outside-in” motion prevents the stain from spreading and pushes the loosened ink into the center where your cleaning cloth can absorb it.
The Surface Guide: Adapting Methods for Carpets, Upholstery, and More
You wouldn’t use the same tool to fix a bike and a cabinet. Ink stains are the same. The perfect method for your jeans can ruin your sofa.
This quick guide helps you match the solution to the surface. Think of it as your first stop before you start cleaning.
| Surface | Top Method to Try First | Special Notes & Precautions |
|---|---|---|
| Carpet & Rugs | Rubbing Alcohol (Isopropyl) | Blot, never scrub. Work from the edge inward to prevent spreading. |
| Upholstery & Couches | Dish Soap & Water or Rubbing Alcohol | Avoid over-wetting! Test inside a seam first. Blot dry immediately. |
| Hard Surfaces (Countertops, Plastic, Melamine) | Rubbing Alcohol or Magic Eraser | Alcohol is safe for most sealed surfaces. A Magic Eraser works via light abrasion. |
| Car Interiors (Fabric Seats, Plastic Dash) | Rubbing Alcohol or Carpet Stain Remover | Ventilate the area. For fabric seats, treat like upholstery. For plastic, use alcohol on a microfiber cloth. |
| Clothes & Fabric (like jeans) | Rubbing Alcohol or Hairspray | Place a towel under the stain. Dab, don’t rub. For questions like “how can i get permanent marker out of clothes,” this is your go-to method. |
| Dry-Erase Boards & Expo Marker Stains | Rubbing Alcohol or Dry-Erase Board Cleaner | Yes, you can get expo marker out of clothes using the same alcohol method. On walls, test a hidden spot first. |
For Carpets and Rugs
I learned this lesson when Peeta, our energetic lab, knocked a pen off the counter and then decided to paw at the resulting ink spot on the living room rug. The key with carpets is containment.
Your goal is to pull the ink *up* and *out* without driving it deeper into the backing.
- Blot Up Any Wet Ink. Use a clean, white paper towel or cloth. Gently press down to soak up as much as you can.
- Apply Rubbing Alcohol. Pour a small amount (70-90% is fine) onto a clean white cloth. Never pour it directly onto the carpet.
- Blot From the Edges. This is the most important step. Place your damp cloth at the very outer edge of the stain and press down. You should see the ink transfer to your cloth. Move your cloth to a clean spot, and work your way inward, circling the stain. This “herds” the stain inward instead of spreading it out into a bigger, uglier blob.
- Rinse and Dry. Once the ink is gone, blot the area with a cloth dampened with just cold water to rinse out any alcohol residue. Then, place a stack of dry paper towels over the spot and weigh it down with a book. This will wick up the moisture and help prevent a water ring.
For a large or stubborn stain, your carpet shampooer is a powerful ally. After treating with alcohol, I’ll fill my shampooer with just hot water and go over the area. It rinses and extracts everything left behind, leaving the carpet fresh and clean. It works wonders on car interior carpets, too.
Pro-Tips, DIY Swaps, and On-the-Go Fixes
You might not have a bottle of stain remover in your desk drawer. I rarely do. The best trick is knowing how to use what you already have on hand.
Safe DIY Alternatives from Your Pantry
Before you run to the store, check your kitchen and bathroom. Many common items can lift fresh ink stains. These pantry staples work by breaking down the oils in the ink or gently lifting the pigment from the surface. They are my first line of defense for small, fresh messes.
- Whole Milk for Ballpoint on Fabric: This one feels like magic. Soak the stain in a bowl of whole milk for 30 minutes. The fats help pull the oil-based ink out of the fibers. Rinse with cool water afterward. It worked on a polo shirt Jason got a pen leak on during homework time.
- White Vinegar or Lemon Juice: The mild acid can be effective on some dyes, especially on hard surfaces. Dab it on, let it sit for five minutes, and wipe. Test on colored fabric first, as acid can act like a bleach.
- Hand Cream or Lotion: The oils and emulsifiers in thick hand creams can dissolve ink. Rub a small dab into the stain on fabric or plastic, let it sit for a minute, then wipe away with a damp cloth. It’s a trick I keep in my purse.
- Baking Soda Paste for Plastic: Make a thick paste with baking soda and a few drops of water. Gently scrub the stained plastic with the paste using an old toothbrush. It acts as a mild abrasive that won’t scratch.
On-the-Go Emergency Fix
You’re at a restaurant and Jessica draws on the booth with a pen from the host stand. Don’t panic. Look around for these saviors.
A dab of hand sanitizer is the most powerful tool you’ll find in most public places. The high alcohol content can tackle fresh ballpoint and even some permanent marker. Put a little on a napkin and dab. For a leather or vinyl booth, follow up immediately with a wet napkin to remove any residue.
Other useful items include:
- Alcohol-based Wet Wipes: Many restaurants have these for cleaning tables. The alcohol in them can make a dent in a fresh ink spot.
- A Dab of Sunscreen: The oils in lotion-based sunscreen work just like hand cream. Use a tiny amount on a napkin.
- Non-Gel Toothpaste: If you’re near a bathroom, a bit of plain white toothpaste (not gel) can work on a hard surface. The mild abrasives and detergents can scrub the stain away. My mom Martha taught me this for cleaning plastic phone cases.
What Helped Me: A Few Family Secrets
Not every solution comes from a bottle. Some come from my family, who have been dealing with stains longer than I have.
My Aunt Jessica, who loves her red wine, once used a spritz of hairspray on a ballpoint ink mark on her tablecloth at a dinner party. The alcohol in the hairspray lifted it right out before it set. It’s a classic quick fix for a reason.
My mother-in-law Brianna from Texas swears by a paste of baking soda and lemon juice for cleaning the plastic liners in her old refrigerator. She used it on a permanent marker line my husband Roger left, and it faded it significantly.
Remember, these are clever backups, not always as powerful as a dedicated ink solvent, but they have saved the day more times than I can count.
When Not to Try a DIY Method
I believe in trying, but I also believe in knowing when to stop. Experimentation is key, but only on the right surfaces.
If a stain is months old and fully set, home methods often just push the dye around. You might set it further. For irreplaceable items like a wedding dress, a vintage quilt, or a very expensive jacket, your first call should be to a professional cleaner. Tell them exactly what the stain is.
If you’ve tried two sensible methods and the stain hasn’t budged, it’s time to call in the experts before you risk damaging the material.
Household Hacks from My Family
Here’s a quick list of the favorite “kitchen sink” fixes from my home to yours. Keep your expectations realistic, but don’t underestimate them.
- Milk for a fresh ballpoint ink stain on cotton. It’s weird, but it works.
- Baking soda paste for scrubbing ink off hard plastic toys or lunchboxes. Safe and non-toxic for kids’ items.
- A quick spritz of aerosol hairspray (the old-fashioned kind) on ink for a fast blotting treatment. Check for colorfastness on fabrics first.
- Rubbing hand sanitizer on a denim label where a permanent marker bled through. This saved a pair of Roger’s jeans.
Think of these as your emergency toolkit. They might not win every battle, especially against a dried Sharpie on polyester, but they’ll help you win a lot of small wars against everyday messes.
The Final Check: Drying, Setting, and When to Stop Trying
You’ve tackled the stain, and the fabric is damp from your efforts. This next part is where patience becomes your most important tool.
Post-Treatment Recovery
How you dry the item can make the difference between success and a set-in stain. I always lay treated fabrics flat on a clean, dry towel. Rolling the towel up gently helps absorb excess moisture without wringing or twisting the fabric, which can stress the fibers. I avoid hanging wet items, as gravity can pull any remaining dye or cleaner into a new, weird shape at the bottom. Direct sunlight might seem like a good drying aid, but it can bleach the surrounding color, leaving you with a clean spot that’s now a different shade. Air dry indoors or in the shade.
Never, under any circumstances, put the item in a clothes dryer until you are 100% certain the stain is completely gone.
The heat from a dryer is a one-way ticket to setting any lingering ink permanently into the fibers. I treat the dryer like a final seal. You don’t apply the seal until the work is perfect and dry.
How to Check Your Work
Once the item is fully dry to the touch, your inspection begins. I take it to a window with good natural light. Hold the fabric up so the light shines through it from behind. This backlighting reveals shadows and faint discolorations your eye might miss under normal light. Next, run your fingertips lightly over the treated area. You’re feeling for any tacky or stiff residue, which could be left-behind cleaner or a hint of ink binder.
If you see a shadow or feel residue, don’t panic. It often means the stain loosened but didn’t fully rinse away. I usually:
- Gently brush the area with a soft-bristled toothbrush to lift any particles.
- Rinse again under cool, running water, working from the back of the stain to push it out.
- Repeat the drying and checking process.
Knowing When to Call It
Some stains, especially permanent marker on light fabric, leave a faint ghost behind after multiple honest attempts. This is the moment for a practical choice. Is it a cherished tablecloth, or is it Jason’s practice soccer jersey? I’ve learned to ask myself: am I cleaning the fabric, or am I now damaging it?
My three-year-old, Jessica, once “decorated” a light couch cushion with a purple marker. After careful work, a soft lavender shadow remained in the weave. Removing it completely would have meant harsh chemicals that would have also damaged the fabric’s texture. We flipped the cushion over. That faint shadow is now a family story, a memory of her creative burst.
Your goal should always be fabric safety first, removal second.
If the fabric feels compromised, thin, or the color is fading from your treatments, it’s time to stop. A faint shadow is better than a hole. Sometimes, the victory isn’t a spotless finish, but a saved piece of clothing ready for many more days of use, stain shadow and all.
FAQ about Removing Pen Ink, Permanent Marker, and Sharpie Stains
What should I do immediately after getting pen ink on my clothes?
Blot the stain gently with a clean cloth to absorb wet ink, then place a towel under the fabric to prevent bleed-through. Check the care label to see if the material can handle home treatment before proceeding with a solvent like rubbing alcohol. Be sure to follow proper techniques for removing pen or marker ink to avoid damaging the fabric.
Can I use rubbing alcohol on any plastic item to remove permanent marker?
No, always test rubbing alcohol on a hidden spot first, as some plastics can discolor or become sticky. For delicate or valuable plastics, try the gentler dry-erase marker trick first to avoid surface damage.
I treated a Sharpie stain on my jeans, but it came back after washing. What now?
This means ink residue is still trapped in the fibers; do not dry the jeans. Re-treat the stain with a longer alcohol soak or a commercial stain remover, then wash again, checking it’s gone before using any heat to dry.
What’s a safe alternative to rubbing alcohol for ink on delicate fabric?
For a gentle first attempt on fabrics like cotton, try soaking the fresh stain in whole milk, as the fats can lift the ink. If the fabric is silk, wool, or has a “dry clean only” label, skip home remedies and take it to a professional immediately—especially if it’s a delicate coffee or ink stain on paper or fragile materials.
How do I remove old, dried ink stains that I just found?
For set-in stains, you’ll need more patience; saturate the area with rubbing alcohol and let it soak for 15-30 minutes before blotting. If multiple treatments don’t work, the ink may be permanently set, and further attempts could damage the fabric. For more on removing set stains from fabric clothing, see the next steps. The following steps provide fabric-safe techniques to remove set stains.
Smart Maintenance After Stain Treatment
Treat ink stains immediately to stop them from setting. Always test your cleaning solution on a discreet area first to prevent damage. I’ve followed this rule since Peeta’s marker incident on the carpet, and it works every time. Keep reading Stain Wiki for more real-world advice from my home to yours.
Suzanne is an accomplished chemist, laundry expert and proud mom. She knows the science and chemistry of stains and has personally deal with all kinds of stains such as oil, grease, food and others. She brings her chemistry knowledge and degree expertise to explain and decode the science of stain removal, along with her decades long experience of stain removal. She has tried almost everything and is an expert on professional and DIY stain removal from clothes, fabric, carpet, leather and any other items dearest to you.