How Do You Remove Pen, Marker, and Printer Ink Stains from Clothes, Couches, and Dryers?
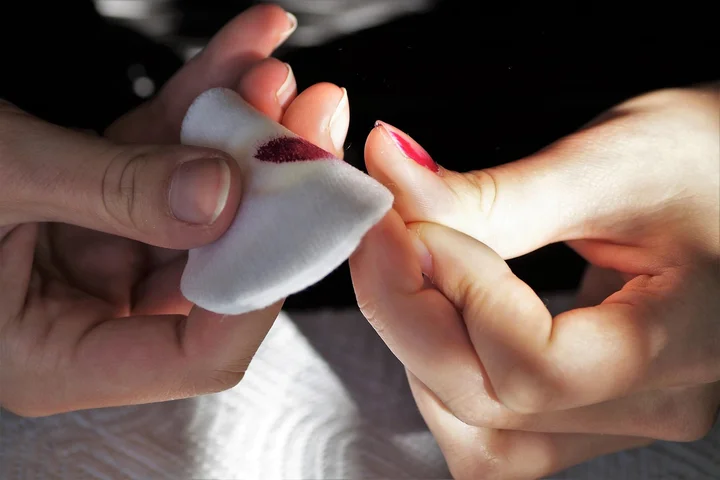
Just discovered a fresh ink stain? Your first move is key. Grab a cotton ball and some rubbing alcohol-dabbing from the outside in can stop many ink stains from becoming permanent.
This article gives you a clear action plan for every ink emergency. You will find:
- How to tell ballpoint, marker, and printer ink apart for the right treatment.
- Step-by-step guides for clothing, fabric upholstery, and leather couches.
- Safe methods for delicate bedding and how to clean a stained dryer drum.
- What never to do, so you don’t set the stain or damage the material.
I’ve tested these methods for years, saving everything from my son Jason’s marker masterpieces to my husband Roger’s printer-ink smudged shirts.
First, Don’t Panic: Your Instant Ink Stain Action Plan
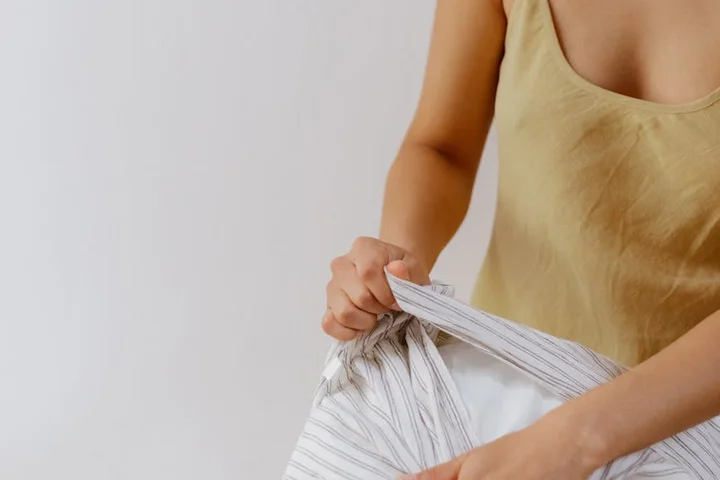
I see that blue smudge on your white shirt. My son Jason gets pen on his soccer jerseys all the time. Take a breath. Ink stains are frustrating, but they are not a death sentence for your favorite things. Your first moves are critical.
For any fresh, wet ink, speed helps. But if you found a dried stain from last week, don’t worry. You can still tackle it.
Your immediate job is to blot, not rub, and get the item away from other fabrics to prevent the stain from spreading.
Here is what you should do right this second:
- Grab a stack of clean, white paper towels or cloths.
- Gently press the towel onto the stain to soak up wet ink. Do not scrub or wipe.
- If possible, remove the item and lay it stain-side down on a fresh towel.
Before you use any cleaner, gather a few universal supplies. I keep these in a dedicated “stain box” in my laundry room:
- Clean white cloths or old t-shirts (color can transfer)
- White paper towels
- Cotton swabs for precision work
- Isopropyl alcohol (rubbing alcohol, 70% or higher)
The non-negotiable rule is to always perform a spot test in a hidden area, like an inside seam, before you apply anything to the visible stain.
This checks for colorfastness and fabric damage. I learned this the hard way with a nice blouse of mine. Thirty seconds of testing saves a lot of heartache.
Identifying Your Enemy: Pen, Marker, or Printer Ink?
Not all inks are the same. Using the wrong remover can set the stain or damage the material. Think of ink like paint. You need the right thinner to break it down.
Ballpoint pen ink, like the kind in my husband Roger’s pockets, is oil-based. It needs a solvent like rubbing alcohol to dissolve it.
Many markers, especially permanent ones, are alcohol-based. That means alcohol might not work as well. You often need a different solvent, like a dry-erase marker trick or a specialty stain remover.
Printer ink is a liquid mess of pigments and dyes. It’s water-based but also contains other chemicals. It acts fast and can be tricky.
The base of the ink-oil, alcohol, or water-dictates your best remover strategy from the start.
The Blotting Technique: Why It’s Your Best Friend
Blotting is the most important skill in stain removal. When you rub a stain, you grind the pigment deeper into the fibers. You can also damage the fabric’s texture, creating a permanent faded or rough spot, which is one of the common stain removal mistakes to avoid.
Blotting lifts the stain out by capillary action. Place the stained fabric over a folded paper towel. Press down firmly with a clean cloth from the back of the stain. You’ll see the ink transfer to the towel underneath.
Pressing from the back pushes the stain out the way it came in, instead of driving it through to the other side.
I use this for everything, from Jessica’s marker art on the couch to printer ink on a tablecloth. Change your blotting towel often to a clean section so you’re not just putting stain back on the fabric.
Can You Get Pen Ink Out of Clothes? A Step-by-Step Rescue
Yes, you absolutely can get pen ink out of clothes. I saved Roger’s favorite hunting shirt this way after a leaked pen in his gear bag. Ballpoint ink on washable cotton, polyester, or blends is very treatable.
The key is using a solvent that breaks down the oil base, followed by a good wash to remove all the residue.
Gathering Your Supplies
You don’t need fancy products. Here’s my go-to kit for a pen ink emergency:
- Rubbing alcohol (70% or higher)
- A dull butter knife or the back of a spoon
- Liquid laundry detergent (I prefer a blue dish soap like Dawn for its grease-cutting power on oil-based inks)
- Clean white cloths or cotton balls
- A bowl or small container
In a real pinch, hairspray with a high alcohol content or clear hand sanitizer can work as DIY alternatives. My Aunt Jessica once used hairspray on a ink spot at a restaurant. It worked, but I find plain alcohol less sticky.
The Removal Process: From Stained to Clean
Remember your spot test. Once that’s clear, follow these steps.
- Blot any wet ink. If the stain is fresh, place the fabric stain-side down on a paper towel. Gently press from the back to soak up excess ink. For a dry stain, skip to step 2.
- Apply the solvent. Pour a little rubbing alcohol onto a cotton ball. Dab it onto the stain, starting at the outer edges and working inward. This contains the stain and keeps it from spreading. You’ll see the ink start to dissolve and transfer to the cotton ball.
- Gently scrape for thick stains. If the ink blob is thick and pasty, use the dull edge of your butter knife to lightly scrape the surface as the alcohol works. This lifts the dissolving ink without hurting the fibers.
- Rinse and apply detergent. Rinse the area under cool running water from the back. Then, apply a single drop of liquid laundry detergent or dish soap directly to the spot. Gently rub the fabric together to work it in. This captures any remaining oily residue.
- Wash the garment alone. Wash the item by itself in the warmest water the care label allows. This prevents any loosened ink from staining other clothes. Check the stain before drying.
Never, ever put the item in the dryer if you can still see any hint of the stain. The heat will permanently set it.
What If the Stain Went Through the Dryer?
So, can you get pen ink out of clothes after drying? You can, but it’s tougher. The heat from the dryer bakes the stain into the fibers. It doesn’t make it impossible, just more stubborn. It’s similar to trying to remove dye stains from clothes.
My method is patience. Soak the stained area in full-strength rubbing alcohol for 15-20 minutes. Place the item in a shallow dish with the stain submerged. You can also make a paste from a oxygen-based bleach powder (like OxiClean) and water, apply it thickly to the stain, and let it sit for an hour before washing.
Treat a heat-set stain with a longer solvent soak and always air-dry the item after washing until you are certain the stain is completely gone.
I’ve revived a few dryer-fixed stains this way. It doesn’t always work perfectly, but it’s always worth a try before you give up on a piece of clothing.
Can Sharpie Wash Out of Fabric? Taming Marker Stains
Let me answer this with a sigh and a laugh. Can you wash Sharpie out of clothes? Sometimes, yes. It’s a cautious “yes” that depends almost entirely on your speed and the fabric’s color. That bright, permanent ink is designed to stick, but it hasn’t met our household’s determination yet. I’ve had more success on white or light-colored fabrics where I can use stronger solvents. On a dark shirt, the stain might just lighten to a faded shadow. The older the stain, the deeper it sets, making your job much harder.
My three-year-old, Jessica, decided our light linen tablecloth was the perfect canvas for a mural last fall. It was a masterpiece of purple and black swirls. My heart sank for a second, but then my stain-removal brain kicked in. Because I caught it while the ink was still wet, I was able to lift almost all of it without a trace. That’s the golden rule with permanent markers: act fast.
What Works on Marker Ink
Not all cleaners are created equal when facing down marker ink. Through plenty of testing, I’ve found three main contenders, but you must choose your weapon wisely based on your fabric.
- Rubbing Alcohol (Isopropyl Alcohol): This is my first line of defense for almost all fabrics. It breaks down the ink’s binders so you can blot it away. It’s usually safe for colors and works on most materials.
- Acetone-based Nail Polish Remover: I keep this in my toolkit for synthetic fabrics like polyester or nylon. It’s powerful, but you must be careful. Acetone will damage or dissolve delicate fibers like acetate or rayon, and it can strip the color right out of painted surfaces or some plastics. Always, always test in a hidden spot first.
- Dry-Erase Marker: This is a neat trick for hard, non-porous surfaces like a whiteboard, laminate table, or even a glossy leather shoe. Scribble over the permanent ink with a dry-erase marker. The solvents in its ink loosen the Sharpie’s grip, and you can wipe both away with a cloth. It rarely works on porous fabric.
Step-by-Step for Fabric
This is the method I used on Jessica’s tablecloth. You’ll need rubbing alcohol, paper towels, cotton balls, and some patience.
- Place the fabric stain-side down on a stack of paper towels. You want the ink to bleed out the back of the fabric, not deeper into it. Put a few more towels underneath to catch the runoff.
- Soak a cotton ball in rubbing alcohol. Don’t pour it on. Dab firmly at the center of the stain, working outward. You’ll see the ink start to transfer onto the paper towels below. Swap out the towels as they become saturated with ink.
- For a stubborn, dried-on spot, make a gentle paste with baking soda and a drop of water. I sometimes use a dab of plain, white, non-gel toothpaste. Gently rub the paste on the stain with a soft cloth, then rinse. This mild abrasion can help lift the last bits of pigment.
- Rinse the area thoroughly with cool water to flush out any leftover alcohol or paste. Finally, wash the item normally with your regular laundry detergent. Check the stain is gone before you put it in the dryer, as the heat will set any remaining mark forever.
How to Get Printer Ink Out of a Leather Couch
This is one of those questions that makes my heart skip a beat. I learned this lesson the hard way when my nephew, Edward, decided our dark brown leather sofa was the perfect surface for printing his soccer team roster. Leather isn’t like cotton; you can’t just toss it in the wash with some stain remover.
Leather is a living material, and treating it with harsh chemicals is a sure way to strip its natural oils, leaving it dry, stiff, and prone to cracking. The goal is to lift the stain without damaging the hide itself. Speed is your best friend here. The longer that ink sits, the deeper it soaks into the pores, making your job much tougher when it comes to removing ballpoint, gel, or permanent ink on leather.
Your Leather-Safe Toolkit
You don’t need a cabinet full of specialty cleaners. For most printer ink mishaps, a few gentle items will do the trick. Gather these before you start:
- Mild Soap: Saddle soap is ideal, but a drop of pure castile soap or a leather-specific cleaner works too.
- Distilled Water: Tap water can leave mineral deposits; distilled water is pure and safe.
- Isopropyl Alcohol (Rubbing Alcohol): The high-test kind, 70% or 90%. We’ll dilute it.
- Clean, White Microfiber Cloths: You’ll need several. The color won’t bleed, and they are super absorbent.
- Leather Conditioner: This is non-negotiable. It’s the moisturizer for your couch after its “bath.”
My aunt Jessica once suggested nail polish remover for everything. Do not use acetone or nail polish remover on leather, as it will permanently damage the finish and dye. It’s too aggressive. For stain removal on leather, suede, and other delicate materials, gentler methods work best. The next steps will point you to trusted guides on these techniques.
Cleaning Steps to Save the Leather
Take a deep breath. We’re going to move slowly and deliberately. If your leather is a specialty type like aniline or suede, stop and consider calling a professional.
- Blot any wet ink immediately with a dry microfiber cloth. Use a dabbing motion to soak up as much liquid as possible. Do not wipe, as this will smear the stain over a larger area.
- Create your cleaning solution by mixing equal parts distilled water and isopropyl alcohol in a small bowl. Dampen a corner of a clean microfiber cloth in the solution, then wring it out so it’s just barely moist. Before touching the stain, test this cloth on a hidden spot, like the back of a cushion or under a seam. Check for any color transfer or finish change.
- Dab the stain lightly with the damp cloth, working from the outside edges toward the center. This contains the stain. You’ll see ink transfer onto your cloth. Switch to a fresh area of the cloth often to avoid redepositing the ink. Patience is key. Scrubbing will grind the ink in and fray the leather’s surface.
- Once the ink is gone, wipe the entire area with a new cloth dampened with only distilled water. This removes any leftover cleaning solution that could dry out the leather.
- Let the spot air dry completely, away from direct heat. Then, apply a small amount of leather conditioner with another clean cloth, following the product’s directions. This final step restores the protective oils you may have removed and keeps the leather from drying out. It’s what prevents a clean but dull, cracked patch.
If the stain is old or extensive, you may see a faint shadow. That’s often the best you can do without professional help. The good news is, a well-conditioned leather couch with a slight shadow has more character than a clean, cracked, and ruined one.
Removing Ink Stains from Bedding: Sheets, Duvets, and Pillowcases
Bedding presents a unique challenge. You are dealing with a huge piece of fabric you cannot easily soak in a sink, and oversaturating it can lead to long drying times or even mildew. My mom, Martha, has a saying she learned growing up in North Texas: “A stain is a houseguest. The longer it stays, the harder it is to ask it to leave.” Her point is to act fast, especially with ink, before it bonds permanently with the fibers.
Modern bedding is often a blend of cotton and polyester or other synthetics. What works on one fiber might not be ideal for another, so finding a universal, gentle method is the goal. You want to lift the stain without damaging the delicate weave of your favorite sheets or the fluffy fill of your comforter.
The key is to use a targeted, minimal-moisture approach that breaks down the ink without drowning the entire bedspread.
Bedding-Safe Stain Removal Method
This is the method I use at home after my son Jason decided to do his homework in bed with a leaky pen. It balances effectiveness with fabric safety.
-
Check the care label for washing instructions. This is your rulebook. It tells you the maximum water temperature and whether the item is dryer-safe. Always follow it.
-
Apply rubbing alcohol with an eyedropper or cotton swab for precision. Do not pour it on. Place a clean, dry towel underneath the stain to catch any ink transfer. Using your tool, dab the alcohol directly onto the ink spot. You will see it start to dissolve and transfer to your towel underneath. Switch to a clean part of the towel as needed. This step breaks down the ink’s binder without soaking the surrounding fabric.
-
Sprinkle a paste of baking soda and water on the spot to pull out residual ink. Mix a tablespoon of baking soda with just enough water to make a thick paste. After the alcohol treatment, gently spread this paste over the damp area. Let it sit for 15-20 minutes. The paste will dry to a light crust, helping to pull any leftover ink particles to the surface.
-
Wash the entire bedding set on the appropriate cycle with regular detergent. Brush off the dried baking soda paste. Wash the sheets or duvet cover normally, using the warmest water the care label allows. For an extra boost, add half a cup of white vinegar to the fabric softener dispenser; it helps rinse away any final traces of ink and detergent during the final rinse cycle.
-
Air dry if possible to check for complete removal before using the dryer. Heat from a dryer will set any remaining stain forever. Hang the bedding on a line or lay it flat over a couple of chairs. Once you confirm the stain is gone, you can toss it in the dryer. If a faint shadow remains, repeat the spot treatment before drying.
How to Clean Ink Out of a Dryer (It’s Easier Than You Think)
I’ll be honest, I used to think an ink explosion in the dryer was a disaster. That was before my eight-year-old, Jason, managed to wash and dry a single soccer sock with a bright red marker in the toe. The panic is real. You open the door and see those little blue or black smears spinning around the drum, and your heart just sinks.
The heat from a dryer cycle acts like an iron, baking the ink into the metal and making it ready to stamp onto every towel and t-shirt you own from now on. You can’t just run another load hoping it will clean itself. But take a deep breath. This isn’t a catastrophe, it’s just a simple cleanup job you can handle in ten minutes.
What You’ll Need
Gathering your tools first makes everything smoother. You probably have most of this already.
- Rubber gloves (to keep your hands clean)
- Isopropyl alcohol (rubbing alcohol, 70% or higher works perfectly)
- Clean cotton rags, old t-shirts, or a stack of paper towels
- A small bowl of warm water with a squirt of mild dish soap
- A separate bowl or rag with just clean water for rinsing
Before you touch anything, please unplug your dryer from the wall outlet. This is the non-negotiable first step for safety. We’re dealing with liquids and electricity, and that’s a mix we absolutely avoid.
Cleaning the Drum and Interior
With the dryer unplugged and your supplies ready, let’s get that drum sparkling again. I like to use an old white cotton sock as my rag for this, because it lets me see exactly how much ink I’m lifting.
- Wipe away any loose ink or broken pen pieces. Use a dry paper towel to gently pick up any chunks of a burst pen cartridge or flaky marker bits. You’re just doing a preliminary sweep to avoid grinding debris into the drum during the next step.
- Dampen a clean cloth with rubbing alcohol and start scrubbing. Don’t pour the alcohol directly into the drum. Just wet your cloth well and start working on one stain at a time. You’ll see the ink start to dissolve and transfer onto your cloth almost immediately. Rotate to a clean section of your rag often. This is the magic step, and it works on everything from ballpoint pen to permanent marker.
- For any leftover sticky or greasy residue, use your soapy water. Sometimes ink has oils or other components that leave a faint, tacky film. A quick wipe with your soapy rag, followed immediately by a wipe with your water-dampened rag to rinse, will take care of it.
- Let everything air dry completely. Prop the dryer door open and walk away for an hour or so. You want zero moisture left inside. Once the drum is totally dry to the touch, you can plug the machine back in and run a quick empty cycle on air fluff (no heat) if you want that extra reassurance. Then it’s ready for your next load of laundry.
The Stain Wiki Ink Remover Kit: From Rubbing Alcohol to Kitchen Cabinet Solutions
Think of this as your ink stain first aid kit. Not all inks are created equal, and your couch isn’t the same as your kid’s tee shirt. You need a strategy. I keep a few key players in my laundry room and under the kitchen sink. When Jason’s marker explodes or I find a pen in the dryer, I don’t panic. I grab my kit.
Your most reliable soldier is isopropyl rubbing alcohol (70% or higher). It’s a solvent that breaks down the oil or alcohol base in most inks, letting you lift it away. For fresh stains, it’s often the only thing you need. Commercial stain removers like OxiClean Max Force Gel Stick or Spray ‘n Wash work well on fabric because they combine solvents with surfactants that pull the stain out. Hairspray works in a pinch for the same reason its alcohol content. For dried, stubborn ink, an old school soak in whole milk can work wonders on some fabrics. Always test any method on a small, hidden area first when trying to remove ink stains from skin or clothing.
The rule is to start with the gentlest method for your specific surface and move to stronger solvents only if needed. Always, and I mean always, test your cleaner on a hidden spot first. The back of a cushion, an inside seam, the corner of the carpet. This simple step has saved more of my furniture than any single product.
Surface Compatibility: Your Quick-Reference Chart
This chart is your cheat sheet. Match the stain location to the method. It’s based on my own tests over years of kid and pet chaos.
| Surface | Primary Method | Key Notes & Exceptions |
| Clothing (Cotton, Polyester, Blends) | Rubbing alcohol, commercial stain remover. | Blot from the back. Launder immediately after treating. Works for pen and most marker ink. |
| Leather Couches & Items | Diluted rubbing alcohol (50/50 with water), applied sparingly with a cotton swab. | Follow with a leather conditioner. Test first. Avoid saturating the leather. |
| Carpet & Rugs | Rubbing alcohol, blotted heavily with white cloths. | Blot, don’t rub. Change cloths as ink transfers. May need multiple applications. |
| Bedding (Sheets, Comforters) | Rubbing alcohol or pre-wash spray. | Check care labels. Treat, then wash in the hottest water the fabric allows. |
| Dryer Drum | Rubbing alcohol on a cloth, followed by soapy water wipe. | Removes ink before it stains the next load. Run an empty cycle to air it out. |
See the pattern? Alcohol is the MVP. But note the exceptions. Silk, wool, suede, and dry-clean only items are in a different league. When wool is involved, remove stains safely with a gentle, cold-water dab and a quick spot test. For those, your best move is to gently dab with cold water and take it to a professional cleaner. I learned this the hard way with a silk blouse. The ink came out, but so did some of the color.
Household Items That Fight Ink
You’re out of rubbing alcohol. The store is closed. Don’t worry. Your kitchen and bathroom might hold the answer. These are my go-to DIY alternatives when I’m in a bind.
- Whole Milk: This is for old, dried ink stains on sturdy, colorfast cotton fabrics. Soak the stain in a bowl of milk for several hours or overnight. The enzymes and fats can help break down the ink. Rinse thoroughly with cold water, then wash as normal. My mother-in-law Brianna, who’s from Southern Texas and has her own remedy for everything, swears by this for ink on work shirts. She says the older the milk, the better it works, but I stick with what’s in my fridge.
- Alcohol-Based Hairspray: Check the label. If ethyl alcohol is a main ingredient, you have a makeshift solvent. Spray it directly onto the stain on fabric, let it sit for a minute, then blot with a clean cloth. You’ll see the ink transfer. Keep blotting with clean areas of the cloth until it’s gone. This works for the same reason rubbing alcohol does.
- White Vinegar Solution: For colorfast fabrics where you want a gentler approach, mix one part white vinegar with two parts water. Soak the stain for 30 minutes, then rub liquid laundry detergent directly into it. Let it sit for 15 more minutes before washing. The acidity can help loosen the bond of some inks.
These DIY methods require a bit more patience than pure alcohol, but they prove you don’t always need a special product to tackle a scary stain. The goal is to dissolve or loosen the ink so your detergent can wash it away. Remember, test first. A milk stain is easier to remove than a ruined fabric from tough stains like ink, but it’s still a stain you didn’t have before.
When Ink Won’t Come Out: Troubleshooting Set-In and Old Stains
You followed the steps, but a faint shadow or a dull ring remains. I’ve been there, staring at a shirt with my son Jason’s name on it, wondering if the art project ink is now a permanent part of the fabric. Don’t lose hope. Old or heat-set stains are tougher, but they’re not always a lost cause. The key is to shift from a quick fix to a patient, strategic treatment.
First, ask yourself two questions. What is the fabric made of? And what has happened to the stain since it first appeared? An ink stain that sat for a month in a closet is different from one that went through the dryer last week. Heat from a dryer, iron, or even hot water can bind the ink’s pigments to the fibers, making them much harder to lift.
If your first method with rubbing alcohol or a pre-treat spray failed, here is your next move. Switch your solvent. If you used an alcohol-based product, try a dry-cleaning solvent or a stain remover with a different active ingredient. The ink in a ballpoint pen reacts differently than the dye in a permanent marker. My aunt Jessica’s favorite red wine lipstick stain (a story for another day) taught me that if one remover fails, another might just work.
Re-Treating a Stubborn Stain
For a stain that’s laughing at a quick dab, it’s time for a long soak. This is my go-to for the stubborn marks my daughter Jessica seems to magically create.
- Lay the stained section over a small bowl or jar, securing it with a rubber band if needed.
- Soak a cotton ball or pad with isopropyl rubbing alcohol (the higher the percentage, the better) and place it directly on the stain.
- Cover the whole area tightly with plastic wrap. This traps the alcohol, stopping it from evaporating so it can work for 30 minutes to an hour.
This extended contact time allows the alcohol to slowly break down the ink’s binder without you having to constantly reapply it. Check it every 15 minutes, replacing the cotton pad if it gets saturated with ink.
For white cotton or polyester blends that still show a tinge, you can take a very careful next step. Mix one part 3% hydrogen peroxide with one part water. Test this on a hidden seam first. Dab it lightly onto the stain residue, let it bubble for no more than a minute, then rinse thoroughly with cold water. I keep a spray bottle of this diluted peroxide in my laundry room for final brightening touches on whites.
A critical safety note here. Never, ever mix cleaning chemicals. Ammonia and bleach create a toxic gas. Combining different stain removers can ruin your fabric and is dangerous. Always work with one product at a time and rinse the area thoroughly before trying something new. My mom, Martha, drilled this into me, and it’s prevented more than one disaster.
When to Call a Professional
We all have our limits. Knowing when to call in an expert saves your precious items and your sanity. If you’ve made two solid attempts with no progress, it’s time to consider professional help.
Pick up the phone for a certified cleaner in these situations:
- Delicate or valuable fabrics: Silk blouses, wool suits, suede jackets, or an antique lace tablecloth from my mother-in-law Brianna. These materials require specialized solvents and techniques you can’t replicate at home.
- Expensive furniture: A large ink stain on a leather sofa or an upholstered chair. Professionals have the tools and solutions to treat the stain without leaving a water ring or damaging the finish.
- Large or set-in carpet stains: If an ink cartridge exploded on your beige carpet and your home efforts only lightened it, a pro can do a full extraction to get the last of it out from the padding below.
Think of a professional cleaner as a specialist doctor for your belongings; they have access to stronger treatments and the experience to use them correctly. For that favorite leather jacket or your living room rug, their fee is often worth the peace of mind.
FAQ about Removing Ink Stains
What’s the fastest first step for a fresh pen ink stain on clothing?
Immediately blot with a clean, dry cloth or paper towel to soak up wet ink. Avoid rubbing, which grinds the stain deeper into the fabric fibers. This tip is especially relevant for fabrics like jeans. In the next steps, we’ll cover how to remove pen ink stains from fabrics and jeans with simple methods.
Is hairspray a safe alternative for marker stains on any fabric?
Hairspray with high alcohol content can work, but always test it on a hidden seam first. Do not use it on delicate fabrics like silk or rayon, as it may damage them.
What should I do first if printer ink spills on my leather couch?
Blot any liquid ink gently with a dry, white microfiber cloth—do not wipe. Quickly check the care instructions or leather type, as some finishes require professional help. Even if it’s a Sharpie stain, be extra cautious.
How do I stop an ink stain from setting on bedding while I prepare to clean it?
Lay the stained area face-down on a stack of white paper towels to wick moisture away. Keep the bedding dry and avoid heat until you can apply a targeted treatment.
Can I just run an empty cycle to clean ink out of my dryer?
No, heat will set the ink. Always unplug the dryer first, then wipe the drum with rubbing alcohol on a cloth to dissolve and remove the ink residue.
Your Blueprint for Ink-Free Fabrics
After tackling everything from printer ink on bedding to permanent marker on my couch, I stand by this: always test your chosen method in a hidden area first. That quick check is your best defense against accidental damage. I share all my real-world cleaning trials, like when Jason and Edward decorated the wall with pens, right here on the Stain Wiki blog.
Suzanne is an accomplished chemist, laundry expert and proud mom. She knows the science and chemistry of stains and has personally deal with all kinds of stains such as oil, grease, food and others. She brings her chemistry knowledge and degree expertise to explain and decode the science of stain removal, along with her decades long experience of stain removal. She has tried almost everything and is an expert on professional and DIY stain removal from clothes, fabric, carpet, leather and any other items dearest to you.