How Do You Remove Dye Stains from Clothes? Your Practical Guide to Red, Pink, and Tie-Dye
I’ve had more than one laundry load turn into a rainbow disaster, thanks to a stray red sock or an overenthusiastic tie-dye day with the kids. Your best chance is to rinse the stain under cold water immediately and gently dab it with a drop of liquid dish soap-this can stop the dye from setting permanently.
- The crucial first steps to take the moment you spot the stain.
- Specific techniques for tackling vibrant red and pink dyes.
- How to handle tie-dye bleed on both white and colored fabrics.
- My tested methods using safe, common household items.
I’ve spent years testing stain removal methods on everything from my daughter Jessica’s art smocks to my husband Roger’s hunting gear, so I know what actually works.
First Aid for Dye Stains: Stop the Panic
I know that feeling. You pull a red sock from the whites load, or see your kid’s pink popsicle handprint on a light-colored shirt. Your heart sinks. The first instinct is to scrub hard, but that’s the worst thing you can do. It just pushes the dye deeper into the fabric fibers.
Your immediate action plan is simple. Grab a clean, dry cloth or paper towel and blot the stain gently to lift any wet dye. Do not rub. If the dye has touched skin or nearby fabric, the next steps include simple ways to remove hair dye stains from skin and fabric. These tips will help you finish the cleanup smoothly. Next, flip the garment inside out. Run cold water from the back of the stain. This pushes the dye out the way it came in, instead of flushing it through the fabric.
I rate fresh dye stains a 7 out of 10 on the panic scale. They’re serious but not hopeless. You have a golden window of 24 to 48 hours before heat permanently sets the dye. That means no warm water washes, no drying in the sun, and absolutely no dryer until the stain is completely gone.
What if you’re out? At a restaurant, a friend’s house, or the park? Don’t panic. Head to the restroom. Use a paper towel and cold water from the sink to gently blot and flush the stain from the back. If you have access to club soda, dampen the area with it. The carbonation can help lift the dye until you get home.
Let me be very clear about this one rule. My mom, Martha, drilled this into me. Never, ever put a dye-stained item in the clothes dryer until you are 100% certain the stain is gone. The heat will cook the dye into the fibers, turning a temporary problem into a permanent one.
How to Remove Red Dye Stains from Clothes
Red dye is bold, vivid, and stubborn. I’ve battled it from cherry Kool-Aid, Jason’s sports drinks, and my aunt Jessica’s occasional red wine spills. While it’s a tough opponent, red dye stains are very treatable if you act fast. Your first question should always be: is the fabric white, or is it colored?
Can You Get Red Dye Out of White Clothes?
On white fabrics, you have more aggressive options. My go-to is an oxygen-based bleach, like OxiClean. It brightens whites and attacks the dye molecules without the harshness of chlorine bleach.
- Fill a sink or bucket with the hottest water safe for the fabric.
- Dissolve the oxygen bleach powder completely according to the package directions.
- Submerge the stained garment and let it soak for at least 4 hours, or overnight for severe stains.
- After soaking, wash the item normally with detergent in the warmest water allowed.
- Check the stain is gone before you dry it. If a faint shadow remains, repeat the soak.
For a safe DIY alternative, make a thick paste of baking soda and 3% hydrogen peroxide. Spread it over the stain and let it sit for 30-60 minutes. The paste will bubble and lift the dye. Rinse thoroughly with cold water, then launder.
My pro-tip comes from a laundry disaster. Jason’s red sports drink bottle leaked all over his white gym clothes in his bag. When the stain is large or widespread, don’t spot-treat. Soak the entire garment in the oxygen bleach solution. This ensures the dye doesn’t just move to a different part of the fabric.
Can You Get Red Dye Out of Colored Fabrics?
This is trickier. You must remove the stain without damaging the garment’s original color. Your best friend here is patience and cold water.
Start by pre-treating. Apply a generous amount of liquid laundry detergent directly to the stain. Gently work it in with your fingers or a soft toothbrush. Let it sit for 15 minutes. Then, soak the whole item in a basin of cold water with a bit more detergent for several hours, or overnight. Be careful not to make any mistakes during stain removal that could worsen the stain.
For extra power, use a commercial enzyme-based stain remover labeled as color-safe. Products like these use natural enzymes to “digest” the stain compounds, which is gentler on fabric dyes. They’re especially helpful for removing biological stains from fabric, such as blood, sweat, or dairy residues. Apply, wait, then wash on a cold, gentle cycle.
This step is non-negotiable. Always do a colorfastness test on an inside seam or hem before using any treatment on colored clothes. Apply your chosen pre-treatment or a bit of the soaking water, wait 10 minutes, then blot with a white cloth. If color transfers to the cloth, the fabric dye will run, and you should take it to a professional.
How to Remove Pink Dye Stains from Clothes
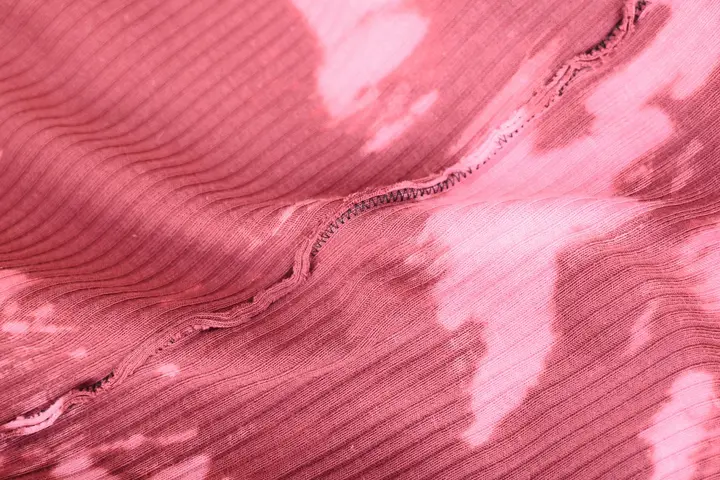
Pink stains have a way of showing up everywhere. A lipstick kiss on a collar, melted raspberry candy, or a red sock bleeding in the wash.
They are common and deeply frustrating. I split my methods by the base color of your fabric. What saves a white tee could ruin a favorite colored blouse.
How Can I Get Pink Out of White Clothes?
White fabrics let you use stronger tactics. My reliable one-two punch is dish soap followed by an oxygen bleach soak.
- Blot the stain immediately. Do not rub.
- Apply a drop of clear dish soap, like Dawn, directly onto the pink mark. This cuts through any oily base from lipstick or candy.
- Gently massage it in with your fingertips. Let it sit for 10 minutes.
- Rinse thoroughly under cool running water.
- Fill a sink or basin with warm water and add an oxygen-based bleach, such as OxiClean. Soak the entire garment for one to eight hours.
- Wash as usual with detergent. Always air dry until you confirm the stain is gone.
The dish soap tackles the grease, and the oxygen bleach lifts and brightens the remaining dye from the white fibers.
For pink “color run” stains that set in the dryer, a commercial color remover is your best bet. Products like Rit Color Remover work by chemically stripping the fugitive dye.
Follow the package directions, which usually involve simmering the item in a pot. It feels like a science experiment, but it works.
I learned this trick after my aunt Jessica’s pink wine splash on my cream tablecloth. A full glass of rosé went flying. The color remover pulled every last bit of pink blush out of the linen.
How Can I Get Pink Out of Colored Clothes?
On colored clothes, you must be gentle to protect the original dye. My favorite tool is glycerin.
Glycerin is a mild, sticky liquid that breaks down dye bonds. You can use pure glycerin or a clear, glycerin-based hand soap.
- Dab a small amount of glycerin or the hand soap onto the stain.
- Rub the fabric gently between your thumbs. You will feel the texture change as the dye breaks down.
- Let it sit for 20 minutes. The pink should start to look faded.
- Rinse from the back of the fabric with cool water to flush the dye away.
Rubbing with glycerin loosens the pink dye without the harshness of bleach or alcohol, which can strip your garment’s color.
After pre-treating, wash the item alone in cool water. This is non-negotiable. Always add a color-catching sheet, like a Shout Color Catcher.
These sheets trap loose dye in the wash water. I use them every time my son Jason washes his bright soccer kits. They caught the pink from a leaked marker and saved his blue jersey.
How to Remove Tie-Dye Stains (When the Art Project Goes Rogue)
I knew this day would come. Jason and his buddy Edward decided they were “modern artists.” Their canvas? My best kitchen towels. The vibrant splotches of pink and blue were lovely, just not where they were supposed to be.
Tie-dye is made to be permanent. Your clock starts ticking the second that dye hits the wrong fabric.
Your only real chance is to move faster than the dye can chemically bond with the fabric fibers.
Can You Get Tie-Dye Out of White Fabrics?
White fabric gives you one huge advantage: you can use stronger bleaching agents. But you still have to be fast.
First, don’t panic and scrub. That just grinds the dye in. Grab the item and run straight to the sink.
- Flush the Stain Under Cold, Running Water. Turn the fabric inside out if you can. Hold the stained area directly under the faucet, forcing the water through from the back. You want to physically push as much loose dye out as possible. Do this for a good three to five minutes. The water will run brightly colored at first, then slowly clear.
- Soak in an Oxygen Bleach Bath. Fill a basin or bucket with the hottest water safe for the fabric (check the care label). Dissolve a scoop of oxygen-based bleach (like OxiClean) completely. Submerge the item and let it soak for at least 8 hours, or overnight. I keep a dedicated plastic tub in my laundry room for these all-day soaks.
- Wash as Usual. After the soak, run the item through a normal wash cycle with your regular detergent. Check the stain before drying. If it’s gone, great. If a faint shadow remains, repeat the soak and wash.
My aunt Jessica, a red wine enthusiast, taught me this: some stains become part of the fabric’s story. A tie-dye stain that’s been dried or sat for weeks has likely bonded to the fabric fibers for good.
On white fabric, an old, set tie-dye stain is often a permanent decoration.
Can You Get Tie-Dye Out of Colored Fabrics?
This is the tricky one. You can’t use a strong bleach, or you’ll ruin the fabric’s original color. Your tactics shift to careful flushing and targeted treatment.
The initial rinse is even more critical here. You’re trying to win with water pressure alone.
- Rinse from the Back, Immediately. Again, turn the garment inside out. Run cold water through the back of the stain. This pushes the dye out the way it came in, instead of driving it deeper into the fabric. Keep flushing until the water runs mostly clear.
- Apply a Heavy Dose of Stain Remover. While the spot is still damp, spray it generously with a stain remover like Shout or Spray ‘n Wash. I drench it until the fabric is fully saturated. Let it sit for a full 15 minutes. Don’t let it dry out.
- Wash in the Hottest Water Possible. Check the garment’s care tag and select the hottest water temperature allowed. Use your regular detergent and run a complete cycle.
I have to be honest. With colored fabrics, the odds are lower. That dye is literally engineered to become one with the cloth.
Consider any removal from colored fabric a victory, but know that some stains are meant to last, like my mother-in-law Brianna’s “I told you so” look when a coffee stain sets.
Tackling Other Common Dye Stain Disasters

Dye stains come in many forms beyond a pink sock in the laundry. Hair dye mishaps, mysterious color bleeds, and craft time explosions are all part of life. I have faced them all.
How to Remove Hair Dye from Clothes
My aunt Jessica loves to experiment with bold reds and purples. I have a few of her old towels with permanent reminders of those experiments. For fresh stains, you have a couple of common household tools.
A plain, white, cream-based toothpaste (not a gel) can work. The mild abrasives and surfactants help lift the dye. I apply it, gently rub it in with an old toothbrush, and let it sit for ten minutes before rinsing with cold water.
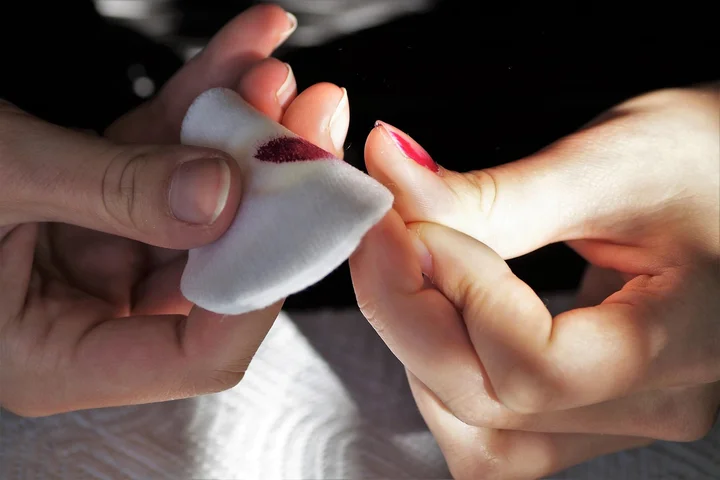
My preferred method is isopropyl alcohol (rubbing alcohol). It breaks down the dye chemistry effectively. I soak a cotton ball and dab it firmly onto the stain, working from the outside in.
You must test the alcohol on a hidden seam or hem first, as it can damage or discolor some synthetic fabrics and delicate fibers.
After treating with either method, I wash the garment normally with the strongest safe detergent. For tough stains, I repeat the process before drying.
How to Get an Old Dye Transfer Stain Out
An old dye transfer stain, where a blue jeans bled onto a white shirt that sat for weeks, is a real challenge. The dye has had time to bond deeply with the fabric fibers. You must be patient.
For white cotton or linen, I prepare a warm water bath with a scoop of oxygen bleach (like OxiClean). I soak the item for at least 8 hours, or even overnight. The oxygen bubbles work to lift the stain from the fiber over time.
For colored fabrics, a commercial dye stain remover is my next step. These products are formulated to grab onto loose dye molecules. I follow the bottle instructions exactly, often involving a long soak. This method targets dye stains on fabric surfaces and helps restore color. When used as directed, it’s gentle on fabrics.
You must manage your expectations with old stains; while you can often lighten them significantly, complete removal becomes less likely the longer the stain has set.
I learned this with one of my son Jason’s old soccer shirts. A red stain from a washed cap faded from a dark blotch to a faint pink shadow after treatment, but it never fully disappeared.
Quick Fixes for Easter Egg, Food, and Marker Dyes
These are the colorful chaos of everyday life with kids. My rule is to act fast. The moment you see the stain, start treatment.
For Easter egg dye or food coloring (like from a spilled fruit punch), my first move is always a cold water rinse from the back of the stain to push it out, not deeper in. Then, I soak the spot with plain white vinegar.
The vinegar helps break the dye’s bond with the fabric. I let it bubble for five minutes, then rinse again with cold water. After that, I wash it with detergent on a cold cycle.
Permanent marker is a beast. Rubbing alcohol is again the hero here. I dab it on until the ink transfers to my cotton ball. For a small, weird trick, you can actually scribble over the permanent marker stain with a dry-erase marker.
The solvents in the dry-erase ink dissolve the permanent ink, and you can then wipe both away quickly with a paper towel before it sets.
I used this trick on a plastic tablecloth after a craft project with Jessica. It worked in a pinch, but for clothes, I stick with the trusted rubbing alcohol and a follow-up wash.
The Science of the Stain: Why Your Methods Work
You can throw products at a stain and hope. I prefer to know why something works. It turns panic into a plan.
When my son Jason came home from camp with a brilliant, self-made tie-dye shirt, I was thrilled. When that same red dye bled onto a white sock in the wash, I was less thrilled. Understanding the science saved both items.
Chemistry Corner: Dye is a Persistent Guest
Think of fabric dye like a visitor who really, really wants to move in. It’s not just sitting on the surface. Modern dyes are designed to form strong, tight bonds with the molecules of the fabric fibers.
This molecular bonding is why a simple water rinse often does nothing-the dye has already started setting up house.
Your job is to gently persuade it to leave without damaging the “house” (your fabric). Different tools work in different ways.
How Your Stain Fighters Really Work
I test methods on old pillowcases first. It saves my good clothes. Here’s what I’ve learned about why the winners work.
Oxygen Bleach (like OxiClean® or hydrogen peroxide)
This is my first line of defense for dye stains on colorfast fabrics. It’s gentler than chlorine bleach.
Oxygen bleach releases oxygen molecules in water. Those molecules attack the chemical structure of the dye stain itself.
It works by breaking the bonds that hold the dye molecule together, fading the stain from a vibrant intruder to a ghost you can wash away.
It’s fantastic on Jason’s white soccer socks after they’ve met a stray red crayon. I always check the care label first.
Dish Soap (The Dawn® Method)
This is for dyes suspended in something oily or waxy. Think lipstick, some fabric dyes, or that crayon again.
Dish soap is a surfactant. It breaks the surface tension of water and gets between grease and fabric.
It emulsifies the oily base, trapping it in tiny bubbles so it can be rinsed away, taking the pigment with it.
I used this on a pink lipstick stain from Aunt Jessica on a cotton tablecloth. The oil released, and the color followed.
White Vinegar
Vinegar is an acid. Many fabric dyes are pH-sensitive, meaning they react to changes in acidity or alkalinity.
Soaking a dye stain in a vinegar solution can slightly alter the pH environment of the fabric.
This change can loosen the dye’s grip on the fibers, making it easier for your detergent to lift it out in the wash.
It’s a great first soak for a fresh stain, especially on more delicate fibers where bleach feels too harsh. My mom, Martha, swears by it for food dye spills.
No single method is magic. Often, I combine them-like using dish soap to tackle the oily part of a stain first, then an oxygen bleach soak for any remaining color. Knowing the “why” lets you mix your own solutions.
Safety First: Material Red Flags and Product Guide
Before you grab any cleaner, pause. The fabric matters more than the stain color. A rushed fix can ruin a favorite shirt forever.
I learned this with a beautiful silk blouse my Aunt Jessica sent me. A splash of red wine seemed like a small problem. My usual method made it a huge, permanent one.
Material Red Flags: When to Stop and Call a Pro
Some materials are high-maintenance friends. They need special care.
- Silk & Wool: These are protein-based fibers. They’re delicate and can be damaged by many common stain fighters. I treat any stain on these as a “professional help only” situation.
- Leather & Suede: These aren’t washable fabrics. Trying to scrub or soak them at home will likely cause discoloration or hardening. A specialist cleaner is your only safe bet.
- “Dry Clean Only” Tags: Respect this label. It’s there because the fabric or construction can’t handle water and agitation in your machine. Home methods risk shrinking, warping, or color damage.
If you see any of these materials, your safest move is to take the item to a professional cleaner and point out the fresh stain. Tell them what the dye is from. It gives them the best shot.
Your Stain-Fighting Toolkit: Recommended Products
For everything else, having the right tools makes all the difference. Here’s what I keep in my laundry room.
- Oxygen-Based Powder Bleach (like OxiClean): This is my MVP for dye stains on white or colorfast fabrics. It lifts color through oxidation, not harsh bleaching. It’s fantastic for tie-dye mishaps or that pink sock that turned everything in the wash rosy.
- Enzyme-Based Liquid Stain Removers (like Zout or Shout): These are great for organic dyes, like from berries or beets. The enzymes break down the stain’s structure. I used this on a grass and dirt stain from Jason’s soccer jersey after a game with Edward.
- Color-Catching Laundry Sheets (like Shout Color Catchers): These are magic for preventing new stains. Toss one in with a mixed load, especially with new red items. If a dye bleeds, the sheet grabs it first. My mom, Martha, swears by these.
- Rubbing Alcohol (70% Isopropyl): This is surprisingly effective on fresh, non-oily dye stains from markers or pens. It acts as a solvent. Always test on a hidden seam first.
- Clear Glycerin Soap (like Grandma’s Secret Spot Remover): This gentle soap helps lift dye without harsh rubbing. It’s a good first step for delicate colored fabrics. My mother-in-law, Brianna, introduced me to this old-school trick.
| Product | Best For… | Use Caution On… |
|---|---|---|
| Oxygen Bleach Powder | White cottons, linens, colorfast fabrics. | Silk, wool, dry-clean items, non-colorfast dyes. |
| Enzyme Stain Remover | Food, grass, and biological dye stains. | Same as above. Check label for silk/wool safety. |
| Rubbing Alcohol | Fresh ink, marker, pen stains. | Acetate, triacetate fabrics (can melt them). |
Never-Use Tips: The Quickest Ways to Make It Worse
Some advice sounds logical but is secretly destructive. Avoid these two big mistakes.
- Never use chlorine bleach on colored fabrics or unknown stains. Liquid chlorine bleach removes color. It will strip the dye from your clothes, not just the stain. On an unknown stain, it can create a permanent yellow or brown chemical set.
- Never use hot water on a fresh dye stain. Heat sets stains into the fabric fibers. Always start with cold water to flush out as much dye as possible. You can use warmer water later in the wash cycle after pre-treating.
Think of hot water like an iron. You wouldn’t iron a stain to fix it. Using hot water first does the same thing. It cooks the dye right into the threads.
Adapting the Treatment: A Surface Compatibility Guide

One spilled sports drink on the living room carpet taught me this lesson fast. What works on a cotton t-shirt can ruin your car seats. The surface changes everything.
This guide helps you match the method to the material. It saves time and prevents damage.
The Surface Compatibility Chart
| Surface | Primary Treatment | Key Precautions |
|---|---|---|
| Clothing & Washable Upholstery | Fabric-specific stain remover, hydrogen peroxide, color-safe bleach. | Test for colorfastness first. Never use chlorine bleach on wool or silk. |
| Carpet & Rugs | Diluted carpet shampoo, white vinegar solution, or isopropyl alcohol (test first). | Blot, never scrub. Rinse thoroughly to avoid residue that attracts dirt. |
| Car Interior (Fabric/Upholstery) | Mild dish soap solution or dedicated automotive upholstery cleaner. | Blot carefully. Avoid saturating fabric over foam padding to prevent mold. |
| Hard Surfaces (Countertops, Tile) | Isopropyl alcohol, baking soda paste, or melamine foam (like a Magic Eraser). | Test on a hidden spot. Some finishes can be dulled by abrasives or alcohol. |
Clothing and Home Upholstery
The rules for your clothes apply here too. My mom, Martha, always said to start in the most hidden corner you can find.
An invisible test spot is your best friend against a bigger, more visible stain.
For a removable cushion cover, treat it like clothing and run it through the wash. For a fixed sofa, you’re working spot-by-spot.
Use a clean white cloth to apply your chosen solution. Blot and lift. Rinse the area with a cloth dampened with clean water to stop any cleaning agent from leaving a ring.
Carpet and Area Rugs
Our golden retriever, Peeta, once tracked in a muddy, dyed mulch. The beige hallway carpet was not happy.
Your first job is to contain the stain. Grab a stack of clean, white towels or paper towels.
Press down firmly and lift to soak up the dye before it sinks deeper into the carpet fibers.
I mix a tablespoon of clear dish soap or a trusted carpet shampoo with two cups of warm water. I apply a small amount with a cloth, blot, and then “rinse” by blotting with a water-dampened cloth.
A final, dry towel pressed on the area helps pull up moisture. Let it air dry completely. A fan helps.
Car Interior Upholstery
Car stains are a special challenge. You’re dealing with sun exposure, unknown fabric blends, and foam backing.
I keep a travel bottle of my upholstery mix in the glove box: one part clear dish soap to ten parts water.
A mild dish soap solution is often safer on car fabrics than heavy-duty cleaners, which can leave a sticky film.
Blot, do not pour. Use a soft brush on stubborn spots, but be gentle. My husband Roger swears by a dedicated automotive fabric cleaner for his truck seats, and they do work well on grease and dye mixtures.
Hard Surfaces (Countertops, Tile, Plastic)
For these, you can often be more direct. Isopropyl alcohol (rubbing alcohol) is a star here.
Dampen a cloth with it and wipe. For a dried, stubborn dye mark, make a paste with baking soda and a few drops of water. This is a simple step in leather stain dye removal for leather surfaces. If you need more, you can explore additional leather stain dye removal techniques for tougher spots.
Gently rub the paste on the stain with your finger or a soft cloth. The mild abrasion helps lift the color. Wipe clean. Always do a spot check in an inconspicuous area first.
The Final, Critical Step: Post-Treatment Recovery
You’ve treated the stain and run the wash cycle. Your work isn’t over just yet. I call this phase Post-Treatment Recovery, and it’s where patience truly pays off.
This is the part where I have to remind myself (and you) to slow down. It’s easy to rush, but heat is the enemy of a set stain. We need to be detectives now, not speed demons.
Air Dry, But Do It Right
I always, without exception, air dry the item after this first treatment wash. Do not use your machine’s dryer. My aunt Jessica learned this the hard way with a wine-stained blouse, and that faint pink shadow is still there years later.
Lay the garment flat on a clean towel or drying rack. Keep it out of direct sunlight. I know it’s tempting to use the sun’s power, but on a damp, recently treated dye stain, the sun can actually cause discoloration or set what’s left.
I usually use my guest bathroom shower rod or a collapsible rack in the laundry room. Anywhere with good airflow is perfect.
The Damp Fabric Inspection
This is my favorite trick, and it’s saved countless t-shirts in my house. You must check the stain area while the fabric is still damp, not bone dry.
Once the item is out of the washer, gently press the stained area with a clean, dry towel to blot away excess moisture. Don’t wring or rub.
Then, find a good light source. I hold the fabric up to my bright laundry room window or even a lamp.
- Look through the fabric, not just at it.
- Slowly tilt it back and forth.
- You are looking for any slight difference in color, a faint shadow, or the dreaded dull ring.
If the fabric looks perfectly even and clear, you’re likely in the clear. If you see a ghost of the stain, it’s not gone. Act now.
Repeat, Don’t Retreat
Seeing a shadow is not failure. It just means the stain is being stubborn, which dye stains often are. Do not put the item in the dryer.
Go back to your treatment method. Reapply your oxygen-based soak, your detergent paste, or your color-safe bleach solution directly to that specific damp area. Let it sit another 15-30 minutes, then wash it again on the same cool setting.
I’ve had to do this three times with one of Jason’s epic tie-dye mishaps. Each cycle lifted more dye. The key is to never apply heat until you are absolutely sure.
The Dryer Rule
This is non-negotiable. Only use the dryer when the fabric is completely stain-free after air drying. The heat from a dryer will cook any remaining dye particles permanently into the fibers.
If your item passed the damp inspection and dried clean, then you can toss it in the dryer with your next regular load. That first air-dry cycle is just a safety check. I do this with every single dye stain, from pink sock mishaps to rogue marker lines. It’s a habit that prevents permanent disasters.
Keeping Colors Where They Belong: Smart Prevention Tips
Everyone asks how to fix a dye stain, but I think the real magic happens before the wash starts. Stopping color bleed is far easier and less stressful than trying to reverse it. These are the habits that save clothes in my house every week.
Sort With Your Eyes, Not Your Gut
I learned this from my mom, Martha. She would sort laundry into what seemed like a dozen piles. You don’t need to be that extreme, but a simple system works.
I use three basic baskets: lights, darks, and brights/reds. Jeans and black t-shirts go with darks. Pastels and whites go with lights. My son Jason’s neon soccer jerseys and anything red or hot pink gets its own “brights” category.
Washing a dark blue towel with a white sock is asking for a dull, grayish tint on everything. When in doubt, wash an item with colors darker than itself.
The First-Wash Rule for New Clothes
This is non-negotiable in my laundry room. That vibrant red dress or deep purple tie-dye hoodie is often saturated with loose dye.
I wash all new, intensely colored items completely alone for their first two washes. Use cool water and a gentle cycle. This helps rinse away the excess dye that hasn’t fully bonded to the fibers yet. Treating a new, brightly colored garment like it’s already guilty of bleeding will save your entire wardrobe. I learned this the hard way with one of Jason’s red jerseys that tinted a whole load of gym socks pink.
Embrace the Magic of Color-Catchers
If I could only give one tip, it would be this. Color-catching sheets are not a gimmick. They work.
I use them in every single load that isn’t just whites. They look like dryer sheets, but you toss them in the washer. As dye bleeds out of clothes in the wash water, the sheet absorbs and traps it. You’ll see the sheet turn the color of the runaway dye. It’s proof it’s working.
For mixed loads with lights and darks, a color-catcher is my cheap insurance policy against disaster. My aunt Jessica, who loves her red wine, swears by them for her fancy table linens.
A Simple Flip Makes a Big Difference
Friction in the washer drum causes color loss. Turning clothes inside-out before washing reduces that friction against other items.
This is especially important for dark jeans, graphic tees with printed designs, and any garment with a dark exterior. The inside of the fabric rubs against the outside of other clothes, locking any loose dye safely away from the rest of the load.
Turning clothes inside-out protects the visible surface of your clothes from pilling and fading, too. It’s a five-second habit that extends the life of your favorite items. My husband Roger does this with his work shirts automatically now.
When to Wave the White Flag: Calling a Professional
Even with my years of testing, some stains win the battle. I’ve learned to recognize the signs before I cause permanent damage.
Three Clear Signs It’s Time for Expert Help
First, the stain looks exactly the same after your second or third careful attempt. You used the right method, you were patient, but that pink tie-dye splotch on your white shirt is still grinning back at you. Persistence is a virtue, but repeated failed treatments can set a dye stain permanently into the fibers.
Second, the fabric itself is the challenge. Delicate materials like silk, velvet, or a detailed beaded gown aren’t forgiving. My Aunt Jessica learned this the hard way with a silk blouse and red wine. The home remedy left a faint shadow and a slightly stiff texture. For fabrics where water marks or fiber distortion are a real risk, a professional cleaner’s expertise is your safest bet.
Third, and most importantly, is the item’s value to you. This isn’t about money, but about sentiment. Is it your wedding dress, a quilt from your grandmother, or your child’s first team jersey? My rule is simple: if the thought of ruining it makes your stomach drop, don’t experiment.
Let me be very clear: there is absolutely no shame in calling for backup. I do it. For a favorite piece, handing it to a pro isn’t a defeat. It’s a strategic decision to prioritize the garment’s survival. Think of them as fabric surgeons with industrial-grade tools and solutions we can’t access.
Every stain tells a story. My husband Roger has a faded blue plaid shirt with a faint, ghostly orange blotch on the sleeve. It’s from a long-ago hunting trip where a leather dye bottle leaked. My attempts lightened it, but it’s still there. He still wears it for messy jobs, and now it’s just part of that shirt’s history. Sometimes, the lesson you keep is more valuable than the perfect result you wanted. You learn a little more about fibers, chemicals, and when to step back. Then you grab your trusty stain kit and get ready for the next colorful adventure life throws your way.
FAQ about Removing Red, Pink, and Tie-Dye Stains
What’s the absolute first thing I should do for any fresh dye stain?
Immediately rinse the stain from the back with cold water to flush out the dye, and gently blot-don’t rub-with a clean cloth. The goal is to remove as much dye as possible before it sets, and you must avoid using any heat until the stain is gone.
I’m out of specialty stain removers; what’s a good household alternative for a fresh dye stain?
For most fresh dye stains, a drop of clear liquid dish soap dabbed on the spot and gently worked in can break down the dye. After rinsing, you can soak the item in a solution of cool water and a scoop of baking soda for an hour before washing. This is a solid prep for hair dye washout stain removal, helping lift color before deeper treatments. If stains persist, the next steps cover more options.
How can I tell if my colored garment is colorfast before I treat a dye stain on it?
Always perform a colorfastness test by applying your chosen treatment (e.g., water, detergent, stain remover) to an inside seam or hem, waiting 10 minutes, and then blotting with a white cloth. If dye transfers to the cloth, the fabric will likely bleed during treatment, and you should consider professional cleaning.
I’ve treated and washed the stain, but a faint shadow remains. What now?
Do not put the item in the dryer, as heat will set the remaining dye permanently. Re-treat the specific area and wash again, repeating the process until the stain is completely gone before allowing any heat near the fabric.
When is it time to give up on a dye stain and call a professional?
If the stain remains unchanged after 2-3 careful treatment attempts, or if the fabric is delicate (like silk, wool, or has a “dry clean only” label), stop home treatments. For valuable or sentimental items, a professional cleaner has tools and solutions that offer the best chance without risking damage.
Your Fabric’s Future After a Dye Stain
Always treat dye stains immediately and test your removal method on a hidden seam first to protect the fabric. I keep my laundry station stocked with color-safe oxidizers and vinegar, a habit I picked up after salvaging Jason’s white socks from a pink tie-dye mishap. If hair dye stains transfer to fabric, quick action matters. You’ll find focused tips on removing dye stains from hair fabric in the next steps. For more hands-on tips and stories from my family’s cleaning trials, keep exploring right here on Stain Wiki.
Suzanne is an accomplished chemist, laundry expert and proud mom. She knows the science and chemistry of stains and has personally deal with all kinds of stains such as oil, grease, food and others. She brings her chemistry knowledge and degree expertise to explain and decode the science of stain removal, along with her decades long experience of stain removal. She has tried almost everything and is an expert on professional and DIY stain removal from clothes, fabric, carpet, leather and any other items dearest to you.