How to Remove Olive Oil Stains from Fabric and Clothing
That dark, greasy ring on your shirt after a cooking mishap can feel like a death sentence for the fabric. Act quickly with dish soap and cold water-this simple step lifts the oil before it sets.
In this guide, I’ll walk you through my proven process step-by-step:
- Why olive oil stains are uniquely tricky and how they set into fibers.
- The immediate, blot-don’t-rub first aid every stain needs.
- My preferred degreasing agent that’s probably already in your kitchen.
- Tailored techniques for different fabrics, from sturdy cotton to delicate linen.
- How to ensure the stain is completely gone before you toss it in the dryer.
I’ve handled countless grease stains over the years, from my son Jason’s soccer jerseys to my aunt Jessica’s favorite tablecloth.
Assess the Stain: Panic Level and Golden Window
Take a breath. A fresh olive oil spill isn’t a disaster. I give it a panic level of 4 out of 10. It’s totally manageable if you act fast.
The key is catching it during the “Golden Window,” the first 30 to 60 minutes. In this time, the oil is still sitting on the surface.
After that, it soaks deep into the fibers. It also starts to oxidize, which means it turns a darker, dull brown color.
You can see the difference. A fresh stain looks glossy and wet. An old one looks like a dull, brownish ring set into the fabric.
I saw this with Jason’s favorite soccer shirt last week. He leaned over the table at dinner and got a big drip right on his sleeve. I spotted it right away, and that made all the difference.
Whether it’s a shirt or a tablecloth, remember this: oil stains are very treatable. Don’t stress.
Immediate First-Aid for Fresh Olive Oil Stains
If you’re wondering how to get olive oil out of a shirt right this second, follow these three steps. They are blot, absorb, and isolate.
Your goal is to lift away oil, not lock it in. Acting quickly here saves you a lot of work later.
Always check the garment’s care label first. Before you put anything on the stain, do a test patch on a hidden seam or hem.
This ensures your cleaning method won’t damage the color or fabric. It takes ten seconds and gives you peace of mind.
Blot, Don’t Rub: The Critical First Move
This is the most important rule. Rubbing grinds the oil deeper into the fabric’s tiny fibers. Blotting gently lifts the oil up and out.
Grab a stack of clean, white paper towels or a white cloth. Press down firmly on the stain. Hold for a moment, then lift.
You’ll see the oil transfer onto the white material, which shows you it’s working. Keep moving to a clean spot and repeat until no more oil comes up.
Absorb Excess Oil with Kitchen Staples
After blotting, you’ll likely have a damp, oily spot left. Now it’s time to soak up what’s left in the fibers. Your kitchen has the perfect tools.
I always reach for cornstarch. Its super-fine powder clings to oil beautifully. My mom, Martha, swears by plain talcum powder for the same reason.
Baking soda works too, but I find cornstarch is a bit more effective. My mother-in-law Brianna uses baking soda for everything, so it’s a fine backup.
Here is the simple process:
- Sprinkle a generous amount of cornstarch over the entire stain. You want to fully cover it.
- Let it sit for 15-20 minutes. You’ll see it start to clump and cake up as it absorbs the oil.
- Brush away all the powdery residue. A soft-bristled brush or even your fingers work.
This step pulls a surprising amount of oil to the surface, making the next cleaning phase much easier.
The Best Step-by-Step Method to Remove Olive Oil Stains
If you are wondering how do I get olive oil stains out of clothes, start here. This sequence works on everything from Jason’s soccer jersey to my favorite linen blouse. You’ll find a quick tip on removing oil stains from clothing textiles in the next steps.
- Pre-treat the stain with a degreaser immediately.
- Wash the item in the warmest water the fabric allows.
- Inspect the stain while the fabric is damp and air dry.
Your first decision is choosing a pre-treater. I always reach for a blue dish soap like Dawn. It is a powerful surfactant, meaning it breaks the surface tension of the oil, surrounding it so it can rinse away in water. A dedicated pre-wash spray is also effective, often containing similar ingredients. I find dish soap is cheaper, always on hand, and I can control the amount.
Step 1: Pre-Treat with a Degreaser
Blot any excess oil with a clean paper towel. Do not rub. Place the stain face-down on another clean towel. Apply a single drop of blue dish soap directly to the back of the stain. Gently massage it in with your finger, pushing the soap through the fibers from the back to the front. Let it sit for 5 to 10 minutes. You will see the grease start to break up and the fabric change color.
Field Note: I keep a soft-bristled toothbrush in my laundry room. For stubborn spots or textured fabrics like corduroy, I dampen the brush, add a tiny soap drop, and gently work it into the fibers from the outside of the stain inward. This prevents pushing the oil deeper.
Step 2: Wash in the Right Temperature
Heat helps dissolve oils, so use the warmest water setting safe for your fabric. Check the care label first. Here is a crucial warning. If your olive oil stain is mixed with egg, meat juices, or dairy, hot water can cook those proteins and set them permanently. For those combo stains, use cool water. For best results, know when to choose hot versus cold water for stain removal. The next steps will explore this topic.
Wash the item on a regular cycle with your usual detergent. For an extra boost, add a half-cup of white vinegar to the fabric softener dispenser or final rinse cycle. The vinegar helps cut through any lingering grease.
Step 3: Inspect and Air Dry
This is the most important rule in laundry. Never, ever put the item in the dryer until you are certain the stain is gone. The dryer’s heat will bake any remaining oil into the fibers for good.
As soon as the wash cycle ends, take the item out. Hold the damp fabric up to the light and look closely at the stain area. Check for any faint yellow shadow or a darker ring. If you see nothing, you can dry it normally. If you see even a hint of residue, you need to repeat the pre-treatment and wash cycle.
Treating Old or Set-In Olive Oil Stains
How do you treat old or set-in olive oil stains? It is tougher, but I have rescued many forgotten items. The key is patience and breaking up the oil that has settled deep in the fibers.
For a week-old stain, try a prolonged soak. Fill a sink or basin with warm water and a generous squeeze of dish soap. Submerge the stained section and let it soak for several hours, or even overnight. For colored fabrics, you can use an oxygen-based cleaner like OxiClean instead. The long soak gives the surfactants time to pull the old oil out—especially effective on denim fabrics.
Another method I use is a baking soda paste. Mix baking soda with just enough water to make a thick paste. Smear it directly onto the dry stain, completely covering it. Let it sit until the paste is bone dry. The baking soda works to absorb the oil. Brush off the dried powder and then wash the item as described in the steps above.
I learned this the hard way with a beautiful cotton tablecloth. My Aunt Jessica visited, and we had a fantastic, messy pasta night. I forgot to treat the cloth before tossing it in the hamper. A week later, I found it with a dark, tacky grease ring. I used the baking soda paste method, letting it dry for a full day. After brushing it off and washing it in warm water, the ring was completely gone. It just needed that extra time to pull the oil up.
Handling Delicate Fabrics and Material Red Flags
Can olive oil stains be removed from delicate fabrics? Yes, but you need a softer touch. My mom Martha has a silk scarf I successfully treated, but I held my breath the whole time. I followed silk grease/oil stain removal methods.
Your approach changes completely based on the fabric. A sturdy cotton shirt, like the one my son Jason wears for soccer, can handle some gentle scrubbing. A silk blouse cannot.
Critical Warnings and “Never-Use” Actions
Before you do anything, check the care label. This is your first red flag.
- Dry-clean only silk, wool, acetate, and suede need extreme caution.
- Leather and velvet are in a category of their own.
- Some modern performance synthetics can be damaged by harsh treatments.
For these delicate items, your safest plan is a two-step home attempt, then professional help.
- Blot up excess oil. Then, cover the stain with cornstarch to absorb what’s left. Let it sit for an hour.
- Gently dab the area with a cloth dipped in cold water and a tiny drop of mild soap (like baby shampoo).
- If the stain persists, stop. Take it to a professional cleaner and point out the stain.
There are actions you must never take on delicate or colored fabrics.
- No hot water. Heat sets oil stains.
- No vigorous scrubbing. This distorts delicate fibers.
- No ammonia or chlorine bleach. These can dissolve or discolor fabrics.
For Silk and Wool: A Gentler Approach
Patience is your only tool here. I learned this after an incident with a favorite wool sweater.
- After blotting, heap cornstarch on the stain. Let it sit for several hours, even overnight.
- Brush away the powder. Mix a drop of baby shampoo in a cup of cold water.
- Dab (never rub) the stain with a clean white cloth dampened in the soapy water.
- Dab with a cloth dampened with plain cold water to rinse.
Lay the item flat on a clean, dry towel to air dry, reshaping it gently as needed. This prevents stretching and gives you a final look at the spot.
Fabrics to Handle with Extreme Care
Some materials are immediate red flags. For these, calling a pro is not a failure-it’s smart.
- Silk & Velvet: Their fibers and piles are easily crushed or water-spotted.
- Leather & Suede: These are skins, not fabrics. Oil can be part of their conditioning, but a spill needs specialized care.
- Formal Wear or Heirloom Items: If you’d be heartbroken if it was ruined, don’t experiment.
My Aunt Jessica sent me a wine-stained silk top once. I used cornstarch, then immediately sent it to her cleaner in Arizona. It came back perfect. If the stain were cooking oil on clothes, the same grease-fighting approach would apply. Dish soap is your ally for oil on fabrics.
Post-Treatment Recovery and Final Checks
Now, the washing machine has done its job. The real test begins. I always treat this part like a doctor’s follow-up appointment.
Air drying is your only option for the first check, and you must keep the item away from direct sunlight. Sunlight can act like a low-heat dryer, setting any faint stain you missed.
I hang shirts on a plastic hanger on the shower rod or lay sweaters flat on a clean towel on my laundry room floor. A well-ventilated room is perfect.
Once the fabric is completely dry, it’s time for the final exam. I do this in two parts.
First, I run my fingers over the treated area. I’m feeling for any slick or waxy residue the detergent might have left behind. Olive oil can be sneaky.
Second, I hold the item up to a bright window or under a strong indoor light. I look at it from different angles. Natural light reveals shadows and faint rings that artificial light can hide.
Here’s a quick chart to help you adapt the core method to anything in your house.
| Surface | Key Adaptation |
|---|---|
| Clothing & Washable Fabrics | Follow the standard pre-treat, wash, and air-dry steps. |
| Carpet | Blot (never rub) with a dish soap solution, then blot with a water-damp cloth to rinse. Use a fan to dry. |
| Upholstery & Sofas | Use minimal moisture. Focus on dry absorption with cornstarch first, then gently dab with a soapy microfiber cloth. |
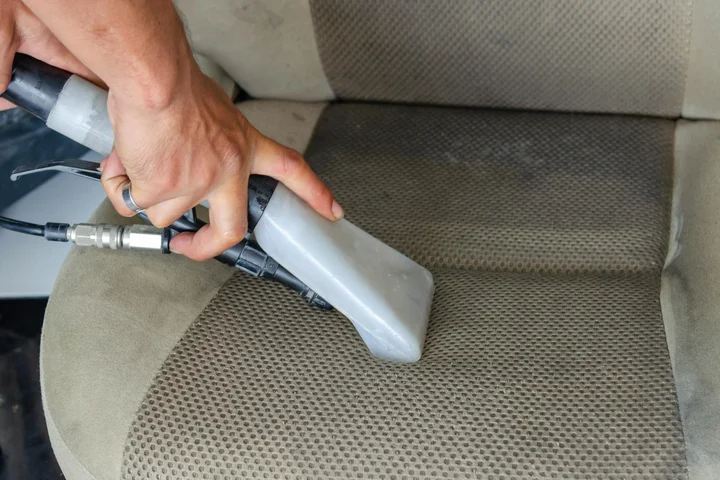
| Car Interior (Fabric Seats) | After the dish soap step, follow up with a dedicated fabric cleaner made for auto interiors to lift any final residue. |
| Hard Surfaces (Counters, Floors) | A simple wipe-down with your dish soap solution is usually sufficient. No special drying needed. |
If you see a shadow or feel any oiliness, don’t worry. It happens to me more often than you’d think, especially on dark fabrics. Persistence always pays off with oil stains. Just repeat the pre-treatment and wash cycle before you even think about the dryer.
How to Dry Without Setting the Stain
This is non-negotiable. My Aunt Jessica learned this lesson with a beautiful silk blouse and a splash of salad dressing. The heat sealed its fate.
Lay the item flat on a clean, dry towel or a drying rack. You can also hang it. The goal is good airflow.
Keep it away from radiators, heating vents, and of course, the sunny spot on the deck.
Your clothes dryer is the enemy of a lingering stain. The heat will bake what’s left into a permanent, dull shadow. I promise, the extra few hours of air-drying patience is worth it.
Surface Compatibility: From Shirts to Sofas
Let’s break down those chart notes a bit more. You need different tactics for different textures.
For standard clothing, you have the most flexibility. The wash-and-rinse cycle handles the soap removal for you.
Carpet requires a softer touch. After you blot with the dish soap solution, you must rinse the area by blotting with a cloth dampened with clean water. Leaving soap in the carpet fibers attracts more dirt. My mom, Martha, taught me to point a fan at the spot to speed drying.
Non-washable upholstery makes me nervous. My sofa has seen its share of spills. For delicate fabrics, your first move should always be a dry one: cover the stain with cornstarch to pull up oil before introducing any liquid, especially on oil stains on couch or sofa. Then, use a barely-damp microfiber cloth with a drop of soap to gently dab. Too much water can cause water rings or damage the padding.
Car interiors are a hybrid. I use the dish soap method on my son Jason’s soccer gear in the backseat. But car fabrics often hold onto a greasy feel. A follow-up pass with a spray-on upholstery cleaner designed for vehicles lifts that last bit of residue and leaves a fresh scent. It’s the one-two punch that works on Peeta’s paw prints, too.
FAQ about Removing Olive Oil Stains
1. What household products can I use to remove an olive oil stain in a pinch?
In a pinch, baking soda or cornstarch are excellent for absorbing fresh oil. For the wash, a drop of blue dish soap is your most effective degreaser.
2. What’s the biggest mistake to avoid when treating an olive oil stain?
Never rub the stain or use hot water initially, as both actions drive the oil deeper into the fibers. Also, never put the item in the dryer until you’re certain the stain is completely gone.
3. Is a commercial stain remover necessary for olive oil, or are home remedies enough?
A commercial stain remover is usually not necessary. A simple, degreasing dish soap is just as effective and often more readily available.
4. How should I pre-treat an olive oil stain to give it the best chance of coming out?
Blot the stain, then apply a drop of dish soap directly to the back of the stain, gently working it in. Let it sit for 5-10 minutes before washing in the warmest water safe for the fabric.
5. Can I use hand soap or shampoo instead of dish soap on a grease stain?
Avoid hand soaps and most shampoos, as they often contain moisturizers that can leave a residue. Dish soap is specifically formulated to cut grease and rinse clean, making it the superior choice.
Protecting Your Fabric After Treatment
Your best defense against a lasting olive oil stain is to act quickly-blot up the oil and apply a dab of dish soap to break the grease before it sets. Always check that the spot is completely gone after washing and air-dry it first; heat from a dryer can make any leftover oil permanent. I share all my family-tested methods, from saving Jessica’s art smocks to tackling Roger’s grill apron, right here on Stain Wiki for your next cleanup challenge.
Suzanne is an accomplished chemist, laundry expert and proud mom. She knows the science and chemistry of stains and has personally deal with all kinds of stains such as oil, grease, food and others. She brings her chemistry knowledge and degree expertise to explain and decode the science of stain removal, along with her decades long experience of stain removal. She has tried almost everything and is an expert on professional and DIY stain removal from clothes, fabric, carpet, leather and any other items dearest to you.