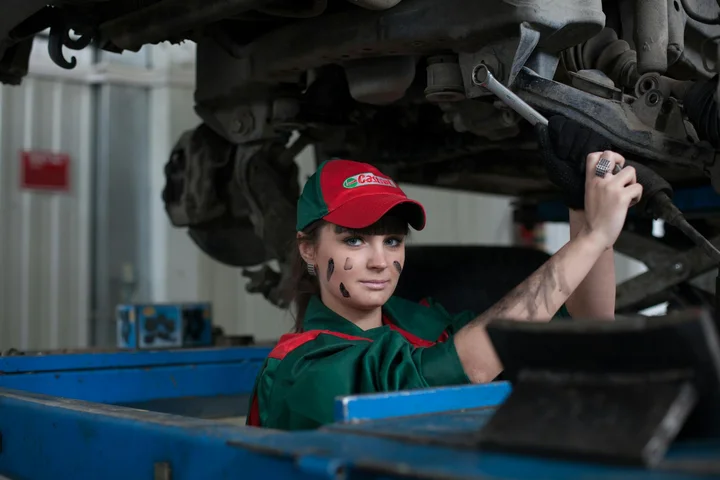
How Do You Remove Old and New Oil Stains from Every Surface in Your Home?
That slick, greasy spot on your favorite shirt or your car seat doesn’t have to be a lost cause. Whether it’s fresh or ancient, you can lift oil stains with patience and the right technique, often using items already in your kitchen.
Here’s exactly what we’ll cover together:
- The critical first step that changes for new spills versus set-in stains
- Tailored methods for clothing, upholstery, carpets, and tough exteriors
- My hands-on tests with specific products on family messes
- Why some “hacks” fail and the reliable alternatives I swear by
- How to protect your fabrics and surfaces from future accidents
I’ve cleaned oil from my husband Roger’s work coats, my son’s soccer gear, and our dog’s bedding, learning what truly works through trial and error.
1. Assess Your Oil Stain: Old, New, and Panic Level
Oil stains are sneaky. The first thing I do is figure out what I’m up against. A new stain is fresh and still wet, maybe even a bit shiny. An old stain has had time to set, dry out, and often oxidizes into a dark, dull brown ring that looks baked into the fabric.
I rate every spill with a “Panic-Level” from 1 to 10. A 1 is oil on a concrete patio. A 10 is salad dressing on a silk blouse. This score tells me how fast I need to move. For any new spill, you have a “Golden Window” of about 15 to 30 minutes to keep it from becoming a permanent resident.
When Jason dribbled burger grease on his white soccer jersey after a game, my panic level hit an 8. I knew I had about 15 minutes before that yellow slick became a permanent badge of his victory meal. We acted fast, and you couldn’t even tell by the next practice.
Your panic level shifts completely based on the surface. Engine oil on Roger’s work jeans is a 3 (annoying, but fixable). The same oil on my living room carpet is an 8. Motor oil on the driveway? That’s a 2. It’s ugly, but it won’t ruin your day.
2. The Universal First Step: Blotting and Immediate Action
No matter the surface or panic level, this step never changes. Your first job is to contain the mess. The cardinal rule is to blot, never rub, because rubbing grinds the oil deeper into fibers or pores.
Here is your immediate action plan:
- Scrape: Use a dull knife or a spoon to gently lift off any globs of excess grease or food.
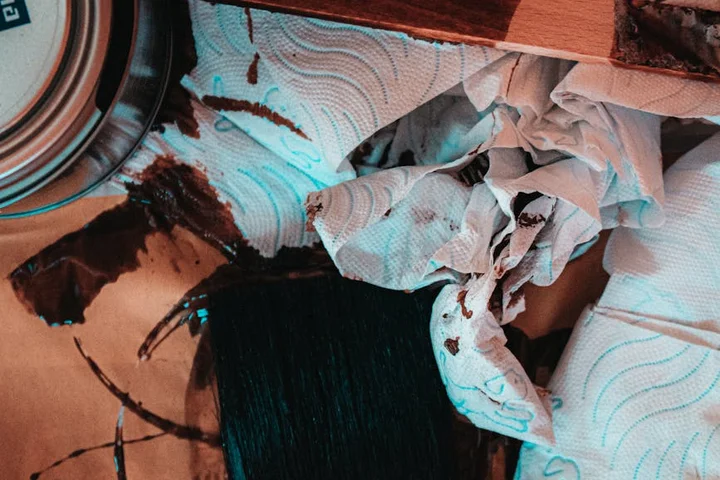
- Cover & Conquer: Smother the wet stain with a dry, absorbent powder. My go-to is plain cornstarch. Baking soda or even unused kitty litter works too. You want to see it clump and turn pasty as it soaks up the oil.
- Wait: Let that powder sit for at least 15 minutes. For a thick grease spot, I might leave it for an hour.
- Brush: Brush or vacuum all the dried powder away from the fabric.
On-the-Go Emergency Fix
What if you’re at a restaurant? Don’t panic. Head to the restroom. A tiny dab of liquid hand soap or hand sanitizer rubbed gently into the stain can break up the oil enough to prevent setting until you get home. You can also use a pinch of table salt as a mini absorbent.
Here is the most critical warning I can give you. Avoid hot water on a fresh oil stain at all costs, as the heat will permanently set the oil into the fibers. Always start with cold water or a dry method.
My mom, Martha, is a genius at preparedness. She always keeps a small, sealed jar of cornstarch in her car’s console. “For fries, burgers, and milkshake drips,” she says. It’s saved many a road trip outfit.
3. The Science of Oil Stains: Chemistry Corner
Let’s talk about why oil stains are so stubborn. It all comes down to a simple rule: oil and water don’t mix.
Oil is hydrophobic, which is a fancy word for “water-fearing.” Picture trying to mix a drop of canola oil into a glass of water. It just beads up and floats, right? When you pour water on an oil stain, you’re not lifting it. You’re often just pushing it deeper into the fibers or spreading it around.
Water alone will never lift an oil stain; it needs a helper to bridge the gap.
The Dish Soap Superhero: Surfactants
That helper is your ordinary dish soap. Inside that bottle are miracle workers called surfactants.
Imagine a surfactant molecule like a tiny magnet with two ends. One end is attracted to oil (it’s lipophilic), and the other end is attracted to water (it’s hydrophilic). When you apply dish soap to a stain, these molecules surround the oil droplet.
The oil-loving end latches onto the grease. The water-loving end faces out, creating a bridge. Now, when you add water and agitate it, the whole package-oil droplet surrounded by soap-can be lifted away and rinsed off.
Dish soap acts like a peacekeeper, finally getting the oil and water to work together so the stain can be washed away. This is why pre-treating with a dab of Dawn is my first move for almost any fresh grease spot, from Jason’s pizza-stained jersey to a dribble of bacon grease on the tablecloth.
Not All Oils Are Created Equal
While the basic rule is the same, the source of the oil changes the game a little.
Cooking oils (vegetable, olive, butter) are often the easiest. They usually respond beautifully to dish soap or a paste of baking soda and water. The grease from last night’s fried chicken? A classic dish soap candidate.
Motor oil and grease are tougher. They’re engineered to withstand heat and friction, so they cling harder. For Roger’s garage jeans, I often need a stronger solvent like a commercial degreaser or even a pre-wash with rubbing alcohol after the initial soap scrub.
Makeup and lotions are tricky blends. They contain oils, but also pigments and waxes. My daughter Jessica’s cheek print on a shirt sleeve needs a double attack: dish soap for the oil base, followed by a stain remover for any lingering color.
The heavier and more engineered the oil, the more powerful your “peacekeeper” solvent needs to be to break its grip.
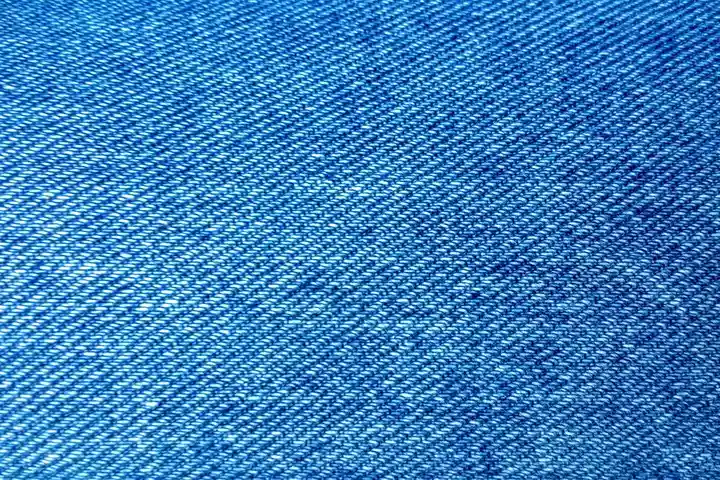
How to Remove Oil Stains from Clothing and Washable Fabrics
Grease and oil are some of the trickiest stains. They cling to fibers and seem to reappear after a wash. I get it, that dark, slick spot on a favorite shirt is frustrating. You’re probably wondering, “how do you get oil out of fabric” for good, whether it’s fresh or has been there for weeks. Let’s tackle both grease stains from clothes.
I always reach for simple, safe items first. You don’t need a cabinet full of harsh chemicals. Here are my go-to DIY alternatives.
- Cornstarch or Baby Powder: This is my first move for a fresh spill. It soaks up the oil like a sponge. I keep a shaker of cornstarch in the laundry room just for this.
- Baking Soda Paste: For older stains, a thick paste of baking soda and water can help draw the oil to the surface as it dries. It’s gentle but effective.
- Plain Blue Dish Soap: The degreasers in dish soap, like Dawn, break down oil on contact. This is the most powerful tool in your DIY kit for oil stains.
After you treat and wash an oil stain, never throw it in the dryer right away. The heat will bake the stain permanently into the fibers. I always hang the item to air dry completely first. Then, I hold it up to the light and check every angle. If I see even a faint shadow, I treat it again.
Not all fabrics can handle the same tactics. Be extra careful with delicate materials. Silk, wool, leather, and dry-clean-only items are red flags. For these, I skip the dish soap and start with a gentle dab of cornstarch. If the stain persists, it’s time for a professional cleaner. It’s not worth risking a ruined silk blouse. Stubborn stains on outerwear and other delicate fabrics require extra care. In the next steps, I’ll share targeted, gentle approaches for those fabrics.
My husband Roger is a mechanic by hobby. His work jeans are a battlefield of old, set-in grease. My pro-tip for him is a long pre-soak. I fill a bucket with warm water and a scoop of oxygen cleaner, like OxiClean, and let those jeans stew overnight. It loosens everything up before they even hit the washer.
Removing New Oil Stains from Clothing
A new oil stain is a race against time. The goal is to stop it from sinking in. Act fast, and you can often make it vanish completely.
Here is my exact step-by-step method for a fresh spill on cotton, polyester, or denim.
- Blot, Don’t Rub: Use a clean paper towel or cloth to gently blot up any excess oil. Rubbing will push it deeper into the fabric.
- Apply Dish Soap: Put a drop of undiluted blue dish soap directly on the stain. Gently work it in with your fingers or a soft brush for about 30 seconds.
- Let it Sit: Walk away for 10-15 minutes. Let the soap break down the grease.
- Wash: Wash the garment by itself, using the hottest water temperature the fabric care label allows. Use your regular detergent.
For stubborn new stains, a targeted product can help. I recommend an enzyme-based laundry detergent, as the enzymes eat through organic matter like oil. A pre-treatment spray, like Shout or Spray ‘n Wash, is also a reliable choice. I keep one in the laundry room for when my son Jason comes in from working on his bike. These are especially effective for biological stains such as sweat and grass.
Removing Old Oil Stains from Clothing
An old oil stain is a tougher opponent. It’s had time to bond with the fibers. This requires a more patient, layered approach. Don’t expect one wash to fix it.
For a set-in stain that survived the first wash, I use this two-part process.
- Draw it Out: Make a thick paste of baking soda and a little water. Smear it over the entire stain. Let it dry completely, which can take a few hours. Once it’s dry and crumbly, brush it off.
- Break it Down: Now, pre-treat the area with your dish soap or a heavy-duty degreaser. Really work it in and let it sit for 30 minutes.
- Wash and Check: Wash as normal. Air dry and inspect. You will likely need to repeat steps 1 and 2 for 2-3 cycles. Be patient. It took my daughter Jessica’s bib three treatments to lose its spaghetti sauce grease ring.
Surface Compatibility for Fabrics
Before you treat any stain, think about the fabric. A method that saves jeans could destroy a blouse. Here’s a quick mental chart I use.
| Hardy Fabrics (Most Forgiving) | Cotton, Denim, Polyester, Nylon, Linen |
| Touchy Fabrics (Be Gentle) | Rayon, Acetate, Viscose, Performance Wear (Spandex/Lycra) |
| Delicate Fabrics (Spot Test Only) | Silk, Wool, Cashmere, Leather, Suede |
The golden rule is to always test your cleaning solution on a hidden seam or inside hem first. I learned this after a dish soap mishap on a rayon shirt left a faded spot. Wait a few minutes to see if the color changes or the fabric weakens. It’s a simple step that saves clothes.
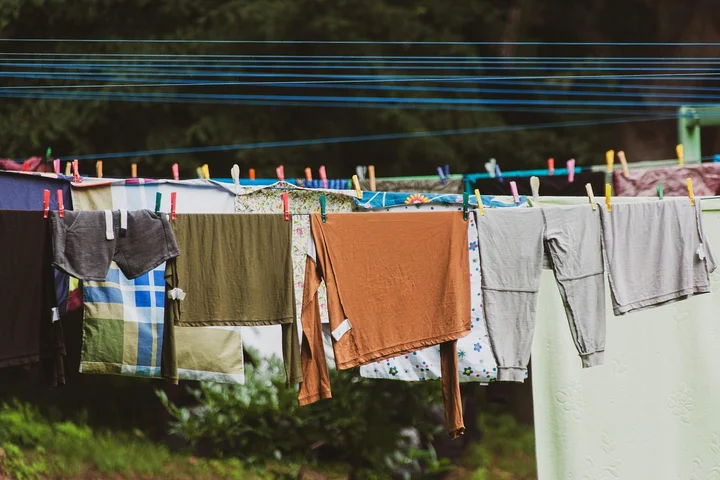
5. How to Remove Oil Stains from Home Textiles and Upholstery
Spills happen where we live. A greasy fingerprint on the curtain from opening it. A splash of salad dressing on the tablecloth during a family dinner. These fabrics feel permanent, but you can fix them.
I learned this after Jason, my eight-year-old, somehow got spaghetti sauce on the living room armchair. Roger just sighed. The method is gentle but effective.
Your Step-by-Step Rescue Plan
Follow this sequence for the best chance of total stain removal.
- Blot, Don’t Rub. Use a clean, white cloth or paper towel to press down on the stain. Soak up all the loose oil you can. Rubbing pushes the oil deeper into the fibers and backing.
- Dust with Cornstarch. Generously sprinkle plain cornstarch or baking soda over the spot. This powder acts like a dry sponge, absorbing the oil from the fabric. Let it sit for at least 15 minutes, or even overnight for a thick stain.
- Vacuum Thoroughly. Use an upholstery attachment to suck all the powder away. You might see a grease mark on the powder you remove, which is a good sign.
- Apply a Cleaning Solution. Mix a teaspoon of clear dish soap (like Dawn) with two cups of warm water. Using another clean white cloth, dab the solution onto the stain. Work from the outer edge of the stain toward the center.
- Rinse and Dry. Dampen a cloth with plain cool water and blot the area to rinse out the soap. Press with a dry towel to remove moisture.
For my light-colored sofa, I always use a white cloth and blot from the outside of the stain inward to prevent ugly water rings. A colored towel can transfer dye, making a bigger problem.
When NOT to Try This
This method is not for every fabric. Stop and check the care tag first.
- If the tag says “Dry Clean Only,” believe it. Home methods can damage the fabric’s finish or cause shrinkage.
- Do not use this on very delicate fabrics like silk or vintage velvet.
- If the cushion cover is not removable, be extra careful. You don’t want to overwet the inner padding.
Drying is critical. Use fans or open windows to move air over the spot. You must ensure the padding underneath dries completely to avoid a musty mildew smell later.
New Stains on Tablecloths or Curtains
These items are often easier because you can usually wash them. Act fast.
Blot the fresh oil immediately. Then, cover the stain with a thick layer of cornstarch. Let it sit for 30 minutes to draw the oil up. Shake or brush off the powder outdoors.
Pre-treat the spot with a drop of dish soap, rub it in gently, and then wash the item on the warmest setting the fabric allows. Check that the stain is gone before you put it in the dryer, as heat can set any leftover oil.
Old Stains on Upholstery
That shadow of a stain from months ago needs a stronger approach. My aunt Jessica taught me this trick for old wine spills, and it works on set-in oil too.
Mix a solution of 1 cup warm water, 1 tablespoon white vinegar, and 1 teaspoon of dish soap. The vinegar helps break down the old, oxidized oil.
Dampen a soft-bristled brush (an old toothbrush works) in the solution. Gently agitate the stain in a circular motion. Do not soak the fabric. Blot repeatedly with a dry cloth to lift the oil and solution out. Oil stains can be tricky to remove, so treating them gently is crucial.
Finish by rinsing and drying the area completely. This might take a few attempts for a very old stain, but patience pays off.
6. How to Remove Oil Stains from Car Interiors
Car interiors are a special challenge. You’re dealing with a mix of fabrics, plastics, and leathers, all crammed in a space that’s hard to clean. Oil from fast food bags or grease from your hands on the steering wheel is common. My husband Roger’s occasional motor oil smudge from checking the dipstick is another classic.
My first piece of advice is to always know what you’re cleaning. Treat cloth seats, carpets, and floor mats differently than vinyl dashboards or leather upholstery. Using the wrong cleaner can cause fading or cracking.
Here is my go-to method for cloth and carpeted areas in your car.
- Vacuum thoroughly first. Get up any loose dirt or crumbs. This prevents you from grinding grit deeper into the fabric when you start cleaning.
- Mix a degreaser. I use a teaspoon of blue Dawn dish soap in two cups of warm water. For tougher stains, a commercial automotive carpet cleaner is great.
- Apply a small amount to the stain. Don’t soak it. Let it sit for 5-10 minutes to break down the oil.
- Gently agitate the area with a soft-bristled brush, like an old toothbrush. Work from the outside of the stain inward.
- Blot aggressively with a clean, dry microfiber cloth or paper towels. Press down hard and lift. Do not rub.
- If you have a wet-dry vacuum, use it to extract the soapy water. If not, blot with a cloth dampened with plain water to rinse, then blot dry again.
Avoid harsh solvents like acetone, bleach, or ammonia on car fabrics. They can permanently damage the color and the material’s backing. For vinyl and plastic, a simple damp cloth with a bit of all-purpose cleaner is safest.
For genuine leather, never use a degreaser. Wipe the oily spot with a damp cloth, then clean with a product made for leather, like saddle soap. The same approach can help with oil stains on suede as well, with care to avoid over-wetting. If in doubt, test a small hidden area first and follow suede-specific guidelines. Condition the leather afterward to keep it supple.
Peeta’s muddy, oily paws after a rainy walk are a classic. I keep a spray bottle of diluted carpet cleaner in the garage for quick cleanups on the floor mats before the oil sets.
Let’s talk panic levels. A new french fry grease stain on your cloth seat is a solid Level 7. It needs quick action. An old, ground-in motor oil stain you’ve ignored for months is a Level 9. It will test your patience and might need professional help.
New Stains in Car Interiors
Speed is your best friend here. The moment you see the spill, grab plain paper towels or a cloth.
Press down on the stain to absorb as much of the liquid oil as you can. Change towels as they become saturated.
For a fresh spill, immediately sprinkle a generous amount of baking soda or cornstarch over it. This powder will absorb the oil from the surface. Let it sit for 15-20 minutes, then vacuum it up completely.
You’ll likely still see a faint mark. Follow that spot with the dish soap and blotting method I outlined above. Catching it new makes the final cleanup much easier.
Old Stains in Car Interiors
Set-in grease is a tough opponent. It has bonded with the fabric fibers. You’ll need a more aggressive approach.
Start with the standard degreasing and blotting method. You may need to repeat it two or three times, letting the cleaner sit longer each time.
For a deep clean, a rented carpet extractor or a compact home upholstery cleaner can be a game-changer. The heated water and powerful suction pull dissolved oil and grime from deep within the seat or carpet pile.
I once had a set-in butter stain from a forgotten pastry on the backseat. After two home treatments, it was still a greasy shadow. A single pass with a rented extractor pulled it right out.
If the stain persists after your best efforts, it might be time to call a professional auto detailer. They have industrial-strength cleaners and techniques for the most stubborn, old stains.
7. How to Remove Oil Stains from Carpets and Rugs

The number one question I get about carpets is simple: can you get the grease out without leaving a mark? The answer is usually yes, if you treat it the right way. Oil soaks into carpet fibers and the padding below. If you just rub it, you spread it and make a bigger, darker stain.
I learned this the hard way when my son Jason and his friend Edward dropped a buttery piece of popcorn on our beige living room rug. My first instinct was to scrub. That was a mistake. The key with carpets is to pull the oil up and out, not push it down and around.
New Oil Stains on Carpets
Speed is your best friend with a fresh stain. The faster you cover it with an absorbent powder, the less it can sink in. Cornstarch, baking soda, or even baby powder will work in a pinch.
I keep a large shaker of plain cornstarch in my laundry room just for this. It has no scent and is safe for all colors.
Acting fast with a dry powder gives you a real shot at lifting the entire stain before it sets.
Old Oil Stains on Carpets
An old stain needs a different mindset. The oil has had time to bond with the fibers. You can’t just absorb it away. You need to break that bond first.
This is where you might need to repeat your cleaning process or use a product designed for greasy carpet spots. These often contain gentle solvents that cut through the aged oil.
Patience is non-negotiable with old stains. You may need two or three careful treatments to see progress.
Here is the method I use for almost every oil stain on my carpets. It’s gentle and uses things you probably already have.
- Blot, Don’t Rub. Use a clean, white cloth or paper towel to gently press down on the stain. You’re soaking up the excess oil on the surface. Change to a clean spot on the cloth as it gets dirty.
- Apply an Absorbent Powder. Generously cover the entire stained area with baking soda or cornstarch. You want a layer about a quarter-inch thick. Let it sit for at least 30 minutes, or even overnight for an old stain. The powder will pull oil up from the base of the fibers.
- Vacuum Thoroughly. Use your vacuum’s hose attachment to suck up all the powder. You should see a noticeable improvement already.
- Apply a Cleaning Solution. Mix a few drops of clear dish soap (like Dawn) with a cup of warm water. Using a clean cloth, dab this solution onto the stain. Don’t pour it. Gently work the soapy water into the fibers with a light blotting motion.
- Blot and Rinse. Use a second cloth dampened with just cool water to rinse the area by blotting. Finally, press a dry towel firmly over the spot to soak up as much moisture as possible.
For a large spill or a stain that just won’t quit, my carpet shampooer is a lifesaver. My aunt Jessica swears by hers for wine spills on her Arizona rugs. I use mine about once a season.
You don’t always need shampoo. Sometimes, I just fill the tank with hot water and go over a greasy area. The machine’s suction pulls the oil and soap residue from deep down. The dirty water it extracts is proof it’s working.
For a persistent stain, a carpet cleaning machine provides the deep lift and powerful suction that hand-cleaning can’t match.
Here is the step most people forget, and it can ruin your carpet. You must dry the area completely and quickly.
After cleaning, I place a thick, dry bath towel over the damp spot. Then, I stand on it for a minute. The pressure forces the towel to soak up moisture from deep in the carpet pad.
I might place a fan nearby to circulate air. A wet carpet pad can grow mold or mildew in just a day or two. This “post-treatment recovery” is what keeps your carpet fresh and clean after the stain is gone.
Pressing a dry towel over the cleaned area to soak up residual moisture is critical to prevent mold and a musty smell.
Here’s a quirky trick from my mom, Martha, in North Texas. For a fresh grease spot on a durable area rug, take a plain white chalk stick.
Rub the chalk heavily over the grease mark until it’s covered in white dust. Let it sit for ten minutes. The chalk absorbs the oil. Then, just brush the powder out with a stiff brush or vacuum it up.
For a high-traffic area rug, I sometimes use a dry, white chalk stick to draw over a fresh grease spot before brushing it out. It sounds odd, but it works.
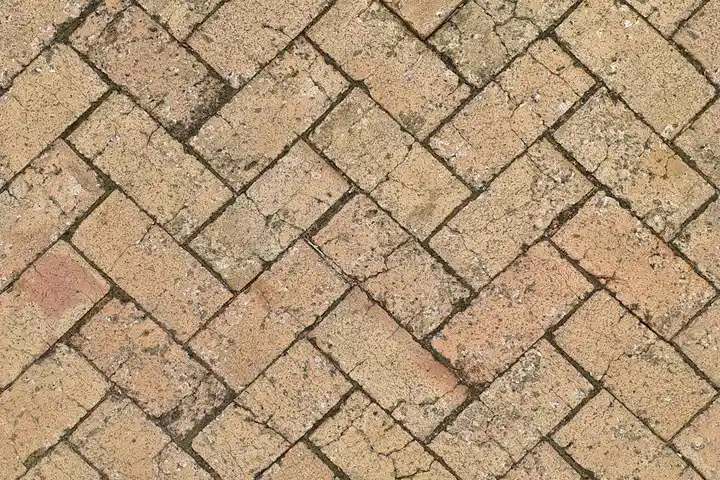
How to Remove Oil Stains from Home Exteriors and Driveways
Oil on your driveway or siding feels like a permanent mark of shame. I get it. Roger’s truck and my son’s bike chain have gifted our concrete with more than a few souvenirs.
The good news is you can tackle oil on concrete, asphalt, and even vinyl siding with some simple, aggressive tactics. The method just depends on how long that oil has been setting up camp.
New Stains on Driveways
Speed is your best friend here. Fresh oil is still mostly on the surface, waiting to be grabbed.
For a new spill, your immediate goal is to absorb every drop you can before it soaks in.
- Smother the stain completely with an absorbent. I keep a bag of cheap, non-clumping kitty litter in the garage for this. Plain clay cat litter, sawdust, or even cornstarch works.
- Crush the litter into the stain with your shoe. You want fine powder making contact.
- Let it sit overnight. The clay will pull the oil up from the pores.
- Sweep up the now-oily litter. You’ll see a big improvement already.
- Mix a generous glob of blue dish soap (like Dawn) with hot water. Scrub the area with a stiff, long-handled brush.
- Rinse thoroughly with a garden hose. For stubborn remnants, repeat the soap scrub.
Old Stains on Driveways
Old, set-in stains require a more involved approach. They’ve sunk deep into the concrete’s pores.
For a dark, old stain, you need a cleaner that can penetrate and break the oil down from the inside out.
You have two great options. For a DIY method, make a poultice. Mix baking soda with just enough water to form a thick paste. Smear it over the stain about 1/4 inch thick. Let it dry completely, which can take a day. As it dries, it draws the oil out. Sweep it away.
My go-to is a commercial concrete degreaser. I buy a concentrated gallon and use it for years. Saturate the stain, following the label directions. Most need 20-30 minutes to penetrate.
Scrub vigorously with a stiff brush. Then, rinse with a powerful stream. A pressure washer on a low setting works wonders here.
My mother-in-law, Brianna, has her own Southern Texas remedy. She swears by a paste of automatic dishwasher detergent and water for her driveway oil spots. The powerful enzymes in dishwasher detergent attack grease. It’s a smart alternative if you have it on hand.
Before you use any cleaner, especially on painted siding or decorative concrete, do a spot test. Apply it to a small, hidden area and wait. Make sure it doesn’t discolor or damage the surface.
Manage your expectations with ancient, dark stains on porous concrete. You can often fade them dramatically, but complete removal isn’t always possible. The oil has simply traveled too deep. A significant improvement is still a win.
9. Troubleshooting Persistent Oil Stains and Last Resorts
You’ve tried the dish soap. You’ve tried the baking soda paste. That dull, shadowy stain is still staring back at you from the fabric. So, can you wash out oil stains that are ancient? The answer is often yes, but it requires moving from basic cleaning to targeted treatment, like those used for cooking oil stains on clothes.
Old oil stains have settled in, bonding with fibers over time, so you need a method that can break that bond without breaking the fabric. The same approach can tackle oil grease stain removal on clothes. My mom Martha has an old linen tablecloth with a decade-old gravy stain that she thought was hopeless. We got it out. Don’t give up yet.
Advanced Home Treatments for Set-In Stains
When standard methods fail, I reach for one of two tools from my utility closet. These are for tough, washable fabrics like canvas, cotton, or polyester blends, not silks or wools.
The Solvent Method (For Synthetic or Sturdy Fabrics)
This mimics what professional dry cleaners use. My husband Roger uses mineral spirits for his garage projects, so I borrowed a small amount for a stained canvas work jacket.
- Work outside or in a garage with doors open. The fumes are strong.
- Dab a tiny amount of mineral spirits on a hidden seam or hem. Wait 15 minutes. If there’s no color change or damage, proceed.
- Place a clean, white cloth under the stain. Using another white cloth, gently dab the stain with the solvent, working from the outside in.
- The oil will start to transfer. Keep moving to a clean part of your cloth as it gets dirty.
- Once the stain is gone, wash the item immediately with heavy-duty detergent and the hottest water the fabric allows. This removes all solvent residue.
The Oxygen Bleach Soak (For Natural, Colorfast Fabrics)
For Jason’s white baseball pants that got grass-stained motor oil on them, this was my savior. Oxygen bleach (like OxiClean) breaks down organic matter.
- Fill a sink or bucket with the hottest water safe for the fabric.
- Dissolve the oxygen bleach powder completely according to package directions.
- Submerge the stained item and let it soak for 8 hours or overnight.
- After soaking, check the stain. If it’s gone, wash as normal. If a faint mark remains, apply a little dish soap directly to it and wash again.
A long, hot soak with oxygen bleach can lift stains you thought were part of the fabric’s history.
When to Call a Professional Cleaner
Some items are too valuable for experimentation. I don’t gamble with these:
- Antique or Delicate Textiles: My Aunt Jessica’s vintage lace shawl? That goes straight to a professional with experience in heirlooms.
- Large Carpet Areas or Rugs: If a big section of your living room carpet is soaked with cooking oil, the extraction and drying required are best left to pros with truck-mounted units.
- Valuable Car Interiors: Grease on delicate car seat leather or headliners can be ruined by the wrong product. An auto detailer has the right tools and knowledge.
Calling a pro isn’t defeat. It’s a smart investment to preserve something you love.
The Non-Negotiable Safety Rule
As you layer treatments, this rule is absolute. Never mix cleaning chemicals like bleach and ammonia, as it creates a toxic, dangerous gas. I only ever use one active treatment at a time. After a solvent, I wash. After an oxygen bleach soak, I wash. I never create a cocktail.
A Final Word of Reassurance
Oil stains test your patience. With oil stains, persistence often pays off. I’ve salvaged many items thought to be ruined by just trying one more gentle cycle. My son’s favorite hoodie survived an encounter with chain grease. My car’s cloth seats recovered from a leaked salad dressing. Breathe, assess your fabric, and tackle it one step at a time—whether it’s clothing, upholstery, or linens.
FAQ about Removing Oil Stains
1. What’s the fastest thing I can do for a fresh oil stain if I don’t have dish soap handy?
Immediately smother the stain with a dry, absorbent powder like cornstarch, baking soda, or even baby powder. This will pull the oil to the surface and buy you time to get the proper cleaners.
2. I have an old oil stain on a delicate fabric like silk or wool. What’s the safest first step?
Do not use dish soap or water. Gently dab the stain with cornstarch, let it sit for an hour, then brush it off. For any remaining mark, your safest bet is to take the item to a professional dry cleaner.
3. What’s the biggest mistake people make when cleaning an oil stain from a car seat or carpet?
Rubbing the stain instead of blotting it. Rubbing grinds the oil deeper into the fibers and backing, making it much harder to remove and often spreading the stain.
4. How can I tell if an old oil stain is truly gone before I heat-dry the item?
After washing, always air-dry the item completely first. Hold it up to a bright light and inspect from all angles; if you see any shadow or discoloration, the stain needs another treatment before the dryer’s heat sets it permanently.
5. I’ve tried dish soap and powder on a driveway stain with no luck. What’s a stronger, safe DIY option?
Make a thick paste with automatic dishwasher detergent and water, spread it over the stain, and let it sit for several hours before scrubbing and rinsing. For deeply set stains, a commercial concrete degreaser applied according to its label is your most effective home solution.
Keeping Your World Oil-Free
The single most powerful tool for any oil stain is speed. Blotting up fresh grease beats scrubbing at a set-in stain every single time. Treating stains quickly saves your favorite things and makes the whole job much simpler.
I hope these methods give you the confidence to tackle oil stains wherever they pop up, from Jason’s soccer shorts to the garage floor. For hundreds more specific guides on everything from wine to crayons, just keep exploring right here on Stain Wiki.
Suzanne is an accomplished chemist, laundry expert and proud mom. She knows the science and chemistry of stains and has personally deal with all kinds of stains such as oil, grease, food and others. She brings her chemistry knowledge and degree expertise to explain and decode the science of stain removal, along with her decades long experience of stain removal. She has tried almost everything and is an expert on professional and DIY stain removal from clothes, fabric, carpet, leather and any other items dearest to you.