How Do You Remove Melted Chapstick Stains from Clothing and Fabric?
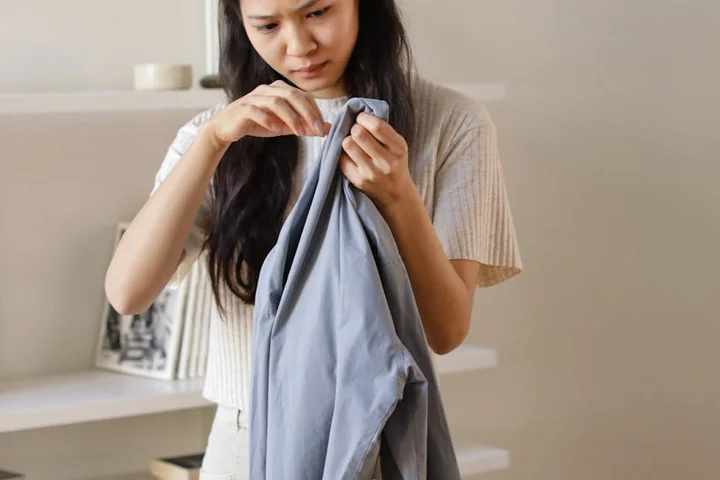
Just discovered a greasy, colored smear on your clothes after a hot wash? I’ve been there, especially with my kids’ laundry. To fix it, harden the wax with cold, scrape it off, then attack the oil stain with dish soap-it’s that straightforward.
Here’s exactly what I’ll cover to get your fabric clean:
- The two key household items you already own that make this easy.
- A clear, step-by-step process to remove the stain without setting it.
- How to adjust the method for different fabrics, from cotton to polyester.
- The biggest mistake people make (hint: it involves heat).
I’ve handled this exact waxy mess on everything from my son Jason’s soccer shorts to my own favorite blouses, so you can trust this advice works.
Panic-Level Assessment & Your Golden Window
Let’s set the record straight. I rate a melted Chapstick stain a solid 4 out of 10 on the panic scale.
It’s a common, waxy, oily mess. It looks terrible on a favorite shirt. The good news is it almost always responds beautifully to the right steps.
Your “Golden Window” isn’t about how fast you run to the sink. It’s about preventing a permanent set. The clock starts the moment the wax melts and stops the second the garment hits a hot dryer.
Heat is your enemy here. It will bake the oils and pigments deep into the fabric fibers. I learned this the hard way with a load of my son Jason’s soccer practice clothes.
Even if you missed the window and the stain is dried in, don’t give up. I’ve salvaged stains from my husband Roger’s hunting jacket that sat for a week. The process just takes a bit more patience.
Your First-Aid Kit: The Immediate “Don’t Panic” Steps
Take a breath. You have about 60 seconds to prevent the stain from getting bigger. Here is your action plan.
- Scrape off the blob. Use a dull butter knife, a spoon, or an old credit card. Gently lift any solid, globby residue off the fabric. Don’t rub. You’re just removing the excess.
- Create a barrier. Immediately slide a few folded paper towels or a clean, white cloth under the stained area. This catches any wax that transfers through, preventing a stain on the other side.
- Remember the goal. We are working to solidify the wax and lift the oil. Our first move is always to harden it, not melt it further.
This leads to the most common question I get.
Should you use heat or cold on a Chapstick stain? The answer is cold, first and always. Heat will spread the liquid wax and oil, making a small stain a giant one. Cold makes it brittle and easy to lift.
What You’ll Grab From Your Kitchen or Bathroom
You don’t need a specialty product. Your home is already stocked with what you need.
Your Cleaning Agents:
- Dish Soap (like Dawn): My absolute first line of defense. The surfactants in blue Dawn are brilliant at grabbing oily stains without harsh chemicals.
- Rubbing Alcohol (Isopropyl Alcohol, 70% or 90%): A fantastic solvent for breaking down the waxy, oily part of the stain after you’ve lifted the bulk.
- White Vinegar: My Aunt Jessica swears by vinegar for a final rinse. It helps neutralize any soapy residue and can tackle lingering color.
- An Ice Cube: Your best friend for step one. It hardens the wax instantly.
Your Tools:
- White Cloths or Paper Towels: You need lots of these. White ensures no dye transfers to your fabric.
- A Soft-Bristled Toothbrush (dedicated to cleaning): Perfect for gently agitating soap into the stain fibers.
- A Dull Knife or Card: Already in your hand from the first step.
The Core Method: Removing Fresh Melted Chapstick from Clothing
The absolute best way to get chapstick out of fabric starts with patience and a little cold. This is my primary, go-to guide for any washable shirt, pair of jeans, or jacket. I used this exact method on Jason’s favorite team jersey after a melted tube of cherry lip balm met his soccer bag.
It works because it tackles the stain’s two parts: the waxy base and the oily, pigmented ingredients.
Step 1: Harden the Wax with Cold
Grab an ice cube from the freezer. Rub it directly over the greasy spot for a good 30 seconds. You want that wax to feel solid and brittle, like a crayon mark.
Once it’s hard, gently flex the fabric back and forth to flake off as much of the waxy top layer as possible. Don’t scrape with a knife, just use your fingers. Getting this bulk off first makes the next step much easier.
Step 2: Pretreat with Dish Soap
Apply a single drop of clear dish soap, like Dawn, directly onto what’s left of the stain. Use your fingertip or a soft toothbrush to work it in gently. You’ll see it start to turn milky.
Here’s the science my Aunt Jessica loves: dish soap is a degreaser. Its molecules are designed to surround and lift oils so they can be rinsed away with water. Chapstick is basically colored wax and oil, so this is a perfect match. Let it sit for at least 15 minutes to do its work.
Step 3: The Final Wash & Critical Drying Check
Now, wash the garment by itself or with similar colors. Use the coldest water temperature the care label allows. Hot water will melt any residual wax right back into the fibers.
Can you wash chapstick stains out in the laundry? Yes, but only after the ice and soap pretreatment. The washing machine provides the agitation and rinse cycle the dish soap needs to lift the stain away for good.
This next part is non-negotiable: after washing, check the stain area under good light before you even think about the dryer. If you see any shadow or greasy trace, repeat the dish soap step. I learned this the hard way with one of Roger’s work shirts. The heat from the dryer will cook any leftover oil into the fabric permanently, making it almost impossible to remove oil stains from clothing.
Material Red Flags: Fabrics & Colors That Need Extra Caution
This core method is fantastic for cottons, polyester, and sturdy blends. But some materials need a softer touch.
- Dry-clean only silks, delicate wools, acetate, and rayon. For these, your best move is to flake off the hardened wax carefully and take the item to a professional. Tell them what the stain is.
- Dark or vibrant colors. Dish soap is usually color-safe, but I always do a spot test. Dab a bit inside a seam or waistband, wait 10 minutes, and blot it with a damp white cloth to check for dye transfer.
My biggest never-use note: never apply hot water or direct heat (like from a hairdryer or iron) to a fresh chapstick stain. It seems logical to melt it to blot it, but that just drives the wax and dye deeper. You’ll turn a surface issue into a permanent, waxy shadow.
What Helped Me: A Pro-Tip from the Stain Wiki Editor

I found Jason’s soccer shorts in the wash with a greasy smear. His chapstick had melted in the pocket during practice.
I almost started scrubbing, but I remembered a trick from my mom, Martha, in North Texas. She showed me this on a silk blouse.
Her genius move? Using the blunt edge of a butter knife.
This method lets you lift hardened wax off delicate fabrics without catching or tearing the threads.
I laid the shorts flat on the counter. I took a standard table butter knife and turned it sideways. I used the dull, flat edge, not the sharp side.
Then, I gently scraped outward, from the center of the stain toward the fabric’s edge. The wax flaked right off.
You must be gentle and patient. Don’t dig or saw at the fabric. Just use light, firm pressure to push the wax away. Even when removing berry stains, it’s important to handle the fabric delicately.
This first step removes the bulk of the waxy barrier. It makes the next steps, treating the oily stain underneath, so much easier.
When the Stain is Set: Can You Get Chapstick Out of Clothes After Drying?
Can you get chapstick out of clothes after drying? Yes, absolutely.
Don’t despair if you find a set, greasy stain. The process is similar but needs more patience when dealing with oil or grease stains. It has worked for me on school uniforms that went through the dryer.
Heat sets the oils, so we need to break them up again before washing.
First, test any product on a hidden seam. Then, follow these steps.
Step 1: Break Up the Set Oils
Turn the garment inside out. Place the stain over a clean, white cloth or paper towel.
Get a bottle of 70% isopropyl rubbing alcohol and a spoon. Pour a small amount of alcohol into the spoon’s bowl.
Use the back of the spoon to dab the alcohol onto the backside of the stain. This helps push the broken-up oils into your cloth underneath.
Let it sit for five minutes. You should see the oily residue start to transfer to your cloth.
Step 2: The Extended Dish Soap Soak
After the alcohol treatment, apply a clear, blue, or original Dawn dish soap directly to the stain.
Rub it in gently with your fingers. You want to see it covering the entire area.
For a set-in stain, let the dish soap sit for at least 30 minutes, or even overnight for tough ones.
The dish soap needs time to emulsify and lift the deeply settled oils from the fabric fibers.
Step 3: The Patient Wash
Wash the garment by itself, or with similarly soiled items, using the coldest water setting on your machine.
Do not use hot water. Hot water will cook any remaining oil into the fabric for good.
Check the stain before you put it in the dryer. If you see any shadow, repeat the alcohol and dish soap steps.
It may take two or three cycles. I once spent an afternoon on one of Roger’s work shirts. Persistence always pays off with oil stains.
Beyond Clothing: Quick Guides for Other Surfaces
That three-step plan works for more than just a shirt. Harden the wax, treat the oil, clean the residue.
You can use it on almost anything.
From Upholstery and Car Seats
My aunt Jessica’s favorite spot on her velvet couch is also where she always loses her chapstick. Fabric furniture and car seats need a gentle, dry approach.
The real trick is using minimal moisture to avoid soaking the padding underneath.
- Scrape off any big globs carefully with a dull knife.
- Hold an ice cube in a plastic bag directly on the stain for a full minute. This makes the wax brittle.
- Flick away the hardened bits with your fingernail.
- Dampen a corner of a white microfiber cloth with warm water and one tiny drop of blue dish soap.
- Dab, never rub, at the oily mark that remains. Start from the outside and work in.
- Use a dry part of the cloth to blot up all the soapy moisture.
- Let the area air dry completely.
Always test your soapy water on a hidden seam first. I learned this after changing the color of a pillow back cushion.
My mom, Martha, taught me the dab-and-blot method. It saved my car’s cloth seats after a summer road trip.
From Carpet
This is where heat becomes your best friend. The goal is to melt the wax and transfer it out of the carpet fibers. This same approach also aids crayon and plastic stain removal on interior carpets.
This paper bag trick is my favorite for wax on carpet. It feels like a magic trick.
- Scrape and ice the stain just like you would on upholstery.
- Place a plain brown paper bag or a few layers of white paper towel over the spot.
- Set your iron to the lowest “synthetic” or “no steam” setting.
- Gently press the warm iron onto the paper for just 3-5 seconds. Lift it up to check.
- You’ll see the wax start to soak into the paper. Move the iron to a clean part of the paper and repeat.
- Keep going until no more wax transfers.
You must keep the iron moving. Letting it sit in one spot can scorch both the paper and your carpet.
Once the wax is gone, you might see a faint oily shadow. Mix one part white vinegar with two parts water. Dab it on the spot, then blot dry with a clean cloth. This lifts that last bit of oil. That same approach can help remove oil stains from wood floors. Use it sparingly to protect the finish.
Keeping Chapstick Stains at Bay: Simple Prevention Habits
Fighting stains is good. Avoiding them is better. A few simple habits save you a lot of scrubbing later.
I make my kids, Jason and Jessica, empty their pockets before pants go in the hamper. It’s a weekly ritual. We find coins, rocks, and yes, melted chapsticks.
Never leave chapstick in a hot car. My husband Roger learned this the hard way with a tube in his truck’s center console. The summer heat turned it into a liquid puddle.
Store your lip balms in a cool, dry place. A drawer in the kitchen or bathroom is better than the dashboard.
Now you have a plan for when it happens. A little melted wax doesn’t have to ruin your favorite things.
You can handle this. I get chapstick on my clothes all the time. I just grab the ice cube tray and take a deep breath.
FAQ about Removing Melted Chapstick Stains
I just found a chapstick stain. What’s the very first thing I should do to prevent it from setting?
Immediately scrape off any excess wax with a dull edge like a butter knife, then place an ice cube on the stain to harden it. This quick action stops the wax from spreading and locks in the stain for easier removal, especially when dealing with melted wax on floors.
Is it safe to use dish soap on all types of fabric when treating a chapstick stain?
Dish soap is safe for most washable fabrics, but always spot-test on a hidden seam first to check for color bleeding. Avoid using it on dry-clean only materials like silk or wool, and opt for professional cleaning instead.
What should I do if the chapstick stain is still visible after washing?
Do not put the garment in the dryer; re-treat the slime stain with dish soap or dab it with rubbing alcohol from the backside. Repeat the wash in cold water and inspect thoroughly until the stain is gone before drying.
Besides dish soap, what other household items can I use if I don’t have it on hand?
Rubbing alcohol is a strong alternative for dissolving oily residue, or use a gel hand sanitizer with alcohol content. White vinegar can also help break down lingering color when added to the rinse cycle.
How can I remove chapstick from delicate or dry-clean only fabrics at home?
Carefully harden the wax with cold and flake it off with a blunt tool, but avoid any moisture or scrubbing. For guaranteed safety, take the item to a professional cleaner and specify it’s a wax-based lip balm stain.
Keeping Fabrics Fresh After Chapstick Spills
Your top priority is to freeze the stain solid, then scrape it off gently to avoid pushing wax deeper. Treat what remains with a drop of dish soap or rubbing alcohol to dissolve the oils before washing. I use this exact plan when Jessica smears chapstick or when Peeta’s leash rubs it on my jeans. These same steps come in handy for oil stains on denim. When it comes to denim oil stain removal, this plan is one I reach for again and again. Find more of my family-tested methods right here on Stain Wiki.
Suzanne is an accomplished chemist, laundry expert and proud mom. She knows the science and chemistry of stains and has personally deal with all kinds of stains such as oil, grease, food and others. She brings her chemistry knowledge and degree expertise to explain and decode the science of stain removal, along with her decades long experience of stain removal. She has tried almost everything and is an expert on professional and DIY stain removal from clothes, fabric, carpet, leather and any other items dearest to you.