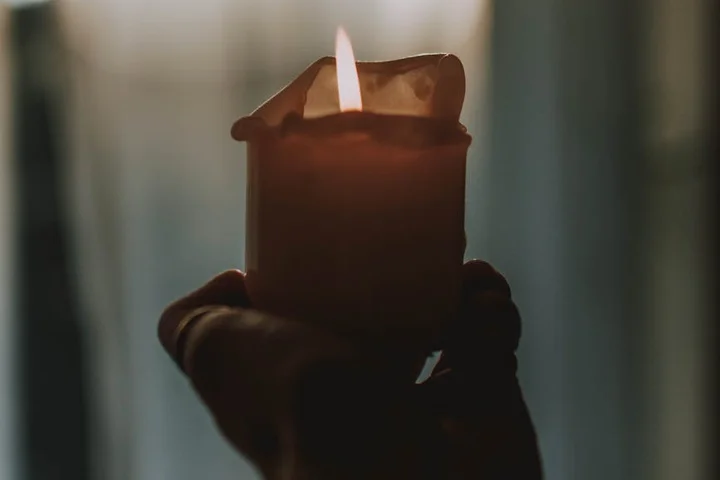
How Do You Remove Melted Candle Wax from Clothing, Sweaters, and Tablecloths?
Finding a splatter of hardened wax on your favorite fabric is frustrating, but I promise it’s usually fixable. You can remove most candle wax stains by letting it harden, then lifting it away with careful heat and a bit of patience.
In this guide, I’ll share the proven steps I use at home. Here’s what we’ll cover:
- Why letting the wax harden completely is your most important first step.
- The iron-and-paper towel method that works on most cottons and linens.
- How to adapt the process for delicate sweaters and wool without an iron.
- My trick for tackling any stubborn, colored wax stain left behind.
I’ve tested these methods for years on everything from Roger’s wax-spattered work shirts to my aunt Jessica’s linen tablecloths.
Panic-Level: Candle Wax on Fabrics
Take a deep breath. This is a manageable one.
I rate candle wax on fabric a 3 out of 10 on the panic scale. The hardened wax blob isn’t a stain itself.
The real enemies are heat and any dye from the candle.
The Golden Window for Wax
You have time, but you need a plan.
The golden window is before any heat from a dryer or hot water wash hits the fabric. That heat will melt the wax again and drive any colored dye deep into the fibers, making a permanent stain.
You can let the wax sit hardened for days. Just don’t toss the item in the hamper and forget.
Where Urgency Actually Lies
Don’t start rubbing at the wax.
Scrubbing pushes the wax deeper and can damage delicate threads. The real urgency is to handle the fabric gently and keep it away from high heat until you’re ready to treat it.
My son Jason once tried to “help” by wiping a wax spill on his sweatshirt. He just made a bigger, thinner mess.
Gathering Your Wax-Fighting Toolkit
You don’t need fancy chemicals. You likely have everything at home.
Essential Tools
Grab these items first:
- An Iron: A standard clothes iron is your main weapon.
- Paper Bags or Plain Brown Paper Towels: White paper towels can work, but brown paper (like from a grocery bag) is more absorbent and less likely to leave ink.
- A Butter Knife or Dull Scraper: For gently lifting off big wax chunks.
- Freezer Access: Your freezer is a fantastic first step for stiff fabrics.
Safe DIY Alternatives
If you don’t have a commercial stain remover, don’t worry.
A few drops of clear dish soap or some isopropyl (rubbing) alcohol are perfect for tackling the oily residue wax leaves behind.
They break up the fats without harsh chemicals. I keep a small spray bottle of 70% isopropyl alcohol in my laundry room for this exact reason.
What Helped Me (A Pro-Tip)
My Aunt Jessica loves a good, long dinner party with candles.
Last visit, a red candle dripped all over my linen tablecloth. I didn’t have a butter knife handy. I used an old credit card to gently scrape up the bulk of the cooled wax. It was stiff enough to lift the wax but soft and smooth enough not to snag the fabric.
It worked perfectly. Now I keep a dedicated plastic scraper in my toolkit.
Material Red Flags
Not all fabrics can handle the heat.
Pause if your item is silk, acetate, rayon, or has a plasticized waterproof finish. The iron’s heat can melt, scorch, or distort these delicate materials.
For these, freezing and careful scraping is your best first move. Then consult a professional.
Never-Use Actions
Some “quick fixes” cause more harm.
- Never pour boiling water directly onto wax on fabric. This can shock the fibers and spread the wax into a larger, greasy ring.
- Never use a hair dryer or heat gun on a high setting. You can’t control the temperature well, and it’s easy to scorch the fabric.
- Never pick at wax with sharp objects like fingernails or knives. You’ll pull threads and create holes.
My mom Martha taught me that patience and the right tool always beat a hurried, harsh method.
The Science Behind Lifting Wax (Chemistry Corner)
That greasy feel on your favorite sweater? That’s your clue. Candle wax isn’t a typical food or drink stain. It’s an oil-based stain, a hydrocarbon that behaves more like a soft plastic than a liquid.
This oily, plastic-like nature is why you can’t just rinse wax away with water-it repels it, clinging stubbornly to fabric fibers.
Why Your Iron is a Secret Weapon
Think of hardened wax like a stick of cold butter. It’s solid and stuck. But warm it up, and it turns liquid again. The iron method uses this exact principle of heat transfer.
You melt the wax on the fabric, and immediately absorb it. I always keep a stack of plain brown paper bags (like the ones from the grocery store) or parchment paper in my laundry room for this.
As you iron over the paper, the liquefied wax gets wicked up into the paper’s fibers, effectively pulling it out of your clothing. You’ll see the wax stain disappear from your fabric and appear as a translucent spot on the paper. Just keep moving to a clean spot on the paper until no more wax transfers.
The Power of the Deep Freeze
This is the opposite approach, and it’s perfect for delicate items you’d never put under an iron, like a beaded tablecloth or a chunky knit. My Aunt Jessica swears by this for her fancy linens.
Extreme cold makes the wax contract and become brittle. Once it’s frozen solid, it loses its grip on the individual threads.
You can then flex the fabric or use a blunt tool, like a butter knife, to gently snap and scrape the wax away in flakes. I’ve used a bag of frozen peas in a pinch when a votive candle tipped over on a placemat during a dinner party.
Don’t Forget the Dye
After the wax is gone, you might see a colored shadow. This is a separate battle. The wax acted as a carrier, depositing dye (often a tannin-based stain from the candle’s pigment) deep into the fabric.
You must treat this like any other dye stain. My go-to is to dab with a cotton ball soaked in rubbing alcohol, as it can help break down the colorants.
Always test your dye-removal method on a hidden seam first, and never proceed until every speck of physical wax is gone. Trying to wash out a dye stain with wax still in place will just set both stains permanently. I learned that the hard way with one of Roger’s hunting flannels. Even with a proper dye stain removal, it didn’t come out.
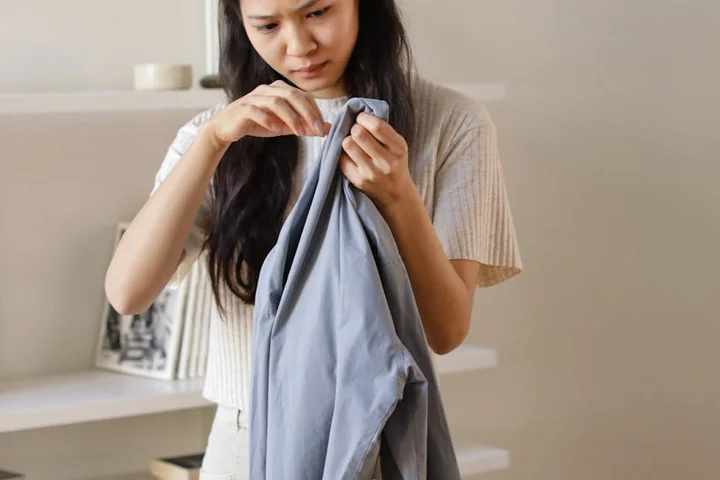
Step-by-Step: Removing Wax from Everyday Clothing
How do you remove melted candle wax from clothing? You stay calm and use heat. My son Jason learned this the hard way last Halloween. He leaned over a jack-o-lantern, and his favorite soccer hoodie met a drippy candle. I walked him through the exact process I’ll share with you now.
Immediate First Aid: Scraping Gently
Do not wash the item. Do not rub the stain. Your first job is to deal with the big, solid chunks.
Let the wax cool completely. It should feel hard and brittle to the touch. I sometimes put the garment in the freezer for 15 minutes to make this step easier.
Take a dull knife, a butter knife, or even an old credit card. Gently flex the fabric and use the edge to scrape off as much of the raised, solid wax as you can without damaging the fibers. Hold the fabric taut and scrape away from your body. You’ll be left with a thinner, stained film.
The Iron and Paper Method (Core Technique)
This is the magic step. It uses heat to liquefy the wax and absorbent paper to suck it right out of the fabric.
You will need:
- An iron
- Plain white paper towels, a brown paper bag, or unprinted newsprint paper
Always, always test your iron’s heat on an inside seam or hidden area of the garment first. This prevents scorching delicate fabrics like polyester or rayon. My husband Roger’s hunting jacket needed a much lower heat than my cotton tablecloth.
- Set your iron to a low or medium heat with NO steam.
- Place the stained fabric between two sheets of your absorbent paper. The wax spot should be sandwiched.
- Press the warm iron down on the top paper sheet directly over the wax spot. Hold for 10-15 seconds.
- Lift the iron and check the paper. You will see the proof: a translucent, greasy stain where the wax melted and transferred.
- Move the paper to a fresh, clean spot. Repeat the pressing and checking until no more wax transfers to the paper.
The paper bag trick my mom Martha taught me is my favorite. When the bag becomes translucent and oily, you know it’s working.
Does Candle Wax Come Out in the Wash? (The Washing Step)
Often, yes. But not yet. The ironing removes the wax, but it usually leaves behind the oily dye stain from the colored candle.
Before you wash, pretreat that leftover stain. I put a few drops of liquid dish soap (like Dawn) directly on the spot and gently rub it in. The soap breaks down the oily residue.
Let it sit for 5-10 minutes. Then, wash the garment as you normally would, using the warmest water safe for the fabric. Do not put the item in the dryer until you are 100% certain the stain is gone, especially when dealing with set-in stains.
The Critical Drying Check (Post-Treatment Recovery)
Heat from the dryer will set any leftover stain permanently. This is the most common mistake.
After washing, take the item out and inspect the stained area while it’s still damp. Hold it up to the light. Do you see any shadow or discoloration?
If you see even a faint ring, repeat the dish soap pretreatment and wash it again. Air-dry it to be safe. Only when the spot looks completely clean in natural light should you toss it in the dryer.
I learned this lesson with a beautiful tablecloth from my Aunt Jessica. I almost set a pink wine-candle stain forever. A second wash with a longer pretreatment soak saved it.
Gentle Methods for Sweaters and Delicate Fabrics
Let’s start with the most common question I get: “How do you remove melted candle wax from sweaters?” My answer always begins with patience, not panic. The key is treating the wax, not the fabric, as the enemy.
Why Freezing is Your First Move for Wool and Cashmere
I learned this the hard way with Roger’s favorite gray wool sweater. A cozy night by the fireplace ended with a blob of beeswax on the cuff. My first instinct was to pick at it, which only pushed it deeper into the fibers.
Instead, I bagged it and put it in the freezer for about an hour.
Freezing makes the wax brittle and changes it from a sticky infiltrator into a solid, removable object.
This is especially critical for spongy, absorbent fibers like wool and cashmere. Heat from an iron would drive the wax in permanently. Cold coaxes it out.
Peeling and Picking: The Delicate Scrape
Once the garment is frozen stiff, work quickly. Lay it on a flat surface with the wax spot facing up.
- Use your fingernail or the dull side of a butter knife to gently flex the fabric around the wax.
- You’re not digging or slicing. You’re encouraging the frozen wax disk to crack and lift away from the individual threads.
- Peel up large pieces first, then use the edge of a credit card to flick away smaller shards.
For cotton, the wax often pops off in one clean piece. Wool holds on tighter. You’ll likely be left with a faint, waxy shadow in the fibers. That’s okay-that’s what the next step is for.
Can You Wash Candle Wax Out of Clothes Like This? (Special Washing Instructions)
Yes, but never with heat. After scraping, you’ll have a grease stain left behind. This is where fabric type dictates your move.
- For Wool/Cashmere: Place the stain face-down on a stack of clean paper towels. Apply a few drops of a mild dish soap (the clear, original kind) directly to the back of the stain. Gently press with a damp cloth-the soap will pull the oily residue into the paper towels. Let it sit for 15 minutes, then rinse thoroughly with cool water. Lay flat to air dry.
- For Machine-Washable Delicates (acrylic, rayon): Apply a pre-wash stain remover or a dab of dish soap to the spot. Let it sit for 10 minutes. Wash the garment alone on the coldest, gentlest cycle. Air dry. The tumbling of a warm dryer will set any leftover grease.
The rule for delicate wax removal is always “cold and slow.” Heat is the fast track to a permanent stain.
When to Skip the Iron Entirely (Material Red Flags for Delicates)
The classic paper-bag-and-iron method is a disaster for many fabrics. If your item has any of these features, do not apply heat.
- Any beading, sequins, or glued-on embellishments (they’ll melt).
- Silk or velvet (heat can scorch and crush the pile).
- Plastic-based fibers like vinyl or some raincoat materials.
- Anything labeled “dry clean only.” Take it to a pro and point out the wax.
My aunt Jessica learned this with a beautiful silk blouse. The iron fused the wax into the weave. We saved it, but it took a professional cleaner and a lesson learned.
Saving Your Tablecloth: From Formal Linen to Casual Cotton
My mom, Martha, has this beautiful vintage linen tablecloth. When I saw a red wax puddle on it after a family dinner, I felt that special kind of dread. The good news is, that tablecloth is spotless again. You can save yours, too, whether it’s casual cotton or something fancier.
First, a universal rule: never try to pick or scrub the wax while it’s warm. You’ll just grind it deeper into the fibers.
Tablecloth vs. Clothing vs. Upholstery: A Quick Guide
Your strategy changes a bit based on what you’re cleaning. A tablecloth gives you a flat, stable surface to work with, which is a big advantage.
| Surface | Best Method | Key Consideration |
|---|---|---|
| Tablecloth | Iron & Paper | Lay it perfectly flat. Check for wax in the folds. |
| Clothing/Sweater | Freezer & Scrape | Protect delicate buttons or embellishments from the iron’s heat. |
| Upholstery/Couch | Iron & Paper (with caution) | Always test the iron heat on a hidden seam first to prevent fabric shine or scorching. |
Remember this: the iron method is your most powerful tool for flat textiles, but the freezer is the safest first step for anything delicate, stiff, or embellished.
Adapting the Iron Method for Large, Flat Surfaces
This is where tablecloths shine. You have space to work.
- Lay the tablecloth on your ironing board or a protected, heat-safe table. If the wax spot is in the middle, you may need to work in sections, repositioning the cloth.
- Place a few layers of plain white paper towel or brown paper bag over the wax. I keep a roll of plain, unprinted butcher paper in my laundry room just for this.
- Set your iron to a medium, dry heat (no steam). Gently press the iron onto the paper over the wax spot for 5-10 seconds.
- Lift the iron and check the paper. You’ll see the melted wax has transferred to it. Move the paper to a clean spot and repeat until no more wax transfers.
The key is patience and using a fresh paper section each time to avoid re-depositing wax. If there’s a colored dye stain left behind, you’ll tackle that after the wax is fully gone.
The Freezer Trick for Stiff or Embroidered Tablecloths
Got a heavy damask or a tablecloth with intricate embroidery? The iron might be tricky over those raised areas. The freezer is your friend here.
Simply fold the tablecloth to expose the wax spot and place it in a freezer for about 20 minutes. The wax will become brittle. Use a dull knife or your fingernail to gently flick and flake the frozen wax away.
This method is fantastic because it’s completely dry and eliminates any risk of heat damage. For large, stiff tablecloths, you might not get every last speck this way, but it removes the bulk before a final, careful ironing.
Can You Wash Candle Wax Out of a Tablecloth?
Never wash wax in the machine first. Hot water will melt the wax and spread it over the entire fabric, making a much bigger problem.
Washing is the final step, after you’ve removed all the solid wax you possibly can. Check the fabric care label. For most cotton and polyester blends, you can now wash it in the warmest water the fabric allows with your regular detergent.
For vintage linens or delicate fabrics like silk, hand washing in cool water is the only safe option after wax removal. My mom Martha’s tip for her linens? A final rinse with a tablespoon of white vinegar in a basin of cool water helps ensure any residual oily film is gone. It’s especially important to be gentle when you remove stains from linen fabric to avoid damage.
One last pro tip: before you iron or freeze, check if wax pooled in the folds of the fabric. Gently open the fold and use a blunt tool to break up any hidden wax dam, so your main method can work completely.
Troubleshooting: When Wax or Color Stains Remain
Great job getting the wax off. That’s the hard part. Now, take a close look at the fabric. You’ll likely see one of two things: a greasy, shadowy mark or a colorful dye stain. Sometimes you get both. This is completely normal.
Wax removal is almost always a two-part process: first the solid wax, then the leftover stain it leaves behind. There are common stain-removal mistakes to avoid, which can prevent set-in stains. Stay tuned for more tips on how to avoid these mistakes. Don’t put the item in the dryer. Heat will set any remaining stain permanently. Always air-dry the fabric first so you can check your work.
Addressing the Oily Shadow: Tackling the Stain After the Wax is Gone
That faint, greasy ring is leftover oil from the candle wax. I see this all the time after our family’s “power outage candlelight dinners.” My son Jason’s sweater always seems to catch drips. To fix it, you need a degreaser.
My go-to is a simple, clear dish soap like Dawn or Palmolive. These are designed to cut through grease on plates, and they work the same magic on fabric.
- Lay the stained area flat.
- Apply a single drop of the clear dish soap directly onto the greasy mark. Rub it in gently with your fingertip. You’ll see it start to turn milky.
- Let it sit for 10-15 minutes. This gives the soap time to break the oil’s bond with the fibers.
- Rinse thoroughly under the warmest water safe for the fabric, pushing the soap and oil out from the back of the stain.
- Check the spot. If the shadow is gone, wash the entire item as usual. If a faint mark remains, repeat the process before drying.
This dish soap method works because it emulsifies the oily residue, lifting it from the fibers so your regular wash can finish the job. My Aunt Jessica swears by this for wine-stained tablecloths, too.
Removing Candle Dye Stains: A Different Approach
Colored wax leaves a different problem. The pigment soaks into the fabric like a tiny dye job. You can’t degrease color away. You need to break the dye particles apart or lift them out.
For this, I turn to oxygen-based bleach, like OxiClean or a generic sodium percarbonate powder. It’s color-safe on most fabrics and works by oxidation. My mom Martha taught me to keep a tub of it mixed for soaking kid’s sports uniforms, especially after they had been exposed to chemical residues.
- Fill a sink or basin with warm water.
- Dissolve the oxygen bleach powder according to the package directions. It will fizz slightly.
- Submerge the stained fabric and let it soak for at least one hour, or even overnight for tough dyes.
- After soaking, check the stain. It should be gone or significantly faded. Then, wash the item normally with your regular detergent.
Always test oxygen bleach on a hidden seam first, especially with dark or delicate colors, to ensure it doesn’t cause fading. This method saved a favorite tablecloth after a deep red holiday candle decided to melt all over it.
Recommended Products: Categories for Specific Problems
You don’t need a cabinet full of specialty cleaners. A few smart basics cover most post-wax stains.
For Oily Residues: A clear, concentrated dish soap (Dawn Original, Palmolive Original). Their formula is a powerhouse for breaking up fats.
For Dye Stains: An oxygen-based bleach powder (OxiClean Versatile Stain Remover). This is my first line of attack for pigment-based stains.
For Protein-Based Dyes or Stubborn Spots: An enzymatic laundry pre-treater (like Persil ProClean Stain Fighter or a pre-wash spray). Enzymes are fantastic at digesting organic matter, which some dyes are derived from.
My mother-in-law Brianna from Texas brings me a giant jug of her favorite degreasing dish soap every visit. She knows it’s the real workhorse.
When Not to Try This at Home: Knowing Your Limits
As much as I love a good DIY fix, some situations need a professional’s touch. Knowing when to stop can save a cherished item.
Do not attempt these methods on antique fabrics, delicate silks, vintage lace, or non-colorfast heirlooms. The stress of scraping and the chemicals involved could cause irreversible damage.
If you’ve already tried the ice-and-iron method followed by a stain treatment and the mark remains set, further home attempts might just drive it deeper. This is your cue to stop.
For large, set-in stains (think an entire candle melted into a tablecloth that sat for weeks) or after your own good-faith efforts have failed, take the item to a professional dry cleaner. Tell them exactly what the stain is-candle wax and dye-and what you’ve already tried. Their industrial solvents and expertise are what you’re paying for, and it’s worth it.
Prevention, Quick Fixes, and When to Call a Pro
On-the-Go Emergency Fix: At a restaurant, use an ice cube to harden wax, then gently flick it off with a butter knife.
I know that panic. You’re out for a nice meal, and a candle drips onto your sleeve.
My son Jason got a blob of wax on his white soccer jersey during a team dinner. It looked like a permanent badge.
Here’s the simple trick I used right at the table to save his jersey. Grab an ice cube from your water glass.
Press it directly onto the wax spot for a full minute. You’ll feel the wax turn hard and brittle under your fingers.
Next, use the dull edge of a butter knife to gently flick or scrape the wax away. Don’t dig into the fabric.
This quick freeze makes the wax pop off in chunks, leaving only a faint oily shadow behind. For that, I dabbed a little table salt onto the residue to soak it up until we got home.
Simple Habits to Prevent Wax Drips
Stopping the mess is easier than cleaning it. I learned this from my mom, Martha.
She always trims wicks to a quarter-inch before lighting. A shorter wick burns cleaner and drips less.
Place candles on a wide, stable dish or a dedicated candle plate, not directly on furniture. My aunt Jessica uses a beautiful ceramic saucer under every wine glass and candle.
Keep burning candles away from drafts. A flickering flame is a messy flame.
I also use candle holders that are taller than the candle itself. This contains any runaway drips.
For tablecloths, my mother-in-law Brianna taught me a simple trick. Put a clear glass vase or hurricane sleeve over pillar candles during dinners. It looks elegant and acts as a drip shield.
Recognizing When to Take It to a Professional Cleaner
Sometimes, love and home remedies aren’t enough. That’s okay.
If the wax has soaked into a delicate fabric like silk, velvet, or a heirloom lace tablecloth, stop. My rule is simple.
When you’re unsure of the fabric content or the dye stability, let a pro assess it first. They have solvents and techniques we don’t.
Take it to a professional if you’ve already tried heat and the stain has set, leaving a dark, greasy ring.
I made this call with a wool blend sweater that had red candle dye in the wax. The color had migrated.
A professional cleaner can safely use specialized spotting agents to lift both the wax and the dye without harming the fibers. For dye stains on hair fabric, a similar gentle, fabric-safe approach can work. It cost a little, but saved the sweater.
If the item has sentimental value, the investment in a professional is always worth the peace of mind.
FAQ About Removing Candle Wax from Fabrics
Can I use a hair dryer instead of an iron?
It’s risky and not recommended, as a hair dryer’s intense, focused heat can easily scorch fabric and melt the wax too quickly. If you must, use it on a low, cool setting with a paper towel barrier to absorb the wax, and keep it moving constantly.
What if I already washed and dried the item with the wax still on it?
The heat likely set the dye stain permanently, making removal very difficult. Your best course is to take the item to a professional dry cleaner immediately, informing them of the wax and the heat exposure.
Does scented or beeswax require a different removal method?
No, the core removal process is the same-harden, then lift with heat or cold. However, scented or dyed beeswax may leave a stronger colored stain, so be prepared to treat that oily dye residue with dish soap or alcohol after the wax is gone.
What’s the best way to prevent wax drips on tablecloths during a dinner?
Use a candle holder taller than the flame or place a clear hurricane glass over pillar candles as a drip shield. Trimming wicks to a quarter-inch before lighting also promotes a cleaner, drip-free burn.
When is it absolutely time to call a professional cleaner?
Stop home treatment if the fabric is an antique, delicate silk/velvet, or has non-colorfast dyes. Also, seek a pro if you’ve made a good-faith attempt and a significant stain persists, as their industrial solvents can tackle set-in residues we can’t.
Final Thoughts on Candle Wax Stains
Remember, your best move is to freeze the wax before you do anything else. Trying to scrape or pick at warm, soft wax just pushes it deeper into the fibers. Treating wax with ice and a dull knife first makes every step that comes after much more effective, especially when you’re dealing with stubborn stains like tree sap on clothes or hair. From Jason’s sweater to our holiday tablecloth, this cold-start method has saved so many items in our home.
I hope these steps help you save a favorite piece. For more guides on tackling sticky messes from kids, pets, and life, keep exploring Stain Wiki.
Suzanne is an accomplished chemist, laundry expert and proud mom. She knows the science and chemistry of stains and has personally deal with all kinds of stains such as oil, grease, food and others. She brings her chemistry knowledge and degree expertise to explain and decode the science of stain removal, along with her decades long experience of stain removal. She has tried almost everything and is an expert on professional and DIY stain removal from clothes, fabric, carpet, leather and any other items dearest to you.