How to Remove Crayon and Melted Plastic Stains from Clothes, Carpets, and Cars
Discovering a glob of melted crayon on your upholstery or plastic on your pants is frustrating, but fixable. Your immediate action should be to freeze the stain to make it brittle, then carefully scrape off the excess with a blunt tool before it bonds further.
In this article, I’ll share my tested methods for: the crucial freeze-and-scrape technique, safe, effective cleaners for different materials, detailed steps for clothing, carpets, and car interiors, and how to avoid common mistakes that set stains permanently.
I’ve perfected these approaches through years of handling real-life messes from my own kids, Jason and Jessica, and our dog Peeta.
Understanding Crayon and Melted Plastic: The Stain Chemistry
I think of crayon stains and plastic stains as distant, troublesome cousins. They look similar when they ruin your favorite shirt, but they act very differently.
Crayon is a waxy, oil-based color stick. The stain comes from the wax and pigment bonding to fibers. Melted plastic is a whole other beast. It’s a thermoplastic polymer, which means it softens with heat and hardens as it cools, literally fusing to whatever it touches.
Chemistry Corner
You can fight wax with chemistry you already know. Oily wax doesn’t mix with water. To remove it, you need a solvent that breaks the wax’s grip. Dish soap is a degreaser. Rubbing alcohol dissolves oils. Both work by surrounding and lifting the wax molecules away from the fabric.
Melted plastic is trickier. Heat makes it soft and sticky. Once it cools, it forms a solid, physical bond. Your goal is to either re-melt it gently for removal or to freeze it until it becomes brittle enough to snap off.
Panic-Level Assessment
On a scale of 1 (coffee) to 10 (permanent ink), here’s my take. A crayon mark on fabric is a 4/10. It’s frustrating but very often fixable. A melted plastic stain is a solid 7/10. It requires more finesse and the risk of fabric damage is higher.
The “Golden Window” for action is key. For crayon, act before you put the item in a hot dryer. The heat will set the wax permanently. For melted plastic, you have a tiny window after it drips but before it cools and hardens completely. Once it’s cool, the real work begins.
This is why common items are so powerful. My mom, Martha, taught me that blue Dawn dish soap isn’t just for pans. Its grease-cutting power tackles crayon wax perfectly. Rubbing alcohol from the medicine cabinet can dissolve fresh wax and soften certain plastics without a harsh chemical smell.
Your First Move: Immediate Steps for Crayon and Plastic Stains
Stop right there. Your first reaction is the most important. Do not rub the stain. Do not apply more heat. For melted plastic, let it cool completely. Trying to wipe hot plastic just smears it and pushes it deeper into the fibers. This is especially important with melted chapstick stains on clothing.
Should you remove these stains immediately? Absolutely. Speed is your best tool. The longer a stain sits, the more it sets. For crayon, you’re racing against the dryer. For plastic, you’re racing against the clock as it cools and bonds.
For a fresh crayon mark, your first job is physical removal. Grab a dull butter knife, a spoon, or an old credit card. My son Jason gets crayon on his jeans all the time. I gently scrape off the excess waxy blob. This prevents it from spreading during the cleaning. From there, it’s a bit different from a fresh ink stain in fabric.
For cooled plastic, you need a gentle touch. After a hot glue gun incident with my daughter Jessica, I learned to let the blob harden. Then, I use my fingernail or the edge of that credit card to gently lift and peel away any large, loose pieces. If it doesn’t lift easily, stop. You’ll tear the fibers.
Before you put any cleaner on the stain, you must do a test patch. I don’t care if you’re in a hurry. Find a hidden seam, an inside cuff, or the back of a cushion. Apply your chosen cleaning solution there first. Wait a few minutes. Check for color fading or fabric damage. This one step has saved countless items in my house from a cleaning disaster.
- Stop and Assess: Identify the stain. Is it waxy crayon or hardened plastic?
- For Crayon: Scrape off excess wax with a dull edge.
- For Plastic: Allow it to cool fully, then gently peel off what lifts easily.
- The Non-Negotiable Step: Perform a test patch with your cleaner in a hidden spot.
How to Get Crayon Out of Clothes and Fabric (Yes, Even After Drying)
Can you get crayon out of clothes after drying? Absolutely. I promise. Finding a waxy, colorful smear after a load of laundry is a special kind of frustration, but it’s fixable.
How do I get crayon out of clothes? The secret is breaking down the wax with a little heat and a good solvent.
The Go-To Method: Dish Soap and Heat
This is my first line of defense. It works because dish soap cuts grease and controlled heat softens the wax.
- Place the stained area between two paper bags or several paper towels.
- Set your iron to a low, no-steam heat.
- Iron over the top paper layer. The heat will melt the wax, and the paper will absorb it.
- Replace the paper as soon as you see wax transfer. Keep going until no more transfers.
- Rub a drop of liquid dish soap directly into any remaining color stain.
- Launder as usual with the warmest water safe for the fabric.
Always check for colorfastness first by testing the soap on a hidden seam.
How to Remove Crayon Stains from White Clothing and Fabric
White fabric gives you more aggressive options. My Aunt Jessica taught me this trick for wine stains, and it works wonders on crayon pigment on furniture.
After using the iron and paper method, make a paste of oxygen-based bleach (like OxiClean) and water.
Apply it to the stain and let it sit for at least an hour before washing. This lifts the color without the harshness of chlorine bleach, making it especially useful for delicate fabrics or dye stains in clothes.
How to Remove Crayon Stains from Colored Clothing and Fabric
Color-safe is key here. You want to dissolve the wax without stripping the dye.
Rubbing alcohol is excellent. Dampen a cotton ball with it and blot the stain from the outside in. The color will start to lift onto the cotton. This technique is particularly effective for removing dye stains from fabrics or surfaces.
You can also use a commercial pre-treatment spray. Let it sit for 10 minutes before tossing the item in the wash.
How to Remove Crayon Stains from Dry Clean Only Clothing
Do not iron delicate fabrics. Your goal is gentle solvent action only.
Lay the garment flat. Place a clean cloth underneath the stain.
Dab at the stain with a cotton swab dipped in rubbing alcohol. Use a light, quick dabbing motion.
This method pulls the wax and dye out without rough agitation that could damage the fibers.
If the stain is large, take it to a professional cleaner and point it out—especially if it’s on a delicate or white jersey or denim fabric.
The Stain Wiki Toolkit: Pro Methods and Preventing Future Messes
Why These Stain Removal Methods Work
Removing these stains isn’t magic, it’s simple chemistry. Crayon is wax and oil based.
Plastic is a polymer, a chain of molecules that melts with heat.
Solvents like rubbing alcohol or dish soap break the bond between the wax or oil and the fabric fibers.
Heat softens melted plastic, making it pliable enough to scrape or blot away.
Absorption is the final step. You lift the dissolved or softened gunk out with a cloth or paper towel.
Cleaning Products That Work Well
You likely own most of these already. I keep them all in a caddy under my sink.
- Rubbing Alcohol (Isopropyl Alcohol): My top pick for crayon on hard surfaces and some fabrics. It cuts through wax fast. Yes, rubbing alcohol absolutely removes crayon.
- Dish Soap (The Dawn Kind): The grease-fighting power tackles the oily part of crayon stains. I use it as a pre-treat for clothing.
- Commercial Adhesive Removers (Like Goo Gone): For tough, dried plastic or tape residue on non-porous surfaces. Always test first.
- Heavy-Duty Laundry Detergents: Look for ones with enzymes or grease-cutting formulas for post-scrape fabric cleaning.
- Ice Cubes: To harden melted plastic for careful scraping. Simple and effective.
What about vinegar? Vinegar is a mild acid, great for minerals or odors.
Vinegar will not remove melted plastic. It doesn’t have the chemical action needed to break down polymers or wax.
Save your vinegar for coffee stains or descaling the kettle.
The Car Kit: A Story from Peeta’s Misadventure
Last summer, a red crayon melted on my dashboard. Peeta then jumped into the back seat with sandy paws.
I had red wax ground into my car’s cloth upholstery. It was a gritty, waxy nightmare.
That was the day I assembled a permanent stain kit for the car. Now it lives in a small toiletry bag in the trunk.
- A travel-sized bottle of rubbing alcohol
- Several microfiber cloths (old ones are perfect)
- A plastic scraper (a gift card works)
- A travel pack of stain wipes
- A small spray bottle of water
Having these tools on hand means a mess is a minor delay, not a weekend project.
For that dashboard and upholstery mess, I used the scraper first, then alcohol on a cloth. It came right up.
Preventing Crayon and Melted Plastic Stains
An ounce of prevention saves hours of scrubbing. I learned this from my mom, Martha.
Her North Texas home was always spotless, even with grandkids running through.
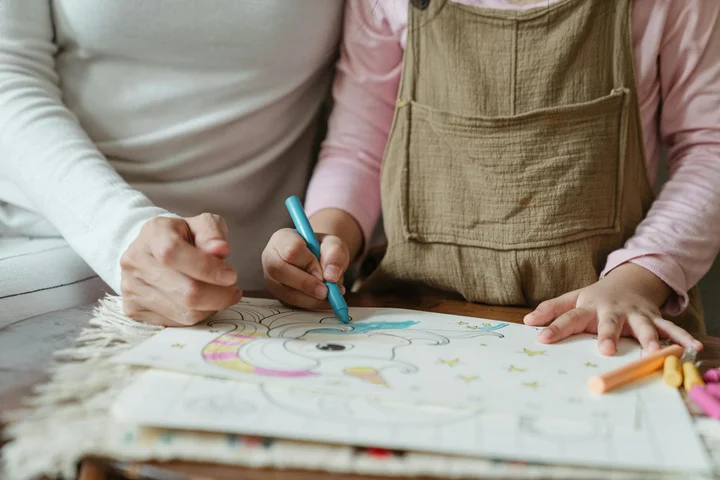
- Create a Fortified Art Station: I put a vinyl tablecloth under Jessica’s art table. Crayons only leave this zone.
- The Laundry Pocket Check: My husband Roger hunts. Before his clothes go in the wash, I check every pocket for plastic wrappers, chapstick, or forgotten crayons.
- Car Rules: Crayons and toys with plastic parts stay in a thermally-insulated bag during hot car rides.
- Immediate Blotting: If something melts, don’t rub it. My first move is to blot with a paper towel to lift away the bulk.
Life with kids and pets is messy. These routines just make the messes easier to manage.
FAQ About Removing Crayon and Melted Plastic
What’s the fastest way to tackle a fresh crayon stain if I don’t have an iron handy?
Immediately scrape off excess wax with a dull knife or credit card, then apply a small amount of dish soap or rubbing alcohol directly to the stain and blot. This breaks down the wax on contact, preventing it from setting before you can properly wash the item.
I’m nervous about using heat on melted plastic. What’s the safest first step?
Always let the plastic cool completely, then harden it further with an ice cube for a minute. Gently flex the fabric to pop the brittle plastic off; this avoids smearing and minimizes the need for heat on delicate fibers.
How can I prevent crayon in my car from becoming a permanent, heat-set stain?
Keep a microfiber cloth and a small bottle of rubbing alcohol in your glove compartment. At the first sign of a crayon mark, blot (don’t rub) with the alcohol; the sun’s heat will quickly bake the wax into the upholstery if you wait.
My carpet is synthetic. Is the paper bag and iron method safe for removing melted plastic?
Test the iron’s heat on a hidden corner first, as synthetic fibers can melt. Use the lowest, no-steam setting and apply pressure for only 3-5 seconds at a time, checking the carpet fibers and paper for melting or distortion constantly.
What should I do if a crayon or plastic stain remains after my first removal attempt?
Do not put the item in the dryer, as heat will permanently set the residue. Reassess: for waxy residue, reapply solvent; for plastic film, try freezing and scraping again before attempting a different cleaner on a test patch.
My Top Rule for Tackling Tough Stains
No matter if it’s crayon from the kids or melted plastic from a project, the one thing I always do is freeze the mess first with an ice pack to make it brittle and easy to lift. That single step stops you from grinding the stain deeper and gives every other cleaning method a fighting chance. I share all my family-tested tricks, from handling Peeta’s muddy paws to Jessica’s glitter explosions, right here on Stain Wiki-follow along for more.
Suzanne is an accomplished chemist, laundry expert and proud mom. She knows the science and chemistry of stains and has personally deal with all kinds of stains such as oil, grease, food and others. She brings her chemistry knowledge and degree expertise to explain and decode the science of stain removal, along with her decades long experience of stain removal. She has tried almost everything and is an expert on professional and DIY stain removal from clothes, fabric, carpet, leather and any other items dearest to you.