How to Clean Candle Wax from Holders & Containers Without Damage
Staring at a candle holder caked with stubborn wax? The good news is that almost every wax spill is fixable with a bit of patience and the right method. For many containers, simply freezing them to pop the wax out whole is the fastest, cleanest solution.
This guide will walk you through the safest techniques for different materials. You’ll learn why freezing works so well on glass, how to use boiling water for tricky shapes, when a warm oven is your best friend, and the simple tools for scraping up last bits without a scratch.
I’ve tested every one of these methods in my own home, from the votives Jessica covered in glitter glue to the hunting lanterns Roger brings back caked in wax.
First, Assess Your Candle Holder: Material Matters Most
I always pause before cleaning any candle holder. The material tells you exactly how to proceed safely.
Different materials react to heat, cold, and pressure in unique ways. A method that works for glass could crack a delicate ceramic piece.
Your first job is a quick inspection with your eyes and fingers.
Check for hairline cracks, delicate painted finishes, or any glued-on decorations. I learned this from my mom Martha; she spotted a nearly invisible crack in a ceramic holder before it became a disaster.
Here’s my quick-reference guide from years of testing:
- Glass: Sturdy with heat but hates sudden temperature shocks. It’s often your most forgiving material.
- Metal: Conducts heat incredibly fast. It can go from warm to too-hot-to-touch in seconds.
- Ceramic: Often porous, which means it can absorb stains. It needs gentler care to avoid damage.
The Best Methods to Get Wax Out of Candle Holders
From simple pops to stubborn sludge, I have a method for every situation. I’ll list them from the easiest to the most hands-on.
Each one has its place, depending on your holder’s material and how much wax is left.
The Freezer Method: For a Clean, Solid Pop-Out
This is my favorite for a no-fuss cleanup. It feels satisfying when the wax releases in one perfect disk.
I use this all the time for the simple glass jars from my son Jason’s school candle projects.
- Ensure your candle holder is at room temperature. Place it upright in your freezer.
- Leave it for 1 to 2 hours. The wax will contract and turn hard and brittle.
- Remove it and gently flex the sides if it’s metal or thin glass. For sturdier holders, tap the bottom on a countertop. The wax should pop out.
This method is ideal for simple, uncracked holders made of glass, metal, or solid ceramic.
Be warned: never use this on a holder with any existing cracks. The extreme cold can make tiny hairline fractures much worse. My mother-in-law Brianna found this out with a favorite cracked pot.
The Hot Water Bath: Melting Wax Safely Away
When wax is pooled deep in a container, floating it out with hot water is incredibly effective. Think of it like loosening hardened butter. This is a glimpse into the water temperature stain removal science breakdown. More on this science appears in the next steps.
My aunt Jessica, who loves wine candles, swears by this for her tall glass holders.
- Heat water until it’s just below a boil. I use a kettle for control.
- Slowly pour the hot water directly into the candle holder, filling it almost to the top. Never pour the water over the outside of a cold holder.
- The wax will melt and rise to the surface. Let it sit until the wax cools into a solid, thin layer on the water.
- Lift off the wax layer with a fork or your fingers. Pour out the water and dry the holder thoroughly.
The hot water bath is best for glass and metal containers that can handle the thermal input.
Beware of thermal shock. Pouring boiling water into a cold, fragile glass or ceramic holder from the outside can cause it to crack instantly. Always let the holder warm to room temperature first.
The Gentle Heat Method: For Stubborn or Residual Wax
After the main wax is gone, you might find a sticky, tacky film left behind. Gentle, controlled heat solves this, especially when used to remove sticky residue from electronic cases.
I use this on everything from my husband Roger’s metal hunting lanterns to ceramic jars with stubborn residue.
You have two excellent options:
- Hairdryer: Use the low heat setting. Hold it 4-6 inches away and keep it moving over the wax. Wipe the melting wax away with a thick pile of paper towels.
- Warm Oven: Preheat your oven to its lowest setting (around 150°F). Place the holder on a parchment-lined baking sheet. Heat for 5-10 minutes until the wax is soft, then wipe it clean while wearing oven mitts.
Constant motion with the hairdryer is non-negotiable to avoid concentrating heat and damaging the holder’s finish.
My clear “never-do” list: never use a direct flame from a lighter or stove. Never place a candle holder directly on a stovetop burner. I saw a friend melt the bottom off a plastic-decorated holder that way.
How to Clean Residual Wax and Soot from Holders

You got the big wax chunks out. Now you see that sticky film and those black soot marks.
It feels greasy and looks dull. I see this all the time after family movie nights with candles.
A bit of cooking oil on a paper towel will dissolve that waxy residue safely and quickly.
Just rub the oiled towel over the sticky spots. The wax breaks down because oil dissolves oil.
After the wax is gone, wash the holder with warm, soapy water to remove the oil film.
For soot on glass, make a thick paste with baking soda and a little water.
Dab it on the black marks and let it sit for a minute. The paste acts as a gentle abrasive.
You can also use a drop of dish soap directly on a damp cloth for light soot stains.
My aunt Jessica taught me that trick for her wine bottle candle holders.
For holders with detailed patterns, grab a soft bristled toothbrush.
I use an old one to scrub the baking soda paste into grooves. It gets into places your fingers can’t.
Special Cases: Delicate, Intricate, and Odd-Shaped Holders
Tealight holders, candelabras, and pieces with deep grooves need a gentler touch.
Heat can crack delicate glass or metal. Always try the freezer method first for these.
Putting a delicate holder in the freezer for an hour makes the wax brittle and easy to remove.
My mom Martha’s crystal holder would shatter with heat, but freezing works every time.
For intricate designs, like a candelabra with vines, use a plastic tool after freezing.
A cuticle stick or a plastic knife lets you pry the frozen wax out without scratching the surface.
I used this on a detailed metal holder from Brianna, and it came out perfectly clean.
For odd shaped holders with deep wells, freezing is your best friend.
Once the wax is frozen, you can often pop the whole piece out in one chunk.
If wax remains in deep grooves after freezing, a soft toothbrush with a little oil will finish the job. For turmeric stain removal all surfaces, a similar gentle approach works. Test a small area first and use mild cleaners to protect the finish.
Just be patient and work gently. You don’t want to force anything and cause damage.
The Science of the Stain: Wax Chemistry and Why These Methods Work
Think of candle wax like cooking oil that’s been left in the fridge. It’s an oil-based substance. At room temperature, it’s a solid. This simple fact is your key to cleaning it, especially when dealing with delicate fabrics.
Wax hates water. We call this hydrophobic. That’s why soaking a holder in soapy water usually just leaves a weird, waxy film. You need to work with its oily nature, not against it.
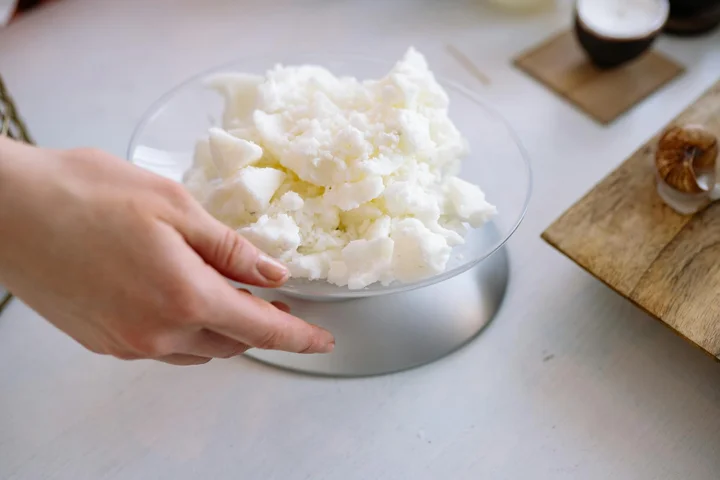
The freezer trick works because cold makes the wax contract and become brittle. I tested this on one of my glass dessert bowls Jason used for a candle. After two hours, the wax puck popped out like a hockey disc with a gentle twist of a butter knife.
Heat, like from hot water or a hairdryer, does the opposite. It returns the wax to its liquid state so you can pour it away. If some wax ends on clothing, let it cool and gently lift away any excess with a dull edge. Then follow a fabric-safe removal method. Just remember to control the heat to avoid cracking the holder or making a bigger mess.
For that final, sticky film, you use oil. Why? Because oil dissolves oil. A little cooking oil on a paper towel breaks down the last traces of wax residue without harsh chemicals. My mom, Martha, taught me that one—it works on jar labels, too. Surfactants act as emulsifiers, helping grease break up and rinse away with water. So cleaners that include these agents can remove grease stains just as oil dissolves wax.
Material Red Flags and Critical Warnings

Not all candle holders are created equal. Some need a gentler touch. Here’s what makes me pause and proceed with extra care.
Handle these holders like they’re made of eggshells:
- Thin or delicate crystal: The rapid temperature change from freezer to hot water can cause it to crack or shatter. My Aunt Jessica learned this the hard way with a wine glass she used as a votive.
- Holders with painted, printed, or metallic finishes: Heat can bubble the paint. Scrubbing can strip it right off.
- Anything with glued-on decorations: Think seashells, beads, or rhinestones. Both extreme cold and heat can weaken the adhesive.
- Mixed-material holders: If it has a wood base or resin accents, those parts can warp or cloud with heat and moisture.
Here are the “Never-Ever” tactics I’ve seen cause real damage:
- Never use steel wool, abrasive scrub pads, or harsh scrapers on soft metals like brass, copper, or aluminum. You’ll scratch it forever.
- Never pour harsh solvents like nail polish remover (acetone), paint thinner, or gasoline into a holder to dissolve wax. They can ruin finishes and the fumes are dangerous.
- Never apply extreme direct heat, like holding a holder over a stovetop burner. You risk thermal shock, burns, and fire.
My final rule, which has saved me countless times, is the test patch. Before you commit to any method, test your cleaning agent (even if it’s just hot water) on a tiny, hidden spot on the holder, like the very bottom. Wait a few minutes. See if the color bleeds, the finish clouds, or anything changes. It takes two minutes and prevents a lifetime of regret.
How to Prevent Wax from Sticking to Holders in the Future
Once you’ve cleaned a beautiful jar, you’ll want to keep it that way. A few simple habits make all the difference.
Create a Protective Barrier
My Aunt Jessica in Arizona swears by this old trick for her decorative votives. A tiny barrier between the wax and the glass makes cleanup a one-wipe job.
- Use a Candle Plate or Saucer. This is your first line of defense. I keep a stash of inexpensive, decorative ceramic coasters just for candles. My mother-in-law, Brianna, uses old china saucers from thrift stores. They catch every drip.
- Try a Light Coat of Oil. For non-flammable holders like glass, ceramic, or metal, a spritz of cooking oil spray works wonders. Wipe a very thin, almost invisible layer on the inside before placing a new candle. The wax can’t bond tightly to the surface. My mom, Martha, taught me this years ago. Just be absolutely sure no oil gets on the wick itself.
- Choose Dripless Candles. For formal occasions or in holders that are impossible to clean, dripless candles are worth the extra cost. They’re designed to burn more evenly and contain their own melted wax.
Master the Burn
How you burn the candle directly impacts the wax mess. A clean burn is a tidy burn.
Always trim your wick to ¼ inch before lighting. A long wick creates a large, flickering flame that melts too much wax at once. This causes pooling, tunneling, and those ugly black soot marks on your holder. I keep nail clippers in my candle drawer for this-it’s faster than searching for wick trimmers.
Let the candle burn long enough on its first use to create a full melt pool across the entire surface. This prevents “tunneling,” where wax sticks to the sides forever.
My Personal Pro-Tip
I turned a small habit into a system that saves me from a crusty sink later.
I keep a little decorative vase on my kitchen counter. When we blow out the dinner candles, the warm holders go straight into the vase. After the dishes are done, I can quickly pour hot water over them while they’re still slightly warm. The wax pops right out. No forgotten, cemented-on jars hiding in the living room for months.
When Your Best Effort Isn’t Enough: Knowing When to Stop
You’ve boiled water, you’ve used ice, you’ve scraped gently. But sometimes, a holder is just… finished. Knowing the difference saves you time and prevents heartbreak.
Signs of Permanent Damage
Some damage can’t be cleaned away because it has altered the material itself.
- Etched or Cloudy Glass. Highly concentrated fragrance oils in some candles can actually etch the glass over time, leaving a permanent cloudy film. If your holder looks frosty even after all wax and residue is gone, the glass itself is etched.
- Melted Plastic or Lining. If a holder has a plastic insert or a painted/glazed interior that got too hot, it may melt or bubble. That bubbled texture will forever trap wax and grime. My son Jason once left a candle burning too long in a decorative tin, and the interior coating blistered. It was a loss.
- Deep, Stubborn Color Stains. Some dark dye from a red or blue candle can stain porous materials like unglazed ceramic or concrete. If multiple cleanings with soap and rubbing alcohol don’t fade it, the stain is likely permanent.
Time to Repurpose, Not Fight
Don’t risk breaking a sentimental piece with aggressive scraping. Give it a new, dignified life instead.
That beautifully shaped glass jar with the frosted side? It’s now a perfect bathroom holder for cotton balls or q-tips. A chunky ceramic pot that held a giant candle is fantastic for a small succulent. I have one on my desk holding pens. Cleaning defeat is just the first step toward creative repurposing.
A Word on Wear and Love
I have a votive holder on my mantle that has a faint smoke shadow near the rim. I’ve cleaned it a dozen times, but a whisper of grey remains.
It was on the table the night my daughter Jessica took her first steps. Roger and I were lighting it when we got the call that my aunt was coming to visit. That little shadow is part of its story now. Not every mark is a stain to be conquered. Some are just gentle proof of a home well-lived and a candle that set the mood for good moments. It’s okay to let those be.
FAQ about Cleaning Candle Wax from Holders
What’s the fastest way to get wax out of a glass candle holder?
For uncracked glass, the freezer method is typically fastest. Freeze the holder for 1-2 hours, then gently tap the brittle wax disk out.
Is it safe to use the freezer method on delicate or painted holders?
No, avoid freezing holders with cracks, thin crystal, or glued-on decorations, as cold can cause cracking or adhesive failure. Always opt for gentle heat instead.
What’s the best way to clean wax from ceramic without causing damage?
Use a hairdryer on low heat, held 4-6 inches away and constantly moving, to soften the wax. Wipe it away immediately with a thick paper towel to avoid absorption. This same method works for removing melted wax from floors. Finish by wiping the area clean to prevent slips.
How do I remove leftover sticky residue from a metal holder safely?
Rub a little cooking oil on a paper towel over the residue to dissolve it. Then, wash the holder thoroughly with dish soap and warm water to prevent oil buildup. This approach also helps with motor oil stains, loosening oily residues so they rinse away more easily. If the stain is stubborn, a brief soak or a dedicated degreaser can boost results.
Can I prevent wax from bonding to intricate holders in the first place?
Yes, lightly coat the interior with cooking oil spray before inserting a candle. This barrier lets wax release easily, but ensure no oil touches the wick to avoid fire risk.
Keeping Your Candle Holders Clean for Good
The single best piece of advice I can give you is to freeze the holder first. This solidifies the wax, letting you pop out the main chunk in one piece with a butter knife. Dealing with the leftover film is much easier than wrestling with a whole pool of melted wax. If you’re dealing with chalk stains on clothes or hair, a quick, careful prep can help it lift too. We’ll cover that next.
Always check your holder’s material for a “heat-safe” label before using boiling water or the oven. I’ve learned this saves beautiful ceramics and delicate glass from thermal shock cracks. For more straightforward tips on everyday messes, I share all my family-tested methods right here on the blog.
Suzanne is an accomplished chemist, laundry expert and proud mom. She knows the science and chemistry of stains and has personally deal with all kinds of stains such as oil, grease, food and others. She brings her chemistry knowledge and degree expertise to explain and decode the science of stain removal, along with her decades long experience of stain removal. She has tried almost everything and is an expert on professional and DIY stain removal from clothes, fabric, carpet, leather and any other items dearest to you.