How to Remove Stains from Car Paint and Interior: Your Complete Guide
Just spotted a mysterious splatter on your hood or a new spill on the backseat? Don’t worry-nearly every stain can be resolved with patience and the right, gentle method.
In this guide, I’ll cover everything you need to know:
- How to identify and treat common exterior stains like tree sap and bird droppings.
- Safe, step-by-step cleaning for interior fabrics, leather, and plastic.
- Using household staples like isopropyl alcohol and dish soap effectively.
- What to avoid so you never damage your car’s finish or upholstery.
I’ve spent years testing these methods on everything from my family’s minivan to the messes from my kids’ soccer gear.
Your Car Stain Panic-Level Guide: What’s Urgent?
Not all stains are created equal. Some are mild annoyances, while others can permanently ruin a surface if you wait too long.
Think of your reaction time as a “Golden Window” for action. This is the short period before a spill or splatter chemically bonds with the surface it landed on. Once it sets, removal becomes ten times harder.
My daughter Jessica once “helped” wash my car on a hot day. I didn’t dry it quickly enough, and the next morning, I saw a constellation of water spot rings baked into the hood. The Golden Window for those mineral deposits slammed shut overnight.
For car paint, the clock ticks much faster than for your upholstery.
Exterior stains are under constant attack from sunlight and heat, which accelerates the setting process. Here’s a quick guide to help you prioritize your cleanup missions.
| Stain | Panic Level (1-10) | The “Golden Window” |
|---|---|---|
| Bird Droppings & Bug Splatter | 9 | Minutes to a few hours. Their acids can etch paint clear coat. |
| Tree Sap & Tar | 7 | A day or two. It starts sticky but hardens into a stubborn glaze. |
| Coffee or Soda Spill (on cloth seats) | 6 | A few hours. The sugar and dyes will wick deeper into the fabric. |
| Grease or Oil Spots | 5 | Several days. It will spread and attract more dirt over time. |
| Mud or Dirt | 3 | A week. Mostly a grit issue that can scratch paint if rubbed dry. |
Roger’s truck often gets parked under our pine trees. A blob of sap we missed for a week took a careful, gentle solvent soak to remove without damaging the paint. Catching it sooner would have been a simple wipe.
Acting fast is your best weapon. For high-panic stains, even a quick rinse with plain water is better than doing nothing while you gather your supplies.
The Science of Car Stains: Why They Stick
To remove a stain well, you need to know what you’re fighting. Different stains stick for different reasons.
Think of your car’s paint, especially the clear top coat, like the protective outer layer of your skin. Harsh chemicals and acidic gunk can etch into it, leaving a dull spot or mark that no amount of washing will fix.
Chemistry Corner: The Three Main Stain Types
Protein-Based Stains: This group includes bird droppings, bug guts, and even milk spills inside the car.
They are acidic and can be surprisingly “hot.” They don’t just sit on the surface, they can actually start to dissolve the very top layer of your paint or fabric sealant if left too long.
Tannin-Based Stains: Coffee, tea, some sodas, and tree sap fall here.
Tannins are natural plant dyes. They love to bind to surfaces, creating a colored stain. Heat makes them set almost permanently. That’s why a coffee spill on a black car seat in the summer sun is such a nightmare.
Oil-Based Stains: Grease, tar, cooking oil, and some lotions.
These stains repel water. They won’t rinse away and instead coat fibers or paint in a slick, sticky film that attracts dirt. You can’t fight an oil stain with water-based cleaners alone.
Knowing the stain type tells you what cleaner to use. It’s like using the right key for a lock.
For oil, you need a detergent or solvent that breaks the grease into tiny droplets so it can be rinsed away. That’s why a drop of Dawn dish soap in water is my first line of defense for greasy fingerprints on the door. That same approach also helps with tougher oil stains like motor oil or cooking oil. A quick pretreat before washing or rinsing keeps those stains from setting.
For tannins, you often need a slightly acidic or specialized cleaner to break the dye’s bond with the surface. For proteins, a neutral pH cleaner and quick removal is key.
Never forget the role of the sun. UV radiation acts like a giant oven, baking stains into any surface. It accelerates the chemical bonding process for every stain type.
This is why a bird dropping on a shaded bumper might give you a longer Golden Window than the same dropping on your sun-baked hood. Always consider parking in the shade if you know you have a fresh mess to deal with later.
Safe DIY Alternatives: What You Already Have at Home
You do not always need a fancy product. Common household items can tackle many car stains safely.
Here are three reliable substitutes I keep in my cleaning caddy.
- White Vinegar for Water Spots: Its mild acidity dissolves mineral deposits without harsh chemicals.
- Baking Soda Paste for Grease: Mix with water into a paste. It gently scours sticky grease spots.
- Isopropyl Alcohol for Tree Sap: This breaks down the sticky bonds so sap lifts right off.
You must test any cleaner, even a DIY one, in a hidden spot first. Try it inside a door frame or under the trunk lid.
My mom Martha lives in North Texas with hard water. She taught me her vinegar trick. Last summer, my car’s windshield was covered in spotted residue from sprinklers.
I used a 50/50 mix of vinegar and water. The spots wiped away easily after a minute. It saved me a trip to the car wash.
DIY mixes work well for fresh, light stains. For old, heavy stains like baked-on tar, a dedicated product is often stronger and faster.
Step-by-Step: How to Remove Stains from Car Paint
Start every cleanup the same way. This protects your paint from scratches.
- Rinse the stained area with plain water. This washes away loose grit.
- Use only soft, clean microfiber cloths. Old rags can hide dirt that will scratch.
- Blot and lift the stain. Do not scrub it back and forth.
How to Remove Bird Droppings and Bug Stains
Bird poop is highly acidic. Bug guts dry into a hard shell. Both can etch paint fast.
- Soak a microfiber cloth with water. Drape it over the stain for five minutes to soften it.
- Add a few drops of car wash soap to the cloth. Gently wipe the area with light pressure.
- Rinse the spot well with water. Dry it immediately with a clean towel.
Treat bird droppings as a top priority, just like we covered in the panic-level stains. Speed prevents permanent marks.
What helped me? I keep a spray bottle of quick detailer in my glove box. When Jason or I see a fresh mess, we can blot it fast.
How to Remove Tree Sap
Tree sap feels tacky and turns into a clear, hard lump if ignored.
- Pour some rubbing alcohol or hand sanitizer onto a cloth. Do not pour it directly on the car.
- Press the cloth onto the sap. Let it sit for about thirty seconds.
- Gently wipe the sap away. It should slide off in a gummy string.
- Wash the area with car soap to remove any oily residue.
Never pick at sap with a fingernail or a key. You will leave a deep scratch in the clear coat.
For an on-the-go emergency, I have used a gas station hand sanitizer packet. It works when you are far from home.
How to Remove Water Spots
Water spots are those chalky white rings. They happen when water with minerals evaporates on the paint.
- Mix equal parts white vinegar and distilled water in a spray bottle.
- Spray the solution onto the spotted area. Wait one minute.
- Wipe the area with a damp microfiber cloth. The spots should vanish.
- Dry the surface completely with a fresh towel.
Post-treatment recovery is straightforward: make sure the area is bone dry. Any leftover moisture will just cause new spots.
How to Remove Rust Stains (Like from Brake Dust)
Rust from brake dust looks like tiny orange specks stuck to the paint.
- Use a dedicated iron remover spray. Follow the label instructions carefully.
- For a DIY paste, mix lemon juice and baking soda. Apply it, wait five minutes, and rinse it off thoroughly.
- Always follow with a car wash soap to clean the surface.
Here is a material red flag: never use abrasive steel wool on your car’s paint. It will create a web of fine scratches.
Deep rust etching might not come out with home methods. A professional detailer can assess the damage.
How to Remove Tar and Grease
Tar from hot roads and grease from leaks create black, gooey patches.
- Put a small drop of dish soap or automotive degreaser right on the stain.
- Gently rub it with a microfiber cloth. Let it sit for two to three minutes.
- Rinse the area very well with water. You might need a second application.
A safe DIY alternative for fresh grease is plain cornstarch. Sprinkle it on, let it absorb the grease, then brush it away.
Roger’s truck gets coated in road tar after his hunting trips. A little degreaser and patience always lifts it off without a mark.
Step-by-Step: How to Remove Stains from Car Interior

I always start with the same rule. You must know what you’re cleaning.
Identify your interior material-cloth, leather, or vinyl-before you touch a stain. Using the wrong cleaner can cause more damage than the spill itself.
How to Remove Coffee Stains from Car Fabric
That morning commute spill is a classic. Coffee leaves a tannin stain, which is why hot water makes it worse.
Cold water keeps the tannins from binding tighter to the fabric.
Blot up every drop of liquid you can with a clean, dry cloth first.
Mix a teaspoon of clear, mild dish soap with a cup of cold water.
Dab this onto the stain with another cloth. Do not pour or scrub.
Use a soft-bristled upholstery brush to gently agitate the cleaner into the fibers, then blot it all back up.
Let it air dry completely. I check for a faint ring by running my hand over the spot. If I feel a slight stiffness, I repeat the process with just cold water to rinse.
Surface Compatibility: Cloth vs. Leather vs. Vinyl
This quick chart helps you adapt any method. When in doubt, test in a hidden spot like under the seat.
| Material | Safe Cleaner Base | Critical Warning |
| Cloth / Fabric | Mild detergent, upholstery cleaners | Avoid oversaturation to prevent mold. |
| Leather | pH-balanced leather cleaner only | Never saturate. Wipe, don’t soak, or the leather can crack. |
| Vinyl / Plastic | Mild soap and water, all-purpose cleaners | Scrub gently to avoid scratching the surface. |
How to Remove Ink Stains
Ink stains make my heart sink. They can be stubborn, but alcohol often breaks them down.
First, find a hidden seam or fold and test a drop of 70% isopropyl alcohol.
If the fabric color doesn’t bleed, dampen a cotton swab with the alcohol.
Dab it directly onto the ink spot. You’ll see the color start to transfer to your swab.
Blot frequently with a clean section of cloth to lift the dissolved ink away from the fabric.
If you’re worried about dye bleeding, try a spritz of non-oily hairspray. The alcohol in it can work in a pinch, but test it first too.
How to Remove Blood and Vomit Stains
These are protein-based stains. Heat will cook them into the fabric, making them permanent.
Always use cold water. I learned this the hard way cleaning up after Peeta got carsick on a hot day.
Blot up any solid material with a paper towel. Mix a mild enzyme cleaner, like one for pet accidents, with cold water.
Apply it to the stain and let it sit for 10 minutes. The enzymes break down the proteins.
Blot repeatedly until the cloth comes back clean.
For post-treatment recovery, let the area air dry away from direct sunlight, then check for any lingering odor or residue. Sunlight can set any remaining proteins.
How to Remove Chocolate and Food Stains
Chocolate is a tricky combo. It has both oil and sugar.
Scrape off any solid bits with the edge of a credit card.
For cloth, I use a dab of an upholstery cleaner or a mix of one part white vinegar to three parts water.
Dab it on, let it sit for a minute, then blot dry.
If the stain has melted and seeped deep into the seat foam, your home method might not reach it. This is one of the common mistakes when it comes to stain removal.
That’s when a car shampooer with an extraction hose becomes necessary. My mom, Martha, taught me to recognize this limit.
How to Remove Gum
Gum requires patience, not force. Pulling hard can stretch and snap the fabric threads.
Place a few ice cubes in a plastic bag and hold it on the gum until it’s rock hard.
Use your fingernail or a dull knife to gently pry the gum off in pieces.
For any sticky residue left behind, a tiny drop of mild solvent like goo gone on a cloth will dissolve it. Blot it clean.
Jason and his friend Edward once left a whole pack of gum melted into my back seat. The ice cube trick saved the upholstery from a major thread-bare disaster.
Material Red Flags and Post-Cleaning Care
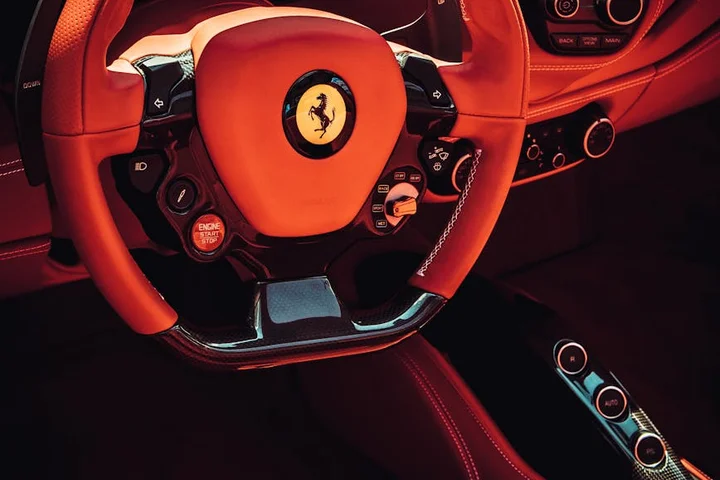
Some materials need a professional touch from the start.
Material red flags include delicate suede headliners, certain dyed leathers that bleed easily, and older vinyl that’s already cracked or brittle.
If your interior has these, call a detailer. My aunt Jessica’s vintage car has leather I won’t touch with anything but the conditioner she recommends.
Your “Never-Use” List
- Bleach on paint or interior plastics. It destroys color and finish.
- Ammonia-based cleaners on leather. They strip natural oils and cause drying and cracks.
- Abrasive pads or stiff brushes on any surface. They create microscratches that collect more dirt.
My mother-in-law Brianna once used a kitchen scrubber on a vinyl dashboard. It left permanent swirl marks.
Post-Treatment Recovery Steps
Cleaning is only half the job. Proper recovery prevents new problems.
Always rinse the area with a cloth dampened with clean water to remove any soapy or chemical residue.
Blot it as dry as you can, then let it air dry fully with the windows cracked if possible.
Inspect the spot in bright sunlight before you call it done. Sunlight reveals hidden residue or water rings you might have missed.
Know the Limitations
Home methods have boundaries. Deep-set stains that have been baked in by the sun for months may not budge.
Paint transfer from a parking lot scrape or stains on upholstery with existing damage often need professional-grade equipment. For paintball stains on washable fabrics, prompt home treatment with the right cleaners can prevent setting and simplify removal. If the fabric is delicate or the stain is stubborn, professional help may still be needed.
I set realistic expectations. For my family’s daily driver, I handle the coffee and mud. For anything complex or on a prized vehicle, I trust a pro detailer.
Building Your Stain Defense: Prevention and Kit Essentials
You can spend all your time learning how to fix stains, or you can get really good at stopping them from sticking in the first place. I choose the second option. With Jason’s muddy cleats and Peeta’s love for drooly car windows, my family car is a magnet for messes.
My strategy is simple. I use the right tools to create a barrier, and I keep a few key items ready for fast attacks. This approach has saved my upholstery from Jessica’s juice boxes more times than I can count.
Your Go-To Product Arsenal
Using household cleaners on your car is a gamble I never take. The wrong product can strip wax, haze plastics, and degrade fabrics. Stick with formulas made for the job, especially when trying to remove hard water stains from car paint.
- pH-Neutral Car Wash Soap: This is your paint’s best friend. Dish soap strips away protective wax, but a proper car wash soap cleans without damaging the finish. I use it every other week.
- Automotive Interior Cleaner: Look for a cleaner designed for your specific interior material (fabric, leather, vinyl). A good one lifts stains without leaving a sticky, dirt-attracting residue.
- High-Quality Microfiber Cloths: Not all microfibers are equal. Cheap ones can scratch. I keep a stack of clean, plush towels just for the car. They grab and hold dirt instead of pushing it around.
- Protectant Spray (for interiors): After cleaning vinyl or plastic dashboards, a light application of a UV-protectant spray creates a barrier. It makes the next wipe-down of dust or a stray fingerprint much easier.
Simple Habits That Make a Huge Difference
Prevention isn’t about being perfect. It’s about building small, smart routines that add up.
Regular waxing for your paint is non-negotiable. Think of it as a raincoat for your car. A good coat of wax (my husband Roger applies it every few months) makes bug splatter, bird droppings, and tree sap much less likely to bond and etch into the clear coat.
Seat covers are my secret weapon. I use durable, washable covers on the back seats. They’ve absorbed everything from melted chocolate to muddy paw prints from Peeta after the dog park. I just toss them in the washer.
The golden rule? Quick clean-ups. A fresh spill is a temporary visitor. A dried-on stain moves in permanently. If Jessica spills her milk, I blot it right away with a napkin from the glove box. It takes ten seconds and saves a thirty-minute deep clean later.
Assemble Your In-Car Stain Removal Kit
You don’t need a full detailing suite in your trunk. A small, dedicated kit handles 90% of emergencies. I keep mine in a slim caddy under the passenger seat.
- 3-4 Clean Microfiber Cloths (sealed in a ziplock bag to stay clean).
- A pack of Pre-moistened Interior Wipes (for quick dash or console wipes).
- A small Spray Bottle filled with plain water (for diluting spills instantly).
- A travel-sized bottle of your favorite Automotive Interior Cleaner.
This kit isn’t for full detailing. It’s for immediate damage control until you can get home and do a proper clean. It gives you the power to act fast, which is everything with stains.
The “On-the-Go” Emergency Fix
You’re at a gas station and Edward knocks over a full cola in the back seat. Your kit is at home. Don’t panic. Improvise.
Run inside and grab a bottle of club soda and a bag of chips. Pour the club soda generously over the spill. The carbonation can help lift the stain from the fabric while you blot furiously with paper towels. The salt from the chips? Pour a pile onto any remaining liquid. It will act like a dry sponge, pulling moisture out of the upholstery so it doesn’t set. Vacuum it out when you get home. These same steps can help remove stains from car upholstery, too. For tougher spots, follow up with a fabric-safe upholstery cleaner after blotting.
This is a temporary fix to prevent setting, not a full solution, but it has saved me from permanent soda stains on more than one road trip.
FAQ about Removing Stains from Your Car
1. Bird droppings landed on my car days ago and etched the paint. Is it too late to fix?
If the clear coat is dull or etched, home removal of the residue may still leave a permanent mark. After gently cleaning the area, use a polishing compound designed for cars; if the etching remains, a professional paint correction is your best option.
2. What’s the fastest way to prevent tree sap from damaging my car’s paint if I can’t clean it immediately?
Your best immediate defense is to cover the sap spot with a piece of wax paper or a dab of hand sanitizer on a cloth to prevent it from hardening further. This buys you time until you can properly dissolve and remove it with isopropyl alcohol.
3. I tried vinegar on water spots but they’re still there. What’s the next step?
For persistent mineral deposits, make a paste with baking soda and water, gently apply it with a microfiber cloth, and rinse thoroughly. If spots remain, the etching may be severe, and a professional detailer should assess it for light polishing.
4. Can I use a household product like WD-40 to remove tar or grease from my car’s paint?
While WD-40 can dissolve tar, it’s not formulated for automotive paint and can strip wax or leave an oily film. For safety, use a dedicated automotive tar remover or a small drop of dish soap, and always wash and rewax the area afterward. When removing tar, it’s important to use products that are safe for the car’s paint.
5. My child smeared chocolate on the cloth seats. What’s the very first thing I should do?
Immediately scrape off any solid chocolate with the edge of a credit card, then blot (don’t rub) the area with a cold, damp cloth. Heat from rubbing or warm water will melt the oils and sugar deeper into the fabric fibers, making the stain much worse. Mint chocolate can be particularly tricky to remove from fabrics.
Your Blueprint for a Stain-Free Car
Whether it’s Peeta’s muddy paws on the seats or a forgotten coffee cup ring, the most vital rule is to treat stains immediately with a cleaner matched to the surface. That quick response, paired with gentle blotting instead of rubbing, stops most damage before it starts. I share all my tested methods from years of family messes right here on Stain Wiki, so you can keep every drive looking fresh.
Suzanne is an accomplished chemist, laundry expert and proud mom. She knows the science and chemistry of stains and has personally deal with all kinds of stains such as oil, grease, food and others. She brings her chemistry knowledge and degree expertise to explain and decode the science of stain removal, along with her decades long experience of stain removal. She has tried almost everything and is an expert on professional and DIY stain removal from clothes, fabric, carpet, leather and any other items dearest to you.