How Do You Remove Wrinkles from Leather and Suede Without Damaging Them?
Finding creases in your favorite leather jacket or suede boots can be stressful, but take a deep breath. You can often smooth them out effectively using gentle, controlled heat and proper aftercare, which I’ll explain step-by-step.
Here’s exactly what we’ll cover to get your materials looking smooth again:
- The crucial first step: identifying if you’re working with leather or suede.
- My preferred, safe method using a hairdryer and a protective barrier.
- How to condition leather afterward to prevent drying and cracks.
- Special precautions for delicate suede to avoid water spots and matting.
I’ve perfected these techniques over years of hands-on cleaning, from reviving Roger’s worn hunting boots to caring for my own suede accessories.
Wrinkle Panic Level and Your Golden Window
I rate leather and suede wrinkles a 2 out of 10 on the panic scale. You are not racing against a drying stain. Your main enemy is impatience, especially when caring for leather.
The golden window here is the time you take to plan your approach, because a rushed, harsh fix can leave a permanent scar. I learned this after a disastrous experiment with my husband Roger’s old leather jacket. I thought a quick pass with the iron on low would smooth it out. It left a shiny, stiff patch I can still see.
Take a deep breath. You have time to gather the right, gentle tools. For deep wrinkles from long term storage, like a jacket crushed in the back of a closet for years, you will need patience. You might not fix it perfectly in one go, especially when trying to remove wrinkles without ironing.
Material Red Flags: Critical Warnings Before You Start
Some methods are an instant ticket to ruin. Never use them. Ever.
- Direct Heat: Never place an iron, hair dryer, or clothes steamer directly on the material. The heat can cook the fibers, causing irreversible shrinkage, discoloration, or a hard, shiny glaze. My aunt Jessica’s suede boot disaster is a permanent reminder.
- Soaking with Water: Dousing leather or suede with water is a catastrophe. Leather can become stiff and crack as it dries. Water will leave dark, dull spots on suede that are incredibly difficult to fix. Think of suede like a delicate sponge.
- Harsh Cleaning Sprays: Avoid all purpose cleaners, alcohol based solutions, or strong solvents. They strip the natural oils from leather and can permanently alter the color and texture of suede.
You also need to know what you are working with. Some materials are extra fragile.
- Aniline or Unfinished Leathers: This is top grade, porous leather with little to no protective coating. It absorbs everything. My mother in law Brianna has a beautiful aniline purse I would only treat with a professional’s help.
- Suede and Nubuck: Suede (the fuzzy underside) and nubuck (a buffed top grain) are incredibly sensitive to moisture and pressure. Nubuck is especially delicate.
- Faux or Bonded Leather with a Plastic Coating: That plastic top layer can melt, bubble, or peel with the wrong kind of heat or moisture. It behaves very differently from real hide.
Your universal, non negotiable first step is a test patch. Pick a hidden spot like an inside seam or under a collar. Apply your chosen method very lightly. Wait. See how the material looks and feels once it’s completely dry. This two minute test saved my son Jason’s soccer bag from a major mishap last season.
The Gentle Arsenal: What You’ll Need

Think of this like gathering your tools before a delicate repair. Having the right stuff prevents panic and mistakes.
- Handheld garment steamer: This is your main tool. The steady, gentle vapor is perfect.
- Distilled water: Use this in your steamer. Tap water leaves mineral deposits inside the machine.
- Clean, white cloths: I use old cotton t-shirts. White ensures no dye transfers to your material.
- A quality leather conditioner: This isn’t optional. It’s the follow-up care that makes the whole process work.
- A soft suede brush or nubuck block: Essential for fluffing suede back to life after any moisture exposure.
Safe DIY Alternatives
Don’t own a steamer? I didn’t for years. My Aunt Jessica taught me this bathroom trick for my husband Roger’s old leather bomber.
- For steam: A bathroom hot shower creates a fantastic steam room. Just close the door.
- For conditioning: You can test a tiny dab of pure, food-grade coconut oil on a hidden seam. A commercial conditioner is safer and more balanced for the leather’s pH.
Optional items that help: a padded hanger to keep the jacket’s shape, and some crumpled acid-free tissue paper for stuffing sleeves or couch cushions to hold their smooth form.
Surface Compatibility: Jacket, Couch, or Car Seat?
The core idea is the same, but your approach changes with the size and location of the item.
- Clothing (jacket, coat): This is the easiest. You can hang it, move it, and work on sections easily. Focus on careful hand-smoothing as you go.
- Furniture (sofa, chair): You’re working in place. Steaming a couch arm requires patience. Stuffing cushions back to their plump shape after steaming is the secret to erasing deep seat wrinkles.
- Car Interior (seats, steering wheel): Extreme caution here. Car leather is often coated and gets less air circulation. Moisture can get trapped. I usually skip steaming car seats entirely and rely on a good conditioner and time in a warm garage to relax minor creases.
The Science of the Wrinkle: Why Steam and Conditioner Work
Leather is skin. Imagine your own skin when it’s dry and cold-it gets tight and creased.
Heat and moisture from steam relax the leather’s tight, woven fibers, letting them shift back into place. The conditioner that follows is like a deep moisturizer. It replenishes the natural oils that keep the fibers supple so they don’t want to snap back into that wrinkled fold.
Suede is different. That soft, raised nap is like very short, delicate grass. Direct water will mat it down flat. That’s why you use steam from a distance and immediately brush the nap upright with a suede brush. The heat relaxes the base leather, and the brushing revives the surface.
How to Get Wrinkles Out of a Leather Jacket or Coat
This is the most common question I get. Let’s break it down so you feel confident.
Step 1: The Clean and Dry Prep
Never work on a dirty surface. Dust and grit can get ground in.
Take a clean white cloth, dampen it with cool water, and wring it out completely. Wipe down the entire jacket to lift surface dirt. Let it air dry fully before you move on. I drape mine over a chair back in the kitchen.
Step 2: The Conditioning Boost
This pre-game step makes a huge difference. Hydrated leather is cooperative leather.
Apply a dime-sized amount of conditioner to another clean cloth. Rub it in using small circles on one section, like a sleeve. You’ll see the leather drink it in and the color darken slightly. Do the entire jacket, then let it sit for 10 minutes. This is the time I use to fill my steamer with distilled water. Should you notice any dye transfer or staining, the next steps cover leather stain dye removal tips. These quick methods help restore color without harming the finish.
Step 3: Steaming with a Machine or Shower Steam
Now for the main event. The goal is gentle, even heat, not a soaking.
With a steamer: Hold the nozzle 6 to 8 inches away from the leather. Keep it moving slowly, never letting it blast one spot. For very delicate or antique leather, hold the cloth between the steamer and the jacket as a protective barrier.
The shower method: Hang the jacket on the shower rod, away from direct water spray. Close the door, run the hot shower until the room is full of steam, then turn it off. Leave the jacket in there for 15-20 minutes. My mom Martha swears by this for her suede vests.
Step 4: The Hand-Smoothing Finish
This is where you lock in the smoothness. Work while the leather is still warm and supple from the steam.
Lay the jacket flat on a clean table or bed. Use the palms of your hands to gently stretch and smooth the material away from the wrinkle. Don’t pull hard, just apply gentle, consistent pressure. For sleeves, I smooth from the shoulder seam down to the cuff.
Post-Treatment Recovery for Leather
Patience is key now. You must let it dry correctly.
Hang the jacket on a padded hanger. Place it in a room with good air circulation, but away from radiators, direct sunlight, or fans. Let it dry completely overnight.
Once dry, the leather should feel soft and supple, not stiff. If a stubborn wrinkle remains, don’t attack it again right away. Let the jacket rest for a couple of days, then you can repeat the conditioning and steaming process on just that one spot.
How to Get Wrinkles Out of Suede (The Delicate Dance)
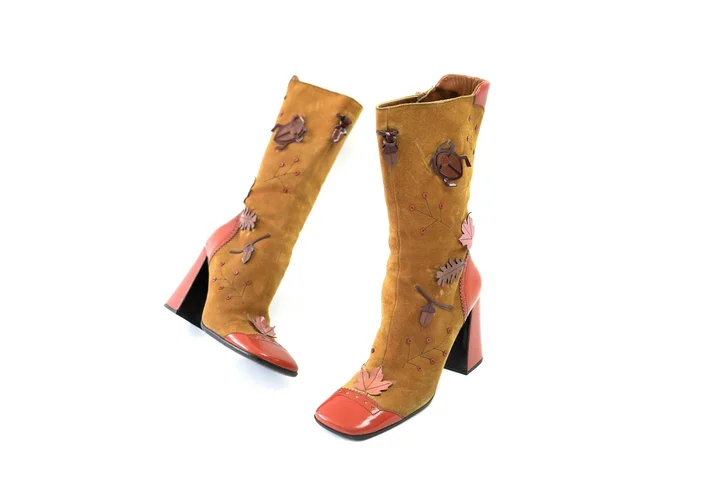
Suede is leather’s more sensitive sibling. Its soft nap is beautiful but easily crushed and marked.
Your goal is to relax the fibers without getting them wet. Think of it as a delicate dance with steam.
Step 1: The Dry Brush First
Always start with a dry, clean suede brush or a clean toothbrush. Never use a wire brush.
Gently brush the entire wrinkled area in one direction. This lifts the nap and lets you see the true creases. You might find some wrinkles brush right out, especially on bed linens and sheets.
This first brush tells you exactly what you’re working with.
Step 2: Indirect Steaming is Key
Do not point the steamer nozzle at the suede. I hold mine about 10 to 12 inches away.
I place a thick, clean terry cloth towel between the steamer and the item. The steam must pass through this barrier.
Move the steamer constantly over the towel for just a few seconds per area. You want the suede to feel barely warm and slightly damp, not wet.
Step 3: The Brush-While-Damp Trick
While the suede is still slightly damp from the steam, take your dry brush again.
Gently brush the area with the nap. This helps the fibers relax into a smooth, flat position as they dry.
Let the item air dry completely, away from direct heat. Never use a hair dryer.
Step 4: The Stuffing Method for Stored Items
For deep creases in suede boots or a folded handbag, you need support from the inside.
Crumple acid-free tissue paper or use a clean, dry towel. Gently stuff the item so the creased area is smoothed out from within.
Leave it stuffed for a full 24 hours as it dries. The internal pressure gently coaxes the wrinkles to release.
What Helped Me: A Suede Savior Story
My husband Roger has an old suede vest he loves for hunting. The elbows were permanently wrinkled.
I used the ‘stuff and steam’ method. I rolled hand towels and stuffed them tightly into the arms.
Then, I steamed through a thick dish towel from a full foot away. After letting it dry for a day, those deep elbow wrinkles had relaxed beautifully without a single water spot.
What Not to Do: The Quick Fixes That Cause Lasting Damage

I get the temptation to just grab the iron. I’ve been there. But with leather and suede, shortcuts lead to regrets.
Here are the methods that will ruin your favorite items.
Never Use a Direct Iron
Do not use an iron on leather or suede. Not even with a pressing cloth.
The intense, focused dry heat can scorch the surface in an instant. It can also shrink the material or melt the finish, leaving a shiny, plastic-like patch.
Once that shiny spot is there, it is permanent. You cannot buff it out.
Don’t Drench or Soak the Material
Thinking of running water over it or using a wet cloth? Please don’t.
Saturating leather strips its natural oils, leading to stiffness and cracks. Water stains can be particularly tricky to remove. Soaking suede causes permanent dark water stains and mats the nap into ugly, hard clumps.
My Aunt Jessica learned this the hard way with a wine-spilled suede clutch. The stain was bad, but the water ring from her cleanup attempt was worse.
Avoid Generic “Go Ham” Cleaners and Heat Guns
All-purpose sprays or cleaners often contain alcohol or solvents. These degrade the protective finish on leather and suede, unlike those designed specifically for fabric.
A heat gun or hair dryer on a high setting is far too intense. It bakes the material, making it brittle.
These are not fabrics you can attack with heavy chemicals or brute-force heat. Gentle persuasion is your only reliable tool.
Keeping Wrinkles at Bay: Smart Storage and Care
Prevention is always easier than the cure. A little routine care keeps your leather and suede looking sharp.
Use the Right Hanger and Stuff Your Bags
For jackets and blazers, use wide, padded hangers. They support the shoulders and prevent hanger bumps.
My mom Martha taught me to always stuff handbags, boots, and folded items with acid-free tissue paper when I’m not using them. It maintains their shape and fights creases.
It’s a simple habit that makes a huge difference over time.
Condition Regularly, Store Properly
For smooth leather, I condition my good bags and boots every six months with a product made for that specific leather type. It keeps the material supple. For suede and nubuck, cleaning requires different steps. A suede nubuck smooth leather cleaning guide covers those specifics.
Store items in a cool, dry place. Use breathable cotton storage bags, not plastic. Plastic traps moisture and can promote mold.
The Final Check Before You Store
Before you put something away for the season, give it a quick once-over.
Brush suede with your specialty brush. Wipe down leather with a clean, dry cloth. Make absolutely sure the item is completely dry, especially when dealing with delicate materials.
My mother-in-law Brianna always says, “Never store a worry.” A minute of care now saves an hour of steaming later.
FAQ About Removing Wrinkles from Leather and Suede
I’ve steamed my leather jacket but a stubborn wrinkle remains. What should I do next?
Do not re-steam it immediately. Let the jacket rest for 48 hours, then apply a small amount of conditioner to just that area and repeat the gentle steaming process from a safe distance. Rushing can dry out and damage the fibers.
Can I use a hairdryer instead of a steamer on my suede boots?
No, a hairdryer’s direct, dry heat is too intense and will likely bake and stiffen the suede. You must use indirect steam from a garment steamer or a hot shower to safely relax the fibers without damaging the delicate nap.
What’s a safe, last-minute trick for wrinkles on a leather handbag if I don’t have conditioner?
Fill the bag with crumpled acid-free tissue paper to smooth it from the inside and let it sit in a steamy bathroom (not direct shower spray). For conditioning, a tiny dab of pure coconut oil on a hidden seam can work in a pinch, but a proper leather conditioner is always better.
I accidentally got my suede item damp while steaming. How do I fix it?
Immediately stop and let it air-dry away from direct heat. Once barely damp, gently brush the nap with a dry suede brush. If water spots remain after drying, a professional cleaner is your safest next step.
After successfully removing wrinkles, what’s the one thing I should do to keep them from coming back?
Always store the item properly using a padded hanger for jackets or stuffing bags with tissue paper to maintain shape. Regular conditioning for leather and gentle brushing for suede will keep the materials supple and resistant to creasing.
Long-Term Care for Wrinkled Leather and Suede
Your most reliable strategy is to use indirect, gentle warmth for leather and only light, held-back steam for delicate suede. Always test your chosen method on a hidden seam or patch first-this simple habit saves materials from irreversible harm. Suede stain removal, in particular, calls for gentler methods to protect the nap. Look for suede-specific tips in the next steps. I share my full testing notes and family-tested methods for all kinds of fabrics and surfaces right here on Stain Wiki.
Written by Suzanne Rosi Beringer. Suzanne is an accomplished chemist, laundry expert and proud mom. She knows the science and chemistry of stains and has personally deal with all kinds of stains such as oil, grease, food and others. She brings her chemistry knowledge and degree expertise to explain and decode the science of stain removal, along with her decades long experience of stain removal. She has tried almost everything and is an expert on professional and DIY stain removal from clothes, fabric, carpet, leather and any other items dearest to you.