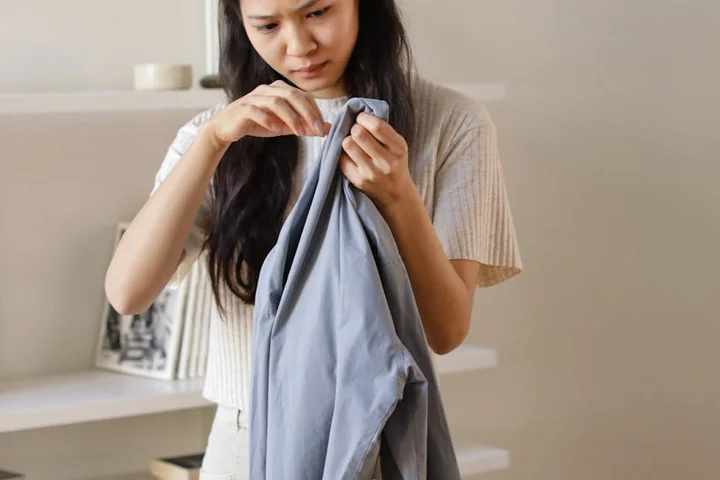
How to Remove Chemical Spills and Residues from Clothing Safely
Just spilled bleach or cleaner on your clothes? I get it. Act fast by blotting with a clean, dry cloth and rinsing the area with cool water to dilute the chemical before it sets.
In this article, I’ll share my tested methods for handling these tough messes. You’ll learn:
- How to identify and safely treat common household chemical spills
- The step-by-step process for both fresh and dried-on residues
- My favorite non-toxic, fabric-safe alternatives for cleanup
- Crucial tips to prevent colors from fading or fibers from weakening
I’ve dealt with everything from laundry soap mishaps to garage oil stains on my family’s clothes for years.
Your First Move: The 60-Second Safety Protocol
My husband Roger spilled paint thinner on his jeans once. My first word wasn’t a cleaning tip. It was “Get those off, right now!”
Your skin matters more than the shirt. Always.
Stop, Drop, and Assess
Don’t just grab a cloth and start wiping. That can spread the chemical and push it deeper. Follow these steps.
- Stop. Put the chemical container down safely. Move away from any fumes.
- Drop. If the spill is on clothing, get it off your body immediately. For carpets or upholstery, step back from the area.
- Assess. Look at the spill. Is it smoking? Is your skin red? If so, that’s a medical emergency-call for help first.
The Panic-Level Assessment
We rate stains on a “panic scale.” Grape juice is a 3. Chemical spills are an 8 out of 10 for urgency.
You have a tiny “Golden Window,” often just minutes. Some chemicals, like hair bleach, can eat through fabric or cause permanent color loss almost instantly.
Heat from a dryer or even warm water can set the stain forever. Rubbing can grind it in. Your goal is to act fast, but act smart.
Universal First Aid for Fabric
After you’ve made the area safe, here is your first response for almost any chemical spill on washable fabric.
- Remove the garment carefully. Try not to drag the stained part across clean fabric.
- Rinse from the back. Hold the stained area under a cool, gentle stream of water from the faucet or shower. Run the water through the back of the fabric to push the chemical out, not deeper in.
- Keep it cool. Use only cool or cold water. Never hot.
- Blot, don’t rub. If rinsing on a surface, gently press with a clean, white cloth to lift the liquid. Rubbing creates friction and heat.
This first-aid buys you the time to figure out exactly what you’re dealing with next.
Identifying Your Spill: From Bleach to Bug Spray
My Aunt Jessica loves red wine. My son Jason’s soccer gear gets doused in bug spray. They create wildly different stains.
Knowing what you spilled is half the battle. You can usually figure it out by using your eyes and nose.
The Sight & Smell Flow Guide
Ask yourself these questions as soon as you safely can.
| What do you SEE? | What do you SMELL? | Likely Culprit |
|---|---|---|
| Instant whitening or color stripping | A sharp, swimming-pool smell | Bleach or Oxidizer |
| A powdery, crystalline residue | A strong chlorine or chemical smell | Pool Chemicals |
| A greasy, spreading spot | A sharp, paint-like or medicinal odor | Solvent (paint thinner, nail polish remover) |
| A sticky, gluey mess | Varied (from fruity to chemical) | Adhesive or Glue |
| A wet spot that feels slippery or soapy | Minimal, or a clean scent | Bases (like lye in drain cleaner) |
The Science of the Stain (Chemistry Corner)
You don’t need a lab coat. But knowing a chemical’s “family” tells you how to fight it. My mom, Martha, taught me this simple grouping.
- Oxidizers (Bleach, Hydrogen Peroxide): These don’t stain; they destroy color. They break dye molecules. The damage is often immediate and permanent.
- Acids (Vinegar, Toilet Bowl Cleaner, Battery Acid): Can weaken plant-based fibers like cotton or linen, causing holes over time. They might also alter dye.
- Bases or Alkalis (Drain Cleaner, Lye, Heavy-duty Cleaners): Feel slippery. They can damage protein fibers like wool and silk, making them yellow and brittle.
- Solvents (Rubbing Alcohol, Paint Thinner, Nail Polish Remover): Dissolve oils, plastics, and dyes. They leave a greasy residue as they evaporate and can melt some synthetic fabrics.
- Oily Residues (Bug Spray, WD-40, Cooking Oil): These aren’t always “chemicals” in the scary sense, but they leave a greasy film that attracts dirt. They need a detergent to break them up.
How to Identify What You Spilled
Think about what you were doing. The product’s job gives you a huge clue.
Were you cleaning the bathroom? It’s likely a bleach, acid, or base-based cleaner. Check the label for keywords like “bleach,” “limescale remover” (acid), or “clog remover” (base).
Were you doing a craft or home repair? Think solvents (paint thinner) or adhesives (super glue, wood glue). These feel sticky or greasy as they dry.
Were you treating a stain or prepping for outdoors? This points to stain removers (often solvents) or insect repellent (oily residue).
If the container is nearby, the safety label and instructions are your best guide. They often have specific first-aid for skin and fabric contact. I keep this info in mind before I even open a tricky product, a habit I picked up after one too many adventures with the kids.
Treating Common Culprits: A Step-by-Step Guide
Chemical spills on fabric feel like a double emergency. You worry about the stain and the fabric itself. Let’s tackle them one by one—starting with how to remove stubborn stains from delicate fabrics.
Bleach and Chlorine Stains (The Color Thieves)
What it looks like: A spill is a wet patch with a sharp smell. A stain is a faded, often whitish or yellowish spot where the color is gone.
Immediate action: For a liquid spill, blot quickly and rinse under cold running water from the back of the fabric. This dilutes the bleach before it eats more color.
Treatment steps: First, know this. True bleach stains are permanent damage. You can’t “restore” the original dye. Your goal is to mitigate the spot and make it less obvious. This is especially tricky when dealing with bleach stains on black clothing.
- For white fabrics with yellowing: Mix one part 3% hydrogen peroxide with two parts water. Dab it on the spot, let it sit for 10 minutes, then rinse. This can sometimes lift the yellow tinge.
- For colored fabrics: Your options are limited. You can try dabbing with a color-safe bleach alternative, but test it on a seam first. Often, the kindest fix is to dye the entire garment a darker color to hide the spot.
Material Red Flag: Do not use hydrogen peroxide on silk or wool. It can damage the fibers.
Final wash instructions: Wash the garment alone on a cool, gentle cycle with a mild detergent. Check the spot before drying. Heat will set any remaining damage.
What Helped Me (Pro-Tip): Roger left a cap-off bug spray bottle in his hunting jacket pocket. It wasn’t bleach, but it left a weird oily spot that looked bleached. I made a paste of blue dish soap and baking soda, rubbed it in, let it sit for an hour, then washed it. The paste lifted the residue and evened out the fabric’s look. It’s my go for mystery chemical spots now.
Acidic Splashes (Drain Cleaner, Toilet Bowl Cleaner, Vinegar)
What it looks like: You might see a wet patch or discoloration. Sometimes, the fabric just feels weak in that spot.
Immediate action: Safety first. Wear gloves. Do not rub. Gently blot away any excess liquid. Then, you must neutralize the acid.
Treatment steps:
- Create a mild baking soda solution (1 tablespoon per cup of cool water).
- Slowly pour or dab it onto the affected area. You might see a faint fizz. That’s the acid being neutralized.
- Let it sit for 5-10 minutes, then rinse thoroughly with cool water.
The fabric may be compromised forever. Acids can burn through cotton and other natural fibers, creating holes that show up later. Handle the area very gently from now on.
Final wash instructions: Wash the garment on a gentle, cool cycle with a small amount of detergent. Air dry it. Inspect the area for thinning before ever putting it in the dryer.
Oily Solvents and Resins (Paint Thinner, Grease, Adhesives)
What it looks like: A greasy, slick patch that may smell strongly. Dried glue or adhesive forms a hard, plasticky spot.
Immediate action: Scrape off any solid gunk with a blunt knife. For liquid spills, sprinkle cornstarch or baking soda to absorb what you can, then brush it off.
Treatment steps: Remember “like dissolves like.” Oil breaks down oil. This same approach also helps remove oil stains from clothing textiles. Pre-treat fabrics with a dab of dish soap before washing.
- For fresh oily stains: Apply a generous dab of blue dish soap (like Dawn) directly to the spot. Work it in with your fingers and let it sit for 15 minutes. The soap will emulsify the oil.
- For dried glue or adhesive: Rub a small amount of coconut oil or olive oil into the residue. Let it soak for 30 minutes to soften the bond. The oil loosens the glue so you can gently scrape it away.
Final wash instructions: Wash the item in the hottest water safe for the fabric, with your regular detergent and an extra rinse cycle. The heat and soap will wash away the dissolved oils. Check that the spot is gone before drying.
Laundry Detergent and Soap Residue (The Stain You Made While Cleaning)
What it looks like: Blue or white chalky streaks, spots that feel stiff or sticky, or overall dinginess.
Immediate action: Don’t add more detergent. This is usually from overloading the washer or using too much soap.
Treatment steps:
- Rewash the garment by itself.
- Add 1 cup of white vinegar to the drum during the rinse cycle, or use a washer cleaner tablet in an empty hot cycle first.
- For a single item, you can soak it in a sink of warm water with 1/4 cup of vinegar, then rinse thoroughly by hand.
- Treat cloth mold or mildew stains before washing.
Final wash instructions: After the vinegar rinse, run the garment through one more quick wash cycle with no detergent at all. This ensures all residue is flushed out. Always use the recommended amount of detergent, not more.
The Invisible Residues: Factory Chemicals and “New Clothes Smell”
That “new clothes smell” is often a sign of chemical finishes. People ask me all the time: can you wash chemicals out of Shein clothes, or remove BPA and flame retardants? These chemicals are similar to the ones found in some dyed fabrics that retain an odor even after washing.
Here’s the honest truth. Washing significantly reduces these residues, but may not eliminate them completely. Factory-applied finishes are designed to be durable.
My rule is to always wash new clothes, especially for my kids, Jason and Jessica. I use a rigorous pre-wash protocol I learned from my mom, Martha.
My Pre-Wash Protocol for New Items:
- Soak the new garment in a bucket or clean sink filled with warm water and one cup of white vinegar for 30-60 minutes. The vinegar helps break down some finishes and odors.
- Without rinsing, transfer it to the washing machine.
- Wash inside out with a mild, fragrance-free detergent on the appropriate cycle.
- Use an extra rinse cycle if your machine has the option.
- Always air dry for the first wash to avoid heating any remaining chemicals into the fibers.
This process removes a large portion of surface chemicals and that plasticky smell. For flame retardants or specific coatings, manage your expectations. You are reducing exposure, not performing a chemical strip. For items like workout gear or children’s pajamas where this is a concern, this wash routine is the most practical and effective first step you can take at home.
The Surface Compatibility Chart: From T-Shirt to Car Seat
The rules change a bit depending on what you’re cleaning. What works on your husband’s old cotton work shirt isn’t always right for your car’s upholstery.
This quick guide adapts the core principles for common surfaces.
| Surface | Core Principle | Key Difference & My Tip |
|---|---|---|
| Clothing | Blot, treat from back, rinse thoroughly. | Be extra gentle with delicates like silk or wool. I treat my son Jason’s polyester soccer jersey much more aggressively than a nice blouse. For delicate fabrics, I often just use a mild dish soap and water solution. |
| Carpet | Blot, dilute, extract. | Blotting is your absolute best friend here. Press down hard with a clean towel to pull liquid up from the pad. My golden lab Peeta once tracked in fertilizer. I spent 10 minutes just blotting before I even touched a cleaner. |
| Upholstery | Test, blot, minimal moisture. | You can’t rinse a couch cushion in the sink. Use the least amount of liquid needed. My mom Martha taught me to put a dry towel under the spot I’m cleaning to absorb any cleaner that soaks through. |
| Car Interiors | Test in a hidden area first. | Car fabrics and dyes can be weird. Test under the seat or in the door jamb. For a big solvent spill on fabric seats, a handheld carpet extractor is a game-changer. It pulls the residue out instead of just smearing it around. |
Safety, Final Wash, and Prevention
Getting the stain out is only half the job. Making sure the fabric is safe to wear or use again is the final, critical step, so it’s important to be aware of common stain removal mistakes to avoid.
How to Wash Clothes After Chemical Exposure
Never just throw chemically soiled clothes in with a regular load. Follow these steps.
- Pre-rinse the treated area under cool, running water. Do this until you can’t smell the chemical or cleaner anymore.
- Wash the item alone. Use the hottest water the fabric can safely handle and your regular detergent.
- Run an extra rinse cycle. This is non-negotiable for removing cleaner residues.
- Check for smell. After washing, hold the fabric up to your nose and take a sniff. If you catch any chemical or sour scent, wash it again.
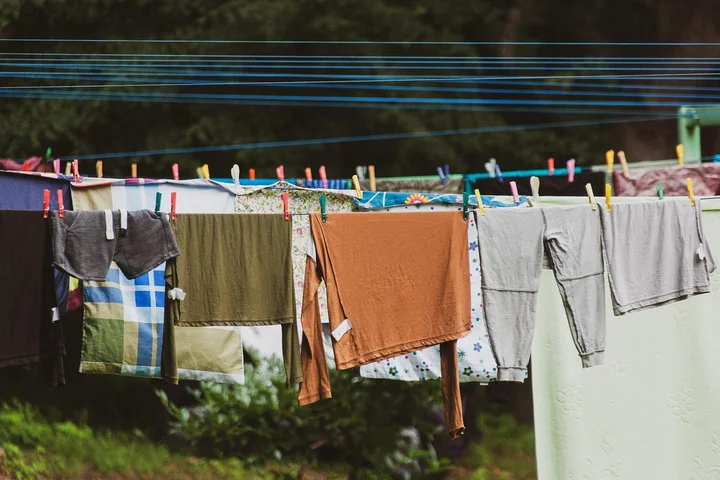
- Air-dry first. Before you put it in the dryer, let it air dry. Heat can set any lingering residue. Once you’re sure it’s clean and odor-free, then you can tumble dry if needed.
I learned the air-dry trick the hard way after treating a grease stain on Roger’s shirt. The dryer made the leftover solvent smell permanent.
Recommended Products for Your Arsenal
You don’t need a closet full of specialty products. These are my tried-and-true basics.
- Oxygen-Based Bleach (like OxiClean): My first grab for organic stains and general brightening. It’s gentler than chlorine bleach.
- Mild, Clear Dish Soap (like Dawn): Perfect for breaking up oils and grease on fabrics. I use it more than any other cleaner.
- White Distilled Vinegar: Great for neutralizing odors and tackling light mineral deposits. My aunt Jessica uses it on wine spills.
- Baking Soda: A gentle abrasive for pastes and a fantastic odor absorber. I keep a box in the fridge and the laundry room.
- 3% Hydrogen Peroxide: A good bleaching alternative for whites and colors. Always test for colorfastness first.
- Enzymatic Laundry Detergent: Essential for pet accidents or protein-based stains. The enzymes actually digest the stain molecules.
Smart Prevention Tips
Avoiding the stain is easier than removing it. A few simple habits save a lot of hassle.
Wear old clothes for messy jobs. My painting and garage outfits are decades old.
Check pockets before washing. A forgotten pen or lip balm can ruin a whole load. I’ve washed too many of Jason’s “treasures.”
Always dilute cleaning products as the label directs. Using them straight is harsh on surfaces and leaves a massive residue to clean up later.
Keep a dedicated stain-treatment towel or sponge in your kitchen and garage. You’ll always be ready to blot fast. Stain-removal techniques have evolved from basic cloths to modern, targeted solutions.
FAQ about Removing Chemical Stains from Clothes
1. What is the most important safety step before I start cleaning a chemical spill?
Immediately remove the contaminated clothing to prevent skin exposure. Always work in a well-ventilated area and wear gloves to protect your hands during cleanup.
2. What’s a safe, all-purpose homemade cleaner for unknown chemical residues?
A solution of cool water and a few drops of clear dish soap is often the safest first step. This combination can lift many oily and water-based residues without damaging most fabrics.
3. Can I use the same method on all fabric types, like polyester and cotton?
No, always check the care label first. While cotton can often handle more aggressive treatment, delicate fabrics like silk, wool, or performance synthetics require a gentler approach with mild soap and minimal rubbing.
4. How can I prevent damaging my clothes when trying to remove a tough chemical stain?
Always work from the back of the fabric and blot-never rub-to avoid grinding the chemical deeper. Test any cleaning solution on a hidden seam first to check for colorfastness.
5. The stain is gone, but the chemical smell remains after washing. What should I do?
Soak the garment in a mixture of cool water and one cup of white vinegar for 30 minutes, then rewash. Vinegar helps neutralize odors, but always air-dry the item afterward to avoid baking any lingering smell into the fabric with heat. It’s particularly effective when used properly to remove bad smells from clothes.
Your Fabric’s Chemical Defense Plan
The biggest lesson is to act fast and always test first. Flooding a spill with water and testing your cleaner in a hidden spot are simple steps that prevent most disasters.
I learned the “test first” rule the hard way with a vintage tablecloth from my Aunt Jessica. A spot test saved it from a harsh cleaner that would have eaten right through the delicate fibers. That moment cemented my process: identify, test, treat, and rinse thoroughly.
Treat every cleaning job with respect for the fabric, and it will reward you by lasting for years. This mindset turns a frustrating chore into a satisfying bit of home care. For more tricks on handling everything from clay to wine, the blog at Stain Wiki has you covered.
Suzanne is an accomplished chemist, laundry expert and proud mom. She knows the science and chemistry of stains and has personally deal with all kinds of stains such as oil, grease, food and others. She brings her chemistry knowledge and degree expertise to explain and decode the science of stain removal, along with her decades long experience of stain removal. She has tried almost everything and is an expert on professional and DIY stain removal from clothes, fabric, carpet, leather and any other items dearest to you.