How to Stain-Proof Leather: Protect Your Shoes, Furniture, and Bags
Worried a single spill will ruin your leather? Preventing stains is straightforward with a quality sealant and consistent care, saving you from future headaches.
This guide will show you:
- How to pick the perfect protector for aniline, suede, or finished leather
- The right way to apply it to shoes, couches, and handbags
- Why skipping a clean, dry surface is the most common error
- How to maintain that shield against life’s messy moments
I’ve tested these techniques for years on everything from Roger’s work boots to the living room sofa Peeta loves to nap on.
What Does Stain-Proofing Leather Really Mean?
Let’s get one thing straight. Stain-proofing doesn’t mean stain-impossible. It’s about creating a shield, not a magic force field. Think of it like rain on a freshly waxed car. The water beads up and rolls off instead of soaking into the paint.
Stain-proofing leather works the same way, creating a water-resistant barrier so spills have less chance to soak in and become a permanent stain. Should a stain appear, knowing how to remove stains from leather bags and purses is your next practical step. Quick, proper removal preserves color and texture.
Chemistry Corner: The Invisible Shield
Most leather protectants use ingredients like silicones or fluoropolymers. Here’s the simple version of how they work. When you apply them, they don’t just sit on top. They form a microscopic, breathable network over the leather’s surface.
This network makes the surface “hydrophobic.” That’s a fancy word that just means it repels water and water-based liquids like juice or coffee. Oils can still be a challenge, but a good barrier gives you precious time to wipe a spill away before it soaks deep into the leather’s pores.
My mom Martha taught me this years ago with her favorite leather purse. We were having iced tea, and she accidentally tipped her glass. The tea pooled on the purse for a full ten seconds. She calmly blotted it, and not a trace was left. “I conditioned and protected this bag when I bought it,” she said. “The spill sat on the shield I gave it. It never even met the real leather.” That lesson from North Texas stuck with me.
The First Step: Cleaning and Prepping Your Leather
You would never wax a dirty car. The same rule applies here. Applying a protectant over dirt or grease is one of the biggest mistakes you can make. You’re just sealing the grime in forever.
Rushing the cleaning step is what I call an 8/10 on the panic-level assessment, because you risk trapping stains and dirt under a permanent seal. Take a deep breath and do this right first.
Your Step-by-Step Leather Cleanse
- Dry Brush or Vacuum. Use a soft-bristled brush (a clean shoe brush is perfect) or a vacuum with a soft brush attachment. This lifts away loose dust and grit from creases in bags or furniture.
- Pick Your Cleaner. Use a pH-balanced leather cleaner. For most items, a simple mix of warm water and a drop of mild Castile soap works. I keep a bottle pre-mixed for quick wipe-downs.
- The Hidden Spot Test. Always test your cleaner. Dab a tiny bit on an unseen area-inside a shoe tongue, under a couch cushion, on a back belt loop. Wait 10 minutes. Check for color bleed or texture change.
- Gentle Wipe-Down. Dampen a soft, white microfiber cloth with your cleaner (never soak the leather). Wipe in gentle, overlapping strokes. Rinse your cloth in clean water and wipe again to remove any soapy residue.
- Air Dry Thoroughly. Let the leather dry completely, away from direct heat. This is non-negotiable. Applying protectant to damp leather can cause cloudiness or mildew. Wait at least 24 hours for full peace of mind.
Material Red Flags: When to Pause
Not all leather is ready for a standard protectant. Here are the big exceptions:
- Suede or Nubuck. These have a raised, fuzzy nap. Standard protectants will mat it down. They need sprays specifically labeled for suede.
- Aniline-Dyed or “Naked” Leather. This is high-quality, absorbent leather with a very natural feel. It’s like a sponge. Always use products made specifically for aniline leather.
- Very Old, Dry, or Cracked Leather. This leather is thirsty. A protectant will just sit on top of cracks. You must condition it first with a quality leather conditioner to restore suppleness, then protect it once the conditioner is fully absorbed. My husband Roger’s old hunting boots are a perfect example of this two-step process.
Choosing Your Leather Protector: A Simple Guide
Think about what your leather faces every day. My son Jason’s soccer cleats get mud and grass stains. Our living room sofa endures juice spills from Jessica.
For shoes and bags, you need a durable, water-resistant formula. For furniture, look for a protector that guards against oils and daily grime.
Start by matching the protector’s strength to your item’s daily battles.
Next, feel your leather. Is it smooth and polished, or soft and napped like suede? Smooth leather can handle sprays and lotions well, unlike suede which requires more delicate care.
Suede and nubuck are delicate. They need a specific, gentle spray to avoid dark spots and stiffening.
The leather’s texture dictates how it will absorb and react to a protector.
Product Types: Sprays, Lotions, and Wipes
Aerosol sprays are my go-to for large areas. They give a fast, even coat on sofas or car seats.
Lotions and creams offer more control. I use them on handbags and Roger’s good dress shoes. You rub them in by hand.
Pre-moistened wipes are perfect for quick jobs. I keep some in the car for cleaning Peeta’s drool off the leather console.
Sprays cover big surfaces, lotions allow precise care, and wipes are for convenience.
Safe DIY Alternatives
Store-bought isn’t your only option. I learned from Roger’s hunting gear care.
A beeswax-based balm works for rugged boots and belts. Melt equal parts beeswax and coconut oil. Let it cool and buff it into the leather.
For a light conditioner and protector, mix one part white vinegar with two parts linseed oil. Apply a tiny amount to a cloth and wipe it on.
These DIY mixes are best for conditioned, full-grain leather items you don’t mind treating carefully.
What Helped Me
Always read the label for the word “breathable.” I skipped this once on a nice jacket.
The protector left a sticky, unpleasant film. Breathable formulas let moisture out so the leather doesn’t feel tacky or get damaged.
Choosing a breathable formula prevents residue and keeps leather supple.
How to Apply Leather Protector Without Mistakes
Applying protector is simple if you follow a process. Rushing leads to problems.
- Clean First. Wipe the leather with a barely damp microfiber cloth. Remove all dirt and let it dry fully. Any moisture trapped under the sealant will cause mildew.
- Test Always. Find a hidden spot. Use the inside of a bag’s strap or the back leg of a chair. Spray or dab a little product and wait 30 minutes. Check for color change or texture issues.
- Apply Thin Coats. Hold sprays about 6 inches away. Use a steady, sweeping motion. For lotions, use a soft cloth and rub in circles. Cover the entire surface evenly.
- Let It Dry. Wait at least 15 minutes after the first coat. Touch it. If it feels dry, you can apply a second light coat for extra protection in spill zones.
- Cure Completely. After the final coat, leave the item alone for a full day. This lets the protector bond properly with the leather.
Patience during application and curing is the secret to a long-lasting shield.
Testing is non-negotiable. My Aunt Jessica once darkened a suede clutch by skipping this step. We had to use a specialized cleaner to fix it.
A two-minute test on a hidden spot can save you from a permanent stain-proofing error.
Common Mistakes When Stain-Proofing Leather
Over-saturating the leather is the top error. A soaked surface can develop a white, cloudy haze that’s hard to remove, especially when dealing with salt stains on leather boots.
Applying protector in direct sunlight or a hot room is bad. Heat causes the product to dry too fast and cake on the surface.
Using a general-purpose spray on all leather types ruins delicate finishes. Suede protectors are different from those for smooth leather.
Avoid flooding the leather, working in heat, and using a one-size-fits-all product.
Use a Well-Ventilated Space
Open your windows or work outside. The fumes from some sprays are strong.
I learned this when my daughter Jessica found a can of protector and sprayed it in our coat closet. The whole hallway smelled chemical for hours.
Good air flow keeps you safe and helps the product dry evenly without a strong odor lingering.
Always protect your lungs by applying these products in a breezy, open area.
After Application: Drying and Curing Your Leather
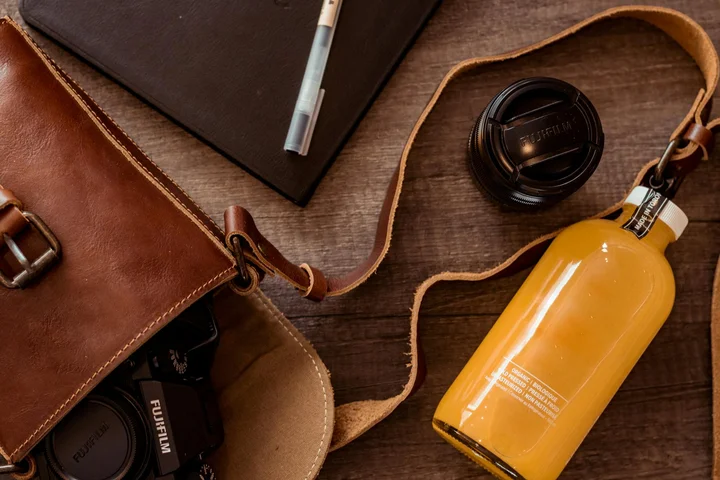
Think of this as your leather’s quiet recovery time. It just finished a treatment and needs to rest.
Immediately after you finish applying the protector, you need to let it cure properly.
The Golden Rule for Drying
Find a spot with good airflow, like a room with a ceiling fan on low. Keep it away from direct sunlight, radiators, or heaters.
Heat dries the surface too fast, trapping moisture underneath that can eventually damage the leather. Airflow is your best friend here.
How to Check If It’s Fully Dry
This is not a guessing game. You need to use your sense of touch.
Gently press the back of your finger against a treated area, like the toe of a shoe or the back of a bag. If it feels cool, damp, or leaves a fingerprint, it’s not ready.
The leather is only safe to use when it is completely dry to the touch and no longer has a tacky or slick residue. Any stickiness means the protective barrier isn’t fully set.
Drying Times Can Vary Widely
Not all leather items dry at the same speed. It depends on the product’s formula and the leather’s thickness and porosity.
My son Jason’s synthetic-leather soccer cleats are thin and non-porous. They often feel dry in just an hour or two.
My genuine leather handbag is thicker and absorbs more. It usually needs a full overnight cure, sometimes 12 hours, before I dare put anything inside it.
Here’s a simple guide I follow:
- Thin or Coated Leather (cleats, some furniture): 2-4 hours.
- Standard Full-Grain Leather (bags, boots, jackets): 8-12 hours.
- Thick, Oiled, or Suede Leather: 24 hours to be absolutely safe.
When in doubt, give it more time. Rushing this step makes the whole process pointless.
Keeping Leather Protected: Maintenance and Reapplication

Your work isn’t done after one treatment. Think of leather protector like sunscreen for your shoes. It wears off.
When to Reapply Your Protector
There’s no single perfect schedule. It depends entirely on how much you use the item.
I use a simple calendar guide based on real wear and tear in my house:
- Every 3-4 Months: Daily-use items. Jason’s school shoes and my everyday handbag get a refresh this often.
- Every 6 Months: Seasonal or weekly-use items. Roger’s good leather boots or our living room armchair.
- Once a Year: Special-occasion items. My aunt Jessica’s fancy wine-tasting clutch she only brings out for parties.
- After a Major Clean: Any deep clean or stain removal strips the protector away. Always reapply immediately after.
Daily and Weekly Maintenance
Protector makes cleanup easier, but you still have to clean. The key is gentle and immediate action.
I keep a soft, dry microfiber cloth in my closet. A quick dusting of my bags and Roger’s shoes once a week keeps grime from building up.
For spills, your first move should always be to gently blot-never rub-with a clean, absorbent cloth. Rubbing just grinds a spill into the protective layer.
Most of the time, that’s all you need. For sticky residues, a slightly damp cloth usually does the trick on protected leather.
Water Damage and Your Protector
This is critical. A water-repellent spray is not a force field. It buys you time, not immortality.
If your leather gets caught in a downpour or fully soaked, the protector has been compromised. The water has overwhelmed it. Some folks reach for a vinegar conditioner as a quick fix—a common myth. Our leather care myths debunked piece explains why this vinegar conditioner approach often misses the mark and points to safer, more effective options.
Let the item air dry naturally, away from heat, just like after treatment. Once it is completely dry, you must reapply the protector before using it again. Think of a heavy rain as resetting your protection clock to zero.
Smart Storage Prevents Problems
How you put leather away is just as important as how you treat it. My aunt Jessica in Arizona taught me this.
Her desert air is brutally dry, which can crack untreated leather. She showed me to always stuff handbags with acid-free tissue paper or clean, soft towels. This holds their shape and prevents deep creases.
Never store leather in plastic bags or airtight containers. Leather needs to breathe. A fabric dust bag or a shelf in a closet is perfect.
For long-term storage in dry climates or heated homes, a light application of a leather conditioner before putting the item away can prevent it from drying out and cracking. Just remember to let it cure fully before storing.
When Stains Happen: Safe Removal Techniques
Even the best prevention plan can’t stop every accident. My son Jason once sprinted through the kitchen with a full glass of chocolate milk, and let’s just say the couch and his shoes learned a hard lesson about momentum.
Don’t panic. For common spills, you can often handle it yourself with a gentle touch.
Your Gentle, Step-by-Step Stain Removal Method
This is my go-to routine for fresh spills like coffee, soda, or even ballpoint ink. I keep these supplies in a small kit under the kitchen sink.
- Blot, Don’t Rub. Immediately grab a clean, white, absorbent cloth or paper towel. Gently press it onto the spill to soak up as much liquid as possible. Rubbing will grind the stain deeper into the leather’s pores.
- Test Your Cleaner. Always test any cleaner on a hidden spot first, like the back of a shoe tongue or under a cushion. Wait 5 minutes to check for discoloration or texture change.
- Clean with a Damp Cloth. Dampen a corner of a clean microfiber cloth with distilled water. Wipe the stained area in a gentle, circular motion. For coffee or food stains, this might be enough.
- Use a Mild Soap Solution. If water isn’t enough, mix a drop of clear, pH-neutral dish soap (like Dawn) into a cup of distilled water. Dampen your cloth in this solution, wring it out tightly, and wipe the stain. Work in small sections and dry the leather immediately with a separate dry cloth to prevent water marks.
- Address Ink with Care. For a fresh ballpoint ink mark, a tiny dab of isopropyl alcohol (70%) on a cotton swab can work. Dab *very* gently, don’t scrub, and follow immediately with the damp water cloth to dilute the alcohol. This takes patience.
- Condition. Once the area is completely dry, apply a tiny amount of your leather conditioner to restore moisture. Let it absorb fully.
The Surface Compatibility Chart
Not all leather is the same. Your technique needs to adapt to the item’s delicacy. Think of blotting pressure like a handshake.
- Delicate Bags & Gloves (Aniline, Nubuck): Use the lightest possible touch. Imagine you’re blotting a butterfly’s wing. Use minimal moisture and blot dry instantly. These surfaces stain and mark easily.
- Furniture & Jackets (Semi-Aniline, Protected): A firmer, more confident press is okay. You can use slightly more moisture on your cloth, but always follow with a dry blot. These are your workhorses.
- Sturdy Shoes & Belts (Full-Grain, Waxed): These can handle the most pressure and cleaning solution. You can be more thorough in your cleaning motions, as these leathers are made for durability and patina.
On-the-Go Emergency Fix
You’re at a cafe and splash espresso on your bag. Professional cleaners aren’t in your purse. Here’s my secret weapon.
Most public restrooms have liquid hand soap and paper towels. If not, a dab of hand sanitizer (the clear gel kind) on a napkin can be a miracle worker for fresh, water-based spills.
Dab a tiny amount of sanitizer onto a white paper napkin, blot it on a hidden spot first, then gently dab at the fresh spill. The alcohol helps break down the stain and evaporates quickly. It’s not perfect, but it’s a fantastic holdover until you can do a proper clean at home. I’ve saved a light-colored handbag with this trick after a run-in with a ketchup packet.
A Warning on “Taboo” Stains: Call a Pro
Some stains are wolves in sheep’s clothing. They seem manageable but can permanently ruin leather if treated incorrectly. For stain removal on delicate materials, especially leather and suede, careful methods matter.
My mother-in-law, Brianna, learned this with a favorite suede jacket. A splash of merlot at a party was promptly doused with club soda and salt-a classic fabric remedy. On suede, it created a stiff, discolored patch that no home fix could reverse.
Immediately call a professional leather cleaner for these stains:
- Red Wine & Pigmented Drinks: The dyes sink deep and oxidize.
- Cooking Oils & Grease: Home remedies often spread the grease wider.
- Nail Polish & Permanent Ink: The solvents that remove these can also strip leather’s dyes and finish.
- Unknown Chemical Spills: If you don’t know what it is, don’t guess.
A pro has specialized tools and solutions to pull these stains out without damaging the hide. It’s worth the cost to save a treasured item.
FAQ About Protecting and Cleaning Your Leather
1. A protector left a shiny residue on my leather. What did I do wrong and how do I fix it?
You likely applied too much product or didn’t buff it in properly. Wipe the surface gently with a clean, dry microfiber cloth; if residue remains, lightly dampen the cloth with distilled water and wipe again, then let it dry fully.
2. I just spilled coffee on my protected bag. What’s my first move right now?
Immediately blot-don’t rub-the spill with a clean, absorbent cloth to lift the liquid off the protective barrier. For the best result, follow up by wiping the area with a cloth dampened with a mild soap and water solution, then dry it thoroughly.
3. Can I use white vinegar to clean a stain off my leather sofa?
Only use a diluted white vinegar solution (1:1 with water) for stubborn hard water or mineral stains after testing on a hidden area. For most food or drink spills, a pH-balanced leather cleaner or mild soapy water is safer to avoid damaging the leather’s finish, especially for water stains on leather.
4. My shoes got soaked in the rain, even though they were protected. What now?
Let them air-dry completely away from direct heat, which can take 24 hours. Once fully dry, the protector has been compromised, so you must clean the leather and reapply a fresh coat before wearing them again.
5. How do I know if my leather is clean enough to apply a protector?
Run a clean, white microfiber cloth over the surface-if no dirt or grime comes off, it’s ready. The leather must also be completely dry to the touch, as any moisture will trap mildew under the sealant. From here, you can decide whether to moisturize, seal, or waterproof the leather. Each option offers different protection and longevity, depending on use and climate.
Keeping Your Leather Looking New
The most important lesson is to protect leather before trouble arrives. I check my family’s gear seasonally-it saves the frantic scrubbing later.
Think of leather care as three simple habits. First, wipe items down with a dry cloth every week or two. My son Jason’s soccer shoes get this treatment every Sunday. For gym shoes, especially athletic leather, a quick clean and deodorize routine keeps them fresh between games. Simple habits like these extend the life of your gear.
Second, apply a quality protector after every deep clean. I do this for my handbags and Roger’s outdoor work boots. It creates a barrier against life’s surprises.
Third, tackle spills the moment they happen. A quick blot can prevent a stain from ever setting. I learned this from my mother-in-law, Brianna, who is famously protective of her leather sofa.
Stick with these routines, and your leather will stay beautiful for years. For more tips on specific stains and cleaners, browse the other guides right here on the blog. If dye stains ever occur, our leather stain dye removal guide offers practical steps to restore color.
Written by Suzanne Rosi Beringer. Suzanne is an accomplished chemist, laundry expert and proud mom. She knows the science and chemistry of stains and has personally deal with all kinds of stains such as oil, grease, food and others. She brings her chemistry knowledge and degree expertise to explain and decode the science of stain removal, along with her decades long experience of stain removal. She has tried almost everything and is an expert on professional and DIY stain removal from clothes, fabric, carpet, leather and any other items dearest to you.