How to Remove Hard Water Stains from Glass Shower Doors and Bathroom Faucets
Those cloudy films and chalky white spots on your bathroom surfaces are a common headache. You can usually dissolve them with a simple spray of white vinegar or lemon juice, followed by a gentle scrub.
This article gives you a clear action plan. Here is exactly what we’ll cover:
- What hard water stains are and why they stick so stubbornly to glass and chrome.
- The safest, most effective cleaners, from pantry staples to trusted commercial products.
- Step-by-step methods tailored for glass shower doors, metal faucets, and tile.
- Easy daily habits to prevent the stains from ever building up again.
I’ve tested these techniques for years in my own home, battling the hard water that plagues my mom’s house in North Texas.
Hard Water Stains 101: What You’re Actually Seeing
That frustrating haze on your glass shower door isn’t dirt or grime. I see it in bathrooms all the time. Hard water stains are actually mineral deposits, primarily calcium and magnesium, left behind after water evaporates, often referred to as limescale.
Think of it like the rings my son Jason’s soccer water bottle leaves on the kitchen counter. The water dries, but the minerals stay put.
The appearance can vary. You often get a dull, cloudy film that makes glass look perpetually dirty. Around faucets, you might feel rough, white crusty spots. On chrome, it can create a subtle, rainbow-like scaling that catches the light.
Here’s the key difference: this isn’t a stain from spilled juice or makeup. It’s a mineral or salt deposit.
For a quick Chemistry Corner from my own tests, remember this simple fact. You need to dissolve these deposits, not lift them. Mild acids like white vinegar or citric acid are perfect for the job because they break down the mineral bonds.
Panic Level: Low and Slow (But Don’t Ignore Them)
On my home disaster scale, hard water stains rate a calm 4 out of 10. It’s not an emergency like red wine on a white carpet.
But let them be, and they will worsen. Those mineral deposits bond more tightly to the surface over time, like glue setting.
I call this the “Golden Window” for easy cleaning. A simple, weekly wipe-down prevents a major scrubbing battle later.
My mom Martha in North Texas taught me this. She gives her glass doors a quick pass with a squeegee after every shower. It takes seconds and saves hours.
Even if you’ve ignored the problem for months, don’t stress. With the right acidic cleaner and a little patience, you can usually defeat even old stains. I’ve restored shower doors that looked permanently etched.
Your First Move: The Universal Test & Safety Check
Before you spray or scrub a single thing, do this one simple step. I learned its importance the hard way on an old bathroom faucet at my mom Martha’s house in North Texas.
Her water is so hard it could probably form rocks. I got eager and went straight for a strong solution on the faucet’s front.
I ended up with a faint, dull patch on the finish that was worse than the water spots I was trying to remove. Now, I test first, every single time.
How to Perform a Stress Test
Find a spot no one will ever see. Think the bottom inside corner of the glass shower door, the very back of the faucet, or an inconspicuous edge of a tile.
Apply a small dab of your chosen cleaning solution there. Let it sit for the amount of time you plan to use it on the visible area.
Then, wipe it clean and check. You’re looking for changes in shine, texture, or color.
A slight haze or a difference in how light reflects means that cleaner is too harsh for that surface. Move on to a gentler option.
Critical Warnings: The “Never-Ever” List
This isn’t just about protecting your surfaces. It’s about safety. Please read this twice.
- Never use abrasive scouring pads (like the green or metal kind) on any shiny metal or coated glass. They will scratch chrome, brushed nickel, and any special glass coatings instantly. The scratches become permanent traps for more grime and soap scum.
- Never, under any circumstances, mix cleaning chemicals. This is non-negotiable. Mixing bleach and ammonia creates a toxic, deadly gas. Mixing vinegar and bleach creates a different but also harmful chlorine gas. Use one product at a time and rinse thoroughly before switching.
- Never use pure, undiluted bleach directly on metal faucets or fixtures for “soaking.” It can aggressively corrode and eat away at the finish.
- Never use steel wool. Even the finest grade can leave behind tiny metal particles that rust, creating new orange stains on your surfaces.
The Safe Tool: Scratch-Free Pads
So what can you use for a little extra scrubbing power? The blue, “non-scratch” or “scratch-free” scouring pads are your best friend.
I use them constantly. They provide gentle abrasion that can lift stubborn mineral deposits without leaving visible scratches on glass or most metal finishes.
For a visual check, the safe pads are almost always blue and feel slightly spongy, while the dangerous abrasive pads are usually green, beige, or metal and feel harsh. When in doubt, test the blue pad on your hidden spot too.
My rule is simple: if the stain is so tough it needs more than a blue pad and some elbow grease, the problem isn’t my tool. It’s my cleaning solution. I go back and try a different method, not a harsher scrubber.
The Surface Compatibility Guide: Pick Your Fighter
First, take a deep breath. I promise this is simpler than it seems.
Most bathroom surfaces-glass, chrome, porcelain-are non-porous. The mineral crust is sitting on top, not soaked deep within. That means we can dissolve it or scrub it off without ruining the finish underneath.
Here is your battle plan. Think of it like picking the right tool from the garage for a specific job.
| Surface Type | Safe, Effective Cleaners | My Go-To Method & Why |
|---|---|---|
| Glass Shower Doors | White vinegar, CLR, Bar Keepers Friend soft cleanser paste | I start with undiluted white vinegar in a spray bottle. The acid cuts through the lime scale without scratching. For the stubborn, cloudy film on Jason’s shower door, I make a paste of Bar Keepers Friend and water. Its oxalic acid is a powerhouse. |
| Chrome or Stainless Faucets | White vinegar soak (paper towels), mild dish soap, lemon juice | For Roger’s faucet covered in white spots, I soak paper towels in vinegar and wrap them around the fixture. Letting it sit for 20 minutes lets the acid work without harsh scrubbing that can mar the shine. |
| Porcelain Sink or Tub | Baking soda paste, citric acid powder, gentle bathroom spray | Baking soda mixed with a little water into a thick paste is my gentle scrubber. It provides abrasion without being harsh. For the tough ring in the tub, a sprinkle of citric acid powder (like from the canning aisle) and some warm water works like magic. |
| Natural Stone (Granite, Marble) | ONLY pH-neutral, stone-specific cleaners. Never vinegar or CLR. | This is the critical one. My mom Martha taught me this the hard way. Acids like vinegar or CLR will etch the surface, leaving a permanent dull spot. I use a cleaner labeled specifically for stone and a soft microfiber cloth. |
The golden rule is to match the cleaner’s strength to the stain’s toughness and the surface’s delicacy. You wouldn’t use a pressure washer on a stained silk blouse. The same logic applies here.
Always test your chosen method in a small, inconspicuous spot first. This gives you confidence before tackling the whole door or faucet. Now, let’s get those surfaces shining.
How Do You Get Hard Water Stains Off Glass Shower Doors?
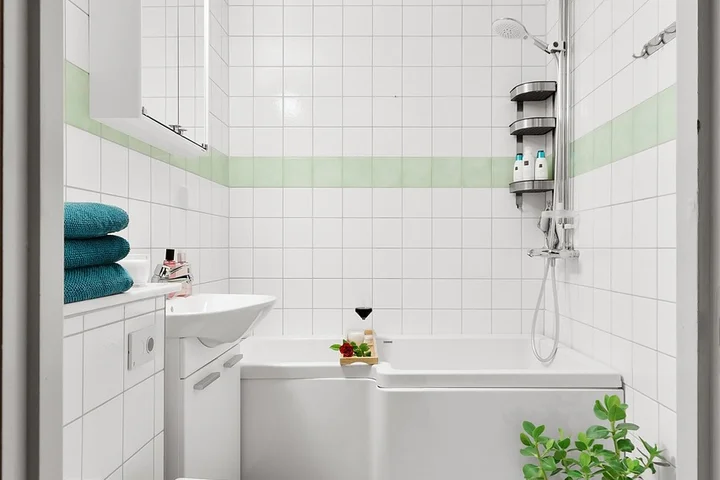
You can get rid of that cloudy, chalky film. I know it feels permanent, like it’s etched into the glass. It usually isn’t. The trick is breaking the bond between the mineral deposit and the surface.
I think of it in two stages: dissolving the widespread film and scouring the stubborn spots. Here’s how I tackle it at home, starting with my go-to method for the worst buildup.
Method 1: The Vinegar Soak (For Heavy Film)
White distilled vinegar is my first line of defense. The acid cuts through mineral scale beautifully. For a serious film, you need to let it work.
Heating the vinegar first makes it much more effective at breaking down the crusty deposits.
- Warm a cup of white vinegar in the microwave for about 45 seconds. Be careful, the container will be hot.
- Apply the warm vinegar directly to the glass. I use a spray bottle for coverage or a soaked sponge. Get the doors good and wet with it.
- This is the key step: let it dwell. For a light haze, 5-10 minutes works. For the thick, white crust in my kids’ shower, I cover the wet vinegar with plastic wrap. This keeps it from drying out. I let it sit for 30 minutes, sometimes an hour.
- After it soaks, use a non-scratch scrub pad or sponge and scrub in small circles. You should see the film turning milky and wiping away.
- Rinse thoroughly with warm water and dry with a microfiber cloth.
My aunt Jessica in Arizona swears by this for her shower doors. The vinegar smell fades quickly once you rinse.
Method 2: The Paste Scrub (For Stubborn Spots)
Sometimes, vinegar alone leaves behind little white specks or rings. That’s where a gentle abrasive paste comes in.
A baking soda paste gives you just enough grit to scrub away leftover spots without scratching the glass.
You have two easy paste options:
- Baking Soda & Water: Mix into a thick, spreadable paste.
- Baking Soda & Dish Soap: The soap adds cleaning power and makes it cling better. This is my favorite for spot treatment.
- Apply your paste directly to the tough spots with a damp sponge or your fingers.
- Let it sit on the stain for 5-10 minutes. The baking soda will continue to work on the minerals.
- Gently scrub the area with a non-scratch blue scrub pad. Use light pressure and small circles.
- Rinse the paste away completely. You’ll see the spot is gone.
I used this just last week on a faucet where water constantly drips. The paste lifted the ring right off.
Method 3: Commercial Cleaner Deep Dive
When natural methods feel like too much work, a dedicated product is a smart choice. Let’s talk about two common ones.
Does CLR remove hard water stains? Yes, absolutely. CLR (Calcium, Lime, Rust) is literally formulated for this job. It’s a stronger acid than vinegar, so it works faster on severe scale.
Always wear gloves and ensure your bathroom is well-ventilated when using strong cleaners like CLR.
Spray it on, let it sit for a minute or two (don’t let it dry), then scrub and rinse. It’s powerful stuff. I keep a bottle for the annual deep clean of our showerhead.
Does Bar Keepers Friend remove hard water stains? Yes, but use the right version. The Bar Keepers Friend Soft Cleanser is perfect. It contains oxalic acid and a fine abrasive, which are effective for removing hard water stains from sinks.
It works like my baking soda paste but is chemically formulated for minerals. Apply it, let it sit briefly, then gently scrub with a soft cloth. It’s fantastic on chrome faucets and porcelain sinks with water spots.
Field Note: My #1 Maintenance Tip
After I spend an hour cleaning my shower doors, I want it to last. My secret weapon costs about five dollars.
Using a squeegee on the glass after every shower is the single best thing you can do to prevent hard water stains from coming back.
It takes my husband Roger and I about 15 seconds. We keep the squeegee hanging in the shower. This simple habit stops water from evaporating and leaving new minerals behind. It keeps the glass clear for months between deep cleanings.
How Do You Clean Hard Water Stains from Faucets and Fixtures?
Those chalky white rings on your faucets are just mineral deposits from hard water. I see them all the time on my chrome bathroom taps. You can tackle them on chrome, stainless steel, and brushed nickel with a simple, safe acid.
Plain white vinegar is my first choice. Its mild acidity dissolves the crusty buildup without harsh chemicals.
The Vinegar-Soaked Paper Towel Wrap for Faucet Bodies
This method works for the curved spout and base of your faucet. It lets the vinegar cling and work.
- Soak a few paper towels in undiluted white vinegar. You want them dripping wet.
- Wrap the soaked towels around the stained parts of the faucet. Cover every spot.
- Let it sit for 20 minutes. The vinegar smell is sharp, but it means it’s working.
- Remove the towels and wipe the fixture clean with a damp cloth. The stains should wipe right off.
For stubborn spots, you might need to gently scrub with an old toothbrush after soaking. I had to do this on our guest bathroom faucet after my mother-in-law Brianna’s visit. Her lotions left a nasty film mixed with hard water spots.
The Baggie Soak for Aerators and Showerheads
Small holes get clogged with minerals. Soaking is the only way to get inside.
- Fill a plastic sandwich bag about halfway with white vinegar.
- Place the bag over the showerhead or faucet aerator so it’s submerged.
- Secure the bag tightly around the pipe with a rubber band or hair tie.
- Let it soak for at least an hour. For a badly clogged showerhead, I sometimes leave it overnight.
- Remove the bag, run the water for a minute to rinse, and watch the flow improve.
This soak clears out the internal buildup you can’t see, restoring water pressure. My son Jason’s soccer buddy Edward once unscrewed our aerator out of curiosity. The grit inside looked like sand. A quick baggie soak fixed it perfectly.
How to Get Hard Water Stains Off Stainless Steel
Stainless steel sinks or fixtures use the same vinegar wrap. But there’s one critical extra step.
After treating with vinegar, always wipe and dry the surface following the direction of the metal’s grain.
Wiping against the grain can leave tiny, permanent scratches that look like streaks. I learned this the hard way on our kitchen sink. Now I use a soft microfiber cloth and always move it in one direction, just like I do when cleaning Roger’s stainless steel tools.
A Quick Word on Abrasive Cleaners
Do not use abrasive pads or gritty powders on any of these finishes.
Scrubbing with anything harsh will microscratch the surface, making future stains stick even worse. It creates a dull, cloudy appearance that’s almost impossible to fix. My mom Martha always said to treat fixtures like fine glass, not a dirty grill.
Tackling Other Bathroom Surfaces: Sinks, Tiles, and Toilets
A question I hear often is how to get those chalky white rings off your sink or the stubborn stain from toilet bowl water. Hard water doesn’t stop at glass. It coats everything, including rust stains on bathroom surfaces.
You can handle these surfaces with common items from your pantry. I keep a stockpile for our two-bathroom house.
Porcelain Sinks and Bathtubs
Baking soda is my first move for porcelain. It’s gently abrasive without scratching.
Make a thick paste with baking soda and a little water. Smear it over the stained area. Let it sit for ten minutes. This method can help remove stains from suede when used with care. For suede, test a hidden area first and avoid over-wetting.
Use a soft cloth or non-scratch sponge to scrub in small circles. The paste will turn a grayish color as it lifts the mineral deposit.
This method works perfectly on our tub after Jessica’s colorful bath times. Rinse everything away with warm water for a clean, streak-free finish.
Toilet Bowl Rings
That nasty ring at the water line is just dried minerals. You have two great options.
Citric acid powder is fantastic. Sprinkle a tablespoon or two directly onto the stain, making sure it’s above the water line. Let it sit for at least 30 minutes, then scrub with your toilet brush and flush. It’s especially effective for yellow stains in bathtubs and toilets.
My aunt Jessica in Arizona uses citric acid for her wine-stained glasses, and it works just as well on toilet rings.
For very tough rings, use a pumice stone made for toilets. Keep the stone and the stain wet. Gently rub the pumice over the mark.
The mineral deposit will come off like magic. Be gentle to avoid scratching the porcelain.
Tile and Grout Lines
Your approach here depends entirely on your grout. Is it sealed or not? If water beads on it, it’s sealed.
For sealed grout, a simple vinegar spray works. Mix equal parts white vinegar and water in a spray bottle.
Spray it on the tile and grout. Let it dwell for five minutes to dissolve the lime scale. Wipe clean with a damp microfiber cloth.
I use this weekly in our shower to prevent a big cleanup later. The vinegar smell fades quickly.
If your grout is unsealed and has turned dark, you need a different tactic. Make a paste with oxygenated bleach powder (like OxiClean) and water. This method is particularly effective for iron stains in tile grout.
Wear gloves. Apply the paste only to the stained grout lines. Let it sit for up to 15 minutes, then scrub gently with an old toothbrush and rinse. This method is especially helpful for removing paint stains from grout. For paint stains specifically, a related guide will be linked in the next step.
Always test any cleaner on a small, hidden area of grout first.
Keeping Drains Clear
Hard water scale builds up inside drains, slowing them down. A monthly maintenance flush can help.
If your pipes are PVC or modern plastic, slowly pour a full kettle of boiling water down the drain. Do this once a month.
The heat helps dissolve soap scum and mineral deposits clinging to the pipes. My mom Martha in North Texas does this religiously, and she never has drain clogs.
Do not use boiling water if you have old metal pipes, as the sudden heat can damage the seals.
When Stains Fight Back: Troubleshooting Tough Buildup
Sometimes, those milky-white splotches seem to laugh at your vinegar spray. You’re not imagining it.
Those stubborn hard water stains can feel permanent, but they usually aren’t. The real danger is when mineral deposits are left for years. They can slowly etch into the glass surface, creating permanent cloudy marks that no cleaner can remove. I learned this the hard way in my son Jason’s bathroom. His shower door had a dull, rough patch I could feel with my fingernail. That was etching, not just a stain.
The Scraper Solution for Flat Glass
For extreme, caked-on scale that liquid cleaners won’t touch, a razor blade scraper is your best friend. But only on perfectly flat, non-textured glass. Never use this on plastic, plexiglass, or mirrored surfaces.
Here’s how I do it safely:
- Spray the glass with your vinegar solution or commercial cleaner to lubricate it.
- Hold the scraper at a very shallow angle, almost flat against the glass.
- Use firm, even pressure and pull it toward you in straight lines. Don’t saw back and forth.
- Wipe the blade clean with a paper towel after each pass.
It makes a satisfying scraping sound and sheets of mineral gunk peel right off. It turned Jason’s door from cloudy back to clear in about ten minutes.
Freeing a Clogged Showerhead
Soaking a showerhead in vinegar dissolves the bulk of the scale. For the really persistent bits clogging the tiny holes, you need a manual tool.
An old toothpick is perfect for this job. It’s soft enough not to damage the metal or plastic nozzles. After the soak, take the showerhead and gently poke each clogged hole with the toothpick. You’ll feel the gritty scale break loose. Rinse it thoroughly under running water. The difference in water pressure is immediate and fantastic.
My mom Martha in North Texas swears by wiping everything down with a dry microfiber cloth after each shower. It sounds like a lot of work, I told her so. But she’s right. It takes 30 seconds and prevents the water from ever drying and leaving spots. I’ve started doing it on my glass door, and I haven’t needed the scraper since. It works.
Post-Treatment and Drying: The Final, Critical Step
You just scrubbed away that crusty, white film. It feels great. But if you walk away now, you’re only halfway done. This step is what separates a lasting clean from a frustrating re-do.
Think of the acid in vinegar or a commercial remover as a hard-working employee. It did its job breaking down the mineral scale. Now, you need to send it home for the day. Leaving any acidic residue on the surface invites new problems, like etching or a sticky, quickly-reappearing film.
Always Rinse Thoroughly
This isn’t a quick splash. I grab a clean spray bottle filled with plain water. I spray down the entire treated area, whether it’s a faucet or the whole shower door.
I watch the water run clear. For shower doors, I’ll sometimes use the handheld shower head on a cool setting to really flood the surface. Your goal is to completely neutralize and wash away every trace of the cleaning agent.
My Aunt Jessica in Arizona taught me this trick. Her water is incredibly hard, and she learned the hard way that skipping the rinse leaves a dull, hazy finish on glass.
Dry With Purpose, Not Chance
Letting bathroom surfaces air dry is how hard water stains are born. Each tiny droplet evaporates and leaves behind a micro-spot of mineral. Understanding drying time for water-based stains on bathroom surfaces helps you intervene before they set. Quick action reduces mineral spots and makes cleaning easier. To stop the cycle, you must intervene.
A clean, dry microfiber cloth is your best friend here. Cotton towels or rags can leave lint and don’t absorb as well. I keep a designated set just for glass and chrome.
- Wipe in one direction using overlapping strokes.
- For large glass doors, I use an “S” pattern to avoid missing spots.
- Check the cloth frequently. Once it feels damp, flip it to a dry section or grab a new one. A wet cloth just smears water around.
Drying the surface yourself is the single most effective way to prevent new water spots from forming the very next time someone showers. It takes two extra minutes but saves you thirty minutes of scrubbing next week.
The Glass Secret: A Streak-Free Finish
For shower glass, I add one more move. After the microfiber cloth, I take another clean cloth and pour a little isopropyl alcohol (the 70% or 90% rubbing alcohol from the pharmacy) right onto it.
I give the glass one final, quick wipe-down. The alcohol dissolves any remaining water residue and evaporates almost instantly. This is my go-to method for the doors on my kids’ shower. It fights the soap scum Jason and Jessica leave behind and makes the glass truly sparkle.
That final alcohol wipe ensures a crystal-clear, streak-free finish that makes your hard work visibly pay off. It’s the detail that makes the whole bathroom feel cleaner.
How Do You Get Rid of Hard Water Stains For Good? Prevention.
Daily/Weekly: Use a Squeegee or Microfiber Towel After Showering
I keep a squeegee hanging right in the shower. After my shower, or after the kids are done, I give the glass a quick swipe.
It takes 30 seconds, but it whisks away the mineral-heavy water before it can dry into a stain.
This simple act is the single most effective thing you can do to prevent new buildup.
My daughter Jessica is three and loves to splash. Without this habit, our doors would have a permanent cloudy film.
A dry microfiber towel works just as well for faucets and mirrors. Just a fast wipe-down keeps everything shining.
Investments: Consider a Water Softener If Buildup Is Constant and Severe
If you’re scrubbing every week and the chalky rings come right back, your water might be very hard.
A water softener installs where water enters your home. It trades hardness minerals for sodium or potassium ions.
It’s a solution for your entire house, protecting your shower, sinks, and even your laundry from scale.
My aunt Jessica in Arizona finally installed one after years of frustration. Now, she just uses mild soap for cleaning.
It is an investment, but for severe cases, it saves you endless time and cleaning product money.
Products: Apply a Commercial Shower Door Sealant or a DIY Rain-X Type Product
For glass doors only, a water repellent coating is a clever trick. It makes water bead up and roll right off.
You can buy dedicated shower door sealants or use a automotive glass water repellent, like Rain-X.
Apply it to perfectly clean, dry glass for a barrier that makes weekly wipe-downs even easier.
I tried this on my own shower door last season. The water beads up so well, it hardly leaves a trace to dry.
Remember, this is only for glass surfaces. Always test a small area first and ensure the room is well-ventilated.
With consistent care, this battle is easily winnable.
Think of prevention not as extra work, but as less cleaning later. A quick squeegee beat is much easier than a deep scrub.
My golden lab Peeta shakes off in the bathroom sometimes. Even with that, our routine keeps everything under control.
FAQ About Removing Hard Water Stains
How can I scrub hard water stains without ruining my shiny faucet finish?
Avoid abrasive pads and powders. Use a non-scratch blue scrub pad or a soft toothbrush with your chosen acidic cleaner, applying gentle pressure to protect the chrome or brushed nickel.
I have sensitive skin and hate the smell of vinegar. Is there an alternative?
Yes, fresh lemon juice works as a mild acid and has a more pleasant scent. For a scent-free option, a paste of baking soda and water provides gentle, effective abrasion for many surfaces.
My guests arrive in an hour and my faucet has water spots. What’s the fastest fix?
Mix a little dish soap with warm water on a soft cloth. This can quickly lift fresh spots and light haze without needing a long acidic soak, giving you a presentable shine fast.
The stains on my shower door have been there for years. Are they permanent?
Not necessarily, but they may require more aggressive dissolving. Try the warm vinegar soak covered with plastic wrap for an hour, or carefully use a razor blade scraper on flat glass as a last resort.
I accidentally used vinegar on my granite sink. What should I do now?
Rinse it thoroughly with water immediately and dry it. Acids can etch natural stone; monitor for a dull spot and consult a stone care professional if a permanent etch appears.
Making Hard Water Stains a Thing of the Past
From my years of home care, I know that preventing buildup with a daily wipe-down is far easier than removing set-in stains. Always start with the gentlest method, like a vinegar spray, to protect your surfaces. You can follow along with our family’s cleaning adventures and get more practical advice on Stain Wiki.
Suzanne is an accomplished chemist, laundry expert and proud mom. She knows the science and chemistry of stains and has personally deal with all kinds of stains such as oil, grease, food and others. She brings her chemistry knowledge and degree expertise to explain and decode the science of stain removal, along with her decades long experience of stain removal. She has tried almost everything and is an expert on professional and DIY stain removal from clothes, fabric, carpet, leather and any other items dearest to you.