How Do You Remove Stubborn Stains, Limescale, and Rings from a Toilet Bowl?
Seeing those ugly brown or orange rings in your toilet can make you think a full replacement is the only fix, but I promise you, it almost never is. With the right approach and a little patience, you can restore your toilet bowl to a bright, clean white without harsh scrubbing or costly chemicals.
This guide will walk you through the methods I use in my own home, from the simple pumice stone trick my Aunt Jessica swears by to the natural acid soak I learned from my mom, Martha. We will cover using a pumice stone safely, the power of natural acids like vinegar and citric acid, when to use a commercial bowl cleaner, and how to prevent these stains from coming back so quickly.
I’ve been testing and writing about stain removal for years, tackling everything from Jason’s grass-stained soccer kits to the mystery stains Peeta the lab tracks in.
First, Figure Out What Kind of Stain You’re Fighting
Walking into the bathroom and seeing a stained toilet bowl is never fun. My son Jason’s soccer buddies, Edward included, seem to have a knack for leaving behind a “souvenir” after game-day snacks and sodas. But not every stain is the same. Identifying the enemy is your first and most powerful move, saving you from wasted scrubbing and the wrong chemicals.
Here’s a quick guide to the usual suspects:
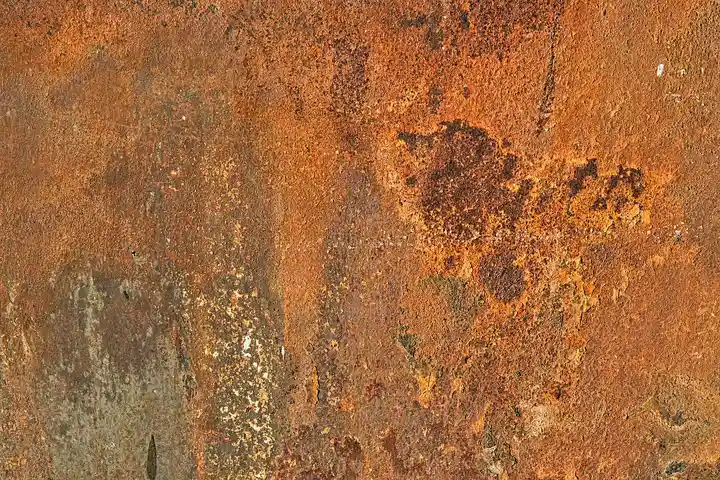
- Rust Stains: These are orange-brown, often looking like a spill of iced tea. They feel gritty if you run a (gloved!) finger over them. They’re common if you have old iron pipes or use well water, something my mother-in-law Brianna in Southern Texas deals with constantly.
- Mineral Deposits & Limescale: Think chalky white or beige crust. It builds up where water sits and evaporates, leaving behind all the calcium and magnesium from hard water. It’s crusty and can feel almost like a layer of dried toothpaste on the porcelain.
- Hard Water Rings: This is that stubborn, often dark line right at the water level. It’s a concentrated band of limescale, soap scum, and general grime that acts like a bathtub ring for your toilet. It clings with impressive tenacity.
- Organic or Mold Stains: These can be pink, orange, or even black. The pink slime (Serratia marcescens) loves moist, stagnant areas and is a fan of phosphates in soap. It feels slimy. Darker mold or mildew spots have a musty smell and often appear in hidden corners under the rim.
Once you know what you’re up against, you can choose your weapon wisely. A method that dissolves minerals won’t touch rust, and vice versa.
The Very First Thing to Do (Before Any Cleaner)
Here’s the trade secret my Aunt Jessica taught me years ago, and it applies whether you’re using a fancy product or a homemade paste: You must work on a dry battlefield. Trying to clean a stain floating in a bowl of water is like trying to wash a specific spot on your car during a rainstorm. The cleaner gets diluted and washed away before it can do its job.
Let’s get that bowl empty.
- Locate the shut-off valve behind or beside the toilet. It’s usually a small silver or chrome handle. Turn it clockwise until it stops. This cuts off the water supply to the tank.
- Flush the toilet. The tank will empty into the bowl, and then… nothing will refill. You’ll be left with the water that was in the bowl.
- Get the last of the water out. Use an old cup or a small container to scoop out as much water as you can. For the final, unreachable puddle in the trap (the curved bottom of the bowl), take an old rag or towel, put on a glove, and simply push it down into the water to soak it all up. Wring it into a bucket. It’s a little messy, but it works perfectly.
Now you have direct access to the stained porcelain. Any cleaner you apply next will cling to the surface, sit directly on the stain, and work at full strength. This one prep step is what makes the difference between a 30-minute scrubbing marathon and a 10-minute effective treatment. I learned this the hard way years ago, watching a whole bottle of cleaner just swirl uselessly down the drain. It’s especially important for tough stains on porcelain and ceramic sinks.
My Go-To Method for Crusty Limescale and Hard Water Rings
How do you remove limescale from a toilet bowl? You dissolve it. The same goes for that stubborn hard water ring. They’re just different versions of the same problem: minerals from your water, like calcium and magnesium, that have dried and cemented themselves to the porcelain. An acidic cleaner breaks those mineral bonds.
I’ve tried a dozen products, from foaming gels to harsh chemical tablets. For the really crusty, textured buildup, nothing beats a simple acid paste you make yourself. It’s cheap, it’s effective, and you control the strength.
Why Acid Works on Mineral Stains
Think of limescale like glue made from rock. You can’t just scrub it off once it’s set; you need to break down the glue. Acids like citric acid (from lemons) or acetic acid (from vinegar) react with the calcium carbonate in the stains, dissolving them back into a liquid you can wipe away. It’s a chemical reaction, not elbow grease—unlike some stains on granite that require a different approach.
You don’t need aggressive, fume-filled chemicals to dissolve what is essentially dried-up rock water; a simple, food-safe acid will do the job safely and completely.
The Two-Ingredient Power Paste
My absolute favorite for this is citric acid powder mixed with a little water or baking soda. I keep a big bag of food-grade citric acid in my laundry room, right next to my washing soda. I use it for this, for descaling my coffee maker, and even for some laundry boosts. White vinegar works great too, but for vertical surfaces and thick paste applications, the powder is less runny.
Here’s my step-by-step method for tackling that ugly ring.
- Prep the Area. Put on some rubber gloves. Flush the toilet to wet the bowl, then use the brush or a cup to scoop out most of the water from the bowl, so you can work directly on the dry(ish) stain. I just use a small disposable cup for this-the one from my kid’s soccer party works perfectly.
- Make Your Paste. In a small bowl, mix 3 parts citric acid powder with 1 part water or baking soda. If using baking soda, you’ll get a fizzing reaction-that’s fine. Stir until you have a thick, spreadable paste, like gritty toothpaste. For vinegar, you can soak paper towels in it and plaster them directly onto the stain.
- Apply It Thick. Using your fingers (with gloves on!) or an old spoon, smear a generous layer of paste directly onto the mineral ring. You want to completely cover it, going a bit above and below the line. The key is to create a layer so thick that the acid can work for hours without drying out completely.
- Let Chemistry Do the Work. Walk away. For a light ring, 2-3 hours might be enough. For the kind of textured, brownish buildup my Aunt Jessica has in her Arizona home, I leave it overnight. Close the lid to prevent pets from drinking it (sorry, Peeta!).
- Scrub and Reveal. After the wait time, the paste will likely be dry and crusty. Give it a quick scrub with your toilet brush to loosen it. For any remaining spots, a dedicated pumice stone is your best friend. Wet the stone and the porcelain, and gently scrub. The pumice is softer than porcelain but harder than the limescale, so it scrapes the gunk off without scratching. Flush to rinse everything away.
You might need to repeat this for exceptionally bad cases, but one treatment usually does the trick. This entire process is the direct answer to “how do I remove hard water stains from toilet.” It’s a battle of patience, not force. The same approach also works on other bathroom surfaces to remove hard water stains.
When my mom, Martha, visited and saw the sparkling bowl, she just nodded and said, “See? I told you my trick with vinegar works.” She was right, of course. Sometimes the old ways, backed by a little basic science, are the most satisfying solutions of all.
Tackling Stubborn Brown and Rust Stains
Yes, CLR can remove certain brown toilet stains, but it’s a specialist tool for a specific job. The brown streaks and rings you see are often a mix of hard water minerals (limescale) and iron deposits (rust). Acid-based cleaners like CLR, Lime-A-Way, or even a professional-grade muriatic acid solution are designed to dissolve those mineral bonds. Think of these acids as a negotiation with the stain, breaking down its structure so you can scrub it away. They won’t work as well on organic stains from mold or bacteria, but for rust and scale, they’re your first line of defense—especially when you remove and prevent rust stains in toilet bowls.
Safety is Non-Negotiable With Acids
Before you even think about opening that bottle, gear up. These chemicals demand respect.
- Wear rubber gloves that go up your forearms and safety goggles. A splash in the eye is no joke.
- Open a window or turn on the bathroom fan. You do not want to breathe in the fumes.
- This is the most critical rule: never, ever mix an acid-based cleaner with bleach or a cleaner containing bleach. The chemical reaction creates toxic chlorine gas. I keep my bleach products in a completely different cabinet for this very reason.
The Controlled Attack Method
Dumping a whole bottle in is wasteful and risky. You want to apply the power directly to the problem.
- Flush the toilet to lower the water level, exposing the stained ceramic.
- Pour your chosen acid cleaner carefully directly onto the worst stain areas. You’ll hear it start to fizz-that’s the acid working.
- Let it sit. For tough stains, 10-15 minutes is good. Don’t let it dry out.
- Take your toilet brush and scrub firmly. You should see the stain begin to dissolve and lift.
- Flush thoroughly, multiple times if needed. You must rinse all the acid residue away.
This focused approach puts the chemistry where it’s needed and makes cleanup safer and easier.
A Lesson from Martha’s Well
My mom Martha lives in North Texas on well water that’s practically orange with iron. Her toilets were a disaster of rusty streaks. I visited with my bottle of Lime-A-Way and my safety goggles. We applied it just as I described, and the fizzing was intense-a sure sign of serious iron deposits. After a good scrub and flush, the bowl was a clean, white surprise. She was thrilled, but we both knew it was a temporary win. With her water, it’s a constant maintenance battle. The experience taught me that knowing your water source is half the stain-fighting battle.
The Gentle Scouring Power of a Pumice Stone
For lighter rust stains or for anyone hesitant to use heavy chemicals, a simple pumice stone is a miracle worker. The key is to keep both the stone and the toilet surface soaking wet. Used gently on a wet surface, the pumice will abrade the stain away without scratching the porcelain, making it a great alternative to chemical treatments for iron stains. I keep one in my cleaning caddy for quick touch-ups. Just hold it under the water, gently rub the stain in a circular motion, and watch the brown mark disappear. It’s satisfying, effective, and completely chemical-free.
What About That Weird Pink or Black Discoloration?
Let’s talk about those creepy stains that seem to grow, not just sit there. That pink ring or those black specks aren’t just dirt.
That pink slime is almost always a bacteria called *Serratia marcescens*. It thrives on moisture, phosphates from soaps, and, well, bathroom air. Those black or dark green patches are usually mold or mildew. You’re not dirty, you’re just hosting a tiny, damp ecosystem.
For these living stains, you need a disinfectant, not just a scrubbing.
Bleach: Your Microbial Bouncer
For the porcelain bowl itself, a prolonged bleach treatment is the most reliable way to kill the organisms and lift the stain. For other parts, like the plastic tank lid, a quicker wipe-down works.
For the Porcelain Bowl (The Deep Treatment)
This method requires the bowl to be empty for a long soak. My aunt Jessica from Arizona taught me this trick for her guest bathroom that no one used for months.
- Put on some gloves and open a window for ventilation. Bleach fumes are no joke.
- Flush the toilet to wet the bowl, then use the plunger or a small cup to push almost all the water out of the bowl and down the drain. You want the stained areas exposed and as dry as possible.
- Apply a thick gel bleach cleaner directly onto the stains, or carefully pour about one cup of plain liquid chlorine bleach around the sides, targeting the discolored rings and spots.
- Walk away. Let it sit for at least 30 minutes. For tough, old stains, I let it sit for an hour or more. This dwell time is what kills the colony and breaks up the film.
- Come back, put your gloves on, and give it a good scrub with your toilet brush. You’ll see the color lifting.
- Flush once to rinse away the bleach and loosened gunk. You may need to flush a second time to clear it all.
For Non-Porcelain Parts (Tank Lid, Seat, Base)
Never use straight bleach on colored plastics, painted wood, or metal fittings, it can cause permanent discoloration or damage. My mother-in-law Brianna learned this the hard way on a vintage seat years ago.
For these areas, use a commercial bathroom disinfectant spray or a diluted bleach solution (1/2 cup bleach to a gallon of water) on a cloth. Wipe the surface, let it sit for 5-10 minutes to disinfect, then rinse with a clean, wet cloth and dry.
When Bleach Isn’t the Answer (Or You Hate the Smell)
If you have a septic system or just can’t handle the bleach smell, a hydrogen peroxide-based cleaner is a great alternative. It’s less harsh on surfaces and doesn’t have the same pungent odor, but it still has oxidizing power to tackle those microbial stains. The process is the same: apply, let it dwell, then scrub.
Vinegar won’t kill *Serratia* effectively. It’s great for mineral deposits, but for this pink menace, you need the stronger stuff.
I keep a gel bleach with a scrubbing wand under my sink just for this monthly battle. After my son Jason’s soccer buddy Edward visited a few times, that pink line appeared like clockwork. A quick gel treatment while I clean the mirror and counter takes care of it before it ever becomes a stubborn problem.
Critical Warnings: What Never to Do
Before you grab anything from the garage, let’s talk safety. Some of the “clever” tricks you hear can ruin your toilet or make a dangerous mess. I learned this the hard way when my husband, Roger, nearly used a garage product on a bathroom sink. Here’s your must-read list of what to avoid.
WD-40 is Not a Cleaner
Let’s tackle a common search right now: does WD-40 remove hard water stains in a toilet? The answer is a firm, absolute NO, and using it will create a much bigger problem. WD-40 is a lubricant and water-displacing penetrant. It’s designed for squeaky hinges and loosening rusty bolts, not for cleaning porcelain. In your toilet, it will leave a greasy, nearly impossible-to-remove film on top of the stain. The bowl will become dangerously slippery, and you’ll then need a degreaser just to get back to square one.
The “Never-Use” Item Checklist
Keep these items far away from your toilet bowl.
- Abrasive Pads or Powders: Steel wool, green abrasive scrub pads, or harsh cleansers with pumice will scratch the glossy porcelain finish. Those microscopic scratches are where new stains and bacteria will hide, making your toilet get dirty faster forever. I only use a soft-bristled toilet brush or a gentle melamine foam (magic eraser) pad for scrubbing.
- Undiluted Muriatic (Hydrochloric) Acid: This is an extreme, last-resort chemical for professionals. The fumes are incredibly dangerous, and it can violently react with other residues. If you must use it, extreme ventilation, head-to-toe protective gear, and precise dilution are non-negotiable. For most homeowners, it’s overkill and too risky.
- Chemical Mixing, Full Stop: This is the most critical rule. Never, ever mix cleaning chemicals. Mixing bleach with ammonia, or bleach with an acid-based cleaner (like vinegar or CLR), creates toxic, lung-damaging gases. Always flush the toilet thoroughly with fresh water between using different products. Clean with one thing at a time.
Know Your Materials
These methods are designed for standard vitreous porcelain toilet bowls. Be mindful of any metal parts. The bolts that secure the toilet to the floor, the pipe fittings inside the tank, and the hinges on the seat are often metal. While brief contact with a diluted acidic cleaner is usually fine, letting a strong acid sit on these parts can cause corrosion over time. After a cleaning soak, I always do a final rinse by flushing a few times to make sure all cleaner is washed away from the hidden trap and connections. If urine odor is a concern in a home toilet, pair these steps with a deodorizing rinse. A simple baking soda flush or an enzyme-based cleaner can help neutralize odors without harsh chemicals.
Always Test First
If you’re trying a new commercial product or a strong homemade paste, do a spot test. The best place is on the inside of the toilet tank lid. It’s the same porcelain but out of sight. Apply a small dab, wait 10-15 minutes, then rinse and check for any dulling or etching. This simple step saved my aunt Jessica’s vintage colored toilet from a potential disaster with a “guaranteed” cleaner that was too harsh.
Safe DIY Alternatives If You’re Out of Cleaners

We’ve all been there. You go to tackle that unsightly ring, and the cleaning caddy is empty. I learned from my mom, Martha, that a well-stocked home often has the answer. You don’t always need a specialty product.
#1: The Citric Acid or Vinegar Soak
This is my absolute go-to. Both white vinegar and citric acid (often sold as a powder for canning) are weak acids that dissolve limescale on contact. It’s a chemical reaction, not just a cover-up.
For a heavy-duty soak, pour one to two cups of white vinegar directly into the toilet bowl, making sure it coats the stained areas under the rim. Let it work its magic for at least an hour, but overnight is ideal. For a more targeted approach, make a paste with citric acid powder and a few drops of water. Smear it thickly over the stains and let it sit. The paste will cling to vertical surfaces. This method is especially effective for yellow stains in bathtubs and toilets.
After the wait, grab your toilet brush and scrub. The scale should fizz and break apart easily. Flush to rinse. A word of caution, straight acid can be harsh on skin. I always wear rubber gloves for this job, the same pink ones I use for dye projects. Never, ever mix this with bleach. The fumes are dangerous.
Option 2: The Borax Paste Scrub
Borax is a workhorse. It’s a mild alkali and a very gentle abrasive, fantastic for scrubbing away discoloration without scratching porcelain. My husband Roger uses a similar paste to pre-treat stains on his hunting gear.
Mix about a half-cup of borax powder with just enough warm water to form a thick, spreadable paste. Using a gloved hand or an old spoon, apply the paste to every stained part of the bowl, especially under the rim. Let it sit for 20-30 minutes.
The borax works to soften the deposits, so when you come back with a sturdy brush, the grime lifts away with minimal elbow grease. This method is also septic-safe, which Brianna, my mother-in-law, always appreciates when she visits.
Option 3: Dishwasher Powder for Light Maintenance
This is a great trick for a quick refresh. Many dishwasher powders contain citric acid to fight hard water film on your glasses. That same ingredient can work on your toilet.
Sprinkle a tablespoon or two of powder directly into a dry bowl. Take your toilet brush, get it slightly damp, and scrub the powder around to create a light abrasive cleaning slurry. Focus on the water line and under the rim. Let it sit for five to ten minutes, then scrub again and flush.
This isn’t for severe, set-in stains, but it’s perfect for wiping out the beginnings of a ring before company comes over. I’ve done this more than once before book club meets at my house.
A Note on the Classic Coke Myth
You’ll hear people swear by pouring a can of cola into the bowl. The phosphoric acid in it can work on limescale. But here’s the practical truth from a messy household.
The sugar content is a problem. It leaves a sticky residue that can actually attract more dirt and dust, making the bowl grimy faster. Compared to direct acids like vinegar or citric acid, the concentration is much weaker. You’re left with a sugary, diluted solution to clean up.
I tried it once years ago. My daughter Jessica’s sticky juice spills taught me that sugar and surfaces don’t mix well. While the science behind using Coke is real, the messy aftermath makes it a less effective choice than the direct, sugar-free alternatives you already have.
When the Stain Won’t Budge: Troubleshooting Old, Set-In Stains
How Do You Remove Old Toilet Bowl Stains? (And Why You Might Not See a Difference)
Old toilet bowl stains have a way of making you feel like you’ve failed. I get it. After my son Jason’s soccer team celebrated at our house, the downstairs toilet had a dark, gritty ring that regular cleaning ignored. To remove old stains, you must attack the mineral buildup or organic grime that has fused with the porcelain over months or years. My first step is always to turn off the water valve behind the toilet and flush to drain the bowl. This gives your cleaner a fighting chance without being watered down. It’s particularly important if you’re dealing with stubborn stains, such as old urine stains that can cause odors on toilet seats.
If you’ve tried once and see no change, you’re not alone. The “I don’t see a difference” moment is common. Old stains are often layered, so a quick wipe won’t work; they need extended contact time with the right agent. For a ring that looked like a muddy tire track, I let a thick paste of baking soda and white vinegar sit on it for three hours. It only lightened it. That’s when I knew I needed a stronger approach, like a hydrochloric acid based cleaner, used with gloves and the window open.
Combining Methods for Tough Stains
One trick rarely fixes everything. For the most stubborn problems, layer an acid treatment to dissolve the stain, then use a pumice stone for physical removal. From ink to grease to wine—the toughest stains—these moments call for a tested plan. In the next steps, you’ll find the exact methods I use for those stubborn cases. This combo saved my guest bathroom after a visit from my wine loving aunt Jessica. Here is my exact process.
- Ensure the bowl is empty of water. Pour in two cups of white vinegar or a commercial lime scale remover. Let it soak for at least four hours, or overnight if you can. The acid breaks the bonds of the stain.
- Wear a rubber glove. Wet a pumice scouring stone under the tap and gently scrub the treated area. The stone should glide, not scratch. It feels like erasing a pencil mark from a smooth plate.
- Flush to rinse everything away. If a shadow remains, repeat the acid soak. Sometimes, I do this two days in a row for really set in discoloration.
When a Toy is Causing Trouble: Safe Removal Tips
Kids are creative. My daughter Jessica once gave a small plastic pony a “bath,” and it got lodged, creating a persistent shadow and a weak flush. If a toy is blocking your toilet or causing a stain shadow, immediately turn off the water supply valve to prevent an overflow. Then, try to retrieve it gently. A straightened metal coat hanger with a small hook taped at the end can fish out soft toys. For something hard, a plunger with gentle, steady pressure might move it. Do not pour drain cleaner or bleach in there first, as it could damage the toy or create harmful fumes.
Accepting the Unremovable: When Stains Are Permanent
You can’t win them all. Some stains, particularly deep rust from old iron pipes, sink into the porcelain’s tiny pores and become a permanent part of the fixture. Our first home had these orange brown trails that even professional products couldn’t lift. At that point, your goal shifts to management. Regular maintenance cleaning with a mild acid, like a weekly spray of vinegar, will prevent new buildup and make the old stain less glaring. My mother in law Brianna calls this “making peace with the porcelain.” It is not about perfection, it is about keeping it clean and hygienic.
Final Sanity Check: Stains Above vs. Below the Water Line
Take a breath and look closely. Stains located above the water line are far easier to handle because you can work on them directly without draining the toilet. If the stain is only under water, you know to drain the bowl first for any treatment. But if the water in the bowl itself has a yellow or brown tint, the problem is not the bowl’s surface. The issue is likely in the tank or your home’s plumbing. Lift the tank lid and check for rust flakes or sediment. A worn out flapper valve or corroded parts can stain the water continuously. Fixing that source will often clear the bowl water over a few flushes.
Keeping the Stains From Coming Back (The Real Win)
Getting the toilet sparkling clean feels amazing. Keeping it that way is the real victory. It’s not about deep chemical knowledge. It’s about simple, consistent habits that take less than a minute of your time.
Think of it like brushing your teeth. You don’t wait for a cavity to start scrubbing. A quick daily brush prevents the big problems. Your toilet bowl needs the same kind of casual, preventive care.
Your New Weekly Ritual
Every Saturday morning, after my coffee and before the kids’ soccer chaos, I do a five-second toilet check. I grab the bowl brush and give the inside a quick, vigorous swirl. No cleaner, no gloves needed most weeks.
This simple weekly scrub physically disturbs the minerals and grime before they can cement themselves into a hard water ring or stain. You’re breaking the bond early. It’s the single most effective habit I’ve picked up from years of managing hard water and a busy family.
The Monthly Treatment Day
Once a month, usually on a lazy Sunday, I give the bowl a little extra love. This is for the spots the weekly brush might miss, like the tricky area under the rim.
I use my favorite DIY paste-a couple tablespoons of citric acid powder mixed with just enough water to form a thick slurry. With a gloved hand, I smear it under the rim and around any suspicious-looking spots. I let it sit for 20 minutes while I fold laundry. Then, a quick scrub and flush. Done.
This monthly treatment dissolves the beginnings of limescale and keeps everything fresh. You can use your chosen acid-citric, vinegar, even a bit of borax paste works.
When You Need More Than Scrubbing
If your water is extremely hard, surface cleaning is just a holding action. You’re fighting the source water itself. My Aunt Jessica in Arizona deals with this. Her water leaves a chalky film on everything.
For a permanent solution, a whole-house water softener is the gold standard. It’s an investment, but it protects every faucet, showerhead, and appliance in your home.
A simpler, more targeted option is an in-tank cleaning tablet. You must check that any drop-in tablet is safe for your toilet’s internal parts, especially the flapper. Some harsh chemicals can degrade rubber and plastic over time. I look for enzymatic or oxygen-based cleaners for a gentler, long-term solution.
The Bottom Line
Staying ahead of toilet stains is far easier than the epic, elbow-grease scrub sessions. That bright, clean bowl you just worked so hard for? A tiny bit of regular attention will keep it that way. You’ll save yourself future frustration and keep your bathroom feeling fresh with almost no effort.
FAQ About Removing Toilet Bowl Stains
The acid paste didn’t work on my limescale. What’s my next step?
For scale that resists a standard acid treatment, you need a stronger concentration and longer contact time. Apply a paste of pure citric acid powder with just a few drops of water, plaster it on thickly, and let it sit overnight-up to 12 hours-before scrubbing with a wet pumice stone.
How can I quickly disinfect and remove light pink slime without a long bleach soak?
For light, fresh bacterial growth, use a hydrogen peroxide-based bathroom cleaner. Spray or pour it directly on the stain, let it sit for 15 minutes to disinfect and break up the film, then scrub and flush; it’s effective and less pungent than bleach.
Are there any safe, daily-use cleaners to prevent hard water rings from forming?
Yes, an automatic toilet bowl cleaner with a gentle, citric-acid-based formula can help. Choose one that’s safe for your toilet’s internal parts and septic system if you have one, as it will fight mineral buildup with every flush.
Is it safe to use these cleaning methods on a toilet with colored porcelain or unique finishes?
Always test first in an inconspicuous area, like inside the tank lid. Harsh acids or abrasives can damage special finishes; for colored or antique toilets, stick to the gentlest method like a borax paste and avoid chlorine bleach entirely.
What should I check if the water in the bowl is discolored, but the porcelain itself looks clean?
This points to an issue in the tank, not the bowl. Lift the tank lid and check for rusting metal parts or sediment. Replacing a corroded flapper valve or installing an in-tank cleaner can often solve this problem at the source.
Your Sustainable Toilet Bowl Care Strategy
The single most effective tactic is to clean stains and rings at the first sign with a safe, acidic cleaner like vinegar or citric acid. This proactive approach dissolves minerals gently and preserves your toilet’s finish far better than ignoring the problem. I write about all my hands-on tests, from Peeta’s muddy paw prints to the lessons from my mom Martha, over on the Stain Wiki blog.
Suzanne is an accomplished chemist, laundry expert and proud mom. She knows the science and chemistry of stains and has personally deal with all kinds of stains such as oil, grease, food and others. She brings her chemistry knowledge and degree expertise to explain and decode the science of stain removal, along with her decades long experience of stain removal. She has tried almost everything and is an expert on professional and DIY stain removal from clothes, fabric, carpet, leather and any other items dearest to you.