DIY Stain Removers: How Do They Really Stack Up Against Store-Bought?
Staring at a stain and wondering if a kitchen-cabinet fix is just a myth? I get it-I’ve been there. You absolutely can tackle most stains at home, often with brilliant results, once you know which recipes to trust.
This isn’t about guesswork. We’ll compare them side-by-side, so you know exactly what you’re getting into. You’ll find out when a DIY paste beats a branded gel, learn three recipes I keep in my own laundry room, see which stubborn stains still need a specialty product, and get my safety rules for mixing anything at home.
I’ve tested both sides for years on everything from my dog Peeta’s muddy paws to red wine with Aunt Jessica.
Your First Move: What to Do When a Stain Happens
The moment you see a spill, your body screams “Rub it out!”. I get it. I’ve been there with a tipped-over glass of red at a family dinner.
You must fight that instinct and blot gently instead. Rubbing grinds the stain deeper into the fibers, making your job ten times harder.
The Panic-Level Assessment
Not all stains demand the same emergency response. Here’s my real-world urgency scale.
- Red Wine, Berry Juice, Coffee (Panic Level: 9/10): These tannin and pigment stains set fast. Move immediately.
- Cooking Oil, Butter, Makeup (Panic Level: 7/10): Grease spreads and attracts dirt. Tackle it before the next wash.
- Mud, Dirt (Panic Level: 3/10): Let it dry completely first. Brushing off the crusty dirt makes the next steps easier.
The Golden Window
You have a short grace period before a stain becomes a permanent resident. Jason’s soccer jersey, caked in mud and grass, needs treatment within an hour for the green to lift completely. Jessica’s grape juice spill on the couch? You have maybe 20 minutes before that purple hue decides it likes it there. Acting fast with the right first step is more important than finding the perfect cleaner.
Your Stain First-Aid Kit
You don’t need a special product for this first response. Grab these instead.
- Cold Water: Flushes out the stain without setting it (hot water can cook proteins like egg or blood into the fabric).
- A Clean, White Cloth or Paper Towels: White avoids dye transfer. Use it to blot and lift.
- Plain Dish Soap (like Blue Dawn): The ultimate grease-cutter and all-around first responder for most spills.
The DIY Kitchen Cabinet: Common Ingredients and How They Work
You likely have a powerful stain-fighting arsenal in your home right now. Let’s look at the usual suspects.
What ingredients are typically used in DIY stain removers?
The classics are baking soda, white vinegar, hydrogen peroxide (3%), plain dish soap, and club soda. I always have these on hand.
The Science of the Stain (Chemistry Corner)
Knowing why something works helps you pick the right tool.
Dish soap molecules have one end that loves water and another that loves grease. They surround grease stains, breaking them apart so water can wash them away.
Vinegar is acidic. This acidity helps dissolve the tannins that give tea, wine, and coffee their color. It’s like a gentle solvent for those tricky brown rings.
Hydrogen peroxide is a mild oxidizer. It breaks apart the chemical bonds in colorful pigments from berries, juice, or blood, making them colorless. Think of it as a gentle, oxygen-based bleach. Some readers also weigh safety when comparing stain removers like Oxiclean and hydrogen peroxide. A quick look at Oxiclean vs hydrogen peroxide stain safety helps you pick products that protect fabrics and skin.
| Ingredient | Primary Action | Best For Stains Like… |
|---|---|---|
| Dish Soap | Emulsifies Grease | Cooking oil, butter, makeup, mud (for the oily dirt) |
| White Vinegar | Dissolves Tannins & Minerals | Coffee, tea, wine, rust, hard water rings |
| Hydrogen Peroxide (3%) | Oxidizes Pigments | Blood, berry juice, grass, chocolate |
| Baking Soda | Absorbs & Gentle Abrasion | Fresh grease spills, odors, surface grime |
| Club Soda | Lifts & Fizzes | Fresh wine spills on fabric (first response) |
My mom Martha taught me a timeless trick. She keeps a spray bottle filled with 1 part dish soap to 3 parts water under every sink. It’s her instant pre-treater for any kitchen or kid spill. I’ve adopted this completely.
Core DIY Recipes You Can Trust
Mixing these ingredients creates targeted solutions. Here are my most reliable formulas.
1. The Organic Stain Blaster (For juice, blood, grass, wine)
This is my absolute favorite for Jason’s grass-stained knees and Jessica’s berry-smeared shirts.
Mix 1 part blue dish soap with 2 parts 3% hydrogen peroxide in a small bowl. I use a tablespoon as my “part”.
Apply a small dab directly to the stain, gently work it in with your finger or a soft brush, and let it sit for 15-30 minutes. Always spot-test on a hidden seam first, as peroxide can lightly bleach some very dark colors. Then wash as usual with cold water.
2. The Baking Soda Paste (For fresh grease on fabric or carpets)
When Roger drips chain lubricant on his jeans, or I splatter bacon grease, this is step one.
Sprinkle a generous amount of baking soda directly onto the stain to absorb the wet grease. Let it sit for 10 minutes, then brush off the powder. For a tougher stain, make a thick paste with a few drops of water, smear it on, let it dry completely, and then brush it off. It lifts the grease right out. This method is particularly effective when trying to remove grease stains from clothes.
3. The Vinegar Refresh (For odors, rings, and set-in tannins)
This is Aunt Jessica’s wine-spill special. For a recent stain, dilute white vinegar with an equal part of cold water. Soak the stained area for 30 minutes, then wash. For old, set-in tea or coffee stains on white cotton, you can use straight vinegar with a spot test first. These tips also apply to removing beverage stains from clothes fabric. They cover coffee, tea, juice, and soda too.
My Go-To for Muddy Paws
For Peeta’s classic post-rain sprint across my beige carpet, I let the mud prints dry fully. I then vacuum up the loose dirt. My attack is a light spray of that diluted dish soap mix (Martha’s recipe), followed by a gentle blot with a damp cloth, then a final blot with just water to rinse. It works every single time without harsh chemicals he might lick.
Putting Recipes to the Test: My Family’s Stain Removal Trials
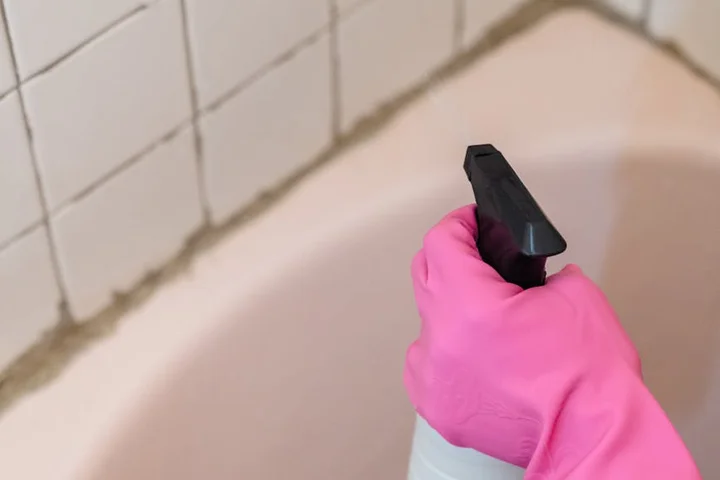
How effective are DIY stain removers compared to store-bought options?
I test them side by side all the time. Last week, Roger came in with a work shirt coated in engine grease and grass stains. I decided to run an experiment.
On the right sleeve, I used my standard DIY mix: equal parts blue Dawn dish soap, hydrogen peroxide, and baking soda into a paste. On the left sleeve, I sprayed a well-known commercial stain pre-treater. I let both sit for 20 minutes.
The DIY paste pulled out a shocking amount of the ground-in dirt and grease. The baking soda paste turned a dull brown. The commercial spray also worked well, lightening the grass marks noticeably. After a wash, both sleeves looked clean.
The DIY method performed just as well on this fresh, organic grime, and it cost pennies.
What Helped Me (Pro-Tip)
My secret weapon for pastes is an old, soft-bristled toothbrush. I dampen the stained area first. Then I apply my baking soda paste and use the toothbrush to gently agitate it. I always work from the outside of the stain inward in tiny circles.
This pushes the cleaner through the fibers without spreading the stain. It’s perfect for collars, cuffs, and those muddy knee patches on Jason’s soccer pants.
But I’m not loyal to DIY at all costs. It has real limits. Jessica, my three-year-old, once found a pen and decorated a light-colored pillowcase. I tried everything: milk, hairspray, rubbing alcohol. The ink faded but left a faint shadow.
A store-bought ink remover gel, formulated specifically for dye stains, lifted that last ghost of color completely. Sometimes, specialized chemistry is the only answer. For removing dye stains from fabrics and other surface materials, start with a gentle test and follow care guidelines to protect fibers.
Match the Remedy to the Stain: When DIY Shines and When to Shop
For which types of stains are DIY solutions most effective?
DIY cleaners excel on fresh, water-based spills on washable fabrics. Think of the messes my family makes daily.
When Edward was over and knocked over a ketchup bottle, it splattered his white tee. I immediately blotted it, then poured on some club soda (the carbonation helps lift the stain). After that, I dabbed on a little liquid dish soap mixed with water. The stain vanished in the next wash.
Other stains where my DIY pantry saves the day:
- Fresh coffee or tea (soak in a vinegar and water solution)
- Mud (let it dry completely, then brush off and treat any residue with a paste)
- Fresh wine on cotton (blot, then cover with salt to absorb, followed by a hydrogen peroxide and Dawn soak)
- Sweat stains (a pre-soak in white vinegar)
For which types of stains are store-bought solutions more effective?
You need the heavy artillery for set-in stains, complex dyes, and delicate or non-washable surfaces.
My Aunt Jessica visited and spilled a full glass of red wine on my light-beige sofa cushion. This wasn’t a washable cotton tee. I blotted it fast, but I knew my usual wine trick might not be enough for the upholstery fabric and padding.
I reached for a professional-grade upholstery cleaner designed for dyes and organic stains. It had the right surfactants and solvents to pull the wine from the deep fibers without overwetting the cushion. It worked perfectly.
Other times I go straight to a commercial product:
- Old, set-in grease stains (like in Peeta’s car bed)
- Ink, marker, or hair dye
- Mystery stains that have been through the dryer
- Heavy biological stains (formulated enzyme cleaners are unmatched)
Quick Reference: DIY or Store-Bought?
| Stain Type | Best Approach | My Go-To Example |
|---|---|---|
| Fresh food & drink (ketchup, coffee, soda) | DIY | Club soda & dish soap on Edward’s shirt |
| Fresh mud or grass | DIY | Let dry, brush, baking soda paste on soccer kits |
| Fresh wine on washable fabric | DIY | Salt soak followed by peroxide mix |
| Set-in grease or oil | Store-Bought | Heavy-duty degreaser for Roger’s work pants |
| Ink, dye, or marker | Store-Bought | Specialized gel for Jessica’s pillowcase art |
| Red wine on upholstery | Store-Bought | Upholstery formula for Aunt Jessica’s spill |
| Old, mystery stains | Store-Bought | Pre-wash spray with advanced enzymes |
Safe and Sound: Avoiding Damage to Your Fabrics and Surfaces
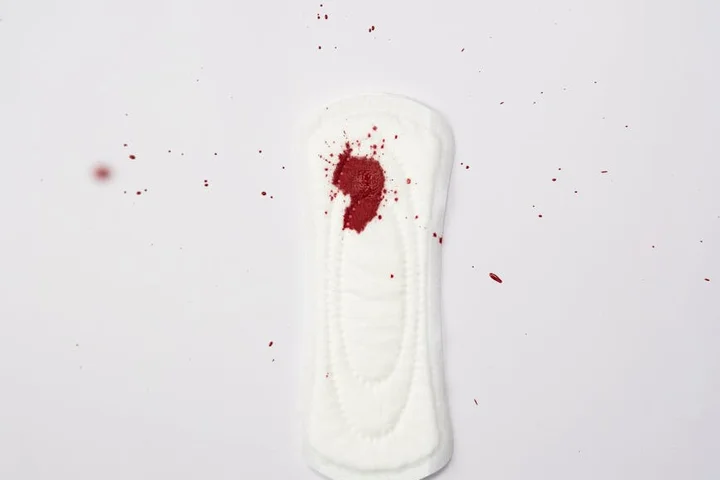
Are there safety concerns with DIY recipes? Absolutely. You’re working with chemicals, even gentle ones. The biggest risk isn’t to you, it’s to your favorite shirt or that antique rug. My rule is simple: treat every cleaning solution, DIY or not, with the same caution you’d give a new store-bought product.
Material Red Flags
Some fabrics and materials are just too delicate for common DIY heroes like vinegar, lemon juice, or hydrogen peroxide. They can dissolve, fade, or weaken, especially when used on delicate fabrics or outerwear. It’s essential to know how to handle them properly to avoid damage.
- Silk & Wool: These are protein-based fibers. Acids like vinegar or citric juice can damage them, leaving fibers brittle.
- Acetate or Rayon: These are often “dry clean only” for a reason. They can be very sensitive to moisture and certain chemicals.
- Stone Surfaces (Marble, Granite): The acids in vinegar or lemon can etch the finish, creating a permanent dull spot.
- Unsealed Wood or Certain Finishes: Moisture and ingredients can warp wood or lift varnish.
The Golden Rule: The Test Patch
I cannot say this enough. You must do a test patch. Every single time. On a new fabric, a new surface, or a new recipe mix.
Find a hidden spot-an inside seam, the back corner of a carpet, the underside of a cushion. Apply a dab of your solution. Wait 10-15 minutes. Blot it dry and check. Look for any color change, texture shift, or bleeding dye. If you see anything, stop. The item needs a gentler, more specialized approach. This one minute saves so much heartache.
“Never-Use” Combinations and Mistakes
Some mixes are dangerous. Some techniques set stains forever.
- Vinegar + Bleach: Never. This combination creates toxic chlorine gas.
- Ammonia + Bleach: Also a big no. This creates another dangerous, pungent gas.
- Hot Water on Protein Stains (Blood, Egg, Dairy): Heat cooks the protein, bonding it to the fibers. Always use cold water first.
- Rubbing a Stain Vigorously: This pushes the stain deeper and can damage the fabric weave. Always blot, don’t rub.
A Cautionary Tale from Aunt Jessica
My wine-loving aunt Jessica called me in a panic. She’d spilled a splash of Merlot on her favorite colored cotton blouse. Remembering a tip, she doused it with straight lemon juice to “bleach” the stain. It sat for an hour.
The wine stain lightened. But so did the shirt’s vibrant blue dye around it, leaving a permanent, splotchy faded circle. She learned the hard way that lemon juice is a natural bleaching agent, and it doesn’t discriminate between stain and dye. No matter how careful one tries to be, some stains are just tricky to remove even when treated naturally. Now, she always dilutes it and does a test patch first.
Beyond the Bottle: Cost, Time, and Environmental Impact
What are the cost comparisons?
DIY almost always wins on pure cost. Let’s break down a classic oxygen-based spray, similar to a store-brand stain remover.
- DIY “Oxy-Spray” (per batch): 1 cup hydrogen peroxide (3%, $1 for 32 oz), 1 tbsp dish soap ($2 for 24 oz), 1 tbsp baking soda ($2 for 1 lb). One batch costs pennies-maybe 10-15 cents.
- Store-Bought (per bottle): A 22 oz bottle of a leading oxygen-based spray costs about $5-7.
The DIY mix costs a fraction per use. Your initial investment in base ingredients lasts for dozens, even hundreds, of applications. A commercial bottle might last for 10-20 stains.
How do application and preparation times compare?
This is the trade-off. A store bottle is grab-and-go. For a DIY mix, you need to gather ingredients and combine them.
It adds about 2-3 minutes of prep. I keep my core ingredients (peroxide, washing soda, Castile soap) together under the sink. The actual stain treatment time is identical-apply, wait, launder.
For me, those few extra minutes are worth the savings and control over ingredients. But on a frantic Monday morning with a ketchup-stained uniform? I get why you’d grab the pre-made spray.
What is the environmental impact?
This is where DIY recipes really shine for me.
Commercial removers often contain synthetic surfactants, optical brighteners, and preservatives. These can be harsh on aquatic life after they wash down the drain. The plastic bottle, even if recycled, has a footprint.
My basic DIY recipes use simpler, more biodegradable ingredients. The packaging is often a reusable spray bottle. You’re reducing single-use plastic and introducing fewer complex chemicals into the water system. It feels like a more respectful way to clean our homes and our planet.
Can DIY stain removers be made in advance and stored?
Some can, but with strict rules.
Peroxide-based mixtures are not for long-term storage. Hydrogen peroxide breaks down into water and oxygen when exposed to light and air. A pre-mixed spray will lose its stain-lifting power within a day or two, especially in a clear bottle. I mix these fresh, right in the sprayer, for each major stain battle.
Vinegar, soap, and baking soda pastes can be mixed in small batches. Store a paste in a small sealed jar for a week or two. A vinegar-and-water solution in an opaque spray bottle is fine for weeks.
My general advice? Label everything clearly, store out of reach of kids (like my curious Jessica), and when in doubt, mix a fresh, small batch. The ingredients are cheap and always on hand.
From Blot to Dry: The Complete Stain Removal Process
The Universal Stain-Fighting Playbook
No matter the goo, the process starts the same. I treat every new stain as a puzzle with a simple key. My youngest, Jessica, once dumped an entire cup of berry smoothie on the living room rug. Here is the exact sequence I followed, and it works for almost anything.
- Blot, Don’t Rub. Grab a clean, white cloth or paper towel. Gently press down and lift to soak up as much of the spill as you can. Rubbing grinds the stain deeper into the fibers, making it a permanent guest.
- Identify and Flush. Figure out what the stain is (grease, protein, dye). Then, flush from the backside if you can. For a shirt, hold the stain under cold, running water from the underside. This pushes the stain out, not through, the fabric.
- Apply Your Solution. Use your chosen DIY paste, spray, or store-bought product directly to the stain. Let it sit and do its work. For my carpet, I made a paste of baking soda and water to pull the berry juice up.
- Agitate Gently. Use a soft-bristled brush, an old toothbrush, or just your fingers to work the cleaner in with a light, circular motion. You’re helping it penetrate, not punishing the fabric.
- Rinse and Extract. This is the most skipped step. You must remove the cleaning solution and any loosened stain residue. Rinse the area thoroughly with clean, cold water. For carpets and upholstery, blot repeatedly with a water-dampened cloth until the cloth comes away clean.
Rushing the rinse step leaves behind a sticky residue that attracts more dirt, creating a new, permanent shadow called “wicking.”
The Surface Compatibility Chart
The core steps stay the same, but your technique needs tweaks based on what you’re cleaning. Here’s my quick-reference guide from years of home tests.
| Surface | Key Adjustment | My Go-To Tool |
|---|---|---|
| Clothing & Linens | Always test your cleaner on an inside seam first. Work over a sink or bowl to contain the mess. | A soft nail brush for cuffs and collars. |
| Carpet | Blot aggressively in step one. In step five, press down hard with towels and stand on them to pull moisture up from the pad. | My trusty, white microfiber cloths for blotting. |
| Upholstery & Car Interior | Use less liquid. Make pastes instead of sprays. Over-wetting can damage padding and cause mildew. | A spray bottle set to “mist” for controlled application. |
| Hard Surfaces (Driveway, Counter) | You can be more aggressive with scrubbing and stronger solutions. Let pastes sit longer to penetrate. | A stiff-bristled deck brush for concrete, a non-scratch scrubber for sealed surfaces. |
Post-Treatment Recovery: The Make-or-Break Phase
How you dry the item is as critical as how you clean it. My mom, Martha, taught me this the hard way with a sun-bleached tablecloth.
Air dry whenever possible. Lay clothing flat on a drying rack or a clean towel. Hang carpets or rugs over a chair outside. For a fixed spot on a sofa or car seat, point a fan at it.
Keep it out of direct sunlight while damp. The sun can set certain stains and fade colors. It’s heat you don’t control.
I never, ever put a treated item directly into the dryer. You must check the stain is completely gone first. Hold the fabric up to a bright light. Look for any faint outline or color change. If you see even a shadow, it needs a second pass. The dryer’s heat will bake that shadow in forever.
The “Second Pass” Strategy for Faint Shadows
Seeing a ghost of the stain after all that work is frustrating. Don’t panic. This is normal, especially with dark juices or chocolate.
Treat the entire area again, but let your solution sit longer. For a persistent oil spot on Jason’s soccer jersey, I’ll apply a dish soap paste and let it sit for an hour before rinsing.
Sometimes, you need to switch tactics. If baking soda paste didn’t lift a carpet stain fully, I might follow with a mist of diluted hydrogen peroxide. The key is to complete the full process—apply, sit, agitate, rinse, dry—each time.
A Note on Patience from a Chocolate-Stained Car Seat
Last summer, Roger left a chocolate bar in his truck. Peeta found it, and the July heat did the rest. The driver’s seat was a melted, smeared disaster.
I thought it was ruined. I used my enzyme cleaner, let it sit, blotted, rinsed, and aired it out. A brown shadow remained. I almost gave up.
Instead, I repeated the process the next day. And once more two days after that. Each time, the shadow got fainter. By the third treatment, it vanished. Stains, especially set-in ones, often surrender to gentle, repeated persistence, not a single harsh attack.
FAQ about DIY Stain Removers
1. What’s the absolute fastest way to treat a fresh food or drink spill?
Blot immediately with a clean cloth, then flush the stain from the back with cold water. Apply a drop of plain dish soap directly to the area, gently work it in, and rinse-this is your best first response for most common spills. Whether the spill is hot or cold, quick action and a cold rinse help prevent setting. This approach serves as a solid base for hot and cold water stain removal.
2. Can I mix up a large batch of DIY stain remover to save time later?
Do not pre-mix solutions containing hydrogen peroxide, as it loses potency within days. Simple mixtures like diluted dish soap or vinegar and water can be stored in a labeled spray bottle for quick use on appropriate surfaces.
3. What’s the most important safety step before using any DIY cleaner?
Always perform a spot test on a hidden seam or corner. This 60-second check prevents color loss or fabric damage that can ruin an entire item.
4. If a DIY treatment doesn’t work completely, what should I try next?
Do not put the item in the dryer, as heat will set the remaining stain. Re-treat the area with a fresh application, let it sit longer, or switch to a commercial product formulated for that specific, stubborn stain type.
5. Is the cost savings of DIY really significant for the average household?
Yes, a single batch of a core DIY recipe costs mere pennies per use. Your initial investment in base ingredients like baking soda and vinegar lasts for dozens of treatments compared to a single bottle of a commercial product.
Your Stain Removal Game Plan
After testing countless recipes on everything from Peeta’s muddy paw prints to Aunt Jessica’s wine spills, I stick to one rule: start gentle and escalate wisely. Homemade solutions like baking soda paste are perfect for quick, fresh messes, while trusted store-bought cleaners tackle set-in stains without guessing games. I share all our family’s real-world tests and results right here on the blog, so come back whenever you’re faced with a new stain challenge.
Written by Suzanne Rosi Beringer. Suzanne is an accomplished chemist, laundry expert and proud mom. She knows the science and chemistry of stains and has personally deal with all kinds of stains such as oil, grease, food and others. She brings her chemistry knowledge and degree expertise to explain and decode the science of stain removal, along with her decades long experience of stain removal. She has tried almost everything and is an expert on professional and DIY stain removal from clothes, fabric, carpet, leather and any other items dearest to you.