How to Remove Sweat and Deodorant Stains: 5 Myths You Should Stop Believing
Are yellow pits and waxy streaks ruining your favorite shirts? The real fix isn’t a stronger chemical, it’s knowing why these stains form and how to gently break them down.
In this article, I’ll clear up the confusion by debunking these common myths:
- Myth 1: Hot water is the best way to tackle sweat stains.
- Myth 2: Using extra detergent will dissolve deodorant buildup.
- Myth 3: Bleach is the only solution for whitening stained collar.
- Myth 4: All deodorant and antiperspirant marks are the same.
- Myth 5: Once a fabric is stained, it’s permanently damaged.
I’ve tested every method on everything from my son Jason’s soccer jerseys to my husband Roger’s work shirts for over a decade.
First, Assess Your Stain Situation: Panic Level & Golden Window
Before you do anything, figure out what you’re dealing with. I give every stain a “Panic-Level” rating.
A fresh, damp spot on a cotton tee is a Panic-Level 1.
An old, crusty, yellowed ring on a dress shirt collar is a Panic-Level 10.
The Golden Window is the first few hours after the stain happens, before it gets a chance to set and oxidize.
Old stains are tougher because body oils soak deep into fibers and the minerals in sweat react with air, turning that ugly yellow or brown.
You can tell a fresh stain by the damp, salty feel. A set stain has a distinct, stiff yellow or brown ring.
My son Jason’s soccer jerseys are Panic-Level 1 experts. My husband Roger’s old work shirts sometimes sneak to a 10.
Your immediate first-aid in the first 30 seconds is simple. Blot any wetness with a clean towel.
Then, gently rinse the back of the fabric under cool, running water to push the stain out, not deeper in.
Five Sweat Stain Myths That Make Everything Worse
Let’s clear up the bad advice so you can use what truly works. I’ve tested all of this, usually on my family’s laundry.
Myth #1: Dump Extra Detergent on It for Power
Pouring a mountain of detergent on the stain feels powerful, but it’s a trap.
Extra soap doesn’t break down the stain’s chemistry any faster. It just leaves a sticky, invisible residue.
That sticky film actually traps the stain particles and body oils you’re trying to wash away.
You’ll see a dull, grayish tint on the fabric where the stain was.
So, is it true that using more detergent will remove these stains better? No, it makes them harder to remove.
The correct principle is to use the right cleaner, not more cleaner. We’ll get to those right cleaners soon.
Myth #2: Hot Water Melts Stains Away
This myth is the number one reason pit stains become permanent. Heat is the enemy here.
Sweat contains proteins. Think of a raw egg. What happens when you cook it? It solidifies.
Hot water does the same thing to sweat proteins, “cooking” them into the fabric fibers.
It also bakes in the aluminum and waxy ingredients from your deodorant or antiperspirant.
Can hot water effectively remove sweat and deodorant stains? Absolutely not. It sets them like concrete.
The golden rule is always start cool or lukewarm to gently loosen the stain, not seal it in.
Myth #3: Vinegar and Baking Soda are Magic for Everything
My mom Martha loves her vinegar, and my Aunt Jessica swears by baking soda. They have their place, but they’re not a cure-all.
Vinegar (an acid) is great for dissolving the mineral salts in sweat. Baking soda (a base) is a mild abrasive and deodorizer.
They are specific tools, not a universal fix, and using them wrong can damage delicate fabrics.
Does vinegar or baking soda work for all types of fabrics and stains? No.
Be very careful with silk, wool, or fabrics with elastic. Vinegar can weaken silk, and baking soda can be too abrasive.
Never, ever mix them into a paste directly on fabric. The fizzing reaction can force stain particles deeper.
Myth #4: If You Can’t See It, It’s Gone
This myth is sneaky. You rinse a shirt, the visible salt line is gone, so you toss it in the dryer.
Big mistake. Invisible body oils and salts are still there.
The heat from your dryer will oxidize those leftover oils, creating brand new yellow stains right before your eyes.
I learned this the hard way after ‘clean’ white tee-shirts came out of the dryer with new yellow pits.
You must treat the entire area that gets damp from sweat, not just the discolored ring.
Pretreat a wide circle around the armpit to catch all the invisible residue.
Myth #5: You Must Buy a Specialty Product to Win
Specialty stain sprays work well, but they aren’t your only option. This idea can make you feel helpless without a product. For many projects, the best application method for wood stain coats can determine the final look. A little technique goes a long way toward smooth, even color.
You likely have two or three extremely effective cleaners in your home right now.
Are commercial stain removers always necessary and effective for these stains? No, they aren’t.
They are convenient, but simple DIY alternatives can be just as powerful and are often safer for skin and fabric.
Common household items like hydrogen peroxide (for whites) or blue dish soap (for oils) are fantastic, targeted weapons against sweat stains. Dish soap is particularly effective for breaking down oily residues.
My mother-in-law Brianna taught me the dish soap trick years ago, and it hasn’t failed me yet.
The Chemistry Corner: What You’re Actually Fighting
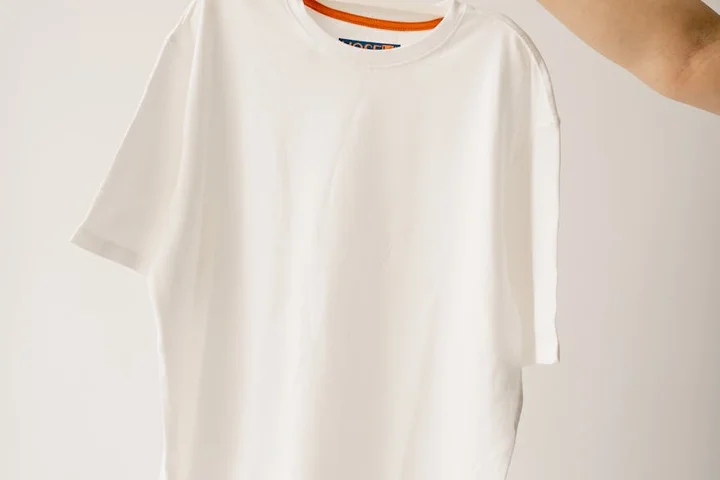
That yellow ring under the arm isn’t a simple dirt stain. It’s a combination of three stubborn components.
Sweat brings protein. Your skin adds natural oils. Antiperspirants leave behind mineral salts, often aluminum-based.
You’re fighting a protein, oil, and mineral trio, and each part needs a different removal strategy.
Think of it as a layered stain, like a cake you need to dismantle layer by layer. Scrubbing the top won’t help the bottom.
This is why specific solvents work. Dish soap molecules, for example, are built to surround and lift oil molecules, breaking that greasy layer apart so it can rinse away.
The Step-by-Step Fix: From Fresh Spill to Set-In Stain
Ignore the old wives’ tales. This is the core, reliable process I follow every time.
- Act fast. Blot any wet residue with a paper towel. For dried stains, gently scrape off crusty bits with a butter knife.
- Turn the garment inside out. Rinse the stain from the back with a strong stream of cold water. This pushes the stain out, not deeper into the fabric.
- Apply your chosen pretreatment directly to the stain. Cover it completely and let it penetrate. For set-in stains, I let it sit for at least an hour.
- Wash the item alone. Use the hottest water temperature the fabric care label allows and your regular detergent.
- After the wash cycle, do not put it in the dryer. This is the most critical step.
This method works because it treats the stain without locking it in with heat or friction.
Your Arsenal: Recommended Product Categories
You don’t need a specialty store worth of supplies. These five categories cover almost every scenario.
- Enzyme-based laundry pretreatments: These sprays or gels contain proteins that break down other proteins. They “eat” the sweat layer.
- Oxygen-based bleach (powder): This safe bleach uses oxygen to lift discoloration and break down organic matter. It’s brilliant for yellowing.
- Blue Dawn-type dish soap: Its formula is a champion at cutting through the body oil layer. A single drop is often enough.
- White vinegar: The mild acid helps dissolve mineral salt deposits from antiperspirants and kills odor-causing bacteria.
- Hydrogen peroxide (3%): A gentle oxidizer that brightens white fabrics and attacks stain molecules. It’s my go-to for kid’s white socks.
Match the product to the stain layer. Enzymes for protein, soap for oil, acid for minerals, oxidizers for color.
Field Note: My Go-To Pit Stain Routine
My husband Roger’s lawn-mowing shirts are the ultimate test. The pits get a dull, stiff yellow stain every time.
I make a thick paste of oxygen bleach powder and a little warm water. I smear it over the entire stained area, inside and out. Then I let it sit for a full hour on the laundry room counter. If the stain is on wool, you’ll want to remove wool stains safely with a gentler method. Wool fibers require careful treatment to avoid damage.
This paste method works 9 times out of 10 on his cotton tees.
My hidden trick is using an old, soft toothbrush. I turn the shirt inside out and gently agitate the fabric from the inside. This works the paste deeper without scrubbing the outer surface too hard.
Safe DIY Alternatives If You’re Out of Products
You’re at home with no stain spray. Look in your pantry instead.
- Baking soda paste for fresh stains: Mix baking soda with a few drops of water to make a spreadable paste. Apply it, let it dry completely, then brush it off. It can absorb some oils and odors. This is a trick I learned from my mom, Martha.
- Diluted hydrogen peroxide soak for whites: Mix one part 3% hydrogen peroxide with two parts cool water. Soak the stained area for 30 minutes, then rinse well. Always test this on a hidden seam first, as it can lighten some colored fabrics.
- Direct dish soap on grease: See a shiny, oily ring? Put a tiny drop of clear dish soap right on it. Gently work it in with your finger, then rinse with cool water before washing.
These are stopgap measures. For old, set stains, specialized products are usually more effective.
Material Red Flags: When to Hold Back
Some fabrics demand kid gloves. Aggressive treatment will ruin them.
Handle these with extreme care: silk, wool, leather, and technical performance fabrics with coatings like DWR (durable water repellent).
Never-use actions are non-negotiable.
- Never pour chlorine bleach directly on a yellow sweat stain. The chemical reaction can turn it a permanent rusty orange.
- Never use hot water as your first rinse on a sweat stain. Heat cooks the proteins into the fibers.
- Never rub silk or wool. You’ll felt the fibers or cause pulls. Always blot.
The rule is simple: find an inside seam or hem, apply your treatment, wait, rinse, and check for damage before proceeding.
Post-Treatment Recovery: The Make-or-Break Dry
This is where success or failure is decided. After washing, you must air-dry the item completely.
Lay it flat or hang it in a shaded, well-ventilated spot. Sunlight can fade colors, but shade is perfect for inspection.
If you see any shadow or faint outline of the stain after air-drying, treat it again. The dryer’s heat will set that shadow forever.
I ruined a good blouse this way. A faint ring I thought was gone came out of the dryer baked into a permanent badge of dishonor.
On-the-Go Emergency Fix
Notice a stain while you’re out? Don’t just hope for the best. Take immediate action.
Restaurant or office quick fix: Grab a paper towel and wet it with cold club soda or plain seltzer. Blot the stain gently. The tiny bubbles can help lift fresh residues to the surface. For stubborn stains, especially food or beverage stains from clothing, a more thorough treatment might be necessary.
Restroom backup plan: Use a dab of liquid hand soap and cool water. Work it in gently, then blot the area dry with paper towels. It’s a temporary fix, but it prevents the stain from fully setting during the day. For a more thorough cleaning, remove the urine stains and odor from toilet seats.
This isn’t a full clean. It’s first aid for your clothing to give you a fighting chance when you get home.
Surface Compatibility: Treating More Than Just T-Shirts
Stubborn marks don’t limit themselves to your gym shirts. A dropped deodorant stick or a leaky gym bag can cause trouble all over the house. The core principles are the same, but your technique must adapt.
Think of it like soccer with Jason. The goal is always the same, but you play a little differently on grass than on a gym floor.
Here’s a quick guide for common trouble spots.
| Surface | Scenario | Adaptation & Key Technique |
| Carpet | A deodorant stick melts in a gym bag, leaving a waxy, greasy blob. | Scrape off excess with a dull knife. Blot (never rub) with a cloth dipped in a mix of dish soap and warm water. Rinse by blotting with a water-damp cloth. |
| Clothing (Focus Area) | Yellowed pit stains on a cotton tee or a white salt ring on a dark shirt. | Pre-treat by soaking the stained area in a paste of baking soda and water or a vinegar solution before it hits the washer. |
| Upholstery | Armchair stains from where you rest your arms after a workout. | Always place a clean, dry towel underneath the stain area you’re cleaning to wick moisture down and prevent a water ring. |
| Hard Surfaces | A deodorant stick dropped on a laminate or tile floor. | Scrape, then wipe with a warm, soapy cloth. For a sticky residue, a little rubbing alcohol on a cloth can break it down without damaging the finish. |
When to Stop and Prevention for Next Time
Sometimes, despite your best efforts, a stain wins. Pushing too hard can damage the fabric itself.
I learned this the hard way with one of Roger’s favorite work shirts. I was so focused on the yellow stain that I didn’t notice the fabric under the arm was getting thin and frayed from all my scrubbing.
If the stain hasn’t budged after two careful treatment attempts, or if the fabric feels weak or changes texture, it’s time to stop.
A permanent shadow is better than a hole.
When NOT to Try This at Home
Your home arsenal has limits. In some cases, calling a pro is the smartest move for your item and your sanity.
- Delicate Heirlooms: That silk blouse from your grandma or a vintage lace item. The fibers are often too fragile for home chemistry.
- Heat-Set Stains: If a stained shirt has been dried in a hot dryer or ironed over multiple times, the stain is likely baked in for good.
- Expensive Formalwear: Your wedding suit or a designer dress. The risk is too high. A professional cleaner has specialized solvents and expertise.
For these, I take my own advice. I box them up and take them to a cleaner I trust. It’s not admitting defeat. It’s respecting the garment.
How to Keep Those Stains From Coming Back
Fighting stains is reactive. Good habits are proactive. A few small changes make a huge difference.
My number one tip? Let your deodorant dry completely before you put on your shirt. That 60-second wait stops the transfer before it starts.
- Wear a Barrier: A simple cotton undershirt absorbs sweat and protects your nicer shirts from direct deodorant and body oil contact.
- Wash Smarter: Turn workout clothes and polos inside-out before washing. This directs the detergent and agitation to the stained inner surface where it’s needed most.
- Measure Detergent: Too much soap leaves a residue that actually traps odors and dirt. Use the recommended amount.
My Aunt Jessica, who loves her Arizona wine and crisp white linens, swears by this: add half a cup of white vinegar to your washer’s fabric softener dispenser.
It helps rinse away detergent buildup that can hold onto smells and discolorations. My son’s soccer jerseys have never been fresher.
FAQ about Removing Sweat and Deodorant Stains
I just got a fresh sweat mark on my shirt. What’s the absolute first thing I should do?
Blot the damp spot with a clean towel, then turn the garment inside out and rinse from the back under cool running water. This pushes the stain out of the fabric instead of setting it deeper. If the stain still persists, you might need to use special techniques for set-in stains.
I already used too much detergent on a stain and now it looks worse. How do I fix it?
Wash the item again with just cool water and half your usual detergent to remove the sticky residue. For a persistent film, a rinse with diluted white vinegar in the fabric softener dispenser can help break down the soap buildup.
Is there ever a case where warm or hot water is okay for these stains?
Only use the hottest water the fabric care label allows after you have thoroughly pretreated and loosened the stain with a cool rinse and cleaner. The initial contact must always be with cool water to prevent setting the proteins. Hot and cold water play complementary roles in effective stain removal. The next steps will guide you on when to apply heat or cold for stubborn stains.
How do I know if it’s safe to use vinegar or baking soda on a specific fabric?
Always do a spot test on an inside seam: apply your diluted solution, wait 10 minutes, then rinse and check for color loss or texture change. For stubborn stains on outerwear or delicate fabrics, you may need gentler, fabric-specific methods. Avoid using these on delicate silk, wool, or elastic-based fabrics without professional advice.
When is it actually worth buying a commercial stain remover instead of using a DIY method?
Use a commercial enzyme-based pretreatment for old, set-in protein stains or for consistent convenience. In biochemistry terms, enzymes in these cleaners break down blood proteins, making them especially effective on protein-based stains. For fresh stains and general maintenance, a drop of blue dish soap or a hydrogen peroxide soak is often equally effective and more cost-efficient.
Your Action Plan for Sweat and Deodorant Stains
Based on my years of rescuing clothes from Jason’s soccer practices and Roger’s outdoor work, the single best move is to pre-treat stains promptly with a gentle, enzyme-based solution before a cold wash. I share all my family-tested methods, from handling Jessica’s messes to Aunt Jessica’s wine spills, right here on Stain Wiki for you.
Written by Suzanne Rosi Beringer. Suzanne is an accomplished chemist, laundry expert and proud mom. She knows the science and chemistry of stains and has personally deal with all kinds of stains such as oil, grease, food and others. She brings her chemistry knowledge and degree expertise to explain and decode the science of stain removal, along with her decades long experience of stain removal. She has tried almost everything and is an expert on professional and DIY stain removal from clothes, fabric, carpet, leather and any other items dearest to you.