How Do You Remove Stains from Antique Upholstery Without Ruining It?
That sick feeling when a spill hits a cherished, fragile fabric is real. Stop right there-the safest first step is always to gently blot with a clean, white cloth and avoid any rubbing or harsh chemicals.
I’ll guide you through my proven, preservation-first approach. Here’s exactly what we’ll tackle:
- How to identify your fabric’s type and age with a simple, hidden spot test.
- Mixing ultra-gentle cleaning solutions from items you already have at home.
- The precise blot-and-lift technique that protects delicate fibers.
- Critical drying methods to prevent watermarks and fabric distortion.
- When to put down the cloth and call a professional conservator.
I’ve used these methods for years, saving everything from my mom Martha’s antique linen to cushions marked by my dog Peeta’s muddy paws.
Your First Step: Stop, Look, and Do No Harm
Your first instinct is the worst one. You see the spill and you grab for the nearest wet cloth.
Do not do that. Your only job right now is to stop everything and take a breath.
Rushing with water or a cleaner can drive a stain deeper into fragile fibers or cause colors to bleed. It can set a stain permanently. I learned this the hard way with my Aunt Jessica.
She was visiting from Arizona, enjoying a glass of red on her mother’s 1920s silk settee. One grand gesture later, and there it was: a dark purple bloom on the arm.
She panicked and dabbed it with club soda. It seemed to work, but a week later, a dull brown ring appeared where the wine had been. The moisture had pushed tannins deeper into the silk, and the settee needed a costly professional rescue.
Ask Yourself These Three Questions
Before you touch a thing, you need to play detective. Get a good light and look closely.
What is the stain? Is it oily, watery, or a mix? Knowing the enemy tells you how to fight it.
Next, gently feel a hidden area of the fabric. What is the fiber? Is it a rough, sturdy horsehair, a fine silk, a brittle velvet, or a fragile cotton print?
Finally, think about age and value. Is this a priceless museum piece or a sturdy, well-loved chair you just want to keep using?
That last question changes everything. A priceless heirloom gets a different plan than a daily-use chair. For a true antique, your best move might be to gently blot up excess liquid and call a professional conservator immediately.
The Safe Toolkit for Delicate Fibers
Modern stain fighters are too harsh for old fabrics. For stubborn stains on outerwear and delicate fabrics, gentle methods are your best bet. You need a gentler arsenal. I keep this kit in a dedicated box so I’m never scrambling.
The Cleaning Agents
Only these five solutions should come near your antique fabric.
- Distilled Water: Tap water has minerals that can leave spots. Distilled water is pure and safe.
- Pure White Vinegar: This mild acid can help with odors and some water-based stains. It’s gentle.
- Clear, Mild Dish Soap (like Dawn Original): A single drop in a cup of distilled water creates a powerful yet safe cleaner for many stains.
- 3% Hydrogen Peroxide: This is your mild bleach alternative. Test it on a hidden spot first, as it can lighten some dyes.
- Rubbing Alcohol (70% Isopropyl): Use this only for fresh ink or certain dye stains. It dries fast and can be very harsh, so it’s a last resort.
The Right Tools
The tools matter as much as the cleaners. You want to lift stains, not scrub them in.
- White Cotton Cloths or Towels: White shows you the stain you’re picking up. Cotton is soft and absorbent.
- Soft-Bristled Brushes: A clean makeup brush or a soft toothbrush is perfect for gently working a paste into fibers.
- Plastic Spoons or Spatulas: Use these to scrape up semi-solids like food or mud. Metal can cut threads.
- A Medicine Dropper or Syringe: This lets you apply tiny amounts of cleaner with precision, avoiding over-wetting.
Safe DIY Alternatives
Sometimes the best solution is already in your kitchen.
For a fresh grease spot, like butter or oil, cover it thickly with cornstarch or talcum powder. The powder will absorb the oil over several hours. Then, gently brush it away and follow up with oil and grease stain removal techniques for clothes.
For general soiling or light stains, make a paste with baking soda and a tiny bit of distilled water. Apply it with your soft brush, let it dry completely, and vacuum it off. This can lift dirt without any liquid risk.
Remember this rule: modern stain removers, spray-and-wash products, enzyme cleaners, and any form of chlorine bleach are banned from this job. They are designed for modern, durable fabrics and will destroy delicate, aged fibers. Your antique needs a gentle touch, not a chemical assault. This mindset is central to vintage textiles stain removal preservation. In that realm, we use gentle, non-chemical techniques to protect character and integrity.
The Non-Negotiable Rule: The Hidden Spot Test
You must test every cleaner on a hidden spot first. I learned this from my mom, Martha, after a mishap with her antique settee. Treat this step as an unbreakable law.
Find a completely hidden area. Look under the seat cushions, behind the decorative skirt, or inside a seam allowance. These spots are invisible during normal use.
- Pick your cleaning solution. For delicate fabrics, I always start with distilled water or a drop of Castile soap in water.
- Dampen a small, white cotton cloth or a q-tip with the solution. Do not soak it.
- Gently dab the hidden spot once or twice. Do not scrub.
- Let it air dry fully. This can take a few hours.
Watch the test area for a full 24 hours. Check for any color bleed or fading. Feel if the fabric has stiffened. Look at your white cloth for dye transfer. These are all bad signs.
What Helped Me (Pro-Tip): I use a magnifying glass to check test spots. It reveals fiber damage you can’t see with the naked eye, like tiny splits in silk or wool.
If you see any damage, the test fails. You must stop immediately. Professional help is the only ethical option to preserve your piece. I had to call a conservator for Brianna’s heirloom chair last year. It was the right call.
Step-by-Step: The Gentle Cleaning Process for Any Stain
After a successful spot test, follow this universal method. It works for everything from Jason’s grape juice to Roger’s motor oil transfers. Go slow.
- Gently scrape off solids. Use a dull butter knife. Be feather-light to avoid grinding the stain in.
- Blot, never rub, with a dry, white cloth. I keep a stack of old cotton t-shirts for this.
- Apply your cleaner with a dropper onto your cloth first, not the fabric. This prevents sudden saturation.
- Work from the stain’s edge inward. This traps the spill and stops a dull brown ring from forming.
The Proper Technique for Blotting (Not Rubbing)
Think of blotting like dabbing a tear from a cheek. You press softly and lift straight up. When my Jessica gets messy, I pat her face clean.
Rubbing is the enemy. It mashes the stain deeper and can fray delicate threads. Blotting lifts the moisture out safely.
Press down with your cloth, hold for a second, and lift. Switch to a clean section of cloth frequently to see the stain lifting.
How to Prevent Over-Wetting the Fabric
Compare the upholstery padding to a kitchen sponge. Once the sponge is soaked, you can’t control where the water goes. You’ve lost control.
Use a barely-damp cloth. I test it on my wrist. If it feels cool but leaves no visible wetness, it’s perfect.
Work in tiny, one-inch sections. If the fabric looks darker or feels tacky beyond your target, stop. Let it air dry completely before continuing.
You can adapt this base method for different stains. For grease stains, I add a drop of blue Dawn to my water. For sugar-based spills, a bit of white vinegar helps. Always refer back to your spot test results first.
Tackling Common Stains with a Preservation Mindset
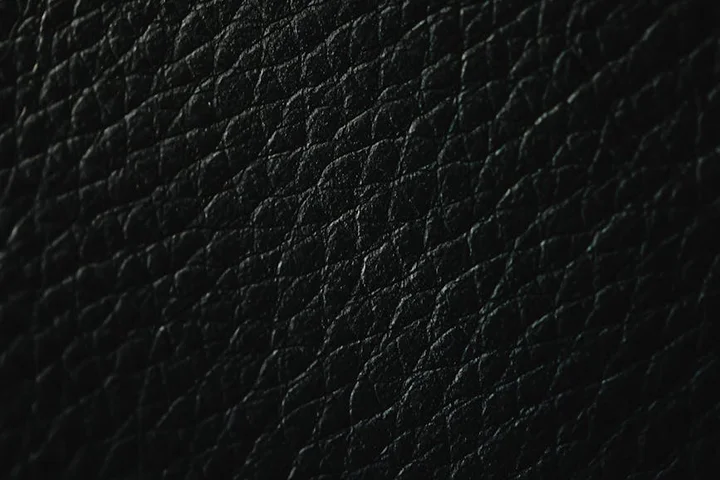
You have to change your thinking with delicate pieces. My goal is to lift the stain without disturbing the fabric’s soul. Speed is less important than caution. I think of my Great-Aunt Jessica’s favorite armchair or the heirloom linen tablecloth from my mom, Martha. You can’t just grab the first spray bottle.
Start every single process with a spot test in a hidden area, like under a cushion or along an inside seam. Wait for it to dry completely. Look for color change or texture damage. Only proceed if it passes.
Old Water Rings or Spots
These are often mineral deposits left behind after a spill evaporates. They look like a dull, crusty ring. Heat or harsh chemicals can set them permanently.
My method is gentle rehydration. Mix a solution of one part white vinegar to four parts distilled water. Dampen a white cotton cloth with the solution, then wring it out until it’s just barely damp.
Lay the cloth over the stain for no more than ten minutes. This softens the deposit. Then, using a fresh, dry part of the cloth, gently dab at the area. The goal is to lift the minerals, not scrub the fabric.
Candle Wax
This happened on a vintage footstool after a cozy, ill-advised movie night. The key is to harden the wax first. Never try to wipe liquid wax.
I grab a zip-top bag of ice cubes or a cold gel pack. Hold it on the wax until it feels very cold and brittle to the touch. This takes a few minutes.
Next, take a dull plastic card, like an old gift card or library card. Gently flex the fabric around the wax and use the card to scrape off the hardened pieces. Work from the edges of the wax blob toward the center to avoid grinding it in. Any leftover oily residue needs a different approach.
Red Wine or Tea (Tannin Stains)
For a fresh spill, blot like crazy with a dry towel. For an old, set-in stain, we need to be strategic. My mom from North Texas taught me this trick for old linens.
Make a very mild solution: one teaspoon of white vinegar in one cup of distilled water. Dampen a cotton swab with it. You want the swab wet, not dripping.
Gently roll the swab over the stain, working from the outside in. Blot immediately with a dry, white cloth to lift the moisture and the stain. You might need to repeat this 2-3 times, letting the area dry between attempts.
Oil or Grease
Grease from fingers or food leaves a dark, shadowy spot. Water will not touch it. You need a dry absorbent.
I immediately cover the spot with a generous pile of cornstarch or plain talcum powder. Let it sit for at least an hour, or overnight for old stains. The powder absorbs the oil.
Brush away all the powder with a soft-bristled brush, like a clean makeup brush. For persistent grease shadows, a tiny drop of clear dish soap on a damp cloth, dabbed and thoroughly rinsed, can be a last resort. This is risky on silks or very old fabrics.
Ink
Ink is a nightmare. My son Jason left a pen in his pocket that ruined a chair once. Isopropyl (rubbing) alcohol can work, but it’s a severe solvent that can strip dyes. It’s important to be cautious when using it on fabrics, especially for pen or marker stains.
If you try it, use the highest percentage you have (91% or 99%). Put a tiny amount on a white cotton swab. Dab at the very edge of the stain. You should see the ink transfer to the swab, just like with other ink stains.
Immediately blot with a cloth dampened with distilled water to dilute any alcohol left behind. Stop if you see color coming from the fabric itself. That means the dye is running.
| Stain / Method | Delicate Clothing (Silk, Velvet) | Upholstered Furniture | Fragile Rug (Oriental, Aubusson) |
| Water Rings | Blot with distilled water only. Vinegar may be too strong. | Vinegar/distilled water solution is usually safe on cotton/linen blends. | Use only distilled water mist and blot. Professional cleaning is best for set-in stains. |
| Candle Wax | Ice and plastic card work. Be extra gentle on pile fabrics like velvet. | Same technique. For residue, a dry-cleaning solvent pen *tested first* may work. | Scrape carefully. Never use heat. Residue may require a professional textile conservator. |
| Red Wine | Blot with club soda if fresh. For old stains, consult a professional dry cleaner. | The mild vinegar solution is a good first attempt on most durable upholstery fabrics. | Blot with distilled water. Tannin stains on wool or silk rugs need a pro immediately. |
| Oil/Grease | Cornstarch is safest. Avoid dish soap on silk or unlabeled vintage fabric. | Cornstarch, then a micro-dab of dish soap solution if needed. | Cornstarch only. Rubbing or cleaners can damage the rug’s foundation or dyes. |
If a stain is set-in, deep, or its origin is a complete mystery, your best tool is the phone. Calling a professional conservator or a specialty cleaner at the first sign of trouble is not a failure, it’s smart preservation. I learned this after a mysterious brown stain on a 1920s lampshade only got worse with my “gentle” efforts.
Aftercare: Drying, Neutralizing, and Protecting
The treatment is only half the battle. How you finish determines if the stain stays gone and the fabric remains healthy.
How the Area Should Be Dried After Treatment
Never, ever use direct heat from a hair dryer, heater, or in direct sun. Heat can set any remaining stain particles and cause dyes to migrate.
First, blot the damp area aggressively with a stack of clean, dry, white towels. Press down firmly and lift. Replace the towel as it becomes wet.
After blotting, promote air flow. I use a regular fan on the cool setting, placed several feet away. For a chair, I might rotate the cushion so the wet spot isn’t bearing weight. Open a window if the humidity is low.
How to Neutralize Any Cleaning Residue
Leftover vinegar or soap can attract dirt or slowly degrade fibers. Neutralizing is a simple but critical step.
Once the treated stain area is dry to the touch, dampen a fresh white cloth with distilled water. Wring it out completely. Gently blot over the entire area you worked on, especially if you are dealing with stains on suede.
Follow immediately by blotting with a dry towel to pull that neutral moisture out. This final rinse removes the cleaning agents and leaves the fabric chemically neutral. Proper rinsing also helps remove chemical residues from spills on clothing.
Steps to Prevent Color Bleeding or Fading
Sunlight is a powerful bleach. During the entire process, from treatment to full drying, keep the piece out of direct sunlight. Close the curtains or move the item if you can.
Always use white, color-fast cloths for blotting. A patterned or dyed towel can transfer color to your damp, vulnerable antique fabric.
If you see any color on your blotting cloth that matches the fabric’s dye, stop all wet cleaning immediately. The dye is unstable. Your next step is a professional.
How the Treated Area Should Be Conditioned or Protected
Cleaning can strip natural oils from fibers like wool or leather. For most antique upholstery, I don’t recommend applying store-bought conditioners yourself. They can leave a sticky film or alter the fabric’s hand, especially when trying to remove oil stains from leather or suede.
Instead, focus on preventative care. After a successful clean and dry, consider a professional fabric protector applied by a specialist who understands antiques. For leather, a conservator can apply appropriate nourishing treatments.
The best conditioning is gentle use and a stable environment. Keep your treasured pieces away from direct heat vents, intense sun, and of course, my three-year-old Jessica and her glitter glue.
When Your Hands Are Not the Right Tool: Calling a Professional
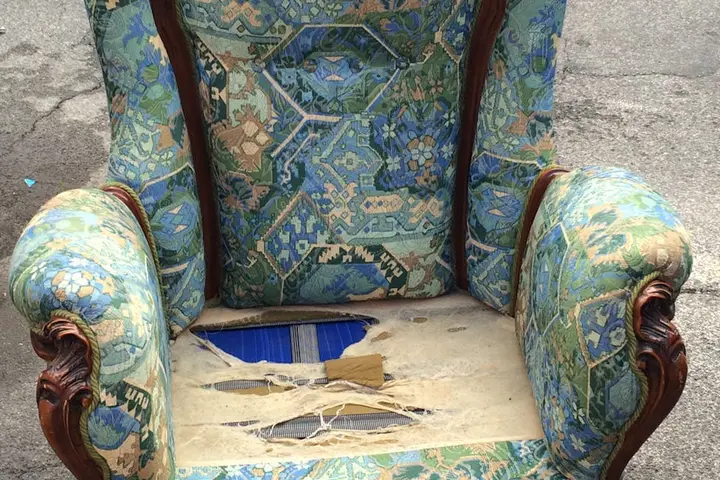
I learned this the hard way with a 19th-century steamer trunk my mom, Martha, passed down. The velvet lining had a water stain and was fraying at the seams. My usual blot-and-pray method felt wrong. That piece needed more than my kitchen cabinet supplies.
Knowing when to step back is the most important skill in caring for delicate textiles. Your hands have done all they can. Now it’s time for a specialist’s hands.
The Clear Signs You Need a Textile Conservator
Not every stain needs a PhD-level treatment. But some absolutely do. Call a professional if you see any of these red flags.
- The piece is museum-level or has significant sentimental value. Think great-grandma’s wedding chair or an inherited tapestry. If losing it would feel like losing a piece of family history, start with a pro.
- The fabric itself is disintegrating. You see brittle threads, powdery fibers, or areas that crumble at a touch. My aunt Jessica has a shawl like this. Cleaning it would dissolve it.
- The stain is historical and part of the object’s story. An old ink signature, a period dye bleed, or even a century-old tea splash. Removing it might erase its authenticity and value.
- Your hidden spot test failed dramatically. The fabric changed color, became stiff, or the stain spread. This is the fabric telling you, loudly, to stop.
What a Conservator Does Differently
A professional upholstery cleaner and a textile conservator are not the same. Think of one as a skilled cleaner and the other as a surgeon for fabric.
My local conservator walked me through her process when I asked about Martha’s trunk. First, she documents everything with photos and notes under special light. She identifies every fiber and dye.
They use science we don’t have at home, like pH-balanced solutions that won’t weaken aged fibers over time. Every treatment is “reversible.” That means if new technology comes along in 50 years, their work won’t prevent a future fix.
They might even decide to only stabilize the piece and not remove a stain, preserving the fabric’s strength for future generations. It’s a long-term mindset.
How to Find and Vet the Right Professional
You can’t just search “clean my old sofa.” You need the right keywords and the right questions.
- Search for “textile conservator” or “object conservator.” Avoid “furniture cleaner” or “stain removal service.” Those companies often use powerful, one-size-fits-all chemicals that can melt delicate silks or velvets.
- Look for membership in professional groups like the American Institute for Conservation (AIC). Their “Find a Conservator” tool is a great place to start.
- Ask specific questions before you hire anyone. Here’s what I ask:
- “What is your experience with fabrics from this specific era (e.g., Victorian, Art Deco)?”
- “Can you explain your testing process before any treatment?”
- “Do you use reversible methods and pH-neutral cleaning agents?”
- “Can you provide references from similar projects?”
A true conservator will welcome these questions and explain their methods in detail, not just give you a cheap price. Be wary of anyone who promises miraculous results or uses high-pressure sales.
The Ultimate Act of Care
Choosing to call a professional feels like admitting defeat. I get it. After years of tackling stains myself, it felt strange to outsource.
But with that old trunk, I realized something. My goal wasn’t just to clean a stain. It was to preserve a story for my kids, Jason and Jessica. A conservator could do that. I might have just made it worse.
Handing over a precious piece to a conservator isn’t a failure of your skills. It’s the highest form of respect for the object itself. You are choosing preservation over just cleaning. You are ensuring its story, stain and all, continues for many more years to come.
FAQ About Removing Stains from Antique Upholstery
How do I quickly identify what kind of stain I’m dealing with?
Gently blot the stain with a clean, white paper towel. An oily stain will leave a translucent ring, while a water-based stain like juice will spread more evenly. Your memory of the spill (e.g., wine, grease) is your best guide for choosing a cleaner.
I don’t have specialized tools. What common household items can I use safely?
A clean, soft-bristled toothbrush or makeup brush is perfect for gentle agitation. For applying liquid, a cotton swab or a spoon to scrape up solids is safe; just avoid any metal edges that could cut threads.
What’s my next step if gentle blotting with water isn’t working?
Stop, let the area dry completely, and reassess. Your next attempt should be with a slightly stronger tested solution, like a drop of dish soap in water, or it may be a sign the stain needs a professional’s solvent.
How can I protect a delicate area after a successful clean to prevent future stains?
Do not apply store-bought fabric sprays, as they can leave a damaging residue. For long-term protection, consult a textile conservator about professional, reversible fabric protection treatments suitable for antique fibers.
What is one clear sign I should stop and call a professional immediately?
If you see any dye transferring from the fabric onto your white blotting cloth, stop all cleaning immediately. This indicates unstable dyes, and continued moisture will likely cause permanent color bleeding or fading.
Preserving Your Antique Fabrics for the Future
Your single best move is to always test a cleaning method on a hidden seam or underside first; this quick check prevents heartache by showing how the fabric and dyes will react. I stick to this rule thanks to a lesson from my mom, Martha, after a close call with her old velvet settee. Join me here at Stain Wiki for more real-world advice that keeps your delicate pieces looking their best.
Written by Suzanne Rosi Beringer. Suzanne is an accomplished chemist, laundry expert and proud mom. She knows the science and chemistry of stains and has personally deal with all kinds of stains such as oil, grease, food and others. She brings her chemistry knowledge and degree expertise to explain and decode the science of stain removal, along with her decades long experience of stain removal. She has tried almost everything and is an expert on professional and DIY stain removal from clothes, fabric, carpet, leather and any other items dearest to you.