How Do You Safely Remove Stains from Vintage Linens and Clothing?
Seeing a new stain on a fragile, antique tablecloth or a beloved heirloom dress can make your heart sink. Take a deep breath-you can often rescue these pieces using slow, gentle methods that prioritize preservation over harsh cleaning.
- How to assess the fabric fiber and stain origin without causing further harm.
- Creating effective, non-toxic pre-treatment solutions from items like white vinegar and glycerin.
- Hand-washing techniques tailored for delicate materials like old lace, cotton, and silk.
- Safe drying and pressing methods that prevent fabric stress and color loss.
- Proper storage practices to protect your cleaned textiles for years to come.
My advice comes from hands-on experience, having restored everything from my Aunt Jessica’s wine-spilled napkins to my own children’s mishaps on antique quilts.
First, Do This: The Vintage Textile Check-Up
This is nothing like cleaning a modern t-shirt. Your primary tool is not a powerful cleaner, but patience.
Think of yourself as a fabric detective. Your first job is a gentle, full inspection under good light.
Look for clues of weakness before you ever touch a stain.
- Check every seam. Are threads loose or fraying?
- Look for thin, worn spots by holding the fabric up to the light.
- Examine hems and edges for brittleness or discoloration.
My mom, Martha, taught me this. She showed me a beautiful hand-embroidered tablecloth from her mother.
It looked perfect. But when we checked the inner hem, the fabric there was so thin it was nearly transparent from decades of washing.
That hidden spot told us the whole piece was fragile. We decided to just air it out, not wash it.
That lesson saved it.
Identifying Your Fabric and Its Weaknesses
Vintage fibers need specific care. Getting this wrong can cause permanent damage.
The fiber content of your piece dictates every single cleaning decision you make.
Here’s a quick guide to common vintage materials:
- Cotton & Linen: These plant fibers are relatively sturdy. They can handle mild acids (like white vinegar) and gentle agitation. Their main enemy is chlorine bleach, which will eat the fibers over time.
- Silk: A protein fiber. It is strong when dry but weakens dramatically when wet. Silk hates alkaline solutions, like baking soda or heavy soap. It can develop permanent water spots.
- Wool: Another protein fiber. It is incredibly sensitive to agitation and sudden temperature changes, which cause it to shrink and felt. It needs cool water and almost no rubbing.
- Early Synthetics (Rayon/Acetate): These can be deceptively delicate. Rayon weakens when wet, much like silk. Many dissolve entirely with acetone (nail polish remover). Treat them as very fragile.
Reading the Stain’s Story
Is it a fresh spill on a 1950s dress? Or a 100-year-old mystery spot on a christening gown?
The approach is different.
Assess the stain’s age, source, and any prior “treatment” history.
Look closely. An old tea stain might be a dull, set-in brown ring. A fresh one is more yellow and might still feel tacky.
Ask yourself:
- Is it a protein stain? (Egg, blood, milk). These often need cool water and enzymes.
- Is it a tannin stain? (Tea, wine, coffee). These usually respond to acidic treatments.
- Is it an oil-based stain? (Grease, butter, old lipstick). These need a solvent or detergent to break them down.
Also, look for “cleaning” stains. Halo rings from old, harsh soaps or faded spots from past bleach attempts tell you what *not* to do again.
The All-Important Hidden Spot Test
Never, ever skip this step. It is your safety net.
Always test your chosen cleaning solution on a hidden part of the garment first.
Find an inside seam allowance, a deep hem, or an underarm area.
- Mix your planned cleaning solution exactly as you intend to use it.
- Dip a white cotton swab or the corner of a clean, white cloth into it.
- Gently dab it onto the hidden test spot. Do not rub.
- Let it dry completely. This can take an hour.
Now, inspect. Did the fabric’s color bleed onto your white swab? Did the fabric itself change color? Does the spot feel weaker or look damaged?
If you see any change, that method is unsafe for your entire piece. You must try a gentler approach.
Panic Level & The Golden Window for Vintage Stains
For a fresh spill on vintage fabric, I give this a Panic Level of 2 out of 10.
Here’s why. Haste and panic cause more damage than the stain itself. Aggressive scrubbing can shred delicate fibers.
With vintage, the “Golden Window” isn’t about minutes. It’s about careful planning.
Rushing is the real enemy of antique textiles. Taking a full day to inspect, identify, and test is the smartest move you can make.
Blot a fresh spill with a clean cloth to remove excess moisture. Then, let yourself pause. Acting in five frantic minutes can lead to a lifetime of regret.
A thoughtful, slow approach gives you the best chance of preserving your treasure.
Critical Warnings: What Never to Use on Antique Fabric
Cleaning vintage textiles is not like dealing with a soccer jersey. The rules are different.
One wrong move can turn a precious heirloom into a pile of brittle threads.
Your first goal is to do no harm, and that starts by knowing what to avoid completely.
Material Red Flags
Before you even think about cleaning, you must identify high-risk fabrics. These require extreme caution or professional help.
- Weighted Silk: Common in early 20th-century garments, this silk is treated with metallic salts. Getting it wet can cause permanent, irreparable splitting and shattering.
- Fugitive Dyes: These are old dyes that were not colorfast. Even a drop of water can cause the color to bleed, creating a permanent, blurry stain.
- Brittle Lace or Netting: Age weakens fibers. Gentle handling might still cause snaps and tears.
- Glued Embellishments: Sequins, beads, or rhinestones attached with old glue. Moisture or solvents will dissolve the adhesive. My Aunt Jessica’s beaded 1920s flapper dress is a perfect example. One spill could send all those beads sliding right off.
If your piece has any of these features, stop. Consider consulting a textile conservator.
The “Never-Use” Chemical List
Modern cleaners are designed for modern, durable fabrics. They are far too harsh for history.
- Chlorine Bleach: This will oxidize and destroy organic fibers like cotton, linen, and silk on a molecular level, causing immediate yellowing and weakness.
- Ammonia: It’s a harsh alkali that can set some stains, degrade protein fibers like silk and wool, and cause dyes to run.
- Powerful Modern Oxidizers: This includes undiluted OxiClean or strong hydrogen peroxide. They work by breaking chemical bonds, which is exactly what you don’t want happening to fragile, century-old threads.
- Acetone or Nail Polish Remover: These are powerful solvents that will dissolve many synthetic fabrics and finishes, and can permanently alter natural fibers.
- Strong Acids/Vinegar on Delicates: While dilute vinegar has its place, using it on silk or wool can cause permanent watermarks and weaken the fibers. It can also react with metallic threads.
Think of these chemicals as a pressure washer when you need a soft paintbrush.
Your Gentle Cleaning Toolkit for Delicate Fabrics
Forget the heavy artillery. Caring for vintage linens is about curating a conservation kit.
The goal is gentle lifting, not aggressive attacking. You want to absorb stains and lift grime, not scrub them into oblivion.
Mechanical Cleaning: Your First and Best Move
Your hands and simple tools are often the most effective and safest options. This means physically removing soil without liquids.
I learned this from a quilt my mom Martha gave me. It smelled of decades in a trunk.
I laid it on a clean sheet. Using a soft-bristled makeup brush, I gently flicked dust from the surface. For deeper grit, I used a low-suction vacuum with a cheesecloth screen over the hose. The amount of gray dust that came out was shocking. The quilt looked brighter instantly, without a single drop of water.
Your mechanical toolkit should include:
- A super soft toothbrush or clean makeup brush for gentle agitation.
- White cotton swabs for precise dabbing.
- A microspatula or blunt butter knife to carefully scrape off waxy substances.
- Clean, white cotton cloths and unprinted paper towels for absorption.
Safe, Homemade Solution Recipes
When you must use moisture, these are your gentle, time-tested recipes. Always, always test on a hidden seam allowance first.
1% Clear Dish Soap Solution:
- 1 teaspoon clear, dye-free, fragrance-free dish soap (like Dawn Free & Clear)
- 2 cups lukewarm distilled water
- This is your universal, gentle cleaner for most stains on stable cottons and linens.
pH-Neutral Wool Wash for Delicates:
- Use a commercial wool wash like Eucalan or Soak as directed. They require no rinsing, which minimizes stress on fibers.
- Perfect for vintage sweaters, lace, or fragile silks where you suspect the dye is stable.
Weak Hydrogen Peroxide for Yellowing Whites:
- 1 part 3% hydrogen peroxide to 10 parts distilled water.
- Only for all-white, sturdy cotton or linen. It can lighten some stains and brighten age-related yellowing.
Brianna’s “Sun Tea for Linens” Method:
My mother-in-law Brianna from Southern Texas taught me this for yellowed but sturdy antique linens.
- Fill a large, clean glass jar with distilled water.
- Add a few tablespoons of lemon juice (the citric acid is a gentle bleach).
- Submerge the yellowed linen.
- Cap the jar and place it in direct sunlight for several hours.
- Check frequently. The sun activates the lemon juice, often lifting the yellow tinge beautifully.
Mixing and Applying Solutions Safely
This is where “less is more” becomes your mantra. More liquid means more risk of dye bleed, fabric distortion, and water rings.
You are performing micro-surgery, not giving the fabric a bath.
- Mix Small: Prepare your solution in a small cup. You likely won’t need more than a quarter cup total.
- Dampen, Don’t Soak: Moisten a white cotton swab or the corner of a clean cloth in your solution. Wring it out until it is barely damp.
- Blot and Lift: Gently dab at the stain from the outside in. Never rub in a circular motion. Use a dry swab or cloth to immediately blot up the moisture and any lifted stain residue.
- The “Rinse”: To rinse, simply use a swab dampened with plain distilled water to dab the area, then blot dry again. You’re diluting the cleaning solution, not flooding the fabric.
- Air Dry Flat: Support the cleaned area on a clean, dry towel and let it air dry completely before moving or storing. This prevents new water marks from forming.
Surface Compatibility: Treating Linens, Clothing, and Upholstery
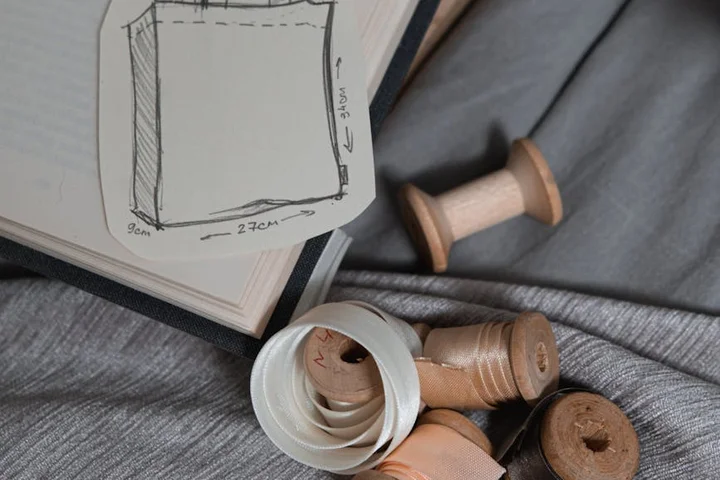
Your gentle toolkit works on everything, but your technique must change. Think of water like a guest. For some fabrics, it’s a welcome visitor. For others, it’s a clumsy one that can overstay its welcome.
Here’s how to adapt your approach for common vintage finds.
| Item Example | Core Rule | Toolkit Adaptation |
| A linen napkin with tea rings | Lay flat. You control the moisture. | Perfect for the “blot and lift” method. Easy to rinse fully. |
| A silk blouse with a perfume stain | Spot treat only. Support the shape. | Use minimal solution on a swab. Never soak the entire garment. |
| An upholstered chair seat | You cannot fully rinse. Dry methods first. | Use a syringe to apply tiny amounts of cleaner. Blot aggressively. |
Flat Textiles (Tablecloths, Napkins, Quilts)
This is where you have the most control. My mom Martha has an old quilt she airs out every spring. She taught me the flat method.
Lay a clean, white towel on a large, stable surface. Place your textile flat on top. This towel acts like a blotter, pulling stain and moisture down and away from the fabric, especially when trying to remove stains from linen fabric.
Use a “blot and lift” technique with your damp cloth instead of rubbing, which grinds the stain deeper into the fibers. Rinsing is simple. You can gently pour cool water over the treated area and let the towel underneath absorb it.
Structured Clothing (Dresses, Blouses, Suits)
These pieces have shapes to maintain. Soaking can ruin interfacing, linings, and the drape of the fabric itself.
Always focus on spot treatment. Place a folded white towel inside the garment, right under the stain. This supports the fabric and catches any bleed-through.
Work from the back of the stain if you can. Apply your cleaning solution sparingly with a cotton swab to the center of the stain, letting it wick outward.
I never submerge a structured vintage piece. The risk of the whole garment becoming misshapen is too high.
Upholstered Pieces and Rugs
This is the hardest game. You can’t take it to the sink. Excess moisture can cause mildew inside the padding.
Always start with a dry method. For a crumbs or dry soil, use a soft brush. For my Aunt Jessica’s antique rug, I gently vacuumed through a screen to protect loose threads.
If you need moisture, control is everything. I use a small syringe to apply droplets of cleaner directly to the stain, then immediately blot with a microfiber cloth. You are trying to lift the stain to the surface, not wet the backing.
Step-by-Step: Tackling Common Vintage Stain Types
Old stains need patience, not power. These categories cover most of what you’ll find.
The Yellowing and Age Spot Blues
Overall yellowing is often the fabric itself aging. Localized brown spots are usually where oils or acids have settled.
For overall yellowing on sturdy cotton or linen, try the sun-tea method. Soak the item in a bath of cold water with a few bags of white tea. Then, lay it damp on fresh grass on a sunny day. The combination can gently brighten fibers. It’s especially helpful for yellow stains on white clothes that are resistant to regular washing.
For small age spots on white fabric, a drop of 3% hydrogen peroxide applied with a swab can work wonders. Always test on a hidden seam first, especially when treating delicate stains like makeup on white fabrics.
Sometimes, the yellow is permanent. My mother-in-law Brianna has a tablecloth with a warm, creamy tone. We decided that tone was its history, and we left it alone.
Old Organic Stains (Food, Drink, Blood)
Think like an enzyme, but act gently. Modern enzymatic cleaners can be harsh on antique fibers.
For an old, set-in stain, try a cool compress. Dissolve a bit of neutral pH detergent (like Orvus Paste) in cool water. Lay a cloth soaked in this solution over the stain for 30 minutes. The moisture can slowly re-activate the stain particles so you can blot them away. Biological stains—like blood, sweat, or urine—often respond best to enzyme-based cleaners that break down proteins. After blotting, follow with such a treatment to further lift the stain before washing.
Decades-old wine or tea stains may have become a tannin patina. You can try this compress method, but know that complete removal is often impossible. The stain has literally become part of the cloth.
Rust and Metallic Stains
Proceed with extreme caution. Rust removers work by acid, which can also eat through delicate fabric.
For a tiny spot, make a paste with citric acid powder and a drop of water. With a toothpick, apply it only to the rust stain. Watch it carefully. The moment the rust fades, neutralize the area with a paste of baking soda and water, then rinse. This method is particularly effective for rust stains on metal surfaces.
I learned this the hard way with an antique lace collar. I got the rust out, but I was a second too late and the acid weakened the thread. Now there’s a tiny hole where the stain was. Sometimes, the cure is worse than the mark.
Special Cases: Lace, Embroidery, and Beads
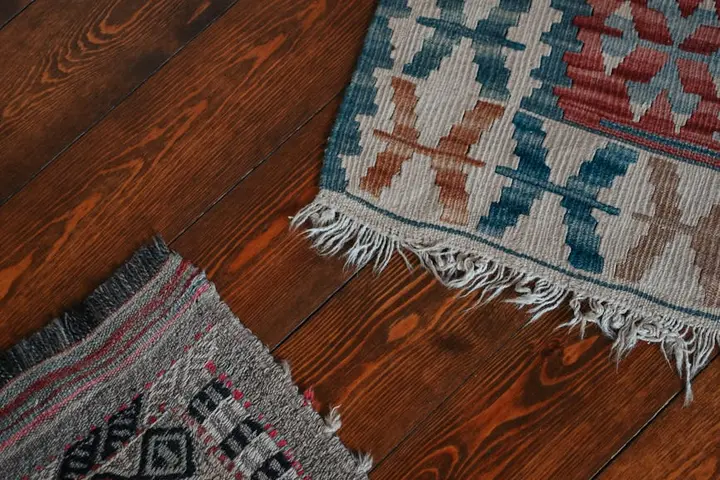
These items need more than care. They need reverence. My own daughter’s christening gown was vintage lace.
Your goal is not to deep clean. It’s to refresh the fabric around the decorations without disturbing them.
Always support the entire piece on a towel in a basin. Let the water and mild detergent do the work with gentle agitation, not your hands.
Cleaning Around the Decorations
First, secure anything loose. If a bead or sequin is dangling, I use a tiny dot of clear-drying fabric glue on the thread on the backside to secure it before it gets wet.
For embroidered areas, you don’t clean the threads. You clean the fabric around them. Use a damp cotton swab to gently roll over the fabric between the embroidery threads, lifting away surface dust and grime.
For lace, pressing is often more transformative than washing. Place it face-down on a towel and press with a cool iron over a pressing cloth to restore crispness.
When to Stop: Calling a Professional Textile Conservator
Knowing when to hand it off is the mark of a true caretaker. It’s not failure. It’s wisdom.
Stop and call a pro if the fabric feels mushy or brittle to the touch, if the stain is on a painted silk (like a scarf), or if the piece has immense value-monetary or irreplaceable sentimental worth.
A conservator doesn’t just clean; they stabilize. They have tools like suction tables to pull stains out without wetting the fabric and chemical testing to identify stain composition. They work with museum-level precision.
To find one, look for members of the American Institute for Conservation (AIC). Getting a piece professionally conserved is the ultimate act of preservation, ensuring it can be part of your family’s story for generations more.
Special Cases: Lace, Embroidery, and Beads
These pieces need kid-glove treatment. The fibers are old, and the decorations are often held on by threads just as fragile.
I learned this the hard way with my daughter Jessica’s christening gown, a family heirloom from my Aunt Jessica. A tiny drip of wax landed on the lace sleeve. My first instinct was to scrape it. I stopped myself just in time.
For anything with lace, beads, or detailed embroidery, your main job is support. You are not attacking a stain. You are gently persuading it to leave a fragile home.
Always place the item on a clean, white towel and support any heavy beadwork so it isn’t pulling on the fabric.
Cleaning Around the Decorations
Your first step is never cleaning. It’s securing.
Check every bead, sequin, and delicate stitch. If anything is loose, use a single thread of fine, neutral-colored cotton to make a tiny, secure knot. Do not use modern glue.
For cleaning, you work around the obstacles. For soil on embroidered areas, I use a tool my mom, Martha, taught me.
Take a cotton swab, dampen it with your chosen cleaning solution (like distilled water), and gently roll it between the embroidery threads. You are cleaning the base fabric, not scrubbing the decorative thread itself.
This method lets you control moisture precisely and avoids snagging or distorting the raised design.
For lace, I lay it flat on a towel and use a small, soft-bristled brush (like a clean makeup brush) to flick away dry dirt. Then, I might place a dampened piece of blotting paper over a stain and let capillary action draw it out.
When to Stop: Calling a Professional Textile Conservator
Knowing when to stop is the most expert skill of all. There is no shame in it.
Call a professional if the fabric feels mushy or dissolves when wet. This means the fibers have degraded too far for home care.
Call a professional for stains on painted silks, historic tapestries, or anything with immense sentimental or financial value. My mother-in-law Brianna’s 1970s wedding veil with hand-painted lace edges? That goes straight to a pro.
Handing over a precious piece is an act of care, not a failure in your cleaning skills.
A conservator uses tools and chemicals we don’t have at home. They work under microscopes. They perform tests on hidden areas first. They create custom supports for the entire piece during treatment.
To find one, start with a local museum. Ask who they use. Look for members of the American Institute for Conservation (AIC). A good conservator will explain their process clearly and never promise miracle results.
They help preserve the story, and sometimes, that’s worth more than removing every last spot.
FAQ about Safely Removing Stains from Antique Fabrics
How do I test if the colors will run before I treat a stain?
Always perform a spot test on a hidden seam or hem with a damp white cloth. If any color transfers onto the cloth or the fabric discolors, the dyes are fugitive and any wet cleaning is too risky. You should especially be cautious when trying to remove dye stains.
What’s the first thing I should do for a fresh spill on a vintage dress?
Immediately blot-don’t rub-the excess liquid with a clean, absorbent cloth. Then, set the garment aside safely and take your time to properly assess the fabric and stain before doing anything else.
What household cleaner is safest for an unknown stain on antique cotton?
A 1% solution of clear, dye-free dish soap in distilled water is your safest first choice for spot testing. For any other household product, you must test it on a hidden area first to check for fabric damage.
My antique linen has a yellow stain that’s been there for years. Can I still remove it?
Possibly, but manage your expectations. Try a gentle compress with a neutral detergent, but know that very old stains can become a permanent part of the fabric’s history and may not come out completely.
The textile is fragile and smells musty. Should I wash the whole piece?
No, full immersion is often too stressful. First, try mechanical cleaning like gentle vacuuming through a screen and airing outdoors. For stains, use minimal spot treatment with a cotton swab instead of washing the entire piece.
Caring for Antique Fabrics After a Clean
I learned from my aunt Jessica that the gentlest method often works best for vintage textiles. Always test cleaners on a hidden spot and avoid harsh scrubbing to preserve delicate fibers. Find more of my family-tested advice on caring for your home right here on Stain Wiki.
Written by Suzanne Rosi Beringer. Suzanne is an accomplished chemist, laundry expert and proud mom. She knows the science and chemistry of stains and has personally deal with all kinds of stains such as oil, grease, food and others. She brings her chemistry knowledge and degree expertise to explain and decode the science of stain removal, along with her decades long experience of stain removal. She has tried almost everything and is an expert on professional and DIY stain removal from clothes, fabric, carpet, leather and any other items dearest to you.