Steam Mop or Traditional Mop: Which Really Cleans Floor Stains?
Confused about which mop to use on that dried spaghetti sauce or muddy footprint? Steam mops win for sanitizing sealed floors with just heat, but traditional mops with a targeted cleaner are champions for greasy, sticky messes.
Here’s exactly what we’ll break down:
- How steam lifts stains without chemicals and where it can fall short.
- Why a basic string mop with vinegar or dish soap still has a major advantage.
- The best pick for your floor type, from hardwood to vinyl plank.
- My own tests on stains from my kids’ juice spills to my dog’s muddy paws.
- Key mistakes to avoid so you don’t damage your floors.
I’ve handled countless stains in my own home and for clients, giving you advice that’s actually been tried on the messy front lines.
First Response: Assessing the Stain and Your “Golden Window”
I judge every floor stain by its “panic-level,” a quick scale from 1 to 10 in my head.
A 1 is just dusty footprints from Peeta running inside. A 10 is something like dried red wine from Aunt Jessica’s visit or a blob of motor oil from Roger’s garage project.
Knowing this number tells you how fast you need to move and what tool to grab first.
The moment after a spill is your “golden window” for action. For a wet, fresh stain, you blot immediately.
For something dried and crusty, like old mud, your approach is slower and more strategic.
Last week, Jason’s friend Edward tracked in a full panic-level 9 mess of wet, gritty mud from soccer practice.
I grabbed old towels to blot it up fast before it set. For the dull, dried juice ring Jessica left yesterday, I had time to think about my weapon of choice.
Urgency dictates your tool: a steam mop for quick heat on fresh organic messes, or a traditional mop and bucket for scrubbing power on set-in grime.
The Core Difference: How Steam and Traditional Mops Attack Stains
A steam mop fights with heat, pushing out sanitizing vapor to loosen dirt. A traditional mop fights with chemistry and elbow grease, using detergent and water to lift stains.
The main difference is simple: one uses thermal energy, the other uses mechanical and chemical action.
On tough, dried-on stains, each has a role. Steam is fantastic for loosening. I hover it over a dried spaghetti sauce spot to soften it up. That same approach works on pasta stains on clothing, tablecloths, and upholstery. Test on a hidden area first to protect delicate fabrics.
For the abrasive action to finally lift it, I often follow with a traditional microfiber mop and a little scrubbing.
Let’s talk science. Heat from steam breaks down the bonds in oil-based stains, making them liquid again so you can wipe them away, especially when trying to remove cooking oil stains from clothes.
Detergent in a traditional mop bucket works by emulsifying grease; its molecules surround the oil so it can rinse off with water. Detergents are types of surfactants and emulsifiers that specifically target grease stains.
For sanitization, steam wins on heat alone. The high temperature kills most germs and dust mites without any chemicals.
With a traditional mop, you need to add a disinfectant to the water if killing germs is your goal, which it should be for pet areas or after someone’s been sick.
Chemistry Corner: Why Heat or Soap Wins
Floor stains usually fall into three camps: oil or grease (think kitchen splatter or garage drips), tannins (like red wine or tea), and plain old dirt or mud. Oil stains can be particularly stubborn on wood floors.
Steam’s heat attacks oil and grease stains directly. It liquefies them, turning a tacky residue back into a liquid you can mop up.
This heat also loosens bonded dirt at a molecular level, making it easier to remove.
In your traditional mop bucket, detergent molecules have a head that loves water and a tail that loves oil.
These molecules surround grease stains, forming little bubbles called micelles that get suspended in water, so when you mop, the stain lifts away instead of just spreading.
Safety First: Floor Compatibility and Critical Red Flags

Before you even think about a mop, you must look at your floor.
Choosing the wrong cleaning method can cause permanent, expensive damage. I learned this the hard way in my own kitchen.
Material Red Flags: What to Avoid
Some floors just don’t mix with certain mops. Here are the big warnings.
A steam mop can damage floors that are sensitive to heat and moisture.
- Waxed floors: The heat will melt the wax, leaving a gummy, cloudy mess.
- Unsealed or worn hardwood: Steam forces moisture into the wood, causing warping, cupping, or cracks.
- Laminate flooring: The seams are vulnerable. Steam can seep in and cause the planks to swell and buckle. This was my lesson.
- Unsealed stone or concrete: They can absorb water and stain.
A traditional mop poses a different threat: too much standing water.
- Any floor that shouldn’t stay wet for long is at risk. This includes the same unsealed woods, laminates, and some older vinyl.
- Over-wetting can lead to mold under baseboards and ruined subfloors.
The Surface Compatibility Chart
Use this quick list as your starting point.
- Safe for Steam: Ceramic tile, porcelain tile, sealed natural stone (like sealed granite or marble).
- Safe for Both: Luxury vinyl plank (LVP), sheet vinyl (if seams are sealed), sealed concrete.
- Risky for Steam, Okay for Damp Traditional: Properly sealed hardwood. Use a barely-damp mop, never steam.
- Risky for Both: The “Red Flag” materials listed above.
The single most important safety step is the test patch. Pick a hidden spot, like inside a closet or behind a door. Try your method there first and wait 24 hours. Look for changes in color, texture, or finish.
Let me tell you about my laminate. I was in a hurry to clean up a juice spill. I used my steam mop on a low setting, thinking it would be fine. Two days later, the planks near the wall had a slight bulge. The steam had crept into a tiny seam. Now, I always check the manufacturer’s guidelines and do that test patch.
The Practical Guide: Step-by-Step Stain Removal with Each Mop
Let’s get practical. Here’s how to tackle a classic, sticky mess: dried ketchup.
Removing Dried Ketchup with a Steam Mop
Steam mops use heat to loosen grime, so pre-treatment is your secret weapon.
- Scrape. Use a dull knife or a plastic scraper to lift off any big, dried chunks.
- Pre-treat. Dampen the stain with a little cool water. Let it sit for a minute to rehydrate the tomato paste and sugar.
- Attach a clean pad. Never use a dirty pad on a fresh stain. You’ll just smear it.
- Use steam bursts. Hold the mop head over the stain and release steam for 10-15 seconds. Let the heat work for another 30 seconds.
- Gently scrub. Use the mop head in a small, circular motion over the softened stain.
- Repeat if needed. For tough spots, you may need 2-3 steam-and-scrub cycles.
- Change the pad. Once the stain is up, switch to a fresh, dry microfiber pad for a final steam pass over the whole area. This picks up the last residue.
Removing Dried Ketchup with a Traditional Mop
This method relies on cleaning solution and elbow grease.
- Scrape. Same first step. Get off the big pieces.
- Mix your cleaner. In a bucket, use hot water and a few drops of dish soap or a pH-neutral floor cleaner. Avoid harsh chemicals on sensitive floors.
- Pre-scrub the spot. Dip an old toothbrush or a small scrub brush into your solution. Gently work it into the stain to break it up.
- Mop over the area. Wring your mop head until it’s just damp. Go over the pre-scrubbed spot and the surrounding floor.
- Rinse. This is critical. Empty your bucket, fill it with clean, cool water. Wring your mop thoroughly and go over the area again to remove any soapy film.
- Dry. Use a dry microfiber cloth or a dry mop head to soak up all standing moisture.
What Helped Me (Pro-Tip)
For any dried, gummy stain, keep an old toothbrush dedicated to floor pre-scrubbing. Before I even grab the mop, I use the brush with a drop of water or cleaner to agitate the spot. This breaks the stain’s bond with the floor, making the actual mopping step so much faster and more effective. It worked on Jason’s gummed-up yogurt spill last week.
Post-Treatment Recovery: Drying and Checking Your Work
Your job isn’t done when the stain is gone. How you finish prevents new problems.
Steam mops leave very little moisture. Most floors will air dry in just a few minutes. Just make sure the room is well-ventilated.
Traditional mopping often leaves puddles. You must do a dry pass with a separate, absorbent mop head or towel. Walk over the area until the floor feels dry to the touch.
Before your floor dries, check for residue. Take a clean, white cloth and wipe it over the cleaned spot. If any color or grime transfers, you need to rinse again. This prevents a sticky, dirt-attracting film from setting up.
On shiny surfaces like sealed tile, prevent streaks by mopping in the direction of the light. Use a dry, soft cloth for a final buff. My Aunt Jessica taught me this trick for her glossy Arizona tile. It makes all the difference.
The Effort and Cost Battle: Which Mop Fits Your Home?
Pushing vs. Scrubbing: A Question of Sweat
A steam mop asks for a gentle push. The head glides on its pad, trailing a hot, damp vapor. There’s no bucket to drag.
There’s no wringing out a heavy, soapy mop head. My back appreciates that difference after a long day.
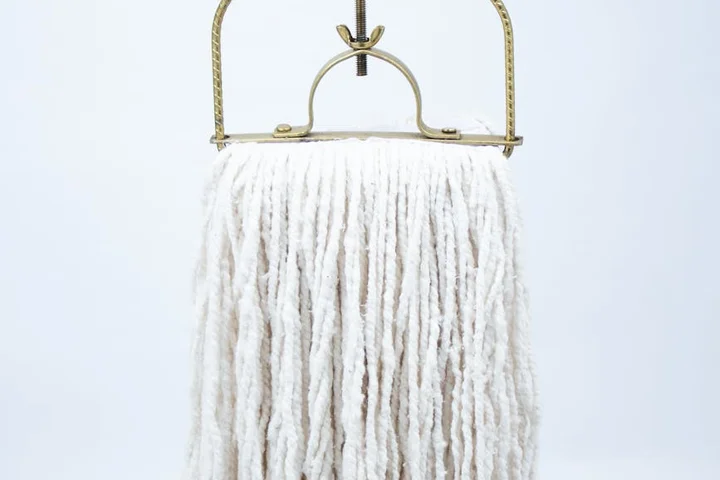
A traditional string or microfiber mop demands more from your body. You bend to wring it out, sometimes more than once per section of floor. For a stuck-on mess, you’re the one providing the scrubbing power, leaning into the handle.
The steam mop wins on pure physical effort, especially for large, open floor plans.
The Race Against the Clock
Which method is faster? My tests in a busy hallway show a split decision.
The steam mop heats up in about 30 seconds. I can cover my kitchen’s tile quickly, as the steam loosens most dried spills from Jason’s juice box or Jessica’s yogurt almost immediately.
No rinsing is needed. You just keep moving.
A traditional mop setup is slower. You fill a bucket, mix a solution, and mop. You must change dirty water to avoid just spreading grime. Rinsing is a separate, crucial step if you use soap.
For sanitizing and drying speed, the steam mop is the clear front-runner. For a quick, damp cleanup of a small area, a traditional mop you can grab and go might feel faster.
Breaking Down the True Cost
The price tag tells only part of the story. Here’s what you spend over time.
| Cost Factor | Steam Mop | Traditional Mop |
|---|---|---|
| Upfront Purchase | $50 – $150+ | $20 – $50 |
| Long-Term Supplies | Replacement pads ($10-$20 per pack), Electricity | Cleaning solutions, Replacement mop heads/buckets |
| Water/Chemical Use | Distilled water (minimal) | Tap water & detergent/vinegar (regular use) |
I bought my steam mop when Jessica started crawling. The upfront cost stung a little, but I weighed it against my time and desire for a chemical-free clean where she played.
The traditional mop is cheaper to start, but costs add up with every bottle of floor cleaner you buy.
The Green Factor: Chemicals vs. Waste
My aunt Jessica in Arizona loves her steam mop because she hates the smell of chemical cleaners. Using just water is a big environmental win, and it’s especially gentle when compared to chemical cleaners for stain removal.
But many steam mops use disposable microfiber pads. That creates textile waste.
The fix? I use and highly recommend reusable, washable pads. I throw them in with my regular laundry.
Traditional mopping often relies on bottled solutions. Even eco-friendly ones have a manufacturing and plastic footprint. A vinegar-and-water mix in a reusable bottle is the best low-waste option here.
You can make either system more earth-friendly with conscious choices: reusable pads for steam, and simple homemade solutions for traditional.
When Not to Try This: Limitations and Final Wisdom
Steam Mop Red Flags
Do not use a steam mop on these surfaces. The intense heat and moisture can cause real damage.
- Unsealed hardwood or cork floors
- Laminate flooring (it can warp the seams)
- Bamboo floors (unless the manufacturer explicitly says it’s safe)
- Waxed or oil-treated floors (the steam will strip the finish)
Traditional Mop Shortcomings
A traditional mop is the wrong tool in a few key situations.
- When you need to sanitize without chemicals. Steam’s high heat kills germs; soapy water mostly just relocates them.
- On very sticky, dried-on stains. You’ll often just smear them without the penetrating power of heat.
- If anyone in your home has severe allergies. Steam can remove allergens without leaving a perfumed residue.
Quick Troubleshooting Tips
What if the steam mop has no steam? Check for a clogged nozzle. Mineral deposits from hard water are the usual culprit. Always use distilled water. Run a descaling solution (half vinegar, half water) through it, following your manual’s instructions.
What if the traditional mop just spreads dirt? Your water is too dirty. Change it more often, at least once per room. For greasy kitchen floors, a dash of dish soap in hot water cuts the grease better than many floor cleaners.
Choosing Your Champion
Look at your floors and your life. My main floor is tile, and my kids are messy. The steam mop is my MVP.
Choose a steam mop if your floors can handle heat and you value sanitizing, speed, and a chemical-free clean for a higher initial price. When evaluating cleaning options for carpets, you might compare steam with chemical cleaners to see which preserves fibers and reduces residue. A quick steam vs chemical cleaning comparison for carpets can help you decide.
Choose a traditional mop if you have delicate floors, want the lowest entry cost, or don’t mind the physical process of traditional cleaning.
Remember, no mop is magic. For a truly set-in stain-like the grape juice that sat under the rug for a week-my mom Martha’s wisdom still holds. Sometimes, you need a dedicated cleaner, a soft brush, and a hands-and-knees scrub to get the job done right.
FAQ About Choosing and Using Mops for Floor Stains
What immediate steps should I take if a steam mop leaves a stain looking worse or smeared?
Immediately stop and let the area cool to prevent setting the smear. Blot with a dry microfiber cloth, then pre-treat with a dab of dish soap and water before a gentle re-steaming.
Can I use homemade solutions like vinegar or baking soda with a steam mop for extra cleaning power?
Never add anything but distilled water to the tank to avoid clogs and damage. For stubborn stains, spray a vinegar solution on the floor first, let it sit, then steam as usual. If stubborn vinyl floor stains persist, the next steps will cover how to remove stubborn vinyl floor stains.
How do I safely remove a set-in grease stain from my kitchen floor without damaging the sealant?
Scrape off excess grease, then apply a paste of baking soda and water to absorb it; scrub gently with a soft brush and rinse with a damp cloth. Avoid harsh chemicals that can degrade sealants over time, especially when removing burnt food grease from cookware.
What are the signs that my mop pad or head needs replacing to avoid spreading dirt?
Replace pads when they appear frayed, less absorbent, or hold odors after washing. For traditional mop heads, swap them out if they leave lint or fail to pick up dirt despite cleaning.
If I have both steam and traditional mops, which one should I grab first for a fresh spill?
Always blot fresh spills with an absorbent cloth or traditional mop head to remove liquid fast. Follow up with a steam mop only on compatible floors to sanitize and tackle any remaining residue.
Your Floor’s Final Cleaning Verdict
The winning mop is the one chosen for your specific floor type—steam for sealed, heat-tolerant surfaces and a traditional mop with the right cleaner for everything else. I test every method in my own home first, a rule that saved our kitchen tiles after Jason’s post-soccer mess. You can find all my real-world comparisons and family-tested tips right here on Stain Wiki.
Written by Suzanne Rosi Beringer. Suzanne is an accomplished chemist, laundry expert and proud mom. She knows the science and chemistry of stains and has personally deal with all kinds of stains such as oil, grease, food and others. She brings her chemistry knowledge and degree expertise to explain and decode the science of stain removal, along with her decades long experience of stain removal. She has tried almost everything and is an expert on professional and DIY stain removal from clothes, fabric, carpet, leather and any other items dearest to you.