How Do You Remove Stains from a Wedding Dress Without Damaging It?
Seeing a stain on your delicate wedding dress is heart-stopping. Your quick reaction with a plain, damp cloth can stop most stains from becoming permanent.
This guide will help you handle the mess with confidence. Here’s exactly what we’ll cover:
- How to instantly assess the stain and your dress’s fabric.
- Using gentle, non-toxic cleaners you likely already have at home.
- The non-negotiable rule of testing on a hidden seam first.
- Step-by-step blotting and rinsing for lace, silk, and tulle.
- Knowing the clear sign it’s time to call a professional.
I’ve spent years testing methods on everything from my mom Martha’s vintage linens to modern bridal satins, so you’re getting proven, hands-on advice.
First, Don’t Panic: Identify the Stain and Act Fast
Seeing a stain on your wedding dress is scary. I get it. Your first job is to stay calm and figure out what you’re dealing with.
Every stain has a “Golden Window” for treatment, usually the first hour, where your actions make the biggest difference.
Use the Panic-Level Rating System
I rate common wedding dress stains from 1 (mild) to 10 (severe). This helps you gauge urgency.
- Champagne or White Wine (Level 3): Often just a sticky, sugary spot. Low panic if blotted fast.
- Red Wine (Level 8): High panic. The deep color and tannins set quickly into fabric.
- Lipstick or Foundation (Level 6): Moderately high. The oils and pigments can leave a waxy ring.
- Grass or Garden Dirt (Level 4): Medium panic. It’s mostly water-based mud and chlorophyll.
- Food Grease or Buttercream (Level 7): High panic. Grease bonds to fibers and leaves a dark, shiny patch.
Identify the Stain Type by Its Look and Feel
Gently touch the edge of the stain with a clean finger. Is it slick? That’s oil-based. Is it drying crusty? That’s water-based.
Water-based stains like soda often dry with a dull ring, while oil-based ones like makeup feel tacky and look darker.
Many party stains, like gravy or salad dressing, are a tricky combination of both.
Quick ID Tips for Common Culprits
- Champagne: Look for a light, sticky patch with a slight sour scent.
- Lipstick: You’ll see bold color and a distinct waxy texture.
- Dirt: It feels gritty and may have a green or brown tint.
- Food Grease: Appears as a shiny, dark spot that feels slippery.
The Critical First-Aid Rule: Blot, Never Rub
Rushing to wipe the stain pushes it deeper. You must blot.
- Take a clean, white cloth or paper towel. White prevents dye transfer.
- Gently press down on the stain. Start from the outer edges and move inward.
- Lift straight up. Use a fresh section of cloth and repeat until no more moisture soaks in.
This lifting action pulls the stain out instead of grinding it in, which is vital for delicate fabrics.
Field Note: Jessica’s Juice Spill
My three-year-old Jessica once spilled grape juice on a white tablecloth. Her first instinct was to smear it with her hand.
I showed her how to blot with a napkin. We saved the cloth. Wedding dress fabric is even more fragile than linen, so this lesson is perfect for your gown.
Gather Your Gentle Arsenal: The Wedding Dress Stain Kit
You wouldn’t fix a watch with a hammer. Have the right tools ready before you start.
A simple kit prepared in advance takes the scramble out of emergency stain care.
Basic Home Stain Removal Kit
- White, lint-free cloths or a roll of white paper towels.
- Cotton swabs for precise work near beads or lace.
- A dull butter knife to scrape off solids like cake icing.
- Mild, clear dish soap or a baby shampoo.
- Distilled water to avoid tap water minerals.
- A small spray bottle for misting solutions.
- Cornstarch or plain talcum powder.
- White household vinegar.
The Absolute Necessity: The Spot Test
Always test your cleaner on a hidden spot first, like an inside seam or underlayer.
- Dampen a cotton swab with your cleaning solution.
- Dab it gently on the hidden test area.
- Let it air dry completely. This takes about 15 minutes.
- Check for color loss, fabric distortion, or a change in texture.
I ruined a silk scarf once by skipping this step. Spot testing is your insurance policy.
Material Red Flags: Proceed with Caution
Some fabrics and details need a whisper-light touch.
- Silk or Satin: Can develop permanent water marks. Use minimal moisture.
- Acetate or Rayon: These fibers weaken when wet. Avoid any rubbing.
- Beading, Sequins, or Glue: Adhesives can dissolve. Clean the fabric around them, not directly on top.
- Vintage or Antique Fabric: Fibers are often brittle. When in doubt, don’t touch it yourself.
Safe DIY Alternatives from the Pantry
For a fresh grease stain, cover it with a mound of cornstarch. Let it sit for 30 minutes to absorb the oil, then brush it away. When dealing with oil and grease stains on clothes, it’s important to act quickly.
This trick saved a blouse from Roger’s hunting trip barbecue sauce. It’s wonderfully simple.
For a water-based stain like white wine, mix one part white vinegar with three parts cold water. Dab it on with a cloth. The mild acidity can help lift the stain, unlike when you’re trying to remove red wine stains from fabrics.
Smart Product Category Recommendations
Look for these types of cleaners, not necessarily specific brands.
- Oxygen-based bleach (powder or liquid): Safe for white fabrics, it lifts stains without the harshness of chlorine.
- Enzyme-based pre-treatments: Ideal for organic stains like grass or food. They break down proteins.
- pH-neutral detergents for delicates: Formulated for silks and fine fabrics without harsh surfactants.
General Pre-Treatment Steps
Follow this sequence before applying any cleaner.
- Check the dress’s care label. It holds the manufacturer’s best advice.
- Remove excess material. Scrape solids with the dull knife. Blot liquids thoroughly.
- Protect the surrounding fabric. Slide a white cloth underneath the stained layer.
Working from the edges of the stain toward the center prevents it from spreading into a bigger mess.
The Step-by-Step Rescue for Fresh Stains
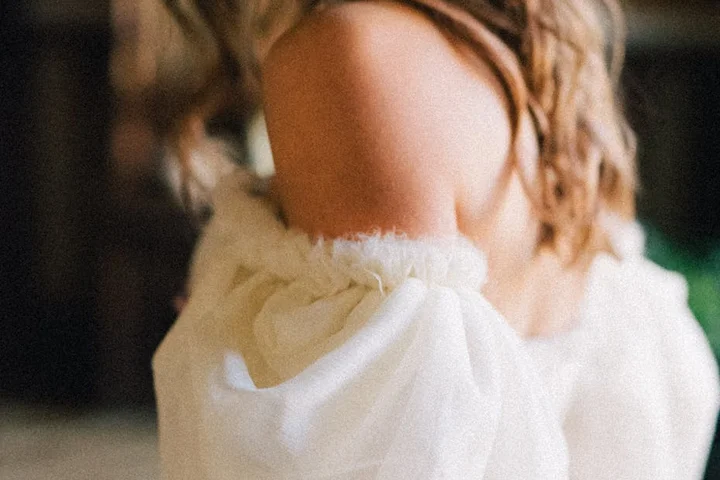
Spills happen fast. I know this from watching my 3-year-old, Jessica, and her juice cup. The key is to act quickly and calmly. Your first job is not to panic and to gently absorb what you can.
For Fresh Water-Based Stains (Wine, Juice, Champagne)
These are the most common culprits at a reception. My Aunt Jessica, a lover of good red wine, taught me this one.
- Immediately grab a clean, white cloth or paper towel.
- Gently blot, do not rub, from the outside of the stain toward the center.
- Sprinkle a generous amount of table salt or baking soda directly onto the damp spot. Let it sit for 10 minutes to absorb the liquid.
- Brush the salt away. If a stain remains, mix a solution of cool water and a few drops of clear, gentle dish soap or a dollop of white shampoo.
- Dab the stain with the solution using a clean cloth, then dab with a cloth dipped in plain cool water to rinse.
- Lay the dress flat on a clean, dry towel and let it air dry completely.
The Chemistry Corner: Salt and baking soda are hygroscopic, meaning they pull moisture (and the stain particles in it) out of the fabric fibers, acting like a first-aid absorbent.
For Fresh Oil-Based Stains (Makeup, Food Grease, Butter)
My son Jason’s soccer gear taught me about grease stains. For a delicate dress, the approach is much softer but uses the same principle.
- Again, blot any excess with a clean cloth.
- Apply one single drop of clear, dye-free dish soap (like Dawn) directly to the center of the stain.
- Using your finger or a cotton swab, gently work the soap into the spot. Let it sit for 5 minutes.
- Dab the area with a cloth dipped in cool water to lift the soap and the dissolved grease. You may need to repeat the dabbing with clean water several times.
- Blot dry and air dry flat.
The Chemistry Corner: Dish soap contains surfactants, molecules that surround grease, break its bond with the fabric, and suspend it in water so it can be rinsed away.
Surface Compatibility Quick-Reference
| Surface Type | Best Approach | Avoid This |
|---|---|---|
| Solid Fabric (Satin, Taffeta) | Gentle dabbing from the back of the stain. Rinse thoroughly. | Vigorous rubbing, which can damage the weave. |
| Lace Overlay or Appliqué | Dab lightly. Use a soft toothbrush for detailed areas. Support fabric from beneath. | Pulling or catching the brush on threads. |
| Beaded or Sequined Sections | Clean *around* the decorations. Dab only the stained fabric you can see. | Getting moisture under beads/sequins, which can loosen glue. |
When using any soap and water solution, always test it on an inside seam first. Your touch should be feather-light. I imagine I’m blotting a butterfly’s wing.
Think of dabbing as pressing a stamp, not scrubbing a pan. Always rinse by dabbing with a water-dampened cloth, never by running the fabric under a tap, which can force the stain deeper.
My Aunt Jessica’s pro-tip for delicate details is golden. For intricate lace, use a very soft, clean toothbrush to *lightly* flick soapy water through the patterns. For tiny spots between beads, a blunt needle wrapped in a microfiber cloth can target clean fabric without disturbing the beadwork.
Navigating Tough Spots and Delicate Details
A stain that’s had time to set is a different challenge. Be patient. I’ve revived Roger’s old hunting shirts with set-in sweat rings, but it takes time and low expectations.
For an old stain, start by soaking the entire dress in a bathtub of lukewarm water with a specialty wedding dress cleaner or a scoop of oxygen-based bleach (like OxiClean) for several hours. This can lift general soiling and slightly loosen the old stain. Then, you can apply the targeted methods above. Some stains may only fade, not vanish completely.
Cleaning Specific Fabrics and Embellishments
Silk Wedding Dresses
Silk is a protein fiber, like your hair. It’s strong but can be damaged by harsh chemicals and heat.
Always use a pH-neutral soap or a cleaner formulated for silk. Never use enzyme cleaners, as they can digest the protein fibers. After rinsing, roll the wet section in a clean towel to absorb moisture and lay flat to dry away from direct sunlight or heat.
Lace Overlays and Appliqués
Lace is often more delicate than the fabric beneath it. Always place a white towel under the lace you’re working on for support. When dabbing, press straight down and lift straight up to avoid snagging.
If the lace is detachable, consider treating it as a separate, even more delicate project.
Beading or Sequins
The risk here is the adhesive. Getting it wet can cause beads to fall off later.
Your goal is to clean the fabric around the decoration, not underneath it. Use a pointed cotton swab for precision. If a stain is directly under a bead, it’s often better to leave it to a professional who can potentially remove and re-apply the bead.
Outdoor Wedding Stains (Mud, Grass)
My dog Peeta tracks in similar messes. Let mud dry completely. Once dry, you can often flex the fabric to make most of it crumble off.
For the remaining dirt and chlorophyll (green grass stain), use the cool water and mild soap dab method. Chlorophyll can be stubborn. A very cautious, diluted drop of hydrogen peroxide (see below) on a cotton swab may be needed after testing.
Using Hydrogen Peroxide or White Vinegar
These can be gentle bleaching or neutralizing agents for white dresses, but caution is key.
Hydrogen peroxide (3% solution) is a mild oxidizer. Test on a hidden seam. Apply with a cotton swab, let it bubble for no more than a minute, then dab with cool water to neutralize. Never use on silk or colored embroidery, as it can bleach or yellow fibers.
White vinegar is an acid. It can help neutralize alkaline stains (like some food stains) and is generally safe. Dilute it with equal parts water, dab, and rinse thoroughly. The smell will dissipate as it dries. Knowing the pH helps tailor stain-removal for fabrics. Acids and bases interact differently with various textiles.
Are Commercial Stain Removers Safe?
Maybe, but you must be a detective. Check the label for dyes and perfumes, which can transfer. Gel or stick formulations give you more control than sprays.
Your non-negotiable rule: test any product on an inside seam, wait 30 minutes, and check for color change or damage before letting it touch the visible stain. When in doubt, a pure castile soap or specialty wedding gown cleaner is a safer bet.
Aftercare: Drying, Storing, and Calling for Backup
Your work isn’t done just because the stain looks gone. This next phase is about gentle recovery and smart preservation.
Post-Treatment Recovery
Rinse the area thoroughly with cool, distilled water. You want to flush out every trace of the cleaning solution.
Lay the dress flat on a clean, white towel. I use a fluffy bath towel in a spare room, away from my dog Peeta’s wagging tail. Roll the dress gently in the towel to blot out moisture.
Never hang a wet wedding dress. The weight of the water can stretch delicate fabrics and lace.
Let it air dry completely, lying flat on a fresh, dry towel, in a room with good airflow but no direct sunlight.
Sunlight might seem like a natural dryer, but it can set any lingering stain compounds and cause yellowing over time.
Only after the fabric is bone-dry should you check your work. Stains can reappear as a faint shadow once dry. If it’s gone, you can breathe a sigh of relief. To help prevent stains after washing, follow a quick post-wash care routine. We’ll guide you through these steps next.
How to Store Your Dress After the Rescue
Storing it right prevents new problems, like mysterious yellowing a year from now.
- Make sure the dress is perfectly clean and completely dry. Even a tiny bit of moisture invites mildew.
- Wrap it in unbleached, acid-free muslin or tissue paper. The white tissue paper from a craft store often isn’t acid-free and can cause damage.
- Place it in a sturdy, acid-free archival box. Do not use a plastic garment bag long-term. Plastic traps moisture and releases gases that yellow fabric.
- Store the box in a cool, dark, dry place. An interior closet is better than an attic or basement, where temperature and humidity swing wildly.
My mom Martha in North Texas taught me this. She stored her own wedding dress in a plastic bag in the closet. Years later, it had a sad, yellowish tint she couldn’t reverse.
Signs It’s Time to Call a Professional
There is no shame in calling for reinforcements. A good wedding dress specialist is worth their weight in gold.
Stop your DIY efforts and take the dress to a pro if you see any of these:
- The stain is large, covering more than a few square inches.
- You don’t know what the fabric is (is it silk taffeta or polyester chiffon?), or it’s a mix of many delicate materials.
- The stain is old and has already set from a previous attempt.
- You’ve tried a gentle method and the stain didn’t budge.
- The dress has extensive soiling, like mud along the hem from an outdoor photo shoot.
- You feel overwhelming anxiety. If your hands are shaking, it’s time to hand it off.
What to Avoid: A Quick Checklist
Let’s gather the big rules from earlier to keep you safe.
- No rubbing or scrubbing. Always blot.
- No harsh chemicals like chlorine bleach, ammonia, or all-purpose cleaners. They can dissolve delicate fibers or dyes.
- No hot water on protein-based stains (blood, sweat, food). Heat cooks the protein into the fabric.
- No putting an iron directly on a stain. Heat sets stains permanently.
- No using colored towels to blot or lay the dress on. Dye transfer is a real headache.
When NOT to Try This Yourself
If your dress is an heirloom, a designer piece, or holds such sentimental value that a mistake would be devastating, start with a professional consultation.
Also, if the dress has multiple, layered stains from the whole wedding day-wine, grass, cake, dancing sweat-a pro cleaner has the tools and expertise to handle that complex chemistry.
Think of it like this: I wouldn’t let my husband Roger, who’s great with outdoor gear, try to repair the delicate lace on my sleeve. Some jobs need a specialist.
A Reassuring Word on Professional Cleaners
A professional cleaner isn’t a sign of defeat. It’s a smart choice for preservation.
I remember Martha’s vintage dress she wanted to pass down. It had decades-old yellowing and a mysterious brown stain on the sleeve. She was heartbroken.
A specialist used a process called wet cleaning and targeted solutions we’d never have at home. They saved it. The yellowing was gone, the stain vanished, and it looked beautiful again.
They have the expertise, the mildest professional-grade solvents, and the equipment to handle your dress with the care it deserves. For peace of mind, it’s often the very best step.
FAQ About Wedding Dress Stain Removal
What’s the safest way to tackle an old, set-in stain I just discovered?
For an old stain, patience is key. Start by soaking the entire dress in a bathtub with lukewarm water and a specialty wedding dress cleaner to gently lift general soiling before attempting any targeted spot treatment.
Is it safe to use white vinegar or hydrogen peroxide on my dress?
Diluted white vinegar (equal parts water) is generally safe for dabbing on many stains, but always test first. Use hydrogen peroxide (3%) with extreme caution and only on white fabrics after testing, as it can bleach or yellow delicate fibers like silk.
How do I clean a stain on a heavily beaded section without ruining it?
Your goal is to clean the fabric *around* the decorations, not underneath them. Use a pointed cotton swab for precision dabbing, and avoid getting moisture under the beads where it could loosen the adhesive.
What’s the biggest mistake people make when trying to remove a stain at home?
The most common and damaging error is rubbing or scrubbing the stain, which grinds it deeper into the fibers. Always use a gentle blotting motion with a clean, white cloth to lift the stain out instead. It’s one of the mistakes to avoid when removing stains.
I’ve removed the stain. How do I store the dress now to keep it from yellowing?
Ensure the dress is completely dry, then wrap it in acid-free tissue paper and place it in an archival cardboard box. Never store it long-term in a plastic garment bag, as plastic traps gases that cause yellowing.
Preserving Your Dress After a Stain
The golden rule from my Aunt Jessica’s wine spill saga? Test every cleaner on an inside seam first, no exceptions. After treatment, a gentle rinse with distilled water keeps silk and lace from developing dull rings. I share more fabric-saving stories like this on Stain Wiki, where we tackle real messes with care.
Written by Suzanne Rosi Beringer. Suzanne is an accomplished chemist, laundry expert and proud mom. She knows the science and chemistry of stains and has personally deal with all kinds of stains such as oil, grease, food and others. She brings her chemistry knowledge and degree expertise to explain and decode the science of stain removal, along with her decades long experience of stain removal. She has tried almost everything and is an expert on professional and DIY stain removal from clothes, fabric, carpet, leather and any other items dearest to you.