How Do I Remove Algae, Calcium, and Rust Stains from My Pool Liner and Tiles?
Finding stubborn stains in your pool can feel overwhelming, but you can fix this. Start by identifying the stain-green for algae, chalky white for calcium, or reddish-brown for rust-then tackle it with targeted, safe cleaners.
This article gives you a clear action plan. Here’s what we’ll cover:
- Simple tricks to tell algae, calcium, and rust stains apart on sight.
- The best way to scrub algae from a vinyl liner without causing tears.
- How to safely dissolve hard calcium deposits from tile grout.
- Using vitamin C to lift rust stains without harsh chemicals.
- Easy habits to prevent all three stains from coming back.
I’m a stain-removal specialist who has tested these methods on my own pool and countless others.
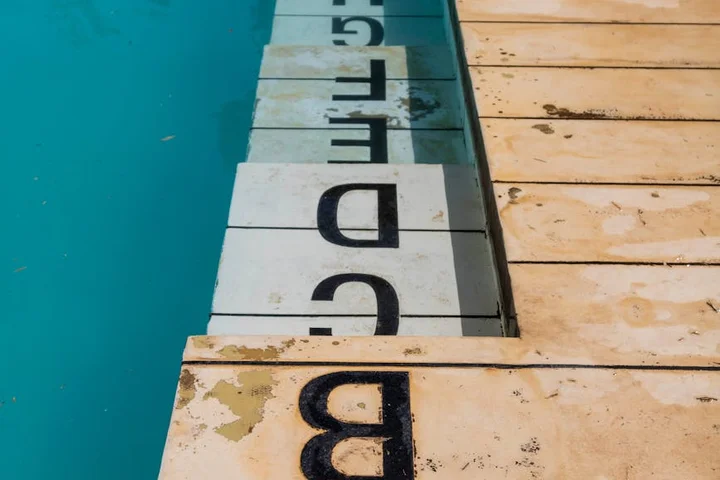
How to Identify What’s Staining Your Pool
Staring at a stain on your liner and not knowing where to start is frustrating. I get it. The first step is always the same: figure out your enemy. Each type of stain leaves a calling card.
The color and texture are your biggest clues. A chalky, white film that feels rough is almost always calcium scale. Slimy green, black, or even mustard-yellow patches that you can wipe away (but that come back) are algae. Those stubborn orange or brown blotches that look like dried tea? That’s usually rust from metal objects or well water.
Sometimes, you need a little detective work. I keep vitamin C tablets in my pool shed for this. Crush one in your gloved hand, get it a bit wet, and rub it directly on the stain for about 30 seconds. If the stain lightens, you’re dealing with iron or another metal. That same approach can help with dye stains on fabrics and other textile surfaces. If you’re trying this on clothing or upholstery, test a hidden spot first to be safe. This trick saved me hours of scrubbing the wrong thing last summer.
My own mistake was with algae. We have a big oak that shades part of the pool in the afternoon. One day, I saw a dark, dusty-looking patch and thought it was just a permanent shadow. A week later, my foot slid on it. That “shadow” had a slimy texture. It was the beginning of a black algae colony, and I’d almost ignored it.
Safety First: Gear Up and Test Before You Clean
Pool chemicals are powerful. Treating them with respect isn’t being cautious; it’s being smart. This isn’t the time for shortcuts.
Before you touch a single bottle, suit up. My gear is simple but non-negotiable. I wear thick rubber gloves (the kind that go up to your forearms), safety glasses from Roger’s workshop, and my oldest pair of jeans and a t-shirt. You do not want this stuff on your skin or in your eyes.
Now, the most skipped step: the test patch. Find an inconspicuous spot, like behind the ladder or on a corner tile. Apply a small amount of your chosen cleaner there first. Wait 10-15 minutes and rinse. You’re checking for discoloration, fading, or texture changes. A damaged test spot is better than a ruined liner.
Never, ever mix pool cleaning chemicals. This is where my Aunt Jessica’s story comes in. She once tried to “boost” her algae treatment by adding a chlorine shock directly to the acid wash she was using in a bucket. The reaction created a toxic yellow gas that sent her coughing from her Arizona patio. She was fine, but badly shaken. Acids and chlorine are a particularly dangerous combo. Always add chemicals to water, not to each other, and follow one treatment with a full rinse before starting another.
Banishing Algae Stains from Vinyl Liners and Tiles
You see that slimy green film or dark spot on your liner. Your first move is simple.
Grab a soft pool brush and scrub the area. This physically loosens the algae’s grip.
Think of it like Jason’s grass-stained soccer socks. You wouldn’t just toss them in the wash. You’d knock off the big chunks first.
Chemistry Corner: Why Algae Sticks Around
Algae isn’t just dirt. It’s a living, growing organism made of proteins.
It forms a sticky, glue-like bond with your pool’s surface. To break that bond, you need an oxidizer.
Chlorine and bleach are powerful oxidizers that attack the algae’s structure at a molecular level, turning it into something you can easily wipe away.
Your Two Best Methods for a Clean Pool Liner
For most spots, a home remedy works great. My Aunt Jessica’s Arizona pool gets these, and this is our go-to.
Method 1: The Household Scrub. You likely have everything you need.
- Mix 1 part plain, unscented household bleach with 3 parts water in a spray bottle.
- Spray it directly onto the damp, brushed stain. Let it sit for 5-10 minutes. You’ll see the color start to fade.
- Scrub gently again with your soft brush and rinse thoroughly with pool water.
Sometimes, algae digs in deep. If the bleach solution doesn’t work after two tries, it’s time for a specialist.
Method 2: The Targeted Attack. A liquid algaecide made for vinyl liners is your next step.
Follow the label instructions exactly. Usually, you apply it directly, wait, and brush. These products are formulated to kill without harming the liner.
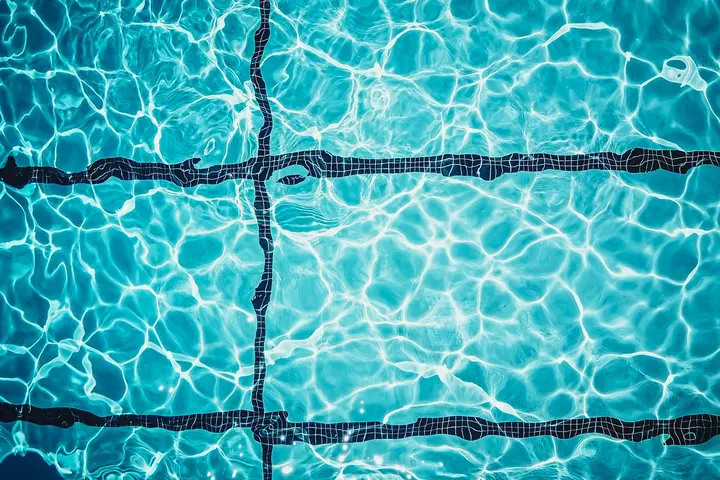
Dissolving Chalky Calcium Scale on Pool Surfaces
Those chalky white rings at the waterline are a different beast. They’re mineral deposits, not living gunk.
To remove them, you need an acid. The big question is: how strong of an acid? I learned this from years of dealing with our hard Texas water.
For light, dusty scale, white distilled vinegar is your safe, effective friend. For thick, crusty buildup, a diluted muriatic acid solution is the professional choice.
You can clean calcium deposits from pool tile with a simple vinegar soak.
Cut an old towel into strips. Soak them in full-strength vinegar and lay them over the scaled tile. Let them sit for 30-60 minutes. The acid does the work. Just wipe clean.
A crucial warning: never use a pumice stone or any abrasive scrubber on a vinyl liner. You will scratch it permanently.
Pumice stones are only for real ceramic or stone tile, and even then, use a light touch.
Chemistry Corner: The Hard Water Build-Up
Calcium scale is basically the same stuff as the white crust on your kitchen kettle.
It’s calcium carbonate. When pool water evaporates, this mineral is left behind, layer upon layer.
Acids dissolve these deposits through a simple chemical reaction. The acid reacts with the carbonate, creating water, a bit of gas, and a soluble salt you can rinse off.
Step-by-Step Scale Removal
For Mild, Surface Scale:
- Make a 50/50 mix of white vinegar and warm water.
- Wear gloves. Dip a soft cloth or non-abrasive pad in the solution.
- Rub the scaled area until the deposit dissolves. Rinse well with clean water.
For Severe, Caked-On Scale:
Muriatic acid requires respect. My husband Roger handles this with full gear.
- Safety first. Put on chemical-resistant gloves, goggles, and old clothes. Work in a ventilated area.
- Always add acid to water, never water to acid. In a plastic bucket, mix 1 part muriatic acid to 10 parts water.
- Apply the solution to the scale with a plastic scrubbing brush. Let it fizz for a minute or two.
- Scrub lightly and rinse the area massively with a hose. Neutralize any spills with baking soda.
Eradicating Rust and Metal Stains
Those ugly reddish-brown or teal-green streaks on your liner aren’t just dirt. They’re metals, usually iron or copper, that have oxidized right on your pool’s surface.
If you’re wondering how do you get copper out of pool water to prevent stains, the answer is a metal sequestering agent. Think of it like a magnet for metal ions. You add this liquid to your pool water, and it grabs onto the dissolved copper or iron, keeping it in suspension so it can’t stick to your liner.
I keep a bottle on hand during the summer, especially after refilling the pool. For stains already on the wall, you need a direct attack.
Chemistry Corner: Iron and Copper Oxidation
Rust is simply iron that’s met oxygen, creating iron oxide. Rust stains can be stubborn, but they require a different treatment than copper stains, which are a bit more colorful, often turning teal or black as they react with pool chemicals.
The magic in a good metal stain remover is a chelating agent, a molecule that wraps around the metal ion like a hug, pulling it off the surface and into the water so you can rinse it away. It’s especially handy for clean, polished stainless steel, helping remove stains with minimal effort. That keeps metal surfaces gleaming and easy to maintain.
Gentle Removal for Pool Liners and Tiles
For a quick, non-toxic test, try ascorbic acid, which is just vitamin C. Crush a few tablets from the pharmacy into a fine powder. Mix it with a few drops of water to make a thick paste.
Slather that paste right onto the stain. Let it sit for about 15 minutes. You might see the stain start to fade. Gently wipe and rinse. For bigger jobs, a commercial liquid rust remover is stronger, especially for rust stains on metal surfaces.
With any liquid acid remover, the dwell time is everything-let it sit for 5-10 minutes, but don’t let it dry out completely. Keep it moist so it can keep working.
Remember, a persistent rust stain is often a clue. It could mean you have metal in your fill water, or a ladder fitting or heater component is corroding. Fix the source, or the stain will just come back.
The Right Way to Scrub and Rinse Without Damage
Scrubbing a vinyl pool liner scares people, and it should. One wrong move and you can scratch it for good. My philosophy here is the same as on a delicate carpet: blot, don’t rub.
Apply your stain remover solution. Use a soft, white cloth or a nylon-bristled brush. Use gentle, circular motions to work it in. Never use a back-and-forth sawing motion, as it’s one of the stain removal mistakes to avoid.
Timing is critical for both safety and results. An acidic solution for mineral stains needs 5-10 minutes to dissolve the deposit. A vitamin C paste can sit for 15. An enzyme-based cleaner for organic gunk might need 30.
Thorough rinsing is the most important step you’ll do. Use a garden hose or sprayer to flood the area, diluting and washing all the chemical and stain residue back into the pool water where your filter can catch it.
Critical Warnings: What Never to Do to Your Pool
I learned this lesson the hard way on an old pool float. Some tools and chemicals create permanent damage.
- Never use steel wool, abrasive scrub pads (like the green side of a sponge), or stiff brushes on a vinyl liner.
- Never use solvents like acetone, paint thinner, or nail polish remover. They can melt or discolor the material.
- Never pour undiluted muriatic acid or other strong acids directly onto any pool surface.
Can you use a pressure washer? On a vinyl liner, the answer is a firm no. The high-pressure stream can puncture or lift the seam tape. For tough tile grout, you might use one on a low-pressure, wide-angle setting, but I usually find a brush and cleaner works just as well without the risk.
Older, faded, or already brittle liners are especially vulnerable. Always test any cleaner in an inconspicuous spot first, like behind a ladder.
Your Tool Kit for Safe Cleaning
Having the right gear makes the job easier and safer. Here’s what I keep in my pool bucket:
- A nylon-bristled pool brush (never wire) for walls.
- A stack of soft, white cotton cloths. They’re cheap and you can see what you’re lifting.
- A handheld garden sprayer for precise application and rinsing.
My husband Roger, who handles our pool’s chemistry, gave me a great tip. “Use one bucket only for pool chemicals and cleaning,” he says. “Never use the same bucket you use for car soap or deck cleaner. You don’t want any surprise chemical reactions.” He’s right. I have a bright red bucket that’s for pool duty only.
Keeping Your Pool Sparkling: Prevention Tips
The very best way to handle any stain is to stop it from happening in the first place. I learned this the hard way with my son’s soccer socks, and it applies perfectly to your pool. Prevention here is all about creating a clean, balanced environment that stains simply can’t survive, especially after washing.
Think of your pool water like a recipe. If the ingredients are off, the result is a mess. My mom, Martha, taught me that with her famous pie crust, and it’s true for water chemistry too.
Balance Your Water Like a Pro
Unbalanced water is an open invitation for stains. Minerals like calcium fall out of solution and stick to surfaces, while imbalanced sanitizer lets algae take hold.
You need to focus on three key numbers:
- pH Level (7.4-7.6): This is the most important. If your pH is too high, your chlorine can’t work well and scaling happens. Too low, and it eats away at your liner.
- Total Alkalinity (80-120 ppm): This acts like a shock absorber for your pH. Get this right first, and your pH will be much easier to manage.
- Sanitizer Level: Keep your chlorine (or other sanitizer) in the ideal range. This is your frontline defense against green, slimy algae stains.
Test your water at least twice a week with a reliable kit, and adjust chemicals as soon as things drift. A small weekly correction is far easier than battling a full-blown stain outbreak.
Get Scrubbing and Cover Up
Chemistry alone isn’t enough. You need some good, old-fashioned elbow grease. Algae and scale start as a thin, invisible film.
Regular brushing breaks up that film before it can bond and become a visible stain. My son Jason and his buddy Edward create a whirlwind of activity in our pool, which means I’m brushing the walls every other day.
Make brushing part of your routine, just like skimming the surface. Use a brush suited for your surface-nylon for vinyl liners, a stiffer brush for tile or concrete.
A quality pool cover is your secret weapon. My mother-in-law, Brianna, from dry Southern Texas, swears by them. She’s right.
- It drastically cuts down on leaves and organic debris that feed algae.
- It reduces water evaporation, which concentrates minerals and can lead to scale.
- It helps your chemicals work longer and more effectively.
Putting the cover on at night or during long absences is one of the smartest habits you can build.
When to Consider Draining: A Word of Caution
Sometimes, stains get so bad or the water chemistry is so far gone that people consider draining the pool for a deep clean. Please, be very careful here. This can especially be risky when dealing with green algae, as improper cleaning may damage the pool surfaces.
For vinyl liners especially, draining can cause serious damage. The liner can shrink, wrinkle, or even collapse without the water’s weight holding it in place.
Draining should only be a last resort for extreme, pervasive stains, and you should always consult a pool professional first. My husband, Roger, is all about direct solutions, but even he knows to call an expert for this. They can assess if your specific liner can handle it and guide you safely through the process. Most stains can be handled with the pool full, saving you risk and a huge water bill.
FAQ About Removing Pool Stains
What household product can I safely use on an algae stain on my liner?
A diluted bleach solution is effective and safe for vinyl. Mix one part unscented household bleach with three parts water in a spray bottle, apply, wait 5-10 minutes, then gently scrub and rinse. Always test on a hidden spot first, especially when trying to remove stubborn vinyl floor stains.
How do I apply an acid cleaner to pool tile grout without damaging it?
For mild calcium scale, soak towel strips in white vinegar and lay them over the grout for 30-60 minutes. For heavy buildup, carefully apply a diluted muriatic acid solution (1 part acid to 10 parts water) with a plastic brush, let it fizz briefly, then rinse massively.
What’s the correct way to scrub a vinyl liner to avoid tears?
Use a soft, white cloth or a nylon-bristled brush only. Apply your cleaner and use gentle, circular motions-never a harsh back-and-forth scrubbing action. Abrasive pads or stiff brushes will cause permanent scratches, which can be tough to remove from interior plastic trim.
Can I use a pressure washer to clean my pool liner or tiles?
Never use a pressure washer on a vinyl liner, as the high-pressure stream can puncture it or lift the seams. For tile grout, you may use one on a very low-pressure, wide-angle setting, but a brush and cleaner is often safer and just as effective.
When should I drain my pool to deal with impossible stains?
Draining should be an absolute last resort, especially for vinyl liners, due to risks of shrinkage and damage. Consult a pool professional first; most stains can be resolved in a full pool with targeted treatments, saving you from potential liner failure and high water costs.
Keeping Your Pool Surfaces Pristine
Your best defense against pool stains is a simple routine: identify the culprit correctly with a spot test, then use the gentlest effective method to avoid harming the liner or tiles. You’ll also see how pool tile stain removal coping can fit into this routine. For more real-world tips like how I handled rust from Roger’s tools or algae after a rainy week, follow along right here on the blog.
Suzanne is an accomplished chemist, laundry expert and proud mom. She knows the science and chemistry of stains and has personally deal with all kinds of stains such as oil, grease, food and others. She brings her chemistry knowledge and degree expertise to explain and decode the science of stain removal, along with her decades long experience of stain removal. She has tried almost everything and is an expert on professional and DIY stain removal from clothes, fabric, carpet, leather and any other items dearest to you.