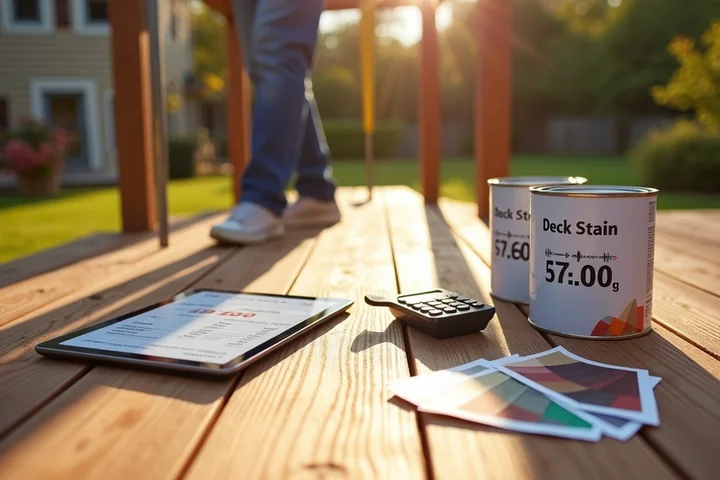
What is the Best Temperature and Time to Stain a Deck?
Worried your deck stain might peel or not soak in properly? Stain when it’s 50°F to 90°F outside and give it a solid 24 to 48 hours of dry weather for deep penetration and a durable finish.
Getting this right saves you from a sticky, peeling mess. I’ll break down exactly how to pick your perfect staining window:
- Why that 50-90°F sweet spot is crucial for absorption
- The ideal time of day to start your project
- How to check your wood’s moisture level quickly
- Timing mistakes that lead to early failure
- Simple aftercare to lock in your hard work
After years of tackling stains on everything from Jessica’s art smocks to Roger’s outdoor gear, I’ve learned that preparation and timing are everything.
Your Quick Action Plan for Spilled Deck Stain
Contain the spill the second it happens. I watched Roger tip over a nearly full can of cedar-tone stain last spring. That dark, oily puddle started crawling across the deck boards faster than Peeta chasing a squirrel.
Your first move is to grab three things: a stack of paper towels, a few clean cotton rags, and a plastic grocery bag. I keep this simple kit in a bucket by my back door now.
Blot, never rub, to prevent the stain from driving deeper into the fibers or grain. Rushing to wipe only grinds the pigment in, which I learned from a red wine incident with Aunt Jessica.
If that stain dries, you are playing a different game. The liquid becomes a tough, painted-on film that simple blotting cannot fix.
The Surface Compatibility Chart: From Carpet to Concrete
Where the stain lands changes everything. A spill on sealed patio stone behaves nothing like one on your jeans. Here is my quick-reference guide from years of home mishaps.
| Surface | Porosity | Treatment Approach |
|---|---|---|
| Wooden Deck | Porous | If wet, blot like crazy with rags. If dry, you may need to lightly sand the spot and touch it up with matching stain. |
| Concrete Driveway | Very Porous | For a fresh spill, pour cat litter or sawdust to soak it up, then scrub with a brush and concrete cleaner. A dried stain often needs a degreaser. |
| Patio Pavers | Varies (Sealed or Unsealed) | On sealed pavers, a damp rag with dish soap usually works. For unsealed brick or stone, use a paste of baking soda and water, but test it first. |
| Outdoor Carpet | Semi-Porous | Blot with a rag dampened with warm water and a drop of blue Dawn. I rescued our porch carpet this way after a paint can mishap. |
| Clothing | Fabric Dependent | On cotton, I pre-treat with Fels-Naptha soap. For synthetic athletic wear, a dab of rubbing alcohol on a cotton ball can lift the stain before washing. |
| Car Interior (from a drip) | Depends on Material | On cloth seats, use a spray of half vinegar, half water. For vinyl or plastic, a quick wipe with an interior detailer spray does the trick. |
Always prompt a hidden test patch first with your chosen cleaner on an unseen corner or seam. This simple step saved my car’s headliner when Jason dripped stain on it.
How to Remove Wet, Fresh Deck Stain
Spills happen fast. Your best chance to beat a deck stain is while it’s still wet. The approach changes based on what it landed on.
From Fabric and Carpet
Your first move is to blot, never rub. Rubbing pushes the stain deeper into the fibers.
I keep a dedicated bottle of odorless mineral spirits in my laundry room for this exact reason. Here is my method.
- Place a clean, white cloth under the stained fabric to catch runoff.
- Dampen another white cloth with a small amount of mineral spirits.
- Blot the stain from the outside edge toward the center. You’ll see the stain transfer to your cloth.
The solvent breaks down the stain’s oils and resins so you can lift them away.
Once you’ve removed as much as possible, you must wash out the solvent itself. Mix a tablespoon of clear dish soap (like Dawn) into a cup of warm water.
Use a clean cloth dampened with the soapy water to blot the area again. Finish by rinsing with a cloth dipped in plain water and let it air dry completely.
From Hard Surfaces (Driveway, Concrete, Tile)
Here, absorption is your friend. You want to soak up the pooled liquid before it sinks in.
My husband Roger learned this the hard way. He was staining a new planter box and tipped the can, sending a river of cedar-toned stain across our gray driveway.
My heart sank. I ran for the oil-dry cat litter we keep for car leaks.
Immediately cover the entire spill with a thick layer of an absorbent like clay cat litter, baking soda, or even sawdust.
Let it sit for 10-15 minutes. The powder will turn dark as it soaks up the stain. Sweep it all up and dispose of it properly.
For any remaining tint, follow up with a scrub using a stiff brush and that same dish soap and water solution. It often takes the final shadow away.
A critical safety note. Whether you’re using mineral spirits or cleaning a large spill, work in a well-ventilated area.
Open windows and doors. Those fumes are strong and not something you want to breathe in for long, especially indoors.
Can You Stain in Cold Weather? What it Means for Cleanup
This is a common question. Cold weather dramatically slows the drying time of oil-based deck stains.
From a cleanup perspective, that’s a small gift. The stain stays wet and workable longer, giving you more time to address drips or spills.
Don’t get too comfortable, though. It will still cure and set, it just takes hours longer.
Remember, your cleanup agents are affected too. Mineral spirits will be thicker and work slower when cold. Warm your solvent bottle in a container of warm water for a few minutes to improve its effectiveness.
Treating the Tough, Dried-On Stain
A dried deck stain is a different beast. It has bonded with the surface. You need a more aggressive tactic, and success isn’t always guaranteed when removing old stains from a wood deck.
On Fabrics and Upholstery
First, check the fabric care tag. If it says “dry clean only,” take it to a professional and point out the stain. For other types of delicate fabrics, it’s best to handle them with extra care.
For washable fabrics, I make a paste. I mix a powerful, solvent-based stain remover (like Goof Off or a similar product) with baking soda or cornstarch to form a thick paste, especially when dealing with grease stains.
Applying a paste lets the solvent sit on the stain without spreading or evaporating too quickly, giving it time to break the bond.
Spread a thin layer over the stain and let it sit for 15-20 minutes. Then, scrape the paste off and launder the item as usual, using the warmest water the fabric allows. This has saved many of Jason’s work pants, especially when dealing with set-in stains.
On Concrete and Wood
For a surface like a driveway or a deck board that got stained by mistake, you often need a chemical stripper or physical sanding.
A deck stain stripper is a potent chemical designed to soften and lift the cured film. You brush it on, let it dwell, and then pressure wash or scrub it off.
Safety is non-negotiable here. Gloves, goggles, and long sleeves are a must. Sanding is another option, but it’s dusty, labor-intensive, and changes the texture of the wood or concrete.
I have to be honest. Some set stains, especially on porous concrete or light fabrics, may leave a permanent shadow. It’s better to manage expectations early.
Should You Stain the Underside of a Deck? A Cautionary Tale
This question is less about the “should you” and more about the “if you do.” Staining the underside creates a rain of drips and overspray.
We learned this the expensive way. Roger was staining the underside of our raised deck. Peeta, our Lab, loved to nap in the cool dirt spot right beneath it.
We forgot to cover the area. Tiny brown speckles covered Peeta’s back like weird freckles. The patio pavers below were polka-dotted.
If you’re staining overhead, protect everything below as if you’re expecting a muddy rainstorm.
Use heavy-duty drop cloths, not old sheets. Weigh down the edges. For plants and furniture, I use cheap plastic painter’s sheeting. It’s not elegant, but it works. Always check what’s underneath before you start brushing or spraying.
Safe DIY Alternatives to Harsh Chemicals
You don’t always need a specialty product from the hardware store aisle. For a fresh spill, your kitchen and laundry room are stocked with powerful cleaners.
My first line of defense always includes baking soda, blue Dawn dish soap, and white vinegar. These three can handle a shocking number of emergency cleanups.
Baking Soda Paste for Hard Surfaces
Did deck stain splatter on your concrete driveway or patio stone? A baking soda paste is my go-to for lifting fresh, oily stains from non-porous surfaces.
Make a thick paste with baking soda and a little water. Smother the stain with it. The paste acts like a dry sponge, pulling the oils up and out as it dries. For my husband Roger’s last oil-spill on the driveway, I left the paste on for a few hours, then scrubbed it off with a stiff brush and water. It lifted the slick spot right up. It was just one of the steps I took while trying to remove oil stains from concrete driveways.
A baking soda paste works by absorbing fresh oils before they can set into a surface.
Dawn Dish Soap for Fabric
If you got stain on your jeans or work shirt, don’t panic. Many deck stains have an oily or solvent base. Blue Dawn is brilliant at breaking down that grease. You’ll definitely want to use it for any oil or grease stains on clothing.
Blot up any excess liquid first. Then, apply a drop of full-strength Dawn directly to the stain. Gently work it in with your fingers or an old toothbrush. Let it sit for 5-10 minutes to cut through the oil. Then, rinse thoroughly with the hottest water safe for the fabric and launder as usual.
Dawn doesn’t just clean dishes; its grease-cutting power makes it a first responder for oily stains on cotton and polyester blends.
Remember, these DIY heroes work best on fresh stains. Once a stain has fully dried and cured, its chemistry changes. The oil binds to fibers, and pigments settle in. At that point, household options are often less effective, especially for oil stains on textiles, and you may need a stronger targeted remover.
An Old-School Tip from the Pros
My mom Martha, who has lived in North Texas forever, swears by old-fashioned lard soap for greasy messes. She’ll grate a bar, dissolve it in hot water, and use that sudsy water to pretreat stains.
The principle is the same as Dawn: breaking the grip of oil. Sometimes, the old ways are still the best ways.
What is the Best Time for Cleanup? Temperature and Timing Secrets
The absolute best time to clean up a deck stain spill is immediately. The clock starts ticking the moment the liquid hits a surface.
Optimal cleanup time is immediately, regardless of the temperature outside.
How Heat and Cold Change the Game
Think of heat as your cleanup enemy. A hot, sunny day will make that stain set with frightening speed. It drives the solvents and oils deep into pores and fibers, fast, especially when trying to remove oil stains from clothes.
A cool, dry day is slightly more forgiving. It gives you a few extra minutes to grab your supplies. But don’t be fooled into thinking you have an hour. You don’t.
This flips the common question about “penetration time” on its head. You don’t want the stain to penetrate at all.
Stain penetrates fast, so you have to act faster to pull it back out.
The Humidity Factor
High humidity makes everything feel sluggish, including cleanup. It can prevent rinsing water from evaporating quickly, leaving a damp, messy work area. Your cleaning solution might not work as effectively, either.
I learned this the hard way cleaning a spill in our humid garage. The soapy water just sat there, taking forever to wipe up. For the fastest, cleanest result, you want low humidity and good airflow to help you dry the area after rinsing.
Preventing Stains Before They Happen

The smartest stain removal is the one you never have to do. Spending ten minutes on setup can prevent a ten-day headache of trying to lift a set-in spot. I adopted this mindset after one too many frantic scrubbing sessions while my kids, Jason and Jessica, “helped” with a project.
Seal the Battle Lines First
Always tape off the area before you start. Painter’s tape creates a sharp, protective barrier that keeps drips and splatters off your trim, walls, or countertops. When my mom, Martha, taught me this, it changed my game. For brushing, hold a piece of cardboard or a plastic paint shield behind your brush. Roger uses this for outdoor projects to keep stain off our siding.
That shield catches rogue droplets instantly. It turns a potential driveway stain or deck spill into a contained issue on your drop cloth.
Keep Your First Responder Close
Have a damp, clean microfiber cloth or old towel within reach. A wet rag can blot up a fresh spill in seconds, before it sinks into fibers or dries. I drape one over my shoulder or tuck it in my pocket. This trick saved our light-colored carpet when Edward spilled his sports drink during a playdate.
For sticky stuff like syrup or paint, a quick wipe with the rag prevents a tacky residue. Speed is your best weapon against a permanent stain.
Wear Your Cleaning Uniform
Put on clothes that are already stained or worn out. Your project clothes should be sacrificial, saving your favorite outfits from ruin. Jason’s old soccer jersey, which survived grass and mud, is now our designated painting shirt. It’s seen more colors than a rainbow and saves his good uniforms.
This isn’t just for big jobs. Even quick tasks, like touching up a scuff on the wall, deserve their own messy-shirt moment. My Aunt Jessica learned this the hard way with a wine splash on a silk blouse.
Stage Your Rescue Supplies
Assemble your cleanup kit and place it next to you before you begin. Being prepared means you can attack a spill the second it happens, not after you’ve run to the garage. My kit always has a spray bottle of club soda, a bowl of cool water, a few clean white towels, and my go-to enzyme cleaner for proteins.
I learned this from my mother-in-law, Brianna. Her “station” method means a spilled cup of coffee on the car seat becomes a simple blot, not a deep-clean crisis. For oily stains, I keep a dab of dish soap ready too.
FAQ About Staining Your Deck: Temperature, Timing, and Troubleshooting
What if I stained my deck when it was over 90°F?
The heat likely caused the stain to dry on the surface too quickly, preventing deep penetration. For durability, you may need to let it fully cure and then lightly sand and reapply a coat during a cooler period.
Is it better to stain in the early morning or late afternoon?
Start in late morning after the morning dew has fully evaporated and the wood surface is warming up. Avoid the intense, direct heat of midday sun which can cook the stain before it soaks in.
Can I stain my deck if rain is forecast in 24 hours?
No, this is a major risk to durability. A fresh stain needs at least 24-48 hours of dry weather to penetrate and form a proper bond; rain too soon will wash it away or create a blotchy finish.
My deck stain still feels slightly tacky after 48 hours. What should I do?
High humidity or cooler temperatures can dramatically slow the curing process. Ensure maximum airflow and give it more time; do not apply a second coat or place furniture on it until it is completely dry to the touch.
What’s the biggest timing mistake that leads to premature stain failure?
Rushing to apply a second coat before the first coat has fully dried according to the product’s instructions. This traps solvents, creates a weak bond, and leads to peeling-always follow the manufacturer’s specified recoat time.
Your Deck’s Best Defense: Temperature and Timing
For deep, lasting protection, always stain your deck when the temperature is mild-between 50°F and 85°F-and the wood is completely dry. This simple rule ensures the stain soaks in properly instead of sitting on top where it can fail. I rely on this method after helping Roger with our own patio, and you can find more of my hands-on surface care tips right here on the blog.
Suzanne is an accomplished chemist, laundry expert and proud mom. She knows the science and chemistry of stains and has personally deal with all kinds of stains such as oil, grease, food and others. She brings her chemistry knowledge and degree expertise to explain and decode the science of stain removal, along with her decades long experience of stain removal. She has tried almost everything and is an expert on professional and DIY stain removal from clothes, fabric, carpet, leather and any other items dearest to you.