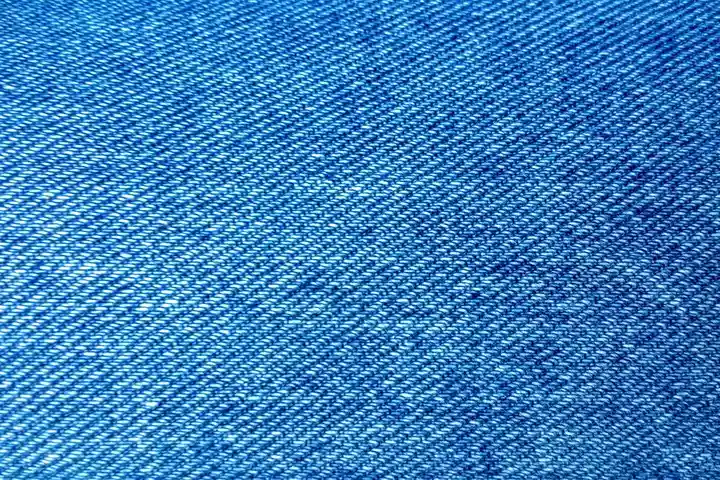
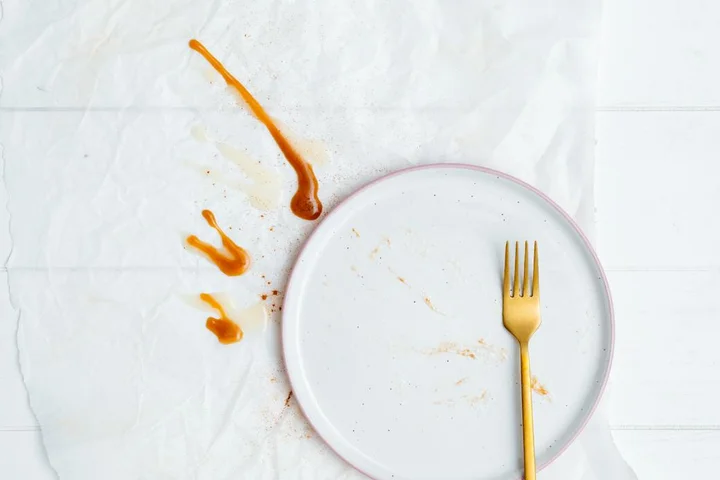
How to Remove Set-In and Dried Grease Stains from Clothing, Upholstery, and Car Interiors
That dull, set-in grease ring on your couch or jeans might look permanent, but I’ve salvaged worse from my own home. For a quick start, scrape off any crusty residue and dab the stain with a degreasing dish soap and warm water solution.
Here’s exactly what I’ll walk you through:
- The simple science behind why dried grease binds to fibers
- My tested steps for clothing, upholstery, and car interiors
- Safe, non-toxic products I keep on hand
- How to adjust methods for delicate fabrics
- When a stain might need professional help
I’ve learned these methods through years of handling stains from my son Jason’s soccer kits to my dog Peeta’s favorite blanket.
Why Grease Stains Are So Stubborn (And What Actually Works)
Think of a grease stain like a tiny, invisible raincoat on each fabric fiber. The oily molecules in grease repel water.
Water just beads up and rolls away. Over days, that grease dries and bonds tightly to the threads, making a dark, set-in shadow.
It’s like trying to wash cooking oil off a spoon using only water. You’ll just get a wet, oily spoon. You need something that can break the oil’s grip.
Putting a grease-stained item in a hot dryer is the fastest way to make the stain permanent.
The heat melts the grease, letting it sink deeper into the fabric’s core. When it cools, it hardens again, locked in for good.
I learned this lesson with my son Jason’s favorite soccer shorts. He wiped his hands on them after a burger. I washed them, but the faint ring was still there.
I figured the dryer’s heat would finish the job. Big mistake. That heat set the grease into a perfect, dull brown circle I could never erase.
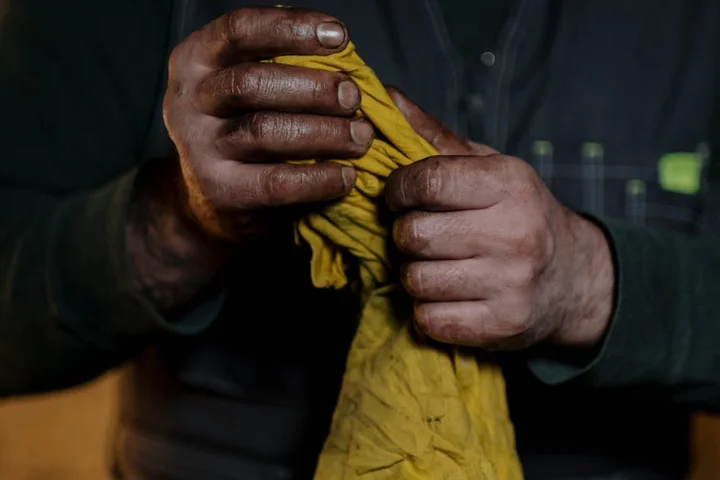
Your Grease-Fighting Toolkit: Safe DIY Alternatives and Trusted Products
You likely have everything you need already. Here is my must-have list for tackling grease anywhere.
- Dish soap: The blue Dawn in my kitchen is my hero. Its formula cuts grease on plates and fabrics.
- Cornstarch or baking soda: My mom Martha taught me this. They absorb fresh oil like a sponge.
- White vinegar: It’s a mild acid that can help break up grease and rinse away soap residue.
- A dry-cleaning solvent: I keep a small bottle for silk or wool blouses. It’s a targeted, no-water option.
- White cloths or paper towels: This is non-negotiable. You need to see the stain lifting.
Safe DIY Alternatives That Really Work
For a new spill, like bacon grease on a t-shirt, act fast. I grab the cornstarch.
I cover the spot completely. It looks like a small snowdrift. After 20 minutes, the powder turns clumpy and dark as it soaks up the oil. I brush it off into the trash.
For a set-in stain, a thick paste of dish soap and a few drops of water is my first attack.
I rub it gently into the stain with my fingers until it forms a slight lather. I let it sit for at least 30 minutes before rinsing with cool water.
Baking soda is great for carpets or car interiors. My dog Peeta once tracked in greasy mud. I sprinkled baking soda on carpets, let it sit overnight, and vacuumed. It lifted the grease and left the carpet smelling fresh.
Household Items vs. Commercial Degreasers
Dish soap and cornstarch handle 90% of my home grease battles. They’re safe, cheap, and work on most fabrics and car upholstery.
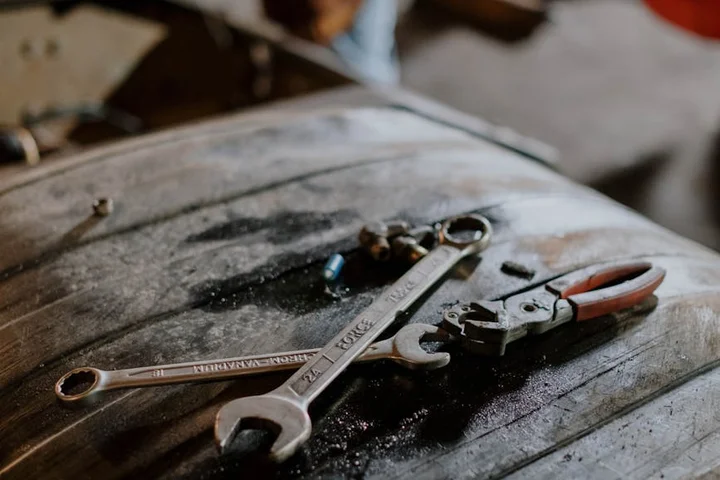
I save commercial degreasers for the toughest jobs, like my husband Roger’s hunting jacket with old engine oil. For those, I use a product like Lestoil or Simple Green.
Household items are for maintenance and fresh stains; heavy-duty degreasers are for last-resort, set-in grime.
Always test any cleaner in a hidden seam first. My aunt Jessica’s velvet pillow taught me that.
Using white cloths to blot is the only way to know you’re winning. You see the yellow or brown grease transferring from the fabric onto your cloth. A dark towel tells you nothing.
How to Remove Set-In Grease Stains from Clothing
How do you remove set-in grease stains from clothing? You break the stain down from the outside in. Even a stain that’s been baked on for weeks can often be lifted with the right approach. The key is patience and using a degreaser that’s safe for fabric, like common dish soap. When it comes to removing grease stains from clothes, there are safe, effective methods you can try at home.
1. Check the Label and Always Test First
Before you touch the stain, check the garment’s care label. This tells you the fabric’s limits. Silk or wool needs a gentler touch than cotton or polyester.
Your next move is non-negotiable. Find a hidden seam or inner hem. Apply a tiny dot of your chosen cleaning agent there. Let it sit for 10 minutes, then blot with water. This test prevents color bleed or fabric damage, saving the whole garment for the sake of one minute of caution. I learned this the hard way with one of Roger’s favorite flannel shirts.
2. Apply a Liquid Dish Soap Degreaser
Squirt a small amount of clear, liquid dish soap (like Dawn or Palmolive) directly onto the dry, stained area. Do not wet the fabric first. The soap needs to meet the grease directly.
Using your fingers, gently rub the soap into the stain, working from the outer edges toward the center. This contains the grease. Cover the entire stained area with a thin, even layer of soap, ensuring the soap penetrates the fibers where the grease hides.
3. Let It Soak and Break Down the Grease
Walk away. Let the garment sit for at least 15 minutes, and for old stains, up to an hour. This gives the surfactants in the soap time to surround and loosen the grease molecules on synthetic fabrics.
You might see the stain change as the soap works. A dark spot may become a fainter, wider ring. That’s the grease breaking apart. For a jersey of Jason’s that sat in his bag for a week, I let the soap work for a full 45 minutes.
4. Launder with the Warmest Water the Fabric Allows
After the soak, wash the garment by itself. Use the hottest water temperature the care label permits. Hot water helps melt and suspend the broken-down grease so the washer can rinse it away.
Add your regular detergent to the wash. For extra power, you can sprinkle a bit of baking soda or a pre-wash stain remover into the drum. How can you remove grease stains from clothing most effectively? Combining a targeted pre-treatment with a strong, hot wash cycle gives you the best shot, especially for oil and grease stains.
5. Air Dry and Inspect Before Using Heat
This is the most critical step for set-in stains. After the wash, do not put the item in the dryer. Heat will permanently set any lingering grease.
Instead, lay the garment flat or hang it to air dry. Once completely dry, check the stain area thoroughly. Look with your eyes and feel with your fingers for any leftover dullness or tacky residue. If the stain is gone, you can safely dry it normally next time. If any trace remains, repeat the treatment process before it ever sees heat.
What Helped Me: For thick fabrics like jeans or work jackets, I use a soft-bristled toothbrush (an old one saved for cleaning). After applying the dish soap, I use the brush to gently scrub the fibers in a circular motion. It helps work the degreaser deeper into the weave without being as harsh as fingernails. It made a huge difference on the cuff of Roger’s canvas work pants.
How to Remove Dried Grease Stains from Clothing
You find that old stain weeks later. It’s set in and dried to a dull, waxy patch.
I hear the question all the time: “how do i get grease out of my clothes” when it’s already baked on. The goal is to re-liquify that grease so your washer can lift it away.
My husband Roger’s mechanic shirts are test subjects for this. The key is patience and the right first move.
Step 1: Gently Scrape Off the Crust
Use a dull knife or the edge of a spoon. Scrape lightly across the stain to lift any dried, caked-on grease.
This mechanical action removes the top layer without grinding the stain deeper into the fabric. Be gentle, like you’re brushing crumbs off a table.
Step 2: Create a Pre-Treatment Paste
I mix a thick paste of baking soda and a few drops of blue Dawn dish soap. The soap cuts grease, and the soda acts as a gentle abrasive.
Smother the entire stain with this paste. You want a layer about as thick as a coin. It should feel tacky and look opaque on the fabric.
Step 3: Let It Rehydrate Overnight
This is the hardest part. Walk away. Let the paste sit for at least 8 hours, or overnight.
The paste works by slowly pulling the hardened grease back to the surface, turning it into a washable mess. In the morning, it often looks darker and oilier-that means it’s working.
Step 4: Rinse and Check Before Washing
Rinse the pasted area under cold running water. Rub the fabric between your fingers. If you still feel a slick spot, repeat the paste treatment.
Only proceed to the washer when the fabric feels clean to the touch under the water. Wash on the hottest temperature the fabric care label allows.
When to Use a Dry Cleaning Solvent
For stubborn stains on dry-clean-only fabrics or very thick materials like a coat, a solvent is your friend. I keep a small bottle of Carbona Stain Devils for Grease & Oil on hand, especially when treating oil stains on clothing.
Apply it to a clean cloth first, not directly on the stain. Dab from the outside of the stain inward. Solvents work by dissolving the grease without water, which is safer for delicate fibers. Always test on a hidden seam first and work in a well-ventilated area.
My golden rule: never put a garment with a visible stain in the dryer. The heat will set any residual grease permanently. Air-dry it completely so you can inspect your work.
I almost lost a good flannel shirt this way. After the first wash, a faint grease shadow remained. I got impatient and dried it. The heat baked that shadow into a permanent ring.
I had to start over, applying the paste twice and washing three times to get it all out. Now, I always air-dry first. It saves so much grief.
How to Remove Set-In Grease Stains from Upholstery and Furniture
I hear this question all the time. “How do you remove set-in grease stains from upholstery?” My couch has seen everything from Aunt Jessica’s wine and cheese nights to Roger’s post-garage pizza slices. The key is patience and not flooding the fabric. It’s especially important when dealing with oil stains on clothing, upholstery, and linens.
You can lift old, dried grease from most upholstery fabrics with a simple, controlled wash.
Your Safe, Step-by-Step Fabric Upholstery Method
This method uses a mild soap solution. It works on most cotton, polyester, and synthetic blends. I keep a dedicated spray bottle for this.
- Blot First. Use a clean, dry microfiber cloth to gently blot the stain. You won’t remove much, but you’re picking up any surface debris.
- Mix Your Solution. In a bowl, mix a teaspoon of clear dish soap (like Dawn) with two cups of lukewarm water. Dish soap is designed to cut grease.
- Apply with Control. Lightly mist the stain with your spray bottle. Do not pour or soak it. You just want to dampen the stained fibers.
- Agitate Gently. Using a soft-bristled brush (an old toothbrush is perfect), gently work the solution into the stain in a circular motion.
- Blot and Rinse. Blot firmly with a clean, damp cloth to lift the soap and grease. Repeat the mist, blot, and rinse steps until the cloth comes away clean.
- Dry Thoroughly. Press dry towels into the area to absorb moisture. Let it air dry completely, away from direct heat.
Overwetting is your biggest enemy here, as it can drive the stain deeper or cause watermarks. A spray bottle gives you the precision you need.
I learned this the hard way cleaning a butter stain on our family room chair. I used too much water and spent days with a fan on it.
Material Red Flags: When to Call a Pro
Not all fabrics are created equal. Some require a specialist’s touch.
- Silk or Velvet: These delicate fibers can water spot, crush, or distort easily. Home cleaning is too risky.
- Antique or Heirloom Pieces: If you’re unsure of the fabric or its age, don’t experiment.
- Stains on Suede or Leather: These materials need specific leather cleaners. Water and soap can cause permanent damage.
For these delicate materials, seeking professional upholstery cleaning is the safest choice to preserve your furniture. My mom Martha has an antique velvet footstool. We never touch it with anything but a vacuum brush attachment.
A Simple DIY Alternative for Lighter Stains
For a fresh grease mark or a very light, dry stain, you can try an absorbent powder first. It’s less invasive.
Sprinkle a generous amount of baking soda or cornstarch over the stain. Let it sit for at least an hour, or overnight for older stains. The powder will absorb the oils. These prep steps help remove oil stains fast on clothes. The next step will show a quick method to finish the job.
Vacuum it up thoroughly. This won’t work for a deep, dark stain, but it’s a great first attempt for a small spot from a forgotten french fry.
I use this trick on our car seats after my son Jason’s soccer snacks leave a faint, greasy fingerprint. It’s quick and doesn’t risk getting the fabric wet.
How to Remove Dried Grease Stains from Upholstery and Furniture
A grease stain that’s been sitting for days is a different beast. It forms a dull, waxy patch that feels tacky to the touch.
You must tailor your method because the grease has bonded deeply with the fibers, especially if it was ground in.
My son Jason’s soccer shorts once left a ground-in stain on our armchair after a week in the laundry hamper. It taught me that fresh and old grease need different plans.
The Gentle Breakdown Process
Rushing this will ruin the fabric. Here is my careful, step-by-step method.
- Test First: Dab your chosen cleaner on a hidden seam or underside. I check the back cushion of our sofa.
- Apply Your Solution: For a natural start, I use white vinegar diluted with equal parts water. For tougher stains, a few drops of a mild, citrus-based solvent on a cloth works. My Aunt Jessica’s wine spill on my couch needed the solvent.
- Let It Dwell: Allow it to sit for 5-10 minutes. You might see the stain’s edges start to loosen.
- Blot, Don’t Rub: Press a clean, white microfiber cloth firmly onto the area. Lift and check. Use a fresh section of cloth each time.
Blotting pulls the dissolved grease up into your cloth, while rubbing grinds it down into the cushion padding.
You will likely see only a partial improvement after the first round. That’s normal.
Stubborn, set-in grease requires multiple, gentle applications over 20-30 minutes.
I reapply the solution and blot again, sometimes three or four times for a stain from Roger’s hunting gear. If you see the stain lightening, you’re on the right track.
The Crucial Drying Step
After the stain is gone, the area will be damp. This is a critical moment.
You must air dry the spot completely to prevent a sour mildew scent from setting in.
I set up a small fan to blow directly on the cushion for a few hours. If the weather is nice, I open the windows nearby to increase airflow.
Never cover the damp area with a blanket or cushion until it’s bone-dry to the touch.
I learned a painful lesson about patience on our old family couch. My dog Peeta had a greasy paw print on it, and I aggressively scrubbed with a brush and soapy water.
Scrubbing that dried stain permanently faded the fabric’s color and left a noticeable, rough patch where the fibers were damaged.
Now, I always take the gentle, blotting route. It saves the fabric every time.
How to Remove Set-In Grease Stains from Car Interiors
Car grease stains feel permanent. I get it. My car has seen everything from Peeta’s muddy paws to drips from Roger’s fast-food runs. The good news is you can fix this.
You need a simple plan for each surface. I always start with a vacuum. It picks up grit that can smear the stain.
Fabric Seats
Grease on fabric seats soaks in deep. Do not rub it.
- Vacuum the seat well. Get into the seams.
- Make a cleaning solution. I mix two drops of mild dish soap, like Dawn, into a cup of warm water.
- Dab the solution onto the stain with a clean cloth. Let it sit for 10 minutes.
- Blot firmly with a dry, absorbent cloth. This soaking and blotting action pulls the grease up and out.
- Rinse by dabbing with a cloth dampened with plain water.
- Let it air dry completely. Do not use the seat heater.
Carpet
Car carpet is tough but can hold stains. Be gentle.
- Vacuum the stained area thoroughly. Go over it a few times.
- Use the same dish soap solution from the seat method.
- Apply it to the stain and let it soak for 5 minutes.
- Use a soft-bristled brush, like an old toothbrush, to gently agitate the fibers.
A soft-bristled brush breaks up the grease without fraying the carpet like a stiff brush would. This is my pro-tip for car carpets.
- Blot up the dirty solution with a towel.
- Rinse by blotting with clean water and blot dry.
Plastic and Vinyl Dashboards
These are the easiest to clean. Avoid harsh chemicals that can cause cracking.
- Vacuum the dashboard to remove dust and crumbs.
- Use a mild all-purpose cleaner. I spray it directly onto a microfiber cloth.
- Wipe the stained area in a circular motion.
- Use a second dry cloth to buff the surface clean. Applying cleaner to the cloth first prevents liquid from pooling in vents or seams.
A common question I hear is, how to remove set-in grease stains from car interiors? The answer is always to start dry, use a gentle soap, and never scrub. Blotting is your best friend.
I learned this after a trip with the kids. Jessica spilled fry grease on the back seat. It baked in the Texas sun for a week. I thought it was ruined. The dish soap method took it right out. Now I keep a spray bottle of the solution in my trunk.
How to Remove Dried Grease Stains from Car Interiors
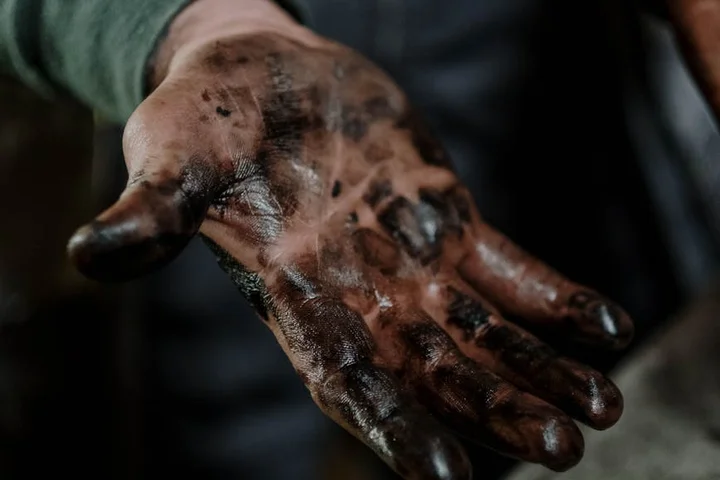
Car grease stains are a special kind of tough. They aren’t like a fresh kitchen spill. These stains have time. They sit for months, baked by the sun, ground in by someone sitting on them. My husband Roger’s truck seats tell the story of every fishing trip and home repair project. Grease from tools, grubby fingerprints on door panels, and that mysterious oily spot from a forgotten fast-food bag all need a specific plan.
Your first move is to try a gentler method, especially for older stains you’re unsure about. I start with the same dish soap and water mix I use on clothes. The goal here is to slowly re-liquefy that hardened grease. Apply the sudsy solution with a soft-bristled brush, like a clean toothbrush. Work it into the stain in small circles. Let it sit for ten minutes to break the bond.
Blot, don’t rub, with a clean microfiber cloth. You’ll see the yellow or brown stain start to transfer. Rinse the area by dabbing with a cloth dampened with plain water, then blot dry. This often works wonders for food grease and hand prints.
When You Need the Big Guns: Automotive Cleaner
For true set-in stains from mechanic’s hands or old oil, you need a stronger approach. This is when I reach for a dedicated automotive upholstery cleaner. These are formulated for synthetic fibers and plastics in your car.
I keep a can of spray-on, foaming cleaner in the garage. The foam is key-it clings to vertical surfaces like door panels and doesn’t just drip away. Here’s my stronger approach:
- Vacuum the area thoroughly to remove any loose grit.
- Shake the can well and spray a thick layer of foam directly onto the stain.
- Let it dwell. Follow the product’s instructions, usually 3-5 minutes. Watch the foam work-it will start to look dirty as it pulls the grease up.
- Agitate the foam gently with your soft brush to help it penetrate.
- Wipe the area clean with a fresh microfiber cloth. You may need to repeat this process for a deeply set stain.
Critical Warnings: What Never to Use
Your car’s interior is delicate. Using the wrong chemical can cause permanent, expensive damage. I learned this the hard way years ago trying to clean a marker stain.
- Never use bleach or ammonia-based cleaners. They will absolutely fade and discolor your upholstery and plastics.
- Avoid acetone, nail polish remover, or paint thinner. These powerful solvents will melt vinyl and plastics, leaving a sticky, ruined surface.
- Steer clear of harsh degreasers meant for engines or garage floors. They are too strong and can break down the fabric’s protective coatings.
- Don’t use excessive hot water on cloth seats. It can force the stain deeper into the padding underneath, making it worse.
Post-Treatment Recovery
After any wet cleaning, you must dry the area completely. Mold and mildew love damp car interiors.
Proper ventilation is non-negotiable. Park the car with the windows down in a safe, shaded spot. If possible, use a fan directed into the car to circulate air. This speeds drying and prevents a musty smell.
Once the area is fully dry, check for color fading. Compare the cleaned spot to the surrounding area in bright, natural light. A slight lightening can sometimes happen on very old stains, but it’s usually a vast improvement over the dark grease spot.
Remember, you’re not always aiming for perfection, especially with old car stains. You’re aiming for a massive improvement. That crusty stain from a gearbox part that’s been there since last summer might not vanish entirely, but it can become a faint shadow you only notice if you’re looking for it. That’s a win. Even my dog Peeta’s nose prints on the window ledge come out with patience and the right foam cleaner.
FAQ About Removing Set-In and Dried Grease Stains
1. I put a grease-stained shirt in the dryer. Is the stain now permanent?
Not necessarily, but the heat has set it deeply. Re-treat the area with a dish soap paste, let it soak for several hours, and wash again-but always air-dry to check your progress before using any heat.
2. What can I use if I don’t have blue dish soap?
Any clear liquid dish soap formulated to “cut grease” will work, especially for cooking oil stains. For a non-soap alternative, try applying a small amount of rubbing alcohol or hand sanitizer to a cloth and dabbing the stain to break down the oils.
3. How do I treat a grease stain on silk or dry-clean-only wool?
Do not use water or dish soap. Instead, apply a dry-cleaning solvent like Carbona to a clean cloth and dab the stain gently, testing on a hidden seam first, especially when cleaning suede. For valuable items, taking them to a professional cleaner is the safest bet.
4. What’s the fastest thing I can do for a fresh grease spill?
Immediately cover the spot with cornstarch, baking soda, or even talcum powder to absorb the oil. Let it sit for 20 minutes, brush it away, then follow with a dish soap pre-treatment before washing.
5. I’ve tried the methods, but a faint shadow remains. What now?
A persistent shadow often means grease is trapped in the fabric’s core. Apply a dry-cleaning solvent or a stronger commercial degreaser like Lestoil (test first!), let it dwell, and wash once more. If it’s on upholstery or a car seat, a professional cleaner may be your final, most effective step.
Protecting Your Fabric After Treatment
From Jason’s grass-stained soccer shorts to the car seat Peeta claimed, I always let a degreaser sit until that slick feeling is gone. That waiting period is what lifts the stain instead of just moving it around. You can find my full tests and more family stories like these right here on Stain Wiki.
Suzanne is an accomplished chemist, laundry expert and proud mom. She knows the science and chemistry of stains and has personally deal with all kinds of stains such as oil, grease, food and others. She brings her chemistry knowledge and degree expertise to explain and decode the science of stain removal, along with her decades long experience of stain removal. She has tried almost everything and is an expert on professional and DIY stain removal from clothes, fabric, carpet, leather and any other items dearest to you.