How to Safely Clean Vintage Leather and Keep Its Beautiful Patina
Afraid that cleaning your favorite leather jacket or chair will strip away its history? You can clean most vintage leather safely by starting with a simple test on a hidden spot and using a mild, pH-balanced cleaner.
In this article, I’ll show you my proven approach. We’ll cover:
- How to figure out what kind of leather you have and what stained it.
- The best gentle, non-toxic cleaners you probably already own.
- My step-by-step routine for tackling old ink, oil, and water rings.
- How to clean without scrubbing away the precious, earned patina.
- Clear signs that a piece needs a professional’s touch instead.
I’ve tested these methods on family pieces for years, from my husband Roger’s old baseball mitt to a trunk I inherited from my Aunt Jessica.
Assess the Stain and Your Panic Level
First, take a deep breath. Most stains on vintage leather are a panic level 4 out of 10. Mold might spike that to an 8.
The “Golden Window” for action isn’t minutes. It’s often days or even weeks. Rushing with harsh methods can crack or discolor the leather permanently.
I learned this from my mom, Martha. She restored an old saddle from her North Texas ranch by waiting, not wrestling with it.
What Never to Do
- Never use hot water. It can shrink and warp the leather fibers instantly.
- Avoid harsh solvents like acetone or nail polish remover. They strip away the natural oils that give vintage leather its character.
- Stay away from ammonia and bleach. These chemicals are too aggressive and will cause brittle, faded spots.
- Skip anything abrasive. Stiff brushes or magic erasers act like sandpaper on this delicate surface.
Think of vintage leather like elderly skin. It’s earned its wrinkles and patina, and it needs gentle, respectful care. My aunt Jessica once rushed a wine spill on a vintage purse with a rough cloth, and we had to spend months calming the damage.
Understanding the Stains on Your Vintage Leather
Stains on vintage leather generally fall into three camps. Knowing which one you’re dealing with is 90% of the battle.
Water-Based Stains
These include ink, wine, and old water rings. Ink leaves a sharp, defined blue or black line. Wine sinks in, creating a dull purple or brown blotch.
Old water rings feel slightly raised and look like a ghostly, off-color halo. They’re from condensation glasses left too long.
Oil-Based Stains
Grease, makeup, and hand creams fall here. Grease creates a dark, slick spot that might feel tacky. Lipstick leaves a waxy, colorful smear.
These stains don’t evaporate. They soak into the leather’s pores. My husband Roger’s hunting gear often has these from machine oil stains on leather.
Biological Stains
Mold and mildew are the troublemakers. They appear as fuzzy green or black spots and often carry a musty, sour scent.
These require immediate attention to prevent spreading. I found some on a vintage trunk in my basement last year.
Identifying the stain type dictates your entire cleaning approach. It’s like when Jason comes home with his soccer jersey. Mud needs a soak, grass needs a pre-treat. Same logic applies here.
Your First Moves: The Golden Rule and Safe Testing
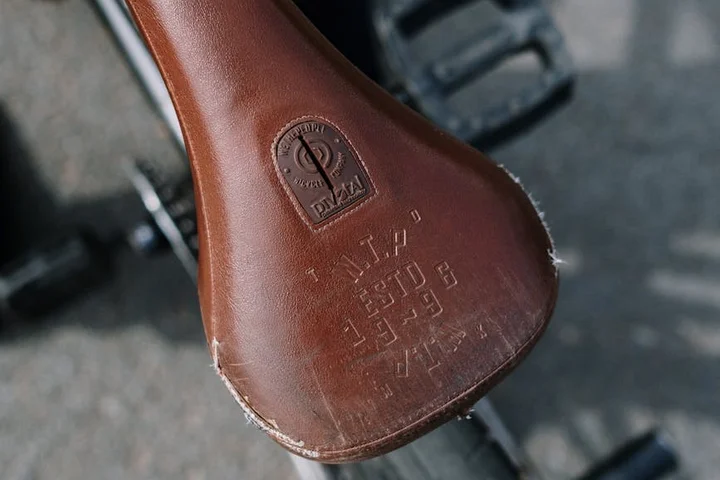
What is the first and most important step? Put down the spray bottle. I know the urge is to wet a cloth and start scrubbing. I’ve felt it too. But with vintage leather, your first tool is your eyes, and your second is a dry cloth. Not all leather is created equal; make sure you know whether to treat it as suede, nubuck, or smooth leather before any cleaning.
Your first job is a gentle dusting with a soft, dry cloth, followed by a careful visual inspection under good light. Look for cracks, existing color loss, and the stain’s texture. Starting with liquid can drive dirt deeper or cause irreversible damage to dry, thirsty leather. It’s crucial to be gentle, especially when dealing with delicate materials like leather and suede.
How can you safely test a cleaning solution?
Always, always perform a patch test. I do this on every single piece, no exceptions.
- Mix your planned cleaning solution.
- Dip a white cotton swab into it.
- Find a completely hidden spot. I check inside a seam, under a flap, or on the backside near a corner.
- Dab a small, quarter-sized area and let it dry fully. This can take an hour.
You’re checking for two things: any color transfer onto the swab, and any change to the leather’s texture or finish once dry. Understanding the chemistry behind leather stains—how tannins and dyes react to pH—helps explain why some cleaners are too harsh. That chemistry also guides safer, more effective stain removal. If the swab shows dye or the spot feels rough or looks cloudy, your solution is too harsh.
What household ingredients are safe?
You likely have these gentle warriors in your home right now.
- Distilled Water: It has no minerals, so it won’t leave streaks or spots as it dries. This is your universal diluting agent.
- White Vinegar (Diluted): Mix it 50/50 with distilled water. Its mild acidity can break down some water-based stains and neutralize odors without harming the leather’s structure.
- Mild Castile Soap: A single drop in a bowl of distilled water creates a gentle, non-toxic cleaner. It cuts light grime without harsh detergents.
- Pure, Food-Grade Olive or Coconut Oil: These are for conditioning only, after cleaning. A tiny amount replenishes lost oils, helping to prevent future cracking and preserve the soft patina. Never use them as a primary cleaner on a fresh stain.
What should you absolutely avoid?
My aunt Jessica learned this the hard way with a glass cleaner on a purse. It stripped the finish right off. Beyond the obvious harsh chemicals, avoid these common mistakes.
- Household glass or all-purpose cleaners (too alkaline).
- Baby wipes (they contain chemicals that dry out leather).
- Rubbing alcohol or nail polish remover.
- Any product not specifically designed for leather care.
- Excessive water or soaking the piece.
Gathering Your Gentle Cleaning Kit
Using the right tools is half the battle. You don’t need fancy gear.
- Soft, white microfiber cloths (color can bleed).
- White cotton towels or old T-shirts (my favorite is a worn-out white tee).
- A soft-bristled brush, like a clean makeup brush or a horsehair detailing brush.
- Cotton swabs for precise work.
- A small, clean bowl for mixing solutions.
That old white T-shirt is my go for all delicate jobs, from leather seats in the car to a vintage bag, because it’s soft, absorbent, and leaves no lint.
Step-by-Step Removal for Different Stain Types
Now for the hands-on part. Tackle each stain type with patience and these specific methods.
How to Clean Water-Based Stains Like Ink or Wine
How do you properly clean these? Act quickly but calmly. Think of it like cleaning my car’s interior after Jason’s juice box spill.
- Blot any wet residue immediately with a dry cotton cloth. Do not rub.
- Dampen a corner of a microfiber cloth with distilled water and a single drop of castile soap.
- Work in tiny, gentle circles from the outside of the stain inward. This prevents the stain from spreading.
- Dry the area thoroughly and immediately with a separate dry cloth.
For old, dried ink, a tiny dab of that 50/50 vinegar solution on a cotton swab can help. Always follow the vinegar immediately by dabbing the area with a cloth dampened with just distilled water to neutralize it, then dry completely. The golden rule? Never let the leather get soggy. For other types of ink, especially pen or marker stains, use a specialized remover.
The Best Approach for Oil-Based Stains Like Grease or Makeup
What is the best approach? Oil needs to be absorbed first, not spread around. This method saved Roger’s favorite old hunting belt.
- Sprinkle a generous amount of cornstarch or plain talcum powder over the entire grease stain.
- Let it sit for at least 12 hours, or overnight. The powder will draw the oil up.
- Gently brush all the powder away with your soft brush.
If a faint shadow remains, here’s the counterintuitive trick. Put a drop of olive oil on a clean cloth and rub it very gently into the residual stain. This can help “lift” the old oil. Then, immediately wipe the area with a cloth dampened with your mild soapy water to remove the fresh oil. Dry well. It sounds backwards, but it works.
Addressing Mold or Mildew Without Causing Damage
How can you address mold? Carefully, and ideally outside. I dealt with this on some old work boots stored in a damp garage. Removing mold from leather shoes and boots requires gentle handling to avoid damaging the material.
First, put on a dust mask to avoid breathing in spores. Take the piece outside.
- With your soft brush, gently flick away all visible dry mold spores. Brush them away from you.
- Dampen a cloth with your 50/50 vinegar and distilled water solution.
- Dab (do not scrub) the affected areas. The vinegar will help kill the mold.
- Let the piece dry completely in indirect sunlight. Never use direct heat or hot sun, as it can bake and crack the leather.
Mold can be stubborn. You may need to repeat this gentle dab-and-dry process two or three times over a few days. Patience is the only safe way to win this fight.
After the Clean: Conditioning and Protecting the Patina

You’ve tackled the stain. Now, we nurture the leather. This step is about honoring its age, not making it look factory new.
What is patina, and why is it important?
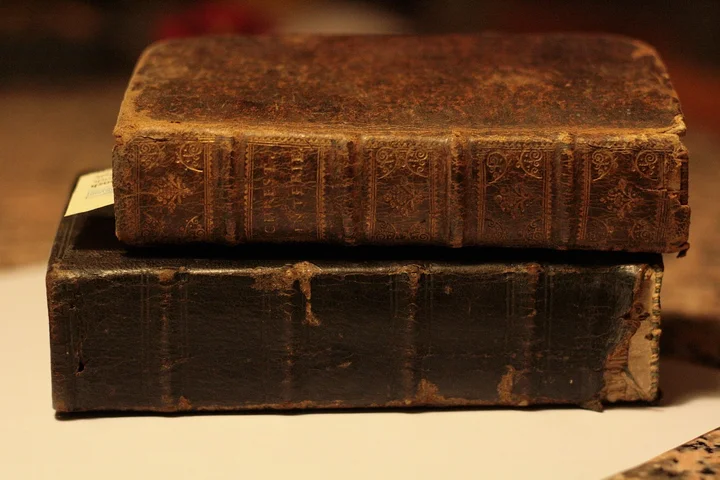
Patina is a leather’s life story. It’s the soft sheen from decades of use, the gentle darkening in the creases, the unique texture that says “I’ve been loved.” My husband Roger has an old hunting jacket that tells a hundred stories in its worn elbows and faded color.
Removing a stain is about preserving the piece, but stripping the patina erases its history and soul. In the realm of vintage textiles, stain removal is a careful preservation practice. We balance cleaning with preserving patina and provenance. Our goal is to clean the accident while keeping the earned character perfectly intact.
After cleaning, what steps condition and protect?
Conditioning is mandatory after any cleaning, even with just water. Cleaning lifts dirt but also some of the leather’s natural oils. If you skip this, the leather can become dry, stiff, and prone to cracking. It’s important to understand the differences between leather moisturization, sealing, and waterproofing to properly care for your leather goods.
Follow these simple steps once your cleaned area is completely dry to the touch.
- Ensure the leather is fully, completely dry. I wait at least 24 hours in a well ventilated room.
- Apply a tiny drop of leather conditioner or pure oil to your fingertips. A little goes a very long way.
- Massage it into the leather using small, gentle circular motions. Work on a small section at a time.
- Let the conditioner absorb for 15-20 minutes. You’ll see the leather drink it in.
- Buff the area gently with a clean, soft cloth (like an old t shirt) to remove any excess and restore the sheen.
Choosing and using a conditioner
Conditioning replaces the natural oils we disturbed during cleaning. For decades old leather, I prefer conditioners with lanolin.
Lanolin is a wax from sheep’s wool that closely mimics leather’s own oils. I’ve found it absorbs well without leaving a greasy or sticky residue behind. It brings back suppleness without darkening the leather as much as some heavy oils can.
I keep a simple lanolin based leather balm in my kit because it’s effective on everything from Jason’s old baseball glove to a vintage handbag. Test any product on a hidden seam first to check for color change. The best result is leather that feels soft and nourished, not slick or shiny.
Smart Storage to Prevent Future Stains and Damage
How you store vintage leather is just as important as how you clean it. The right environment prevents problems before they start.
How should vintage leather be stored?
The main enemies are heat, light, dampness, and pressure. Here is how to keep them all at bay.
- Store in a cool, dry place away from direct sunlight. An attic or damp basement is the worst choice. A closet on an interior wall is ideal.
- Use breathable fabric bags for protection, never plastic. Plastic traps moisture and can lead to mold. A cotton pillowcase works perfectly.
- Stuff bags, jackets, or boots to maintain their shape. Use white, acid free tissue paper. Regular newspaper can transfer ink and is acidic.
- Keep leather away from sharp buckles, buttons, or hardware on other items that can press into and mark the surface.
- Check on stored items every few months. Give them a quick airing out and feel for any unexpected dryness or dampness.
My mother in law, Brianna, taught me this. She has handbags from the 1960s that look incredible. She keeps each one in its own cotton dust bag, stuffed with tissue, on a shelf in her dark, climate controlled closet. She takes them out once a season just to admire them and give them a gentle buff. It’s a ritual that works.
This calm, methodical approach to care is what lets vintage pieces live on for more generations. It’s not about being precious with things. It’s about respecting the material so it can continue to be used and loved, scuffs, stories, and all.
FAQ about Restoring and Protecting Vintage Leather
My first gentle cleaner didn’t work on the stain. What should I try next?
Don’t escalate to harsh chemicals. If a mild soap solution failed, carefully test a 50/50 vinegar and distilled water mix on a hidden spot for water-based stains. For persistent grease, re-apply cornstarch for a full 24 hours to draw out more oil.
Can I use saddle soap on my vintage leather item?
Generally, avoid it. Traditional saddle soap can be too alkaline and stripping for dry, decades-old leather. Stick to the milder, pH-balanced cleaners listed in the guide, and always perform a patch test first.
How can I tell if I’m scrubbing away the patina instead of just dirt?
You’re likely harming the patina if the leather’s color is transferring onto your white cloth or if the surface loses its subtle, varied sheen and becomes uniformly dull. Gentle pressure should lift grime without erasing the leather’s character.
The leather feels sticky or greasy after I conditioned it. What went wrong?
You used too much product. Immediately wipe off the excess with a clean, dry cloth and let the piece air out for a day. Next time, use a dime-sized amount of conditioner for an entire jacket, working it in thoroughly.
What’s the fastest thing I can do for a fresh spill to buy time for proper cleaning?
Immediately blot-do not rub-the spill with a dry, absorbent cloth like a paper towel or cotton napkin. Then, place a clean, dry cloth over the damp area to continue absorbing moisture until you can begin the proper assessment and cleaning process.
Keeping Your Vintage Leather Beautiful
When restoring vintage leather, your best tool is a gentle touch and respect for its history. Test any cleaner in a hidden spot first, and never rush the process. For more hands-on tips and stain-busting stories from my home with Jason, Jessica, Roger, and Peeta, follow along right here on Stain Wiki.
Written by Suzanne Rosi Beringer. Suzanne is an accomplished chemist, laundry expert and proud mom. She knows the science and chemistry of stains and has personally deal with all kinds of stains such as oil, grease, food and others. She brings her chemistry knowledge and degree expertise to explain and decode the science of stain removal, along with her decades long experience of stain removal. She has tried almost everything and is an expert on professional and DIY stain removal from clothes, fabric, carpet, leather and any other items dearest to you.