How Do You Remove Fiberglass from Clothing and Upholstery Safely?
That itchy, invisible fiberglass on your clothes can feel hopeless, but you can fix it. Immediately take the fabric outside, shake it vigorously downwind, and use duct tape to lift fibers-washing first makes it much worse.
This guide will walk you through every step:
- Creating a contained area so fibers don’t spread through your home
- Detailed removal techniques for denim, upholstery, and delicate items
- Why certain tools work and others fail completely
- The final wash cycle that locks in safety and comfort
I’ve tested these methods for years, cleaning fiberglass from Roger’s work clothes and Jason’s soccer kits.
Panic-Level Assessment: The Fiberglass Reality Check
I rate fiberglass a solid 7 out of 10 on the panic scale.
This isn’t a stain you can dissolve. It’s an invasion of tiny, glass-like splinters.
The goal here isn’t to break down a compound with a magical cleaner; it’s a physical, mechanical removal mission.
Think of it like glitter, but the kind that bites. There is no “golden window” to treat it before it sets.
The urgency is high. The longer those fibers sit in a fabric, the more they work their way out.
They transfer to your skin, your furniture, and every other item in the laundry load.
I learned this the hard way after helping Roger re-insulate the attic.
The feeling is distinct. It’s an invisible, prickly itch that becomes a maddening rash. My son Jason brushed against a contaminated jacket once. He was miserable for two days.
Your First Move: Contain the Contamination
Your immediate goal is to stop the spread. Do not walk that contaminated hoodie into your living room.
Everything from this point forward happens outside or in a well-ventilated garage.
Before you even touch the item, suit up. This isn’t optional.
- Rubber or nitrile gloves (dishwashing gloves are perfect).
- Safety glasses to protect your eyes from airborne fibers.
- A basic dust mask. You don’t want to breathe this in.
Gently place the item into a large plastic trash bag. Do not shake it or toss it around.
Twist the top of the bag closed and carry it directly to your outdoor work area.
If you’re already itchy, a roll of duct tape is your first aid. Press it gently onto your skin and peel it off. It lifts many of the surface fibers instantly.
The Core Removal Toolkit: What You Actually Need
You don’t need a chemistry degree for this. You need the right, simple tools. I keep a dedicated kit in my laundry room after a mishap with some old attic insulation.
Recommended Products
Think of this as a precision capture mission. Your goal is to trap particles, not spread them.
- High-Quality Duct Tape or Packing Tape: This is your MVP. The stickier, the better. I use a heavy-duty cloth duct tape because it conforms to fabric textures well.
- A Stiff-Bristled Brush (Dedicated): Get a clean, new brush with firm synthetic bristles. Label it “FIBERGLASS ONLY” and store it in a bag. Never use it for anything else.
- A Vacuum with a True HEPA Filter: This is non-negotiable for large areas. A standard vacuum will shred the fibers and spew them back into your air. My shop vac has a HEPA filter, and it’s worth every penny.
- Laundry Detergent with Enzymes: Look for terms like “bio” or “plus enzymes.” These help break down any binding agents or oils holding the particles. My go-to is a heavy-duty liquid detergent.
Safe DIY Alternatives
If you’re in a bind, you can improvise. My Aunt Jessica once used what she had on hand during a wine-fueled craft project (a long story).
If you lack a HEPA vacuum, your tape becomes your primary and most important tool. A standard lint roller can work on a single piece of clothing in a pinch, but you’ll go through many sheets. Packing tape wrapped around your hand, sticky side out, is a decent substitute.
Material Red Flags
Be honest with yourself about the fabric. Fiberglass removal is a physically harsh process.
Delicate fabrics like silk, fine wool, or loosely woven knits often can’t withstand repeated taping and brushing. The process may damage the fibers more than the contamination itself. My mom, Martha, has an old knit blanket she had to let go of. Sometimes, disposal is the safest and kindest option for your skin. For vintage textiles, stain removal and preservation require gentler, more specialized care. With the right approach, you can address spots without compromising the fabric’s integrity.
Critical Warnings
I can’t stress this enough. Ignoring these steps creates a bigger, airborne problem.
- Never, ever use an ordinary household vacuum without a HEPA filter. It acts like a fiberglass catapult, polluting your entire home.
- Never shake or vigorously rub the fabric indoors. You will see a visible cloud of glitter. That cloud is pure itch.
Step-by-Step Removal by Fabric Type
How to Remove Fiberglass from Clothing
Let’s answer the big questions right away. Can you wash fiberglass out of clothes? Yes, absolutely. Can you always get every single fiber out? That depends on the fabric and your patience. This method works for my husband Roger’s work jeans and my son Jason’s soccer jerseys.
- Take the garment outside. Turn it inside out. Do not bring it into your living room or laundry room first. Your backyard or balcony is your workstation.
- The Tape-and-Brush Dance. Press a strip of tape firmly onto the fabric. Peel it off to lift particles. Use your dry brush to gently dislodge more fibers from the weave. Follow immediately with another tape pass. Repeat this dance over the entire garment, inside and out.
- The Solo Wash. Wash this item alone in the warmest water the fabric allows. Use your heavy-duty enzyme detergent. Do not mix it with other clothes. You don’t want to share this problem.
- The Critical Inspection. After the wash cycle, feel the damp garment carefully, inside and out. Run your hand against the nap. If you feel any prickles, take it back outside for another round of tape on the specific spot.
- The Final Dry. Air dry it completely on a line. Check one last time before it ever sees your dryer. The heat can soften and melt any remaining fiberglass strands, bonding them permanently to the fabric.
How to Remove Fiberglass from Upholstery and Couches
This is about containment. Our couch met fiberglass when a torn beanbag chair (a gift from a well-meaning relative) exploded. We learned fast.
- Isolate the area. Close the door to the room. Open a window for ventilation if possible. This is your contamination zone.
- Dry Removal First. With gloves on, use your tape and stiff brush over every square inch of the affected upholstery. Change tape strips frequently. Go methodically, like you’re mowing a lawn.
- Vacuum with a HEPA filter. Using the upholstery attachment, vacuum the entire piece slowly. Make multiple passes. Empty the vacuum canister or change the bag outdoors immediately after.
- The Damp Cloth Pass. Dampen a microfiber cloth with plain water. Wring it out well. Wipe down the fabric surface to grab any last particles. Rinse the cloth in a bucket of water outside after every few wipes. The water will look cloudy.
For severe cases on removable cushion covers, take them outside and treat them like “clothing.” Sometimes, it’s the only way.
How to Remove Fiberglass from Other Fabrics
Fiberglass doesn’t discriminate. It gets everywhere.
Bedding & Sheets
Can you wash fiberglass out of bedding? You must. Follow the clothing steps meticulously. Be extra vigilant with the post-wash inspection. Your skin touches this all night. I would run a second wash cycle with just hot water as a final flush if I had any doubt.
Automotive Cloth Seats
Treat this like upholstery, but be gentler. A handheld HEPA vacuum is perfect here. Use a soft brush attachment to agitate the fibers before vacuuming. Tape works well on flat seat areas. Avoid soaking the cloth, as car interiors are hard to dry completely. To remove stains from car upholstery, start with a gentle spot treatment on the affected areas. If stains persist, continue with the same careful approach outlined above.
Carpets
Tape is almost useless here. Your strategy changes. Focus on thorough HEPA vacuuming, followed by steam cleaning. The steam cleaner doesn’t need soap. Use plain hot water to flush particles to the surface of the carpet fibers. Let the area dry completely, then HEPA vacuum it all over again. This is what I do for my car mats after a messy project to ensure there’s no soap residue left in the carpet.
Troubleshooting and The Science Behind the Splinters
Post-Treatment Recovery: How to Know It’s Really Gone
You’ve taped, washed, and rinsed. How can you be sure?
Use the “forearm test.” Let the fabric air dry completely first.
Then, gently rub the material on the soft skin of your inner forearm. Wait a minute. Does it itch or feel prickly? If you feel that familiar, awful itch, the fiberglass is not gone and you need to repeat the cleaning process.
Never, ever put fiberglass-contaminated fabric in the dryer. The heat can melt the binder that holds the glass fibers together, permanently welding them to your clothing’s fibers.
Air drying is your only safe bet until you are certain. I only use the dryer as a very last step on items I’ve washed multiple times and passed the forearm test. The heat can then help “set” the clean fabric.
Chemistry Corner: Why Fiberglass is a Physical Nightmare, Not a Chemical Stain
This is the key to understanding your battle. Forget everything about protein or oil stains.
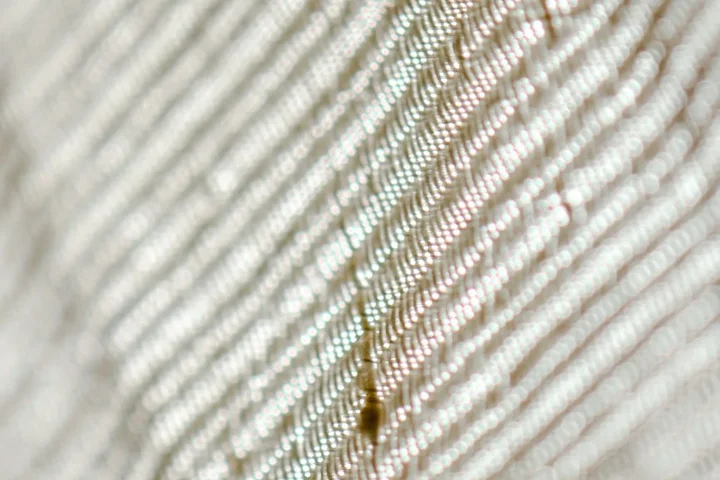
Fiberglass isn’t a spill you can dissolve. It’s millions of microscopic glass shards. They physically hook and embed themselves into the tiny spaces between fabric threads. They don’t have the chemical bonding that typical stains have.
Plain water fails because you can’t dissolve glass. It just moves wet particles around.
Your tools work through physics. Sticky tape adheres to the particles and pulls them out. A stiff brush physically dislodges them from the fibers.
Laundry detergent helps, especially enzyme formulas. They break down the skin oils and sweat that act like glue, holding the glass splinters against the fabric so they can rinse away. That also helps remove biological stains from fabric, like sweat. Pre-treating with an enzymatic cleaner before washing can boost results.
What Helped Me: A Pro-Tip from My DIY-Disaster Days
When Roger decided to re-insulate our attic, our whole upstairs became a scratchy nightmare. We learned fast.
My best tip isn’t about cleaning clothes. It’s about stopping the mess before it starts.
If you’re doing a project, set up a box fan in a window, blowing out. Seal around it with a trash bag and tape.
This creates negative air pressure, pulling airborne fiberglass particles outside before they can settle on every fabric surface in the room. It made a huge difference for us.
Staying Safe: Handling Skin Contact and Preventing Future Messes
You will get it on your skin. It happens to everyone. Here’s what to do.
First, rinse the area with cold, running water. Do not use hot water. Hot water opens your pores and lets the splinters dig in deeper.
Then, use the same method you used on the fabric. Pat the skin dry and use packing or duct tape to gently pull out the particles, especially if static caused any cling.
Follow up with a cool shower, washing with plenty of soap. Change into clean clothes in a different room.
Prevention is always easier than the cure. Before your next project, think like my mom, Martha, who is ruthlessly practical.
- Wear disposable coveralls. Toss them when you’re done.
- Have a dedicated “fiberglass outfit” of old clothes you will wash alone, many times.
- Seal the work area from the rest of the house with plastic sheeting and tape.
Your safest path with a valued sweater or delicate upholstery is often to call a professional cleaner and explain the situation, or to cautiously dispose of the item. It’s not worth weeks of misery.
Sometimes, like with Roger’s favorite work jacket that he refused to part with, you commit to the long, multi-wash battle. But for my good couch? I’m calling for backup.
FAQ about Removing Fiberglass from Fabrics
How quickly should I treat fiberglass contamination to prevent spreading?
Act immediately-fiberglass transfers easily. Isolate the item outdoors within minutes to stop fibers from spreading through your home.
Can I use white vinegar or baking soda to remove fiberglass?
No, these cleaners cannot dissolve fiberglass. Rely on physical removal with tape and brushing, as fiberglass is a mechanical problem, not a chemical stain.
Is it safe to attempt removal on delicate fabrics like silk or wool?
Proceed with extreme caution; tape and brushing may damage delicate weaves. For valued items, consider professional cleaning or disposal to avoid skin irritation.
What’s the best way to check if fiberglass is completely gone after cleaning?
Use the forearm test: rub the dry fabric on your inner forearm and wait for itchiness. Any prickling means you need to repeat the tape-and-wash process.
How do I clean my washing machine after washing fiberglass-contaminated items?
Run an empty hot water cycle with detergent to flush out residues. Wipe the drum and door seal with a damp cloth to capture any lingering particles.
Your Fabric’s Final Defense Against Fiberglass
From tackling fiberglass on Roger’s work jackets to Peeta’s bedding, I’ve found that containing the mess first-by sealing items in a bag and cleaning them alone-is your best move for safety. Always end with a cold water wash and a thorough air-dry to catch any leftover itch before you wear or sit on the fabric again. These tips also apply to removing stubborn stains from outerwear and delicate fabrics. We’ll cover more on that in the next steps. For more practical, tested strategies from our busy household, follow my ongoing fixes here on Stain Wiki.
Written by Suzanne Rosi Beringer. Suzanne is an accomplished chemist, laundry expert and proud mom. She knows the science and chemistry of stains and has personally deal with all kinds of stains such as oil, grease, food and others. She brings her chemistry knowledge and degree expertise to explain and decode the science of stain removal, along with her decades long experience of stain removal. She has tried almost everything and is an expert on professional and DIY stain removal from clothes, fabric, carpet, leather and any other items dearest to you.