How Did We Go From Animal Fats to Lab-Formulated Leather Conditioners?
Staring at a dried-out leather jacket or a scuffed sofa can make you wonder if modern care is any better than the old ways. By tracing leather care from its rustic roots to today’s science-backed solutions, you’ll learn why some ancient tricks still work and when to trust a modern bottle.
Here’s what we’ll explore together:
- The surprising natural oils and fats our ancestors relied on.
- How the tanning process itself was the first form of protection.
- The game-changing inventions of the 19th and 20th centuries.
- What pH balance and polymers mean for your leather’s lifespan.
- Practical tips you can use, inspired by every era.
I’ve tested these methods for years, from reviving my mom Martha’s vintage handbags to keeping our family car seats clean after soccer practice with Jason and his friend Edward.
Leather Stain Panic Level: Assessing Your Emergency
Take a deep breath. That new mark on your leather is stressful, I know. My son Jason once “decorated” the car seat with a ballpoint pen. My first step is always to assess the panic level.
This quick scale helps you know how fast to move.
- Level 1-3 (Low Panic): Things like a light water ring or dust. These are surface issues.
- Level 4-7 (Medium Panic): Coffee spills, grease from pizza, or mud from Peeta’s paws. The clock is ticking.
- Level 8-10 (High Panic): Ink, red wine, or permanent marker. My heart still races thinking about that pen incident.
The “Golden Window” for action is different for every stain. Water rings need gentle drying before they become a dull brown set-in ring. Ink and dye stains need immediate attention before they bond with the leather’s finish.
No matter the panic level, your universal first step is always the same. Blot. Do not rub.
Use a clean, white, absorbent cloth and gently press down to soak up the spill. Rubbing grinds the stain deeper into the grain.
Before you use any new cleaner, even a damp cloth, you must do a hidden test patch.
Find an inconspicuous spot, like behind a cushion or under an arm, and apply your cleaner to see if it discolors or damages the finish. This simple step saved my favorite armchair when my aunt Jessica visited with a glass of merlot.
The Ancient Toolkit: What Were the Earliest Substances Used for Leather Care?
Long before specialty sprays, leather care was about survival. The earliest substances were whatever was on hand.
People used rendered animal fats, like tallow, or oils from fish and plants. They would work these into sandals, waterskins, and armor.
The goal was simple: keep the material flexible and waterproof. They were filling the leather’s fibers with fat to repel moisture.
This ancient logic connects to a safe modern DIY trick for parched, dry leather. A single drop of pure, food-grade neatsfoot or almond oil, rubbed into a hidden test spot first, can revive leather that feels like stiff cardboard.
It works by mimicking those old methods, replenishing the natural oils that have dried out.
But here is a major material red flag. Smearing modern kitchen grease, like bacon fat or olive oil, on your sofa is a terrible idea.
Those substances can go rancid, attract dirt, and permanently stain modern treated leathers. For stain removal on leather, suede, and other delicate materials, gentle methods matter. Our ancestors used raw, unfinished hides, while your sofa likely has a protective topcoat that will reject a greasy smear.
The science of these ancient stains was straightforward. Oils and fats physically filled the microscopic spaces in the leather fibers. This kept water out and prevented the fibers from sticking together and cracking.
Think of a dried-out twig that snaps. Oiling it is like making it bendable again.
From Survival to Status: How Did Leather Care Practices Evolve During the Middle Ages?
By the Middle Ages, leather care started to split. For a knight’s armor or a farmer’s saddle, durability was still everything. They used thick pastes of beeswax and lanolin (wool grease) for heavy waterproofing.
But for a noble’s fine glove or a bookbinder’s cover, appearance mattered too. Simple soaps and milder oils were used to clean and shine without overly darkening or greasing the leather.
You can see the conflict: making something tough often made it darker and greasier. Making it attractive could mean it was less protected from the elements.
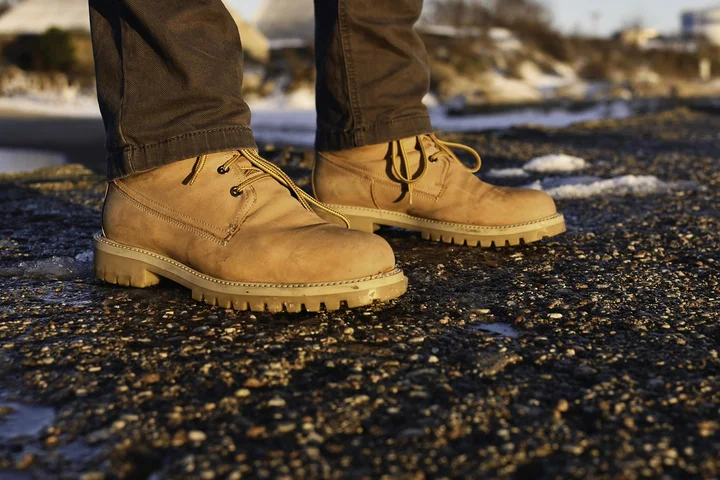
My mom, Martha, still swears by a beeswax paste for her old work boots from the ranch. She melts beeswax with a bit of oil, lets it cool into a balm, and works it into the leather.
That beeswax method is straight out of the medieval playbook, creating a thick, protective, water-shedding barrier perfect for hard use. I would never use it on my aniline leather chair, but for her boots, it’s perfect history in action.
The 19th Century Breakthrough: Science Revolutionizes Leather Treatment
For centuries, leather care was guesswork. You used what you had, often animal fats or plant oils. Sometimes it worked. Often, it left leather sticky, darkened it, or worse, it turned rancid. Today, we can compare data-backed leather cleaners with common DIY remedies to see what truly preserves leather. The next sections reveal what the data supports and where DIY fixes may fall short.
I learned this from my Aunt Jessica’s old trunk. The leather smelled slightly sour, a telltale sign of old, spoiled oils.
The game-changer was chemistry. In the 1800s, we learned to sulfate oils.
Sulfation is a process that makes natural oils like neat’s-foot oil more predictable and stable. It breaks the oil into smaller molecules.
This was huge. These smaller sulfated oil molecules could penetrate the leather’s surface more evenly and deeply.
They nourished the leather’s core without just sitting on top as a gummy film.
More predictable conditioning meant less darkening and, critically, no rancidity. The oil wouldn’t spoil and smell bad over time.
This one advancement moved leather care from folk remedy to a reliable science. We could finally protect leather without ruining it.
Modern Leather Science: How Microstructure Dictates Your Cleaning Strategy
Today, we don’t just treat leather. We understand it. Think of a premium leather sofa or your favorite jacket.
Under a microscope, it’s a dense, woven network of collagen fibers. This network is what gives leather its strength and soft feel.
When leather is new, natural oils lubricate these fibers, letting them slide against each other.
Sun, heat, and cleaning strip those oils away. The fibers dry out, stick together, and eventually snap.
That’s the cracking you see on an old, neglected baseball glove or car seat.
Modern care products are engineered for this microscopic battlefield. Formulators use emulsifiers to create stable blends of oils and water.
They carefully balance pH to match leather’s naturally slightly acidic state, which prevents damage to the fibers and any protective topcoat.
The primary job of a modern conditioner isn’t to coat, but to replenish.
A good conditioner delivers microscopic lubricants back into that fiber network without clogging the leather’s natural pores. It should feel absorbed, not greasy.
Here’s how I categorize products for my own home, from my car’s seats to Roger’s hunting gear:
- pH-Neutral Cleaners: These are your first line of defense. They lift dirt and light grime without harsh alkalines that can dry leather out. I keep a bottle for quick wipe-downs.
- Water-Based Conditioners: My go-to for most upkeep. They use advanced emulsions to carry conditioning agents deep into the leather. They don’t leave a heavy residue.
- Specialty Stain Removers: These are for specific crises-ink, dye transfer, stubborn grease. They’re powerful, so I always test in a hidden spot first.
Chemistry Corner: Oil-Based vs. Water-Based Stains on Leather
Stains on leather aren’t all the same. Your strategy depends on the enemy.
Grease, butter, and oil-based stains bond to the leather’s fibers and any oils already there. They repel water.
This is why a tiny drop of mild dish soap in water can work. The soap molecules surround the grease, allowing it to be rinsed away.
But here’s the catch: soap residue left behind is a magnet for more dirt and can dry out the leather. You must wipe with a clean, damp cloth to remove all soap traces, especially when trying to remove stains from leather bags and purses.
Water-based stains, like juice or soda, are different. They can soak in and sometimes leave a water ring or sticky spot.
Blotting quickly with a dry cloth is key. For the residue, a pH-neutral leather cleaner is your best bet.
Then we have the severe category: ink and dye stains.
These are tiny pigment particles designed to permanently bond to surfaces. On leather, they don’t just sit on top; they invade.
Blotting immediately might save you, but once set, they often require a dedicated leather-safe solvent or a professional’s touch. They’re in a league of their own.
Your Action Plan: Removing Stains from Leather Furniture, Car Interiors, and More
The key to leather stain removal is a slow, methodical sequence. Rushing makes things worse. This is my go-to order of operations for nearly any fresh spill, whether it’s stain or dye.
- Blot, don’t rub. Use a clean, dry, white microfiber cloth to soak up as much of the spill as possible. Rubbing grinds the stain in deeper.
- Identify the stain. Is it oily (butter, salad dressing) or dye-based (wine, juice, ink)? Your next move depends on this.
- Start with the mildest cleaner. I always try a damp cloth with distilled water first. Often, it’s all you need.
- Graduate carefully. If water doesn’t work, use a leather-specific cleaner. Always test any new product in a hidden spot first, like under a cushion.
- Dry completely, then condition. Never skip this last step. It replaces the oils your cleaning removed.
The Surface Compatibility Chart: Adapting Your Approach
Not all leather is created equal. Using the wrong method on delicate leather is a recipe for permanent damage. Here’s how to adjust your strategy, especially when dealing with leather scratches and scuffs.
| Surface Type | Key Trait | Your Approach |
|---|---|---|
| Car Upholstery | Usually has a plastic (polyurethane) topcoat for durability. | You can be slightly more aggressive. Many “car leather” cleaners are safe. Avoid heavy oils that make seats slick. |
| Living Room Sofa | Often “protected” or “semi-aniline” leather. Has a light pigment layer. | This is your standard. Follow the core action plan. Blotting is your best friend. |
| Leather Jacket or Boots | Full-grain or “naked” leather, often with just a wax or oil finish. | Extremely absorbent. Use minimal moisture. Condition immediately after any cleaning. |
| Purses & Bags | Varies wildly. Could be delicate aniline or a durable coated finish. | The “hidden spot test” is non-negotiable here. Check the care tag inside first. |
Step-by-Step for Grease, Ink, and Mystery Spots
For Fresh Oil or Grease Stains
This happened last week with my husband Roger’s hunting gear. A blob of bore cleaner landed on his favorite leather chair. Grease wants to be absorbed, so we help it… into something else.
- Blot the excess with a dry microfiber cloth. Get up what you can.
- Apply a cornstarch or baking soda poultice. I use cornstarch. Heap it on thick, covering the stain completely. Let it sit for at least 8 hours, or overnight. It will look pasty as it pulls the oil up.
- Vacuum the powder away, then clean. Use a soft brush attachment. Follow with a barely-damp cloth and a single drop of pH-balanced leather cleaner. Wipe in a small circle.
For Dye-Based Stains (Ink, Wine, Ketchup)
These stains are about quick action and solvent power. My son Jason’s pen once exploded in my car. Here’s what saved the passenger seat.
- Immediate blotting is non-negotiable. Use a clean section of cloth with each blot to avoid re-depositing the dye.
- Use a leather-safe, alcohol-based cleaner sparingly. Isopropyl alcohol (rubbing alcohol) can work, but it’s very drying. I prefer a commercial leather ink remover. Dab it on, don’t pour. Blot immediately.
- What Helped Me (Pro-Tip): For that pen mark on my car seat, I used a cotton swab with a tiny bit of hand sanitizer (the gel kind), followed immediately by a dab of leather conditioner on the same spot. The alcohol in the sanitizer broke up the ink, and the conditioner replaced the moisture.
Post-Treatment Recovery and Drying
This is where patience pays off. My golden retriever Peeta once shook a full water bowl onto the sofa. The cleanup was easy, but the drying was key.
Always let leather air dry at room temperature, away from heat vents and direct sun. Sunlight can bake in stains and crack the leather. I point a fan at the room for airflow, but not directly at the spot.
To check if a stain is truly gone, let the area dry completely. A shadow that disappears when wet is often just moisture. A true stain remains visible.
Conditioning after cleaning is mandatory to restore the protective oils you just washed away. Use a quality leather conditioner and a soft cloth. Buff it gently once absorbed. Your leather will feel supple, not sticky.
Emergency Field Fixes and Long-Term Prevention
You’re at a restaurant and red wine heads for your bag. Panic is not a plan. You need a field fix.
For most spills, ask for club soda and a clean napkin. Blot the stain, then dampen the napkin with club soda and blot some more. The carbonation can help lift the stain until you get home.
For an ink mark, a tiny dab of clear hand sanitizer on a cotton swab can be a lifesaver. Blot it on, blot it off fast. It’s perfect for pen and marker ink stains. Follow up with conditioner as soon as you can.
Prevention is the real historical wisdom. My aunt Jessica, who loves her wine and her white leather sofa, taught me this. Regular, light conditioning every 6-12 months is far better than crisis cleaning. It keeps the leather nourished and creates a buffer against spills.
Finally, know your red flags. Never use these on quality leather:
- Household glass cleaners (like Windex) – far too harsh and alkaline.
- Vinegar – it’s an acid that can break down leather finishes.
- Baby wipes – they contain chemicals that can dry out and discolor leather over time, especially when used to treat spots like bleach stains.
Leather is meant to last. My mom Martha’s old leather purse has seen decades of use and a few spills. With respectful care, your pieces will develop a beautiful character, telling the story of your life without being stained by it.
FAQ about Applying Leather Care History to Stain Removal
1. Knowing ancient leather was treated with animal fats, can I use kitchen oils on a dry, stained spot?
No, never use cooking oils like olive or vegetable oil, as they turn rancid and attract dirt. For extremely dry leather, test a single drop of pure neatsfoot oil in a hidden spot to safely mimic the ancient replenishing principle.
2. My leather boots got soaked. Can I use the medieval beeswax method to protect them from future stains?
Yes, a homemade beeswax paste is excellent for waterproofing rugged, unfinished leather like boots or work gear. For stained, finished furniture or car seats, this method is too heavy and will clog the surface, trapping the stain.
3. The 19th-century breakthrough prevented rancidity. How do I ensure my modern conditioner won’t damage or smell bad later?
Always choose conditioners from reputable brands that specify pH balance for leather. Before full application, perform a hidden spot test to check for darkening or residue, ensuring the product is stable and safe for your specific type of leather.
4. If modern conditioners “replenish” fibers, should I condition right after cleaning a fresh stain?
No, conditioning is the final step. First, completely clean and dry the stained area to avoid sealing in moisture or stain particles, especially when removing water stains from leather. Once the leather is clean and dry, apply a light conditioner to restore flexibility and protection.
5. How does the “microstructure” knowledge help me choose a cleaner for a new, unknown stain?
It guides you to start with the mildest, most compatible option. Always begin with a dry blot, then a damp cloth with distilled water, as harsh cleaners can damage the fibrous structure. Graduate to a pH-neutral leather cleaner only if needed, based on the stain type.
Leather Care for Your Everyday Life
The entire history of leather teaches us one clear lesson: regular, mindful preservation is far better than frantic restoration. Always test any cleaner or conditioner in a hidden spot first, because modern leathers have delicate finishes that ancient tanners never imagined. I use this principle on everything from Roger’s hunting boots to our living room sofa, and I share more of these straightforward methods on Stain Wiki, especially for stain-proofing leather.
Written by Suzanne Rosi Beringer. Suzanne is an accomplished chemist, laundry expert and proud mom. She knows the science and chemistry of stains and has personally deal with all kinds of stains such as oil, grease, food and others. She brings her chemistry knowledge and degree expertise to explain and decode the science of stain removal, along with her decades long experience of stain removal. She has tried almost everything and is an expert on professional and DIY stain removal from clothes, fabric, carpet, leather and any other items dearest to you.