How Do You Clean Suede, Nubuck, & Smooth Leather?
Staring at a splash of rain or a greasy mark on your favorite boots can make your heart sink. Don’t panic-the right cleaning method depends entirely on knowing which of the three main leather types you’re dealing with.
This guide will walk you through exactly that. You’ll learn how to spot the differences with a simple touch test, build a safe cleaning kit, tackle common stains step-by-step, and keep your leather looking its best for years. I’ve cleaned everything from my son Jason’s soccer-cleat nubuck to my husband Roger’s smooth leather hunting gear.
I’ve tested these methods for years on my family’s most-worn items, so you can trust they’re practical and proven.
The First 5 Minutes: Your Leather Stain First-Aid Kit
I once watched my son Jason try to scrub a grass stain off his soccer cleats. It was a suede pair. My heart sank. That frantic rubbing is our first instinct, but it’s the worst thing you can do.
Leather needs a calm, measured response from the very first second.
The single most important rule for any leather stain is to blot, never rub.
Rubbing grinds the spill deeper into the fibers or finish. Grab a clean, absorbent cloth (I always have a stack of white microfiber towels in the laundry room). Press it firmly into the stain to soak up the liquid. Lift straight up. Repeat with a clean section of the cloth until no more transfers.
What’s Your Panic Level?
I rate stains on a panic scale from 1 (water on laminate) to 10 (red wine on a white couch). Leather stains are a solid 7. They are sensitive, and a wrong move can leave a permanent mark or change the texture.
Treating leather requires respect for the material, not frantic scrubbing.
Find Your Golden Window
You have a short grace period after a spill. I call it the “Golden Window.” For most food, drink, and water-based spills on leather, you have about 30 to 60 minutes before oils and dyes really start to bond with the material.
Acting within this window makes your job infinitely easier. It’s the difference between a quick spot treatment and a multi-day restoration project.
Your Non-Negotiable Warnings
This guide is for genuine suede, nubuck, and smooth leather. It does not cover faux leather or vinyl.
Before you do anything else, sear these three rules into your mind. I learned some of these the hard way, like when I ruined a nice belt with a “miracle” cleaner.
- Never use harsh, all-purpose chemicals, ammonia, or chlorine bleach. They will strip color and dry out the leather.
- Never soak leather or run it under a tap. Leather is skin. Soaking it warps and weakens it.
- Never use direct, excessive heat from a hairdryer, heater, or in direct sun to dry it. This causes cracking and shrinkage. Always air-dry at room temperature.
Is This Suede, Nubuck, or Smooth Leather? The Touch Test
Cleaning leather is not one-size-fits-all. Using a suede method on smooth leather can ruin the shine. Using a smooth leather cleaner on nubuck can mat the fibers flat.
Correctly identifying your leather type is the most critical step before you touch a single cleaner.
Here’s a simple sensory guide I use, even in a dimly lit closet. I always think of my husband Roger’s hunting boots (nubuck), my old favorite jacket (suede), and our living room chair (smooth).
| Type | Source & Finish | Look & Feel | Water Test (A tiny drop!) |
|---|---|---|---|
| Suede | Inner split of the hide. Brushed to a nap. | Clearly fuzzy, matte, soft like a peach. | Water soaks in quickly, darkens the spot. |
| Nubuck | Top-grain leather, sanded on the outside. | Velvety, finer nap than suede. Feels plush. | Water soaks in and darkens, but slower than suede. |
| Smooth Leather | Top-grain or full-grain with a sealed surface. | Shiny or matte finish. Feels firm and smooth. | Water beads up on the surface for a while. |
The Look and Feel of Each Leather
Suede is unmistakable. It has a raised, fuzzy nap because it’s made from the softer inner layer of the hide. It’s entirely matte and feels deeply soft, almost like a very short-haired stuffed animal. Run your finger over it, and you’ll see a color shift as the nap moves.
Nubuck is often called “the aristocrat of suedes.” It feels velvety and luxurious. The nap is much finer and tighter than suede because it’s made by lightly sanding the tough outer grain of the leather. It’s more durable than suede but shares its matte, textured look.
Smooth Leather has a sealed surface. It can be shiny (aniline or polished) or have a matte finish (like some car seats). It feels firm and continuous to the touch. Your finger glides over it without catching on any fibers. This protective topcoat is what repels spills initially.
Spot Cleaning: The Universal First Step for All Three
Once you know what you’re dealing with, start gentle. My mom Martha always said, “Let the material tell you what it needs.” Start dry.
For suede and nubuck, use a dedicated soft-bristle brush (a clean toothbrush works in a pinch). Gently brush the stained area in one direction to lift the nap and dislodge dry debris. For smooth leather, just use a dry, soft microfiber cloth to wipe the surface. When dealing with oil stains, a targeted approach to remove oil stains leather and suede may be needed. Look to the next steps for oil-stain removal tips.
Before any moisture or cleaner touches the spot, you must do a test patch. Find a hidden area-inside a belt loop, under a collar, on the back of a cushion. Apply your chosen cleaner there first and check for color transfer or texture change after it dries.
This two-minute test can save your favorite item. I skipped it once on a handbag and ended up with a permanent dull spot. Learn from my mistake.
How to Clean Suede Without Ruining the Nap
You clean suede shoes by starting dry and staying gentle.
Avoid getting them soaked or using harsh chemicals. Water can permanently mat the delicate nap, and most liquid cleaners will leave a dark spot.
Your first line of defense is always a dry clean. I keep three tools in a shoebox for this.
- A suede brush: This has stiff brass or nylon bristles designed to lift the nap and flick away dirt.
- A suede eraser: It looks like a pencil eraser but is made of a gritty rubber that rolls away scuffs and stains.
- A clean microfiber cloth: For wiping away surface dust before you brush.
Start by brushing the entire item in one direction to lift the fibers and see the true state of the stain. This helps you assess biological stains on fabric more clearly so you can plan effective removal methods.
Surface Compatibility: Shoes, Bags, and Furniture
The core rule is the same, but your technique changes slightly.
For shoes and bags, you can hold them. For a suede couch or chair, you must work on a vertical surface. Brush gently upward against the natural nap to lift it, then smooth it back down. Always test your eraser on a hidden seam first.
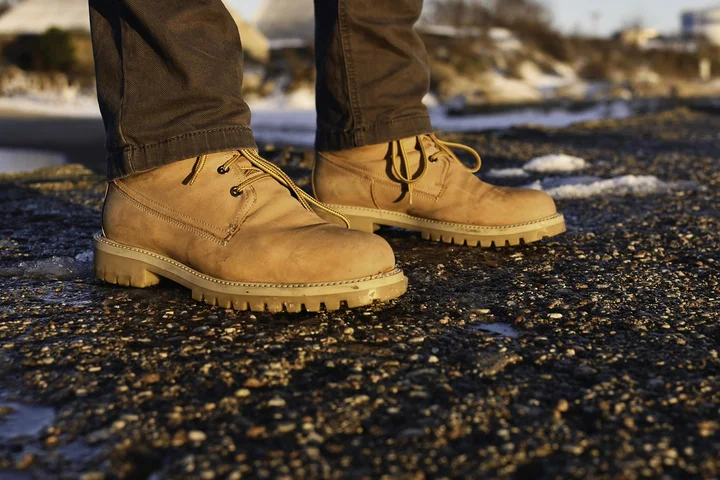
My son Jason plays soccer, and his cleats have a suede toe. After a rainy game, they were caked in dried mud.
I let them dry completely overnight. The next day, I used the edge of a butter knife to flick off the big chunks. Then, I brushed the dried residue away with firm strokes of the suede brush. The nap popped right back up.
Patience and dry tools saved those cleats from a watery, matted fate.
Tackling Specific Stains on Suede
Different stains need different tactics. Here is my field guide.
Dry Stains (Dirt, Mud, Dust)
This is the easiest scenario. Let the stain dry completely.
Brush it thoroughly with your suede brush. For stubborn marks, rub gently with the suede eraser, then brush again to restore the texture. If any stains linger, you can learn how to remove stains from suede for a spotless finish.
Wet Stains (Water, Soda, Rain)
Your goal is damage control. Do not rub.
- Blot the spot immediately with a dry, absorbent cloth or paper towel.
- If the item is a shoe or boot, stuff it tightly with crumpled paper to help it hold its shape as it dries.
- Let it air dry at room temperature, away from heaters or direct sun. Heat can stiffen the leather.
- Once bone dry, brush the nap to revive it. The stain may lighten or disappear.
Oil-Based Stains (Grease, Butter, Hand Lotion)
This is where you need a dedicated product. I use a suede and nubuck absorbent powder or spray.
These products work by chemistry of absorption, not dissolving. They pull the oil out of the leather and into the powder, which you then brush away.
Sprinkle the powder generously over the stain, let it sit for several hours (or overnight), then vacuum or brush it off. You may need to repeat this process.
Extreme Cases (Ink, Red Wine)
Manage your expectations here. These stains are often permanent on porous suede.
You can try a specialist suede cleaner from a brand like Saphir. For ink, my aunt Jessica swears by a tiny dab of rubbing alcohol on a cotton swab, but I warn you, it’s a gamble that can strip color. Test in a hidden area first. If you’re dealing with pen marker ink stains, there are targeted removal steps worth trying. We’ll outline a quick method in the next steps.
Sometimes, the best fix is a professional suede restoration service.
Nubuck Care: Walking the Line Between Suede and Smooth
Is nubuck more difficult to maintain than smooth leather? Absolutely.
It has the soft nap of suede but is made from the top grain of the hide, making it more durable but just as stain-prone. You must baby it.
The best way to remove a water stain from nubuck is to prevent a ring from forming in the first place.
If it gets wet, blot it and let it dry naturally away from heat. Once dry, the spot will look darker. Use a dedicated nubuck brush (often with softer bristles than a suede brush) to brush the entire panel evenly. This helps blend the spot.
The Science of the Stain: The Water Ring
Why does water leave a ring? It disturbs the microscopic fibers of the nap.
When wet, these fibers lay flat and clump together. As they dry, they dry in that compressed position, reflecting light differently and creating a darker, often stiff, patch. Even drying and gentle brushing can often coax them back up.
Can You Use Home Remedies on Nubuck?
Are there any safe home remedies? Very few, and you must proceed with extreme caution.
I often hear the vinegar and water mix suggested for stains. I advise against it on napped leather like nubuck. The acidity can dry out the leather and set the stain by reacting with dyes. For stain removal on leather, suede, and other delicate materials, you need a careful, material-specific approach. I’ll cover safe methods for these materials in the next steps.
The safest “home” tool is a clean, white microfiber cloth dampened with just water, then wrung out until it’s barely damp.
Gently wipe the soiled area, then dry immediately with the dry side of the cloth. Let it air dry completely and brush.
Never use dish soap or laundry detergents directly on nubuck. These are designed to cut grease and will strip the leather’s natural oils, leaving it parched and vulnerable to cracking.
When in doubt, a product made specifically for nubuck is your safest bet. My mother-in-law Brianna taught me that sometimes, the specialized tool is worth the investment to save a favorite pair of boots.
Smooth Leather Cleaning: Protecting the Sealant is Everything
How do I protect smooth leather from stains? The best defense is a good, simple offense.
Think of the glossy finish on your leather sofa or jacket as its raincoat. My routine keeps that coat intact.
First, I dust with a soft, dry cloth. A microfiber cloth works perfectly.
Next, I wipe with a cloth barely damp with distilled water. I never soak it.
Conditioning every few months is what truly prevents stains by keeping the leather supple and the sealant healthy. I use a product made for finished leather, never a nubuck conditioner. A leather stain proofing guide can help you choose the right protection for your leather type. I’ll reference it in the next steps.
Spills still happen. My Aunt Jessica taught me her wine-spill drill, which works for coffee or soda too.
Blot immediately with a clean, absorbent cloth. Do not rub. You’re trying to lift the liquid up, not grind it in.
For a greasy mark from food, I blot away any residue first. Then I use a drop of leather cleaner on another cloth to gently clean the spot.
Post-treatment is non-negotiable. Let the area air dry completely, away from direct heat.
Once dry, the spot might look a bit dull. I apply a tiny bit of conditioner there to blend it with the surrounding leather.
This recovery step replaces the natural oils your cleaning might have removed, preventing future cracks.
Removing Oil Stains from Any Leather Type
How can I remove oil stains from leather? You need the right approach for the leather’s texture.
For suede and nubuck, I use an absorbent powder. For smooth leather, I use a dedicated cleaner.
The goal is to draw the oil out, not scrub it away. This takes patience.
For suede or nubuck, I cover the stain with cornstarch or baking soda. I let it sit for hours, sometimes overnight.
The powder turns clumpy and dark as it absorbs the oil. I brush it away with a suede brush.
You will likely need to repeat this powder process several times for a deep oil stain. It’s slow, but it works.
Smooth leather needs a different tactic. My husband Roger left a dark boot oil smear on his leather chair arm.
I blotted up the excess oil. Then I applied a leather-specific degreaser with a cotton swab.
I let the cleaner sit for just a minute before wiping it off with a damp cloth. It took two gentle applications to lift the smear.
The Right Tools and Simple Protection Plan
What tools do I need for basic leather care? I keep two separate kits.
Can I use the same cleaner on all three types of leather? Absolutely not. Using the wrong product can ruin the finish.
My Suede & Nubuck Kit is simple:
- A suede brush with brass and nylon bristles.
- A white pencil eraser for scuffs.
- Cornstarch in a shaker for oil.
- A suede-specific protective spray.
My Smooth Leather Kit is different:
- Soft microfiber cloths (one for dusting, one for damp wiping).
- A pH-balanced leather cleaner.
- A quality leather conditioner.
- A separate spray for UV and stain protection.
Conditioners for smooth leather will clog and mat the nap of suede, so never mix them up. I keep the bottles on different shelves.
Protective sprays are a final shield. I apply them to clean, dry leather in a well-ventilated area.
I do a light, even mist from about six inches away. Let it dry completely before using the item.
Restoring the Nap on Suede or Nubuck
How do I restore the nap on suede or nubuck? Brushing is everything.
Always brush in one direction when the material is completely dry. Going in circles will tangle the fibers more.
I use a proper suede brush for large areas like boots. For a small spot on a bag, a clean, soft-bristled toothbrush works too.
Brush gently but firmly. You’ll see the velvety texture start to rise again.
Some matting from a heavy water stain can be permanent, but consistent brushing will improve the look dramatically.
My son Jason scuffed his nubuck soccer cleats in the mud. After cleaning, they looked flat and tired.
Ten minutes of brushing while we watched a game brought most of the texture back. It’s a satisfying fix.
How to Store Leather Items So They’re Ready to Wear
What is the proper way to store leather items to prevent damage? I ask myself this every spring when I swap out Roger’s heavy winter boots for Jessica’s tiny sandals. Leather is skin, and like skin, it needs to breathe and be protected from harsh conditions. Storing it wrong leads to stiffness, cracks, or a musty smell that’s tough to fix.
I learned this lesson from my mother-in-law, Brianna. She showed me a beautiful suede jacket from her youth that was ruined after years in a hot attic, wrapped in plastic. It was brittle and had permanent creases. Proper storage starts with a good cleaning and follows a few simple rules to keep your items supple and ready for their next wear.
The Step-by-Step Storage Routine
Never toss a leather item into storage straight from your closet. Dirt and oils left on the surface can set and damage the fibers over time. Follow these steps every time.
- Clean First, Always. Give the item a gentle wipe-down with a product suited for its type. For smooth leather boots, I use a damp cloth with a drop of saddle soap. For suede bags, I’ll use a soft brush. This removes the day’s grime, like the mud from Jason’s soccer cleats or the sticky fingerprints from my three-year-old.
- Stuff for Shape. For bags and shoes, you need internal support. I use plain, acid-free tissue paper. It absorbs any leftover moisture and holds the item’s shape without transferring dyes or acids that can stain. Crumple it loosely and fill the toes of shoes and the body of handbags. This prevents unsightly creases and collapses that are hard to reverse.
- Choose the Right Cover. This is critical. Never, ever use plastic bags or bins. Plastic traps moisture and leads to mildew. Instead, use breathable fabric bags, like cotton pillowcases or dedicated cloth garment bags. I keep a stack of old pillowcases for this very purpose. They let air circulate while keeping dust off.
Finding the Perfect Storage Spot
Where you put your items matters as much as how you prepare them. Think of a place you’d want to spend a few months.
Store everything in a cool, dry, and dark place. A closet on an interior wall is ideal. Avoid areas near heat vents, radiators, or in direct sunlight, like a sunroom or attic. Heat dries leather out, making it crack. Sunlight fades the color. My aunt Jessica in Arizona learned this with a prized leather chair that now has a permanent, pale patch on one arm.
A Seasonal Check-In Tip
Leather can dry out even in perfect storage. I make it a habit to check my stored items every time the seasons change. It takes just a minute. Feel the leather. If it seems stiff or dry to the touch, apply a tiny amount of conditioner recommended for that leather type. A quick buff with a soft cloth restores moisture. This simple act keeps Roger’s good leather jacket and my own bags feeling soft, season after season.
FAQ about Cleaning & Protecting Your Leather Items
1. Can I use the same cleaner on all three types of leather?
No, using the wrong product can cause permanent damage. Always use a cleaner specifically formulated for your leather’s texture-conditioners for smooth leather will clog and mat the delicate nap of suede or nubuck.
2. What should I absolutely avoid when cleaning suede to prevent permanent damage?
Never use water-based liquid cleaners or soak the material, as this will mat the nap and leave a dark spot. Also, avoid harsh scrubbing and direct heat from hairdryers, which can permanently alter the texture and cause shrinkage.
3. Are there any safe, immediate home remedies for a fresh water ring on nubuck?
The safest immediate step is to blot the spot with a dry cloth and let it air-dry completely away from heat. Once dry, gently brush the entire panel with a nubuck brush to help the dried, flattened nap stand back up and blend the ring.
4. How do I quickly blot a fresh oil or grease stain before it sets into the leather?
Immediately blot—do not rub—the excess grease with a clean, absorbent paper towel or cloth. Then, for suede or nubuck, cover the area with cornstarch or baking soda to start drawing the oil out while you get a proper leather stain remover for smooth finishes.
5. When should I stop my DIY cleaning attempts and call a professional?
Stop if the stain worsens, the color begins to lift, or the texture changes after your gentle cleaning attempt. For deep-set ink, dye, or wine stains on porous suede, a professional restoration service often has the best chance of success without causing further damage. For the toughest stains—ink, grease, and wine—expert techniques often deliver the best results. The next steps will include links tailored to these stubborn stains.
Your Go-To Plan for Leather Care Confidence
From my years of rescuing Roger’s nubuck jackets to Jessica’s suede shoes, the one rule I never break is this: always match your cleaning method to your leather’s specific texture—suede, nubuck, or smooth. If grass stains are a challenge on suede shoes, I’ll walk you through quick, gentle removal tips that protect the nap. I’m always testing new methods and sharing the results, so for trustworthy advice that works in a busy home, keep joining me right here on the blog.
Written by Suzanne Rosi Beringer. Suzanne is an accomplished chemist, laundry expert and proud mom. She knows the science and chemistry of stains and has personally deal with all kinds of stains such as oil, grease, food and others. She brings her chemistry knowledge and degree expertise to explain and decode the science of stain removal, along with her decades long experience of stain removal. She has tried almost everything and is an expert on professional and DIY stain removal from clothes, fabric, carpet, leather and any other items dearest to you.