How Have Car Interiors Evolved to Resist Stains? A Practical Guide
Worried about a new stain on your upholstery? Start by identifying your car’s interior material-this simple step is the key to choosing the right, safe cleaning method.
Here’s what we’ll explore together in this article:
- The journey from basic vinyl to today’s high-tech, coated fabrics.
- How modern stain-resistant treatments actually work on a molecular level.
- My proven, material-specific cleaning protocols for spills and messes.
- A look at sustainable and next-generation materials being developed.
I’ve spent years practically testing these methods, from cleaning Peeta’s muddy paw prints to rescuing seats after Roger’s hunting trips.
Identify Your Stain and Act Fast: Common Car Interior Spills
My son Jason ran from the car last week, leaving a trail of mud on the backseat. His cleats were bad, but the crushed juice box Jessica left in the cupholder was worse. Knowing what you’re dealing with is the first step to winning the stain battle.
Here are the usual suspects I face:
- Coffee: That warm brown ring is a nasty combination of dye and oils. It sets fast and can leave a greasy-looking shadow if you just wipe it.
- Grease & Oil: Think of french fry fingers or transmission fluid from your husband’s tools. These create a dark, tacky grease spot that attracts more dirt.
- Ink: A leaky pen can leave a sharp blue or black line. This dye wants to bond with any fabric it touches, fast.
- Mud: Jason’s specialty. It looks like simple dirt, but as it dries, that gritty paste grinds into the fibers.
- Juice & Soda: Jessica’s grape juice left a dark purple ring. These sugary spills are sticky and can leave a discolored patch if they sit.
- Food Spills: Ketchup, chocolate, melted ice cream. These are complex stains with oils, dyes, and proteins that need a multi-step approach.
Your first move is always the same: grab a clean, dry cloth and blot, don’t rub.
Rubbing grinds the stain deeper. Blotting soaks it up. Contain the spill fast. For a juice box flood, I’ve used a whole roll of paper towels to soak up the liquid before it seeps into the seat foam. That sour milk smell is a nightmare to get out.
From Leather to Microfiber: How Car Materials Have Evolved for Cleanability
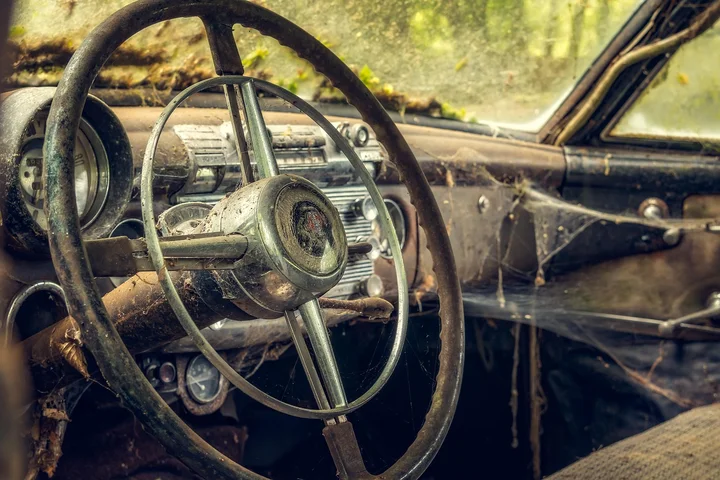
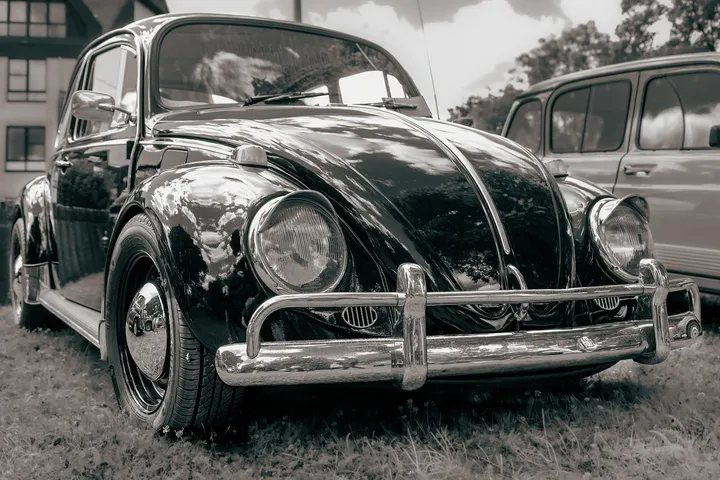
Car interiors used to be simple. My grandpa’s truck had bare metal and vinyl seats. Today, my SUV has seats that feel like a favorite sweatshirt. This change wasn’t just about style. It was driven by us, the drivers, wanting comfort that was also easier to live with.
Early vinyl was durable but could get sticky and crack. Basic cloth was comfortable but soaked up spills. The push was for materials that looked good, felt good, and didn’t stain if you looked at them wrong.
For your cleaning routine, this evolution means you need to know your surfaces.
Using a harsh cleaner on a modern coated fabric can strip its protection. Treating old cloth like a high-tech fabric might not work. I learned this after using the wrong product on my mom Martha’s old sedan. It left a faded spot.
Traditional Workhorses: Cloth and Vinyl
Basic cloth seats, like in many older cars, are often made from nylon or polyester fibers woven together. They’re absorbent. A spill will soak in and spread along the threads, creating a wider stain, especially if not treated promptly using water stain removal techniques for upholstery.
Cleaning them is straightforward because there’s no special coating to worry about. You can often use a simple mix of dish soap and water, or a dedicated upholstery cleaner, and scrub gently with a soft brush. The goal is to lift the stain from the fibers without fraying them—especially when compared to delicate antique upholstery that requires extra care.
Classic vinyl is a plastic surface. It doesn’t absorb, so spills sit on top. This makes wiping up a coffee spill easy. But if you let that spill dry, it can leave a sticky residue or even dye the plastic.
Vinyl can also dry out and crack. My aunt Jessica’s old convertible seats taught me that a simple vinyl protectant after cleaning keeps them supple.
Modern Advances: Synthetics and Coatings
Most modern “cloth” seats are actually made from advanced polyester microfibers. These threads are finer and woven more tightly. Think of a high-quality sport shirt versus an old cotton tee. The tighter weave gives liquids less space to soak in.
The real game-changer is the stain-resistant coating. Many fabrics are treated with a chemical finish that makes them hydrophobic. Water and juice bead up on the surface for a minute, giving you precious time to grab a napkin.
These coatings are effective, but they are not invincible and can be damaged by harsh chemicals.
I avoid heavy-duty degreasers or strong solvents on my seats. They can break down that protective layer. Instead, I use a cleaner designed for upholstery or a very mild soap solution. The key is to preserve the coating so it keeps working for you.
Cleaning Traditional Car Upholstery: Step-by-Step for Cloth and Vinyl
Old-school cloth and vinyl are surprisingly forgiving. You just need a gentle touch and the right simple cleaners.
Before you start anything, find a hidden spot. Test your cleaning solution on the back of a seat or under the dashboard.
This test patch is non-negotiable-it tells you if the color will bleed or the material will discolor before you cause real damage.
Your Toolkit: Simple & Safe Solutions
Skip the harsh store-bought sprays. You likely have what you need at home.
- For general dirt and spills: A few drops of clear dish soap in a spray bottle of warm water.
- For sticky residues or light odors: A 50/50 mix of distilled white vinegar and water.
- For lifting: Clean, white microfiber cloths and a soft-bristled toothbrush.
Some manufacturers grade materials for cleanability, which is why a test spot is so vital. A low-grade cloth might fade where a high-grade vinyl wipes clean easily.
Step-by-Step: Cloth Upholstery
- Blot up any fresh liquid with a dry cloth. Never rub-you’ll grind the stain deeper into the fibers.
- Lightly mist your dish soap solution onto the stain. Let it sit for just a minute to loosen the grime.
- Blot firmly with a damp microfiber cloth. Work from the outside edge of the stain toward the center to prevent spreading.
- Rinse by blotting the area with a cloth dampened with plain water to remove soap residue, which can attract more dirt.
- Dry the area as much as possible with a dry towel. Crack a window to let moisture escape and prevent mildew.
What helped me: For ground-in dirt on cloth, I use a soft toothbrush to gently agitate the cleaner from the outside of the stain inward. It lifts the dirt without fraying the fabric like aggressive scrubbing would. This method is especially effective for delicate outerwear fabrics.
Step-by-Step: Vinyl & Plastic Surfaces
- Wipe the surface with a dry cloth to remove loose grit that could scratch.
- Spray your cleaning solution directly onto your microfiber cloth, not the surface, to avoid overspray.
- Wipe in a consistent, circular motion. For textured vinyl, use the toothbrush to get into the grooves.
- Immediately wipe dry with a separate clean, dry cloth to prevent streaks and a dull film.
My mom Martha swears by a tiny drop of olive oil on a dry cloth to restore a subtle shine to old, faded vinyl dashboards. It works wonders.
Modern Materials Made Easy: Stain Removal for Synthetic and Coated Fabrics
Today’s seats often wear a secret shield. Materials like polyester with a stain-resistant coating or synthetic ultrasuede are designed to repel messes, but they require a different strategy.
Your goal is to clean without stripping that protective layer, which means harsh solvents, degreasers, and aggressive brushes are your enemy.
I learned this lesson with Peeta, my golden retriever. After a rainy walk, he jumped in, leaving perfect, muddy paw prints on the treated cloth passenger seat.
My old instinct was to scrub. Instead, I let the mud dry completely, then vacuumed every speck loose. For the remaining shadow, I used a barely damp cloth with a drop of dish soap and just patted. It vanished. The coating did its job.
How to Clean Coated & Synthetic Fabrics
- Always start with a dry clean. Vacuum or use a soft brush to remove all dry debris. Often, this is all you need.
- For a fresh spill, blot-don’t rub-immediately with a dry, absorbent cloth. The coating should help it bead up.
- If a stain remains, use a cleaner labeled as safe for stain-resistant fabrics. Or, use the same mild dish soap solution, but apply it even more sparingly.
- Dampen your cloth with the solution and blot the stain. Never pour or spray it directly, as pooling liquid can breach the coating.
- Blot with a water-dampened cloth to rinse, then blot dry with a towel. Let the area air dry fully.
Safe Products vs. Stripping Chemicals
Stick to pH-neutral, water-based cleaners. What you should avoid tells the whole story:
- Avoid anything abrasive: Scrubbing pads, stiff brushes, and even some “magic” erasers can scratch the microscopic coating.
- Avoid strong solvents: Alcohol, acetone (nail polish remover), and citrus-based degreasers can dissolve the protective layer, leaving the fabric vulnerable.
- Avoid heavy foams: They leave behind residues that can turn sticky and attract more dirt, defeating the purpose.
Think of it this way: cleaning traditional cloth is like washing a cotton t-shirt, while cleaning a coated synthetic is like wiping a raincoat-you clean the surface without compromising its waterproof layer.
Material Red Flags: Never Use These on Your Car Interior

I learned this lesson the hard way on Roger’s truck seats. He had a nice, dark gray synthetic fabric. A coffee spill turned into a faded, crusty patch because I got overzealous. Using the wrong cleaner can cause more damage than the original stain. Your first move should always be to check your owner’s manual or a hidden tag on the seat.
If you can’t find the label, this list is your safety net. Treat it like the rulebook for keeping your interior looking new.
- Bleach or Heavy-Duty Oxidizers on Colored Fabrics: This includes chlorine bleach and some super-concentrated oxygen cleaners. They don’t just remove stains. They remove dye. I once saw a perfect, ghostly white handprint on a navy blue seat where someone used straight peroxide.
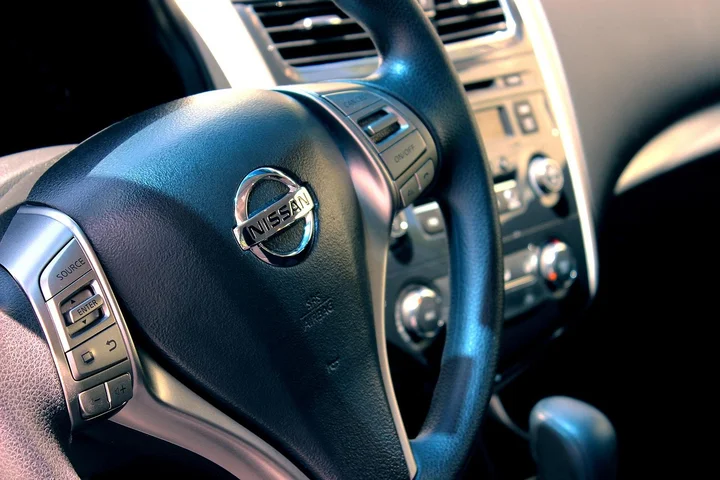
- Ammonia-Based Cleaners on Vinyl, Leather, or Screens: Ammonia is incredibly harsh. It will dry out and crack vinyl and leather over time. On your touchscreen or gauge cluster, it can permanently remove anti-glare coatings, leaving a hazy, streaky mess.
- Hot Water on Protein-Based Stains: For milk, blood, or anything from a living creature, hot water is your enemy. It cooks the proteins, setting the stain permanently into the fibers. Always start with cold.
- Rough Scrubbing Tools on Carpet and Headliners: Stiff-bristled brushes or abrasive pads will fray carpet loops and pill headliner fabric. You’ll be left with a clean but fuzzy, worn-looking spot. Use a soft brush or a microfiber towel for agitation.
- Silicon-Based “Shine” Products on Dashboards and Controls: These create a greasy, sticky film that attracts dust like a magnet. Worse, that slick surface can make steering wheels and knobs dangerously slippery. My aunt Jessica loves a shiny dashboard, but I always wipe hers down with a damp microfiber when she visits.
- Acetone or Nail Polish Remover Anywhere: It’s a fantastic solvent, which is the problem. It will dissolve stains, glue, plastic, and your car’s interior finishes. Keep it far away from your vehicle.
When in doubt, test any cleaner in a hidden spot first, like under the seat or behind a seatbelt flap. Wait for it to dry completely to check for color transfer or texture change.
The Stain Wiki Compatibility Chart: Adjusting Your Approach for Seats, Carpets, and Dashboards
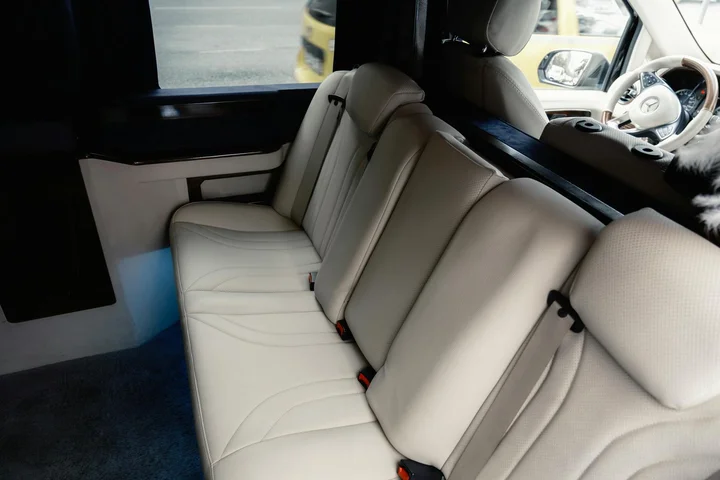
Think of your basic stain solution-a bit of dish soap and cool water-as your foundation. You modify it for each surface, just like you’d add more flour to a sauce to thicken it. This chart shows you how.
| Surface Type | Core Cleaning Method | Key Modification & Notes |
|---|---|---|
| Fabric & Cloth Seats | Blot, dilute, apply mild detergent solution. | Use an upholstery or carpet extractor for deep stains. My home shampooer with a hose attachment works perfectly for Jason’s soccer mud. For old stains, a paste of oxygen cleaner (like OxiClean) and a *tiny* bit of water can work wonders. Let it sit, then extract. |
| Vinyl & Synthetic Leather Seats | Wipe with a damp microfiber cloth. | For stuck-on grime, add a drop or two of clear dish soap to your water. Avoid anything labeled “degreaser” as it can strip protective coatings. Dry thoroughly to prevent a dull film. |
| Genuine Leather Seats | Dust and wipe with a dry microfiber. | Clean only with a pH-balanced leather cleaner. Always follow with a light coat of leather conditioner to replenish oils. My mother-in-law Brianna’s old truck had leather seats cracked from sun and neglect-conditioning could have saved them. |
| Car Carpets & Floor Mats | Vacuum thoroughly, then treat stains. | These are the most forgiving surfaces. You can use a slightly stronger mix of soap and water here. For Peeta’s muddy paw prints, I vacuum, spray with my soap solution, scrub gently with a soft brush, and then use a wet/dry vacuum to pull out all the moisture. |
| Hard Plastic Dashboards & Door Panels | Dry dusting is often enough. | For fingerprints and dust, a slightly damp microfiber cloth is your best tool. If needed, use an interior cleaner labeled safe for plastics. Spray it onto the cloth, not the dashboard, to avoid overspray on the windshield. |
| Touchscreens & Instrument Clusters | Gentle, dry microfiber buffing. | Use a cleaner made specifically for electronics or eyeglasses. Never use window cleaner, alcohol, or ammonia. A single drop of water on the cloth is usually sufficient for smudges. |
The goal is to clean the stain without altering the surface itself. Always blot and lift; never scrub in circles, which can fray fabric and spread the stain. Start gentle, and only get more specific if the stain persists—especially for tricky ones like dye stains on fabrics or surfaces.
Post-Treatment Care: Drying, Checking, and Preventing Future Stains
You’ve tackled the stain. The next part is just as important. Proper aftercare makes sure your work lasts and doesn’t accidentally damage the material. If stains have seeped into the carpet padding or spilled through, quick, targeted aftercare helps prevent lasting damage. In the next steps, you’ll learn how to tackle padding spills and keep cleanup durable.
The Right Way to Dry Your Car’s Interior
Your drying method depends completely on what you cleaned. For cloth seats and carpets, I use clean, dry white towels to gently blot up every bit of moisture I can.
Blotting pulls leftover cleaner and any dissolved stain particles out of the fabric, stopping them from settling back in as a dull ring. This approach also helps when you’re trying to remove set-in stains from fabric clothing, since quick blotting can prevent the stain from setting deeper. It also helps reduce the risk of future rings in treated areas. Never scrub or rub at this stage.
After blotting, let the area air dry with the car doors or windows open. Good airflow is your best friend. I avoid using a hair dryer or heater.
Direct heat can set any remaining stain proteins or cause synthetic fibers to become brittle. For leather and vinyl, a gentle wipe with a dry microfiber cloth is usually enough. If dye transfer or discoloration affects leather, leather stain dye removal techniques can help restore the original color. For best results, have a quick look at a reputable leather dye removal guide before proceeding.
Aunt Jessica learned this the hard way in Arizona. She left her leather seats in the blazing sun after a clean, and they developed faint, bleached patches. Always park in the shade or a garage while your interior dries to prevent fading and heat damage.
Is the Stain Really Gone? How to Check.
Never assume a stain is defeated just because the surface looks clean. I always do a two-part check once everything is totally dry—to make sure it’s truly gone before putting it away.
First, I run my fingers over the spot. I’m feeling for any stiff, crunchy, or tacky residue. If it feels different from the surrounding area, there’s still something there.
Second, I examine it under different lights. I’ll use the bright overhead dome light in the car and my phone’s flashlight at an angle.
Angled light reveals shadows and slight color differences your eyes miss in flat, even light. I found a faint coffee shadow on my passenger seat this way that I would have totally missed.
If it passes both tests, you’ve won. If not, you may need to repeat your cleaning process, focusing on breaking down that lingering residue.
Keeping Stains at Bay: Simple Prevention
A little prevention saves a lot of deep cleaning later. My prevention plan revolves around barriers and routine.
- Use Seat Covers: I have durable, washable cloth covers on the front seats. They take the hit from Jason’s muddy soccer shorts and Peeta’s paws. I just toss them in the wash every other week.
- Vacuum Often: Crumbs and dirt grind into fabrics, making future stains worse. I run a handheld vacuum over the seats and floors every weekend. It takes five minutes.
- Designate an “Emergency Kit”: In my door pocket, I keep a small zip bag with a travel pack of stain wipes, a few white cloths, and a sealed bottle of water. Spot-cleaning a juice spill on the drive home is easy.
Cleaning with the Environment in Mind
I prefer methods that are tough on stains but gentle on our home and the planet. Many effective cleaners are already in your pantry.
For general upkeep, my go-to is a 50/50 mix of distilled white vinegar and water in a spray bottle. It’s brilliant for wiping down vinyl, plastic, and glass without harsh fumes.
For stuck-on grime on fabrics, I make a paste from baking soda and a little water. I gently work it in with a soft brush, let it sit for 15 minutes, then vacuum it up completely.
Always dispose of dirty cleaning water, used wipes, or empty chemical containers according to your local recycling or hazardous waste rules. I never pour leftover cleaner down a storm drain.
A Natural Refresher from the Experts
My mom, Martha, has a fantastic trick for keeping car fabrics smelling fresh without artificial perfumes. She calls it her “Texas Sunshine Spray.”
She fills a small glass spray bottle with ¾ cup of water, ¼ cup of vodka (the cheap kind works fine), and about 10 drops of lemon essential oil.
After a good vacuum, she mists it lightly over the cloth seats and carpets (never on leather or screens). The vodka helps neutralize odors as it evaporates, and the lemon leaves a clean, subtle scent.
Let it air dry completely with the windows cracked, and your car will smell wonderfully neutral, not like a fake air freshener. It’s perfect for clearing out that “wet dog” smell after Peeta’s beach trips.
FAQ about Stains and Car Interior Materials
I just spilled coffee on my seat. What’s the absolute first thing I should do?
Immediately grab a clean, dry cloth and blot-do not rub-to soak up as much liquid as possible. This quick action prevents the stain from seeping deep into the fibers or spreading, making the full cleanup much easier. Also, be mindful of common stain-removal mistakes to avoid. This helps ensure the rest of the cleanup goes smoothly.
Are cloth or vinyl seats easier to keep clean from everyday spills?
Vinyl wins for quick wipe-ups as spills sit on its non-absorbent surface, but it can stain if spills dry. Basic cloth absorbs liquids quickly, often requiring a deeper clean, but it’s generally more forgiving with common household cleaners.
How do I clean my modern “stain-resistant” seats without ruining the coating?
Always start by vacuuming or brushing off dry dirt, then use a mild, pH-neutral cleaner applied to a cloth, not directly to the seat. Avoid harsh solvents, degreasers, and abrasive scrubbing, as these can strip the protective layer permanently.
Why is testing a cleaner in a hidden spot so important?
A test spot reveals if a cleaner causes discoloration, fading, or texture changes before you apply it to a visible area. This simple step prevents permanent damage that is often more unsightly than the original stain.
What should I look for in my next car if easy cleaning is a priority?
Seek out interiors with tightly woven synthetic fabrics and ask about factory-applied stain-resistant or hydrophobic coatings. These materials are specifically engineered to repel liquids and allow for simpler, surface-level cleaning.
Caring for Your Car’s Interior, Now and Later
The single most important step is to identify your car’s upholstery material before you touch any stain. That simple act of checking the label or your owner’s manual will save you from causing permanent damage. I share more specific cleaning guides for every material type over on the Stain Wiki blog, so you’re never left guessing.
Written by Suzanne Rosi Beringer. Suzanne is an accomplished chemist, laundry expert and proud mom. She knows the science and chemistry of stains and has personally deal with all kinds of stains such as oil, grease, food and others. She brings her chemistry knowledge and degree expertise to explain and decode the science of stain removal, along with her decades long experience of stain removal. She has tried almost everything and is an expert on professional and DIY stain removal from clothes, fabric, carpet, leather and any other items dearest to you.