How to Remove Sunscreen and Bug Spray Stains from Car Upholstery
Just spotted a greasy sunscreen smear or a sticky bug spray ring on your seat? You can usually clear it up quickly with a dish soap solution or a vinegar spray you mix at home.
This summer driver’s guide will walk you through:
- Why these oily, chemical-based stains are so tricky to lift
- The exact, non-toxic cleaning supplies to gather from your kitchen
- My tested, step-by-step methods for fabric and leather seats
- Smart habits to keep your car clean all season long
I’ve perfected these methods cleaning up after my kids’ messy summer adventures and my husband’s grimy hunting gear.
What Makes Sunscreen and Bug Spray So Stubborn? A Chemistry Corner
Figuring out how to clean something starts with knowing what you’re up against. Think of it like knowing the difference between mud and chocolate before you wipe your kid’s face.
Knowing the makeup of sunscreen and bug spray gives you the power to choose the right cleaner from the start.
Sunscreen: It’s Basically Grease with a White Cast
I think of modern sunscreen as a high-tech salad dressing. It’s an oil base (like avocado or coconut oil) that lets it spread on your skin, mixed with active mineral blockers like zinc oxide.
When it gets on your car seat, the oil soaks in fast. The zinc can leave a faint white, chalky film. You’re dealing with a grease stain with a side of powder.
This is why plain dish soap is your first line of defense-it’s a degreaser designed to break down oils so water can wash them away.
Bug Spray: A Sticky, Solvent-Based Film
Bug sprays like OFF! are a different beast. They’re often a blend of alcohol and oils like picaridin. The alcohol helps it dry fast on your skin, but it also evaporates quickly on fabric, leaving the oily repellents behind.
This leaves a thin, sticky, almost invisible film. It feels tacky and attracts more dirt.
To cut through this residue, you often need another solvent, like diluted rubbing alcohol or white vinegar, to dissolve the film without damaging your upholstery.
Why Car Upholstery is a Magnet for These Stains
Your car’s interior is a stain incubator. A parked car on a summer day is like a low-temperature oven.
That heat bakes thin oils and solvents right into the tiny pores of fabric or the grain of leather. What was a wet spill becomes a set-in stain in what feels like minutes.
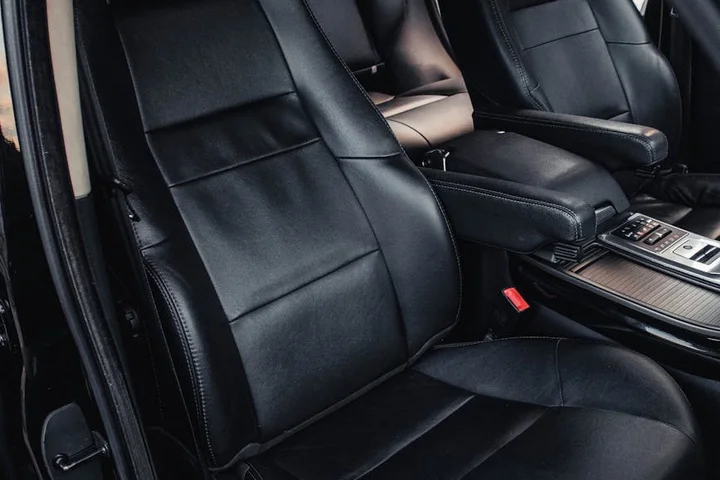
Cloth seats absorb stains deep into the fibers. Synthetic leather (vinyl) might resist absorption at first, but heat can make the stain bond to the surface. Real leather is porous and can be permanently discolored if the stain sets.
The material of your seat changes the game, which is why your very first move should always be identification.
First Things First: Your Immediate Response to a Spill
Speed is everything. My mom Martha taught me to always keep a clean microfiber cloth in the glove box for this exact reason. It has saved my seats more times than I can count.
Your goal in the first 60 seconds is not to clean the stain perfectly, but to remove as much of the offending substance as possible before it sinks in. However, it’s equally important to avoid common stain removal mistakes.
Blot, Don’t Rub: The Number One Rule
I learned this the hard way when Jessica, at age two, spilled apple juice on the couch. My instinct was to scrub at it with a paper towel. I just pushed the sugar deeper into the fabric, making a much bigger, stickier mess.
Rubbing is the enemy. It grinds the sunscreen oils or bug spray film down into the seat’s foundation.
Instead, grab that dry microfiber cloth or a wad of paper towels. Press down firmly onto the wet spot and lift straight up. Repeat. Move to a clean section of the cloth as it soaks up the spill.
Blotting lifts the liquid away; rubbing seals its fate.
Identify Your Upholstery Type Before You Clean
Before you mix any cleaner, you need to know what you’re cleaning. Your car’s owner’s manual has a section on interior care. Look for it.
Often, you’ll also find a tag with a cleaning code under the seat or along its side. Here’s what they mean:
- W: Use a water-based cleaner or foam only.
- S: Use a solvent-based (dry-cleaning type) cleaner only.
- W-S: You can use either water-based or solvent-based cleaners.
If you have leather, check if it’s coated (most are). A coated leather can handle mild soaps. Aniline or uncoated leather needs specialized leather cleaners. When in doubt, test in a hidden spot first, like under the seat or on the seatback.
This one-minute check prevents the heartbreak of using the wrong cleaner and causing permanent damage.
Building Your Cleaning Kit: Supplies for Both Stains
Let’s get your supplies together before you start. You can do this right now.
I bet most of these items are already under your kitchen sink or in a closet.
I always advocate for simple, non-toxic options first-they’re safer for your car and your family.
The DIY Squad: Household Heroes
- Dish soap (like Dawn): It cuts grease brilliantly. Sunscreen and bug spray have oily bases this tackles.
- White vinegar: This breaks down sticky residue and deodorizes. My aunt Jessica uses it for all her Arizona cleanups.
- 70% isopropyl alcohol: It dissolves the active ingredients in bug spray without harming most fabrics.
- Baking soda: A gentle abrasive for pastes. It lifts and deodorizes set-in stains.
- Several clean microfiber cloths: They absorb messes without leaving lint. I keep a dedicated stack in the garage.
- A soft-bristled brush (an old toothbrush works): Perfect for gently working cleaner into fabric weave without scrubbing.
- A spray bottle: For mixing and applying your solutions evenly. It gives you control.
When to Consider a Commercial Upholstery Cleaner
You might see a bottle at the store. If you grab one, look for labels like “automotive interior” or “multi-purpose upholstery.”
From cleaning Roger’s hunting truck to my own minivan tests, a good DIY mix often works just as well and costs pennies.
How to Remove Sunscreen Stains from Car Seats: A Step-by-Step Guide
I’ve cleaned sunscreen off Roger’s hunting gear so many times. The process is second nature.
Act quickly on the oily smear before it soaks deep into the seat material.
The Crucial First Step: Always Perform a Test Patch
Do this every single time. Find a hidden spot, like under the seat or behind a seatbelt flap.
Apply your chosen cleaner there and wait a full 10 minutes.
This test tells you if the fabric color will run or if the material will get damaged. It’s your safety net.
For Fabric and Cloth Upholstery
Step 1: Make a Simple Degreasing Solution
Mix a few drops of clear dish soap into a cup of warm water.
Use clear soap to avoid dye transfer, especially on light gray or beige seats.
Step 2: Apply, Gently Agitate, and Let Sit
Dip a corner of a microfiber cloth in the solution. Dab it onto the stain, don’t rub.
Then, take your soft brush and gently circle it over the damp area.
Let it sit for 5 to 10 minutes. This dwell time lets the soap break apart the sunscreen oils.
Step 3: Blot and Rinse Thoroughly
Blot the area firmly with a clean cloth dampened with plain water.
You must remove all soapy residue. Leftover soap acts like a dirt magnet, making the spot reappear.
Step 4: Dry Completely to Prevent Water Marks
Allow the seat to air dry. Roll down the windows or point a fan at it.
Never use a hair dryer or park in hot sun to dry. The heat can bake any remaining stain into the fabric.
For Leather and Vinyl Upholstery
Step 1: Wipe with a Mild Soapy Cloth
Use a cloth dampened with water and a tiny, tiny bit of dish soap or castile soap.
Wipe the stain gently in one direction. These surfaces can scratch if you scrub too hard.
Step 2: Condition Immediately After Cleaning
Dry the area right away with a soft, dry cloth.
Cleaning leather strips its natural oils, so follow up with a leather conditioner to keep it supple and prevent cracks.
What If the Sunscreen Stain is Already Dry and Set?
This is a common worry. I had a stubborn, dry stain on my back seat from last summer’s beach trips.
First, repeat the fabric steps above. For extra power, make a thick paste of baking soda and water.
Spread the paste on the stain, let it dry completely, then brush it off and vacuum. My old stain needed two treatments, but it finally lifted.
How to Remove Bug Spray Stains from Car Seats: A Step-by-Step Guide

After dealing with sunscreen, you might think bug spray is just another summer spill. It’s not.
My Aunt Jessica’s red wine on the carpet is one problem. Bug spray is another animal. It’s formulated to stick to your skin, and it often contains oils and solvents like DEET that leave a greasy film. This solvent action is what makes bug spray stains trickier; it can dissolve some finishes if you’re not careful. Similarly, red wine spills on carpets benefit from quick action. Understanding how to remove red wine stains from carpets can minimize damage.
Start, Again, with a Test Patch
I know it sounds repetitive, but this is your insurance policy. Find a hidden spot, like under the seat or behind a headrest.
Apply your chosen cleaning solution there first and wait. This is non-negotiable for leather, where a wrong move can cause permanent discoloration or drying. Especially for delicate types like suede or nubuck.
For Fabric and Cloth Upholstery
Step 1: Try a Vinegar and Water Solution First
Grab a clean spray bottle. Mix equal parts plain white vinegar and cool water inside it.
Give the stained area a light mist. Don’t soak it. The vinegar works to cut through the initial oily, alcohol-based residue, especially when dealing with pen ink stains.
Step 2: Blot and Lift the Residue
Immediately press a clean, dry microfiber cloth onto the damp spot. Use a firm, straight-up-and-down motion.
You’ll see the yellowish gunk start to transfer to your cloth. Flip the cloth to a clean section and repeat. Blotting, not rubbing, pulls the dissolved stain out of the fabric fibers especially for stubborn yellow stains on white clothes.
Step 3: For Stubborn Stickiness, Use Diluted Rubbing Alcohol
If a slight slickness remains, it’s time for a gentle solvent. Mix one part 70% isopropyl alcohol with one part water.
Dampen a corner of a fresh cloth with this mix and dab at the stain. Work quickly. Follow immediately by blotting the area with a water-damp cloth to rinse. This method works well for many fabrics, but suede stains require a different approach.
For Leather and Vinyl Upholstery
Step 1: Use Extreme Caution with Alcohol
This is where you slow down. Alcohol is a known enemy of leather’s natural oils.
Start by wiping the stain with a cloth dampened only with cool water. Often, this is enough to lift a fresh spill. However, be sure to check for stains before washing to avoid setting them permanently.
Step 2: If Needed, Use a Highly Diluted Alcohol Wipe
For a persistent spot, use the mildest mix possible. Try one part alcohol to four parts water.
Dip a cloth corner, wring it out completely so it’s barely damp, and give the stain one quick pass. Your next step is critical: dry the area and apply a leather conditioner immediately to replenish lost moisture.
Dealing with the Smell and Final Residue
Even after cleaning, that chemical bug spray smell can linger in fabric.
Sprinkle a thin layer of plain baking soda over the seat. Let it sit for an hour, or even overnight if you can.
Then vacuum it all up thoroughly. This trick neutralizes odors and lifts any last powdery residue. My dog Peeta’s muddy-paw adventures taught me the unmatched power of a good, strong vacuum on car upholstery.
Critical Warnings and Smart Prevention Tips
Materials and Methods to Avoid at All Costs
In your rush to fix a stain, you can do lasting damage. Please, avoid these.
- Bleach or ammonia-based cleaners. They will discolor and degrade most upholstery materials.
- Abrasive scrub pads (like the green side of a sponge) or stiff brushes. They create permanent scratches and fray fabric.
- Undiluted acetone or nail polish remover. These are far too harsh and will melt vinyl and strip leather.
- Generic household degreasers not formulated for interiors. They can leave a damaging residue.
Also, skip the hot water. Heat can set protein or oil stains, making them permanent.
And a note on “magic” erasers: while great for walls, they are mildly abrasive. Using them on car dashboards or seats can dull glossy finishes over time.
How to Prevent These Stains in the First Place
The best stain removal is the one you never have to do.
Make a new summer rule: apply sunscreen and bug spray outside the car. Wait for it to dry completely before you get in.
I bought inexpensive, breathable seat covers for the summer months. They’ve saved my seats from Jason’s post-soccer grime and impromptu snack attacks.
Keep a pack of interior cleaning wipes in your glove box. For a DIY kit, a small spray bottle of water and a few microfiber cloths in a baggie work wonders for quick touch-ups before a stain sets.
When to Throw in the Towel and Call a Pro
You can’t win every battle, and that’s okay.
If a stain is large, old, or has been unsuccessfully treated before, stop, especially if it’s on delicate materials like suede or nubuck, or the interior of a special vehicle.
A professional auto detailer has industrial-grade extractors and specialized knowledge you don’t. They can often salvage what we can’t. My mother-in-law Brianna learned this with the vintage leather in her old Cadillac; pro care was the only way to preserve it.
FAQ about Removing Sunscreen and Bug Spray Stains
How can I prevent these stains from happening in the first place?
Apply all sunscreen and bug spray outside the car and allow it to dry completely before getting in. Using breathable seat covers during summer months provides an excellent protective barrier for your upholstery.
What’s a quick fix I can do if I’m away from home and don’t have my cleaning kit?
Blot the fresh stain immediately with a dry paper towel or napkin to absorb the liquid. If available, a barely-damp cloth with plain water can help lift the surface residue until you can perform a proper clean.
Is it safe to use hand sanitizer on a bug spray stain in a pinch?
Use extreme caution, as most hand sanitizers contain high-alcohol concentrations and additives that can damage upholstery. It’s far safer to wait and use a properly diluted isopropyl alcohol solution (1:1 with water) on fabric, or avoid it entirely on leather.
What should I do if I’ve already tried cleaning and the stain or a dark ring is still there?
This often means soap or cleaner residue was left behind, attracting dirt. Re-clean the area by blotting with a cloth dampened only with clean water to rinse thoroughly, then let it dry completely away from direct heat.
Are there any common household items I should definitely avoid using on my car seats?
Avoid bleach, ammonia, abrasive scrub pads, and undiluted acetone at all costs, as they will discolor and degrade materials. Also, never use heat from a hair dryer or park in hot sun to dry a stain, as this bakes it in permanently.
Long-Term Care for Your Car Upholstery
Speed is your greatest ally against summer stains like sunscreen and bug spray. Blot the area promptly and clean with a non-toxic, oil-fighting solution to prevent residue. I share more hands-on lessons from our family’s messes over on the Stain Wiki blog.
Written by Suzanne Rosi Beringer. Suzanne is an accomplished chemist, laundry expert and proud mom. She knows the science and chemistry of stains and has personally deal with all kinds of stains such as oil, grease, food and others. She brings her chemistry knowledge and degree expertise to explain and decode the science of stain removal, along with her decades long experience of stain removal. She has tried almost everything and is an expert on professional and DIY stain removal from clothes, fabric, carpet, leather and any other items dearest to you.