Are Natural Cleaners Like Vinegar and Baking Soda Safe for Your Car’s Interior?
You want to clean your car without harsh chemicals, but you’re nervous about damaging the seats or dashboard. Yes, vinegar and baking soda are generally safe for your car’s interior if you use them correctly and avoid a few key materials.
In this article, I’ll walk you through exactly what you need to know:
- How to perform a crucial spot test every single time.
- The exact vinegar dilution I use on my own car’s plastic and fabric.
- When baking soda is perfect for odors and when it can be a problem.
- The specific surfaces where vinegar can cause permanent damage.
- My trusted, all-purpose cleaning recipe that works on most spills.
I’m a stain-removal specialist who has cleaned everything from juice spills in my minivan to muddy paw prints from my dog, Peeta.
Your Quick Stain-Fixing Roadmap: Panic Level & First Aid
In my house, a stain on a shirt means panic level 9. A stain in the car? That’s a solid 3.
You have time. A car interior isn’t like clothing that gets tossed in the wash every few days. Stains can sit for weeks before you finally decide to tackle them on a sunny Saturday.
This relaxed timeline is your biggest advantage for car interior stains.
The “Golden Window” for Car Stains
You usually have days, not minutes, to act. That dried-up coffee spill from Tuesday? You can still handle it on Saturday.
There are two big exceptions. Greasy stains, like burger drippings or french fry oil, set into fabric faster. Colored spills, like grape juice or sports drinks, have more time to dye the fibers.
For grease or strong colors, try to act within a day or two for the best results.
The Universal First-Aid Step
No matter what the spill is, your first move is always the same. Grab a clean, dry, white cloth or a stack of paper towels.
Press down firmly and soak up as much liquid as you can. I keep a microfiber cloth in my glove box just for this. Do not, under any circumstances, rub the stain.
Rubbing grinds the spill deeper into the fabric or material, making it a permanent part of your seat.
The Non-Negotiable Rule
Before you put any cleaner, natural or not, on a visible spot, you must test it. Find a hidden area. Under the seat, behind the seatbelt flap, or deep in a footwell.
Apply a small dab of your cleaning solution. Wait a few minutes, then blot it dry. Check for color transfer, fading, or texture changes. My mom, Martha, taught me this decades ago, and it has saved my upholstery more times than I can count, especially when dealing with car upholstery stains.
Testing first is the single most important rule in car interior cleaning.
The Chemistry Corner: How Vinegar and Baking Soda Really Work
These two are kitchen heroes, but they’re not magic. They have specific jobs. Understanding this saves you from frustration.
Vinegar: The Gentle Dissolver
White distilled vinegar is a mild acid. Think of it like a polite but persistent negotiator for certain types of mess.
It’s excellent at breaking down alkaline residues. This includes hard water spots on windows, dried soap scum from previous cleanings, or even that faint white crust left by some air fresheners.
I’ve used a vinegar spray for years to clean my car’s glass and wipe down hard plastic dashboards. It cuts the film without harsh fumes.
Vinegar is a specialist for mineral deposits and film, not a general-purpose stain remover.
Baking Soda: The Soft Scrubber & Neutralizer
Baking soda is a mild, gritty powder. It’s also a gentle base, which is the opposite of an acid.
As a paste with water, its gentle abrasion can lift surface grime from textured plastic or rubber floor mats. More importantly, it’s a fantastic odor neutralizer. A box left open under a seat can absorb funky smells.
I used this trick after my golden retriever, Peeta, had a wet, muddy adventure. A sprinkle of baking soda on the damp carpet area, left overnight, vacuumed up the next day, took the “wet dog” scent right out.
Baking soda works on smells and light surface soil, not deep-set stains.
Why They Aren’t a Universal “Miracle” Pair
Here’s the catch. Many tough car stains are oil-based. Think french fry grease, burger drippings, hand lotion, or spilled coffee with cream. When dealing with these, it’s crucial to understand how oil-based stains differ from water-based ones in terms of treatment.
Vinegar and baking soda don’t cut through grease well. You might lift some surface dirt, but the oily core of the stain will remain, often attracting more dirt later. For grease stains on clothes, pre-treat with liquid dish soap or a laundry degreaser. We’ll cover the best ways to remove grease stains from clothes in the next step.
Mixing them into a fizzing paste is mostly for show. The reaction makes carbon dioxide bubbles, but it neutralizes the cleaning power of both. You’re mostly left with salty water and a mild abrasive.
For greasy stains, you need a detergent or a cleaner designed to emulsify oils, which these natural options struggle with.
| Cleaner | Acts Like… | Best For Car… | Often Fails On… |
| White Vinegar | A gentle dissolver | Windows, hard plastic, removing water spots | Grease, oil, deep fabric stains |
| Baking Soda | A soft scrubber & odor sponge | Textured plastics, carpet odors, light scuffs | Old stains, dye transfers, sticky spills |
Material Red Flags: Where to Never Use These Cleaners
Vinegar and baking soda are useful, but they are not magical universal solutions. Using them on the wrong surface can lead to permanent damage. I learned this lesson the hard way.
I asked my husband Roger to help me find a truly worn-out car seat at a local junkyard. We wanted to test cleaners without risking our own car. We found a cracked vinyl seat and a faded leather steering wheel cover. It was the perfect classroom.
Surfaces That Are a Hard “No”
- Unsealed or Aniline Leather: This is soft, natural-feeling leather. Vinegar’s acidity will strip its natural oils. Over time, this dries the leather out, making it stiff and prone to cracking. If a few drops of water soak in and darken the spot, it’s likely unsealed.
- Natural Suede and Alcantara: These materials are sponges. Any liquid, especially vinegar, can cause permanent watermarks and staining. The texture can also be ruined.
- Old, Brittle, or Already-Cracking Vinyl: On our junkyard seat, a vinegar solution seeped into the existing micro-cracks. It seemed to make them more pronounced as it dried. It accelerated the damage.
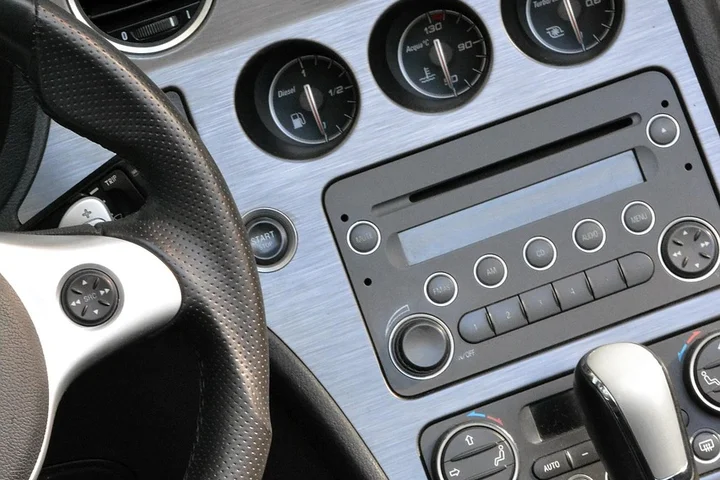
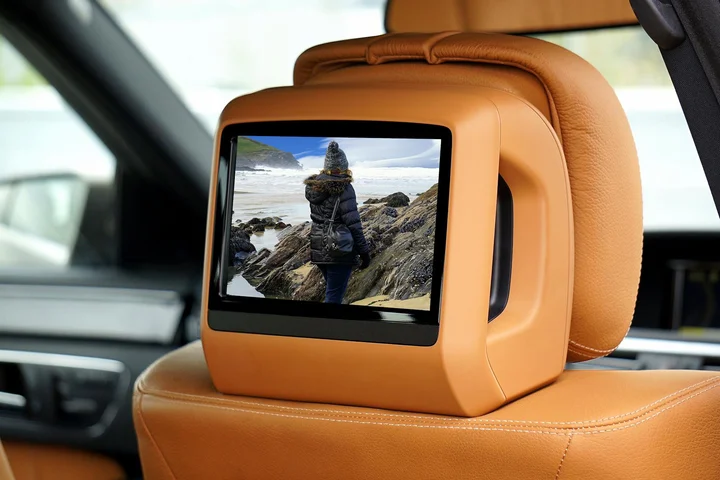
- Modern Vehicle Touchscreens and Anti-Glare Coatings: The abrasiveness of baking soda, even in a paste, can microscratch delicate screen surfaces. Vinegar can degrade special anti-glare or oleophobic coatings over many uses.
The Specific Risks
Vinegar is an acid. On sensitive materials, it doesn’t just clean, it chemically alters the surface. On that junkyard steering wheel, repeated applications made the leather feel like stiff cardboard. Its drying effect is slow but cumulative, and by the time you see the cracks, it’s too late.
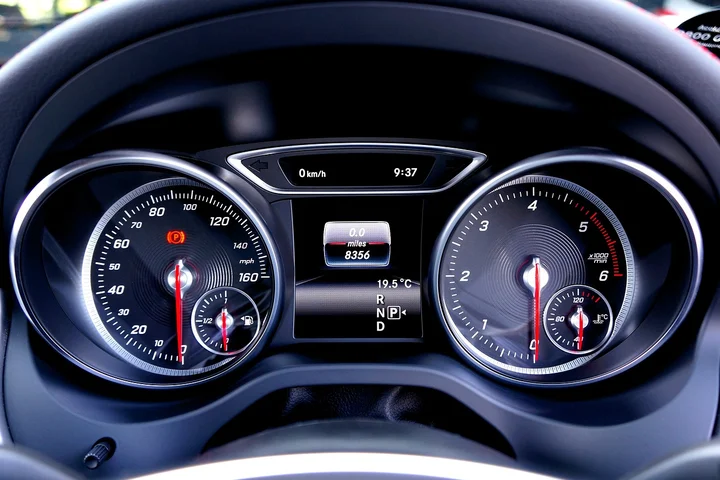
Baking soda is a mild abrasive. There’s a common baking soda myth that it’s always safe to use, but the reality is that its abrasive nature can scratch delicate plastics. Think of it like a very fine sandpaper. On glossy plastic dashboards or clear gauge cluster covers, a baking soda paste will leave a web of fine scratches. These scratches catch light and look hazy. Once they’re there, you can’t polish them out easily.
A Practical Guide to Using Vinegar in Your Car
When used correctly on the right surfaces, a vinegar solution is a fantastic, non-toxic cleaner. It cuts through greasy fingerprints, water spots, and that weird sticky film kids leave on everything.
The Perfect Dilution
Never use straight vinegar. Always dilute it. My go-to mix is simple.
- 1 part white distilled vinegar
- 4 parts distilled or filtered water
I use distilled water to prevent any mineral spots from forming on the glass as it dries. Put this in a clearly labeled spray bottle. The light mist gives you total control.
Step-by-Step Cleaning
For Vinyl, Hard Plastics, and Rubber Mats:
- First, vacuum or dust the surface to remove grit.
- Lightly mist your vinegar solution onto a microfiber cloth, not directly onto the surface. This prevents drips into vents or seams.
- Wipe the area firmly. You’ll see the grime lift onto the cloth.
- For stubborn spots, let the damp cloth sit on the area for 60 seconds to let the vinegar work, then wipe.
- Follow up with a dry section of a microfiber cloth to buff away any moisture and prevent streaking.
For Interior Glass (Windows, Mirrors):
- Spray the solution directly onto the glass. Don’t worry about overspray on plastic frames with this mix.
- Wipe with a damp microfiber cloth in a circular motion.
- Immediately buff the glass completely dry with a second, clean, and dry microfiber cloth. This is the secret to a streak-free shine.
A Note on the Smell
I get it. The sharp scent of vinegar is a big concern. My son Jason always complains, “It smells like pickles in here!”
Here’s the truth: the smell of pure vinegar dissipates completely as it dries, usually within 10-15 minutes. You are left with a truly odor-free surface. If the vinegar smell lingers, you likely used too much or it pooled somewhere. Always ensure good ventilation while cleaning. The fresh, clean smell afterward is worth the temporary pickle vibe.
A Practical Guide to Using Baking Soda in Your Car
You should use baking soda in two smart ways inside your car.
It works as a gentle scrub for spots and a powerful smell eater.
I keep a box in my garage for car emergencies, like when Peeta decides the back seat is a good place for a muddy nap.
Making a Cleaning Paste for Stains
Mix baking soda with just enough water to make a thick, spreadable paste.
This simple paste grabs onto grime in fabric seats or floor carpets without harsh chemicals.
Here is how I tackle a fresh stain, like the chocolate milk Jessica spilled last Tuesday.
- Blot up any excess liquid with a clean, dry cloth first.
- Scoop a tablespoon of baking soda into a small bowl and add water drop by drop, stirring until it looks like toothpaste.
- Spread the paste over the stain with your fingers or a spoon, covering it completely.
- Let it sit for 15-20 minutes. You will see it dry and often change color as it absorbs the mess.
- Use a stiff-bristled brush, like an old toothbrush, to scrub the area gently in circular motions.
- Vacuum the spot thoroughly to remove every bit of dried paste and lifted dirt.
The Sprinkle & Vacuum Freshening Trick
For general odors from sports gear or forgotten snacks, baking soda is my go-to.
Liberally sprinkle a thin, even layer of dry baking soda over your fabric seats and carpets.
Let it sit for at least an hour, or even overnight for tough smells from Roger’s hunting boots.
Then, vacuum it all up with a strong suction attachment.
You must get every last grain. A leftover white film feels gritty and looks terrible.
I always go over the area twice with the vacuum to be sure.
The Surface Compatibility Chart: Adapting Your Attack
Not every surface in your car reacts the same way to natural cleaners.
Always test your chosen method in a small, hidden area first, like under the seat.
This chart shows my preferred, safe approaches for common materials.
| Surface | Recommended Method | My Notes & Precautions |
| Cloth Upholstery | Baking soda paste (for stains) or a vinegar/water spray (1:3 ratio) for general cleaning. | For the vinegar spray, mist lightly, blot, and let air dry fully to avoid a sour scent. My aunt Jessica swears by this for wine spills. |
| Vinyl & Plastic | Vinegar and water solution (1:4 ratio) on a microfiber cloth. | This cuts through the sticky film from little hands. Rinse the cloth often to avoid spreading dirt. |
| Leather | Damp microfiber cloth only, with maybe a drop of mild soap. | Avoid vinegar and baking soda here. They can dry out and crack the leather over time. Just wipe and condition. |
| Carpet Mats | Baking soda paste for stains. The “sprinkle and vacuum” method for odors. | These can take more scrubbing. I use a stiff brush after the paste dries, just like on fabric seats. |
| Hard Plastic (Dash, Door Panels) | Vinegar and water solution (1:4) on a cloth, wrung out well. | Never spray directly. A damp cloth prevents liquid from seeping into vents or electronics. |
A Special Note on Screens and Displays
Your infotainment screen and gauges are very delicate.
Only use a soft, dry microfiber cloth to wipe away dust and fingerprints.
If you must, dampen the cloth with just water, never any cleaner. Harsh chemicals can strip anti-glare coatings.
I learned this after my son Jason tried to clean a smudge with a wet wipe and left a blurry streak.
How Do They Compare to Commercial Automotive Cleaners?
Think of it like cooking from scratch versus buying a pre-made meal. Both can fill you up, but one is custom-made for the job.
Commercial cleaners have a clear edge when they are formulated for a specific, delicate material. A dedicated leather cleaner and conditioner, for example, doesn’t just clean. It replenishes oils. I learned this the hard way when a generic all-purpose cleaner left my husband Roger’s truck seats looking dry and faded. We switched to a proper leather product, and the difference was immediate.
These products are engineered to tackle automotive-grade stains like grease, brake dust, and synthetic dyes from food and drinks. They often include UV protectants for your dashboard and conditioners to keep plastics from cracking.
Where Natural Cleaners Shine
Your pantry staples have their own winning plays.
For cost, availability, and sheer gentleness on most plastics and vinyl, vinegar and baking soda are fantastic. I use a diluted vinegar spray on my dashboard and door panels weekly. It cuts through the light grime from my kids’ hands without the acrid chemical smell. It’s safe for the screen on my radio, too.
They are also brilliant for quick, unexpected messes. When my aunt Jessica spilled her club soda in the passenger footwell last visit, I wasn’t out of my dedicated fabric cleaner. A paste of baking soda and water on the wet spot absorbed the moisture and any stickiness. A follow-up with a damp cloth left it clean and odor-free.
The “Formulated for Purpose” Reality
Sometimes, you just need the right tool. A store-bought interior detailer spray is designed to lift dirt without streaking on glossy surfaces. A foaming carpet cleaner for upholstery is made to suspend ground-in dirt so your wet-dry vac can pull it out. They save you time and guesswork.
Using a purpose-built product is a no-brainer when you’re facing a stain that matches its description on the bottle. I keep a bottle of enzymatic upholstery cleaner for pet accidents. It’s formulated to break down the proteins in the mess my dog Peeta might leave, and it works better than anything I could mix at home.
Can You Mix Vinegar and Baking Soda in the Car?
You can, but you probably shouldn’t. That satisfying fizz is mostly for show inside your car.
When you mix an acid (vinegar) and a base (baking soda), they neutralize each other. You’re mostly left with salty water and carbon dioxide bubbles. The reaction uses up the cleaning power of both ingredients, often leaving you with a solution that’s less effective than using either one separately. For stain removal, people often compare baking soda vs white vinegar stains to see which approach works best on different surfaces. Understanding those differences can guide how you treat car interior spots. For a car interior, you’re better off using baking soda as a dry paste or absorber first, then cleaning the area with a diluted vinegar solution afterward if needed.
Post-Treatment Recovery: Drying and Final Checks
Your work isn’t done when the stain is gone. How the area dries is the final, critical step.
The ideal drying process requires good airflow and patience. Park in a shaded, ventilated spot. Open the doors or windows. Direct, hot sun can bake cleaner residue into fabric or cause discoloration and premature cracking on dashboards and leather.
To speed up drying on cloth seats, I use a simple box fan pointing into the car door. Your car’s climate control works, too. Turn on the air conditioning, which dehumidifies the air, and set the vents to blow on the damp area.
Making Sure the Stain Is Really Gone
Fabric can play tricks on you. A stain might look gone when wet, only to reappear as a faint ring once dry.
Here’s my check. First, I feel the area with my hand. Is it still damp or cool to the touch compared to the surrounding fabric? If so, it’s still drying. Once it’s completely dry to the touch, I look at it from multiple angles in bright, natural light. Run your hand over the spot; a truly clean area should feel exactly the same as the fabric around it, with no sticky or stiff residue.
If you see a faint outline or feel a difference, the cleaning process likely left behind some dissolved stain or cleaning agent. It needs another round.
The Final, Essential Wipe-Down
This is the secret to a professional-looking finish. After any cleaning, especially with commercial sprays, always do a final pass.
- Wring out a clean, soft microfiber cloth in plain water until it’s just damp.
- Wipe over the entire area you just cleaned.
- This lifts away any lingering cleaning solution that could attract dirt later.
A final wipe with a damp cloth prevents that hazy, sticky film that can form on plastics and glass, leaving your interior truly clean, not just cleaner. It’s a trick I picked up from my mom, Martha, and it never fails.
Effective Alternatives When Natural Isn’t Right
What works on your kitchen counter can sometimes fall short in your car. I keep a few key products in my laundry room for the moments when vinegar and baking soda just won’t cut it.
Having the right tool for the job saves you time and prevents damage to sensitive materials. These are my go-to alternatives that I trust with my family’s cars.
For Greasy Fingerprints and Food Spills
My son Jason’s soccer cleats and my daughter Jessica’s cheese doodle fingers create a greasy film on my door panels. For this, I use a classic.
A single drop of clear dish soap in a spray bottle of warm water is my secret weapon for cutting through grease. It’s gentle, cheap, and you already own it.
Here is my method.
- Mix one quart of warm water with one drop of dish soap. Shake gently.
- Spray a light mist onto a clean microfiber cloth, never directly on the surface.
- Wipe the greasy area in a circular motion.
- Immediately follow with a second cloth dampened with plain water to rinse.
- Dry with a third clean, dry cloth.
This prevents any soapy residue that could attract more dirt later.
For Sticky Sap and Ink Marks
Tree sap from parking under pines or a stray pen mark on the plastic console requires a different approach. For these, I use isopropyl alcohol.
Diluted rubbing alcohol is excellent for dissolving sticky residues on hard plastics and vinyl without harming them. My husband Roger uses it to clean his hunting gear, and it works just as well in the car.
Always test it first in a hidden spot, like under the seat. I mix a 1:1 ratio of 70% isopropyl alcohol and water in a small spray bottle.
Apply it sparingly to a cloth and dab at the sap or ink. You will see it transfer onto the cloth. Stop as soon as the mark is gone and wipe the area with a water-dampened cloth.
For Lingering Pet Accident Odors
When my golden retriever, Peeta, had an upset stomach in the back seat, cleaning wasn’t enough. The smell lingered because enzymes in the accident bond to the fibers.
A commercial enzyme cleaner is the only reliable way to eliminate organic odors, not just mask them. These cleaners use live bacteria to literally eat the odor-causing matter. In particular, bio-enzymatic cleaners excel at odor elimination by digesting the sources. They continue to work after application, breaking down lingering compounds.
I soak the affected area according to the bottle’s directions, let it dwell fully, and then extract as much moisture as I can. For severe cases, this specialized tool is worth every penny.
For Ultimate Peace of Mind
When I detail my own car or help a friend clean their new vehicle, I often reach for a dedicated product. It removes the guesswork.
Keeping a quality automotive interior cleaner is wise for anyone who wants a guaranteed-safe result for their investment. These are pH-balanced specifically for automotive materials like treated leather, modern vinyls, and dashboard plastics.
My mother-in-law Brianna swears by her favorite brand for her truck’s pristine interior. It gives her confidence, and that’s valuable. Sometimes, using the product engineered for the task is the simplest, safest path.
FAQ About Using Vinegar & Baking Soda on Car Stains
My old coffee stain didn’t budge with vinegar. What now?
Vinegar struggles with old, set-in stains, especially tannins in coffee. Blot the area with a cloth dampened with a drop of dish soap in water, then rinse with a clean, damp cloth to lift the remaining residue.
I used vinegar and now my car smells like pickles. What did I do wrong?
You likely used too much solution or didn’t let it dry completely. Open the doors for ventilation; the smell will disappear as the surfaces fully air-dry, which usually takes 15-20 minutes.
Baking soda left a white film on my fabric seat after vacuuming. How do I fix it?
A fine film means your vacuum suction wasn’t strong enough. Go over the area again with a stiff brush to loosen the powder, then vacuum thoroughly with a crevice tool attachment.
For a greasy french fry stain, should I use vinegar, baking soda, or a store-bought cleaner?
Use a store-bought automotive cleaner or a drop of dish soap in water. Natural cleaners like vinegar and baking soda are poor at cutting through grease, which is the core of this stain. Motor oil stains especially require a strong detergent.
I accidentally used a baking soda paste on my dashboard and now it looks hazy. Can I fix it?
The mild abrasives have likely caused fine scratches. Wipe the area gently with a soft, dry microfiber cloth; for future cleaning, use only a diluted vinegar solution applied to a cloth, not the surface.
Making an Informed Choice for Your Car
The single most important rule is to test any cleaner, natural or not, in a hidden spot first. Your car’s interior is a mix of materials, and what works safely on one can damage another.
For more tips on caring for fabrics, upholstery, and every surface in your home, follow along right here on the blog.
Suzanne is an accomplished chemist, laundry expert and proud mom. She knows the science and chemistry of stains and has personally deal with all kinds of stains such as oil, grease, food and others. She brings her chemistry knowledge and degree expertise to explain and decode the science of stain removal, along with her decades long experience of stain removal. She has tried almost everything and is an expert on professional and DIY stain removal from clothes, fabric, carpet, leather and any other items dearest to you.