How to Remove Paint from Hair: Your Step-by-Step Guide for Dried and Wet Paint
Discovering a streak of paint in your hair can feel like a crisis. Don’t worry-whether it’s wet or dry, you can usually remove it with gentle, common items like olive oil or hair conditioner.
- The critical first steps for wet paint to prevent it from setting.
- A safe, detailed process for breaking down and removing dried paint.
- Why spray paint needs a slightly different approach.
- The best non-toxic products to use (and what to absolutely avoid).
- How to wash and condition your hair afterwards to restore its feel.
I’ve tested these methods through years of stain removal work and real-life messes with my own kids, Jason and Jessica.
First, Don’t Panic: Assess Your Paint Situation
Your panic level here is a solid 5 out of 10. I felt this when Jason came home with a silvery streak in his hair from a model rocket project. This is far more annoying than it is a permanent disaster. The texture is usually the first clue, from wet slickness to a stiff, crackly feel once dry.
The golden window for easy cleanup is while the paint is still wet. Once it dries, it becomes a more stubborn, crusty problem. If some of that paint has seeped into grout lines, you may want to know how to remove paint stains from grout. The right approach depends on the type of paint and the grout material. Your first job is to figure out what you’re dealing with.
Do not start rubbing or combing the paint. Rubbing grinds the paint deeper and can mat the hair into an impossible, tangled clump. I made this mistake once trying to help Jessica and it took twice as long to fix.
Identifying the paint type guides your entire strategy. Here is a quick reference to help.
| Paint Type | Common Examples | Identification Tips |
|---|---|---|
| Water-Based | Acrylic, Latex, Some Craft Paints | Often has a mild smell. It may feel slightly rubbery when dry. Cleanup with water is possible if caught wet. |
| Oil-Based | Most Spray Paints, Enamel, Oil Paints | Has a strong, sharp chemical odor. Dries to a very hard, glossy finish. Requires oil or solvent for removal. |
Critical Warnings: What Never to Use on Hair
I keep a strict list of chemicals that never go near anyone’s head, learned from Roger’s workshop and my own tests. These products are for surfaces, not skin.
- Paint Thinner or Mineral Spirits
- Acetone (like pure nail polish remover)
- Gasoline or Kerosene
- Harsh Commercial Paint or Varnish Strippers
These are simply too aggressive. They will scorch your scalp, cause severe chemical burns, and turn hair into brittle straw. Your skin can absorb these toxins, which is a serious health risk.
You must be extra cautious with color-treated, bleached, or very fine hair. My aunt Jessica has delicate, colored hair that would be ruined by a harsh approach. Always perform a patch test on a single strand before applying any oil or product to the whole area. Wait 15 minutes to see if the hair becomes gummy or weak. If dye strays onto the skin, there are gentle ways to remove hair dye stains. These quick methods can help prevent lasting discoloration while you work with color-treated hair.
The Chemistry Corner: Why Oils Work
Think of most paints, especially spray paint, as sticky, hardened grease. They are oil-based or use polymers suspended in oil.
The cleaning rule here is “like dissolves like.” Natural oils, like coconut or olive oil, can soften and break down the paint’s binders because they are similar, fatty substances. It is like using butter to grease a pan.
This is where dish soap becomes essential. Dish soap acts as an emulsifier, surrounding the oily paint globules so they can rinse away with water. I use this one-two punch all the time, from Peeta’s paw prints to greasy kitchen spills.
How to Get Wet Paint Out of Your Hair
How do you remove wet paint from hair? The answer depends on speed and the paint type. Start with water-based paints like latex or acrylic.
They are the simplest to handle if you act before they dry.
Step-by-Step for Wet Latex or Acrylic Paint
Follow these steps as soon as you notice the paint.
- Gently scrape off excess. Use a dull butter knife or an old gift card. Pull it along the hair shaft away from the scalp to lift globs.
- Rinse under cool water. Use cool, running water on the spot. Warm water can set the paint proteins, making it glue-like.
- Apply a creamy lubricant. Slather on a thick, creamy conditioner or pure olive oil. You need to completely coat the paint and hair.
- Add dish soap. Work a dollop of dish soap (I always use Dawn) into the oily conditioner. This creates an emulsion that breaks the paint’s grip.
- Rinse and repeat. Rinse thoroughly with cool water. If you feel any sticky residue, repeat the conditioner and soap steps.
What Helped Me (Pro-Tip)
When Jason got blue acrylic in his hair during a model rocket project, I reached for his heavy, cheap conditioner.
Its thick, almost greasy texture coated everything and let the paint slide right out in one piece. For a stubborn spot behind his ear, I left the conditioner smothering the paint for a full ten minutes before adding soap.
Patience with the lubricant is your best tool.
How Do You Get Dried Paint Out of Hair?
How to remove dried paint from hair is a different, more patient game. How to get acrylic paint out of hair that’s rock-hard follows the same rule.
This requires lubrication and time, not pulling or force. Yanking can pull hair out.
The Oil-Soak Method for Dried Paint
This method re-softens the paint from the inside out.
- Saturate the blob. Apply a thick coating of oil directly onto the dried paint. Coconut, olive, or baby oil works. Soak it until it looks glossy.
- Let it penetrate. Wait 15 to 30 minutes. The oil needs this time to seep into the paint and loosen its bond.
- Gently massage. Use your fingertips to softly knead the area. The paint should start to crumble or feel slippery.
- Comb carefully. Use a fine-tooth comb, starting from the ends of your hair and working up toward the scalp. This lifts flakes without tugging.
- Wash it all out. Wash with dish soap to cut the heavy oil, then follow with your regular shampoo. You might need two shampoo sessions.
Safe DIY Alternatives for Paint Removal
No specialty oils on hand? Your kitchen has options.
- Mayonnaise: My aunt Jessica swears by it. The oil softens the paint, and the egg acts as an emulsifier to help it rinse clean.
- Creamy Peanut Butter: The oils help, but you must use the smooth kind. Crunchy bits will make a terrible, sticky mess.
- Vaseline Petroleum Jelly: It’s intensely occlusive and great for small, stubborn spots. It’s messy to wash out but very effective.
Avoid baking soda or salt scrubs here. They are too abrasive for the scalp and can cause micro-cuts, leading to irritation.
Removing Spray Paint from Hair: A Special Case
How to remove spray paint from hair needs a specific plan. How do you get spray paint out of hair? Fast. It’s thin, oily, and engineered to stick to everything.
Its solvents make it a unique challenge compared to wall paint.
Step-by-Step for Spray Paint
- Blot immediately. Use a wad of paper towels to blot (not rub) the area. You want to absorb the wet, uncured paint before it sinks in.
- Soak with oil or conditioner. Drench the spot with cheap vegetable oil or a thick conditioner. This dilutes the paint’s binding solvents.
- Let it sit. Give it a solid 20 minutes to work. Spray paint needs a longer soak time than regular paint.
- Wash with power. Lather up using a clarifying or anti-residue shampoo mixed with a bit of dish soap. Wash twice if needed.
- Plan for a second round. Spray paint is tenacious. Do not be discouraged if you see a faint tint or feel a slight stiffness after the first wash. Just repeat the oil soak and shampoo process.
Roger learned this the hard way after a misdirected spray can incident in the garage. The first wash did little, but a second, longer soak with canola oil did the trick.
Aftercare and Troubleshooting
You got the paint out. Nice work. Now, let’s take care of you and your hair. This part is just as important as the removal process.
If your scalp feels tingly, red, or itchy after trying to remove paint, stop everything and rinse with cool water for several minutes. This can happen with some solvents or vigorous scrubbing. Pat the area dry with a soft towel. A little pure aloe vera gel can be soothing. If the irritation doesn’t calm down quickly, it’s a sign to talk to a doctor or dermatologist.
Post-Treatment Recovery for Your Hair
Your hair has been through a chemical and mechanical workout. It needs some gentle recovery.
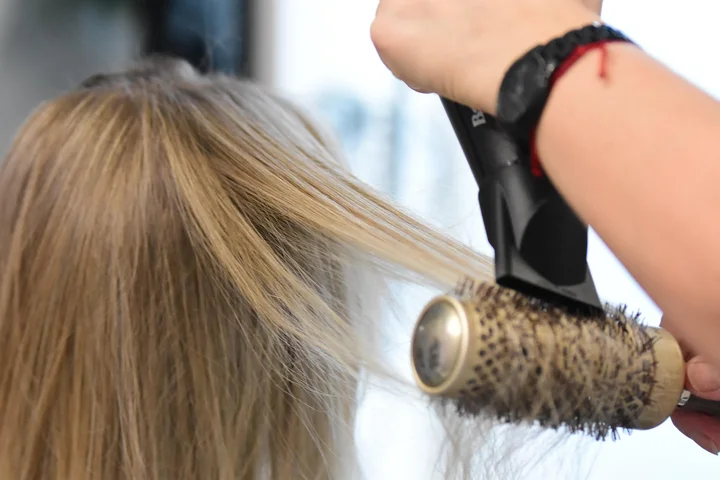
After your final rinse, resist the urge to grab the blow dryer. Let your hair air-dry naturally. The heat from a dryer can bake any tiny, unnoticed residues right into the hair shaft, making them permanent. Air-drying lets you see and feel the true result.
Once your hair is mostly dry, I recommend a final rinse to reset everything. Mix one tablespoon of apple cider vinegar with one cup of cool water. Pour it slowly over your hair, avoiding the eyes. This removes any filmy leftover soap and helps your scalp return to its natural, healthy pH. You’ll notice your hair feels softer and less “squeaky.”
The most critical step is a serious deep conditioning treatment after the paint is gone. The oils and soaps that saved your hair can also dry it out. Use a rich, creamy mask or even a generous amount of pure coconut oil. Leave it on for at least 20 minutes, or even sleep with it in a loose shower cap. This replaces lost moisture and seals the hair cuticle.
When to Stop and Call a Professional
Know your limits. There are times when home methods are not the right call.
If a large section of hair is completely solidified into a hard, matted paint clump, do not keep pulling and soaking. You risk breaking the hair or severely irritating the scalp. This is a job for a professional hairstylist.
You should not try any further removal if your scalp is visibly burned, cut, or severely inflamed from your attempts. Your skin’s health comes first. Seek medical attention for the scalp before worrying about the hair.
For a small, stubborn patch that just won’t budge? It’s okay to surrender. A hairstylist can often perform a precise, strategic trim to remove just the affected strands, saving the rest of your style. It’s a smarter move than causing more damage.
How to Prevent Paint from Getting in Hair
The best stain is the one that never happens. A little prep saves a huge headache later.
Before any painting project, get your hair out of the way. Tie long hair up in a secure bun. For the best protection, create a physical barrier. I keep a pack of disposable shower caps in my toolbox for this exact reason. A tight-fitting headscarf or bandana also works perfectly.
My Aunt Jessica, who enjoys a good Cabernet as much as a home project, taught me a fancy trick. She uses a silk scarf to cover her hair. “It protects my highlights from more than just red wine splashes,” she says. It’s a great multi-use barrier.
For an extra layer of defense, apply a thick coat of your regular conditioner to dry hair before covering it. If paint does hit, it’s more likely to stick to the conditioner than your hair, making cleanup much faster. It’s also beneficial to wash your hair after any protective styling to ensure it’s clean and healthy.
Recommended Product Types (Not Brands)
It helps to have the right tools in your cleaning arsenal. Here are the categories of products that are useful for this kind of task: Oxiclean, CLR, and BKF.
- Heavy, Creamy Conditioners: For the pre-paint barrier and the essential post-treatment deep conditioning.
- Pure Plant Oils: Coconut, olive, or avocado oil. These are your first-line gentlest solvents for breaking down paint.
- Clarifying Shampoo: Designed to strip away product buildup, it’s powerful for final cleanup of oily residues.
- Gentle, Moisturizing Dish Soap: The kind labeled for “soft hands.” It cuts grease without being as harsh as some technical cleaners.
FAQ about Removing Paint from Hair
How quickly do I need to act to remove wet paint?
You must act immediately to prevent the paint from setting. Begin by gently scraping off excess and rinsing with cool water before it dries. Be mindful of mineral residue that hard water can leave on the surface, as those stains can bond with the finish. Later, we’ll cover how to remove hard water stains from car paint safely.
What’s the most effective household item for dried paint?
A pure plant oil like coconut or olive oil is best. Saturate the dried paint and let it soak for 15-30 minutes to soften it from the inside out before washing. This method is particularly useful for removing paint from fabric clothing.
Can I use nail polish remover (acetone) if the paint won’t budge?
No, never use acetone or pure nail polish remover on hair. It will severely dry out and damage your hair, potentially causing chemical burns to your scalp, especially if you’re washing keratin-treated hair.
What’s the easiest way to prevent this mess in the first place?
The simplest barrier is a tight shower cap or headscarf. For extra protection, apply a thick coat of conditioner to dry hair before covering it. If you’re aiming to skip washing after a workout, these barriers help you go longer between washes.
My scalp is red and itchy after trying to remove paint. What should I do?
Stop immediately and rinse the area with cool water for several minutes. If the irritation persists, discontinue home methods and consult a doctor.
Keeping Your Hair Healthy Through the Cleanup
Your best move is always to act fast on wet paint and switch to a gentle, oil-based method for anything dried. Treating the stain correctly protects your hair from damage far better than rushing with harsh removers. I post regular tips from our home’s real messes-like Jason’s spray-paint adventures or Jessica’s glitter-glue incidents-so follow along on Stain Wiki for more honest help. We’ll also highlight common stain-removal mistakes to avoid. That way you’ll know what not to do and save your fabrics.
Written by Suzanne Rosi Beringer. Suzanne is an accomplished chemist, laundry expert and proud mom. She knows the science and chemistry of stains and has personally deal with all kinds of stains such as oil, grease, food and others. She brings her chemistry knowledge and degree expertise to explain and decode the science of stain removal, along with her decades long experience of stain removal. She has tried almost everything and is an expert on professional and DIY stain removal from clothes, fabric, carpet, leather and any other items dearest to you.