What’s the Difference Between Water-Based and Oil-Based Stains (and How Do You Treat Each)?
If you’ve ever made a stain worse by treating it wrong, you’re not alone. The fastest way to fix any stain is to correctly identify it as water-based or oil-based first.
This guide will walk you through that exact process. We’ll define what makes each stain type unique, explain why using the wrong cleaner backfires, give you my step-by-step removal methods for both, and list the simple tools you already have at home.
I’ve learned this through years of tackling everything from Jason’s grass stains to Aunt Jessica’s spilled merlot on my own carpets.
The Core Difference: It’s All About Chemistry
Think of water-based stains as colored water. They are dyes or pigments dissolved in water, waiting to sink into fibers.
Picture Jessica’s grape juice spill on the couch. That purple pool is mostly water with color mixed in.
Oil-based stains feel different. They are greasy, slippery substances that repel water.
Remember the time Roger tracked in a smear of transmission fluid from the garage. It left a dark, slick patch on the doormat that water just rolled right off.
Water and oil refuse to mix. You have seen this in a kitchen pan.
Pouring water on an oil stain does not clean it. The water beads up and rolls away, leaving the grease behind.
This basic chemistry dictates your entire cleaning strategy from the very first step.
For a water-based spill, you often start by diluting and blotting with water. For an oil-based mess, you need a agent that can grab and surround the grease.
What are the main differences between water-based and oil-based stains?
Water-based stains come from liquids like soda, wine, or fruit juice. They soak in like water and often leave a visible dye mark.
Oil-based stains come from greasy things like butter, makeup, or car oil. They feel tacky, repel water, and can leave a dark, translucent ring.
The treatment for each is opposite at the start: you dilute water-based stains, but you must emulsify oil-based ones.
The Quick Stain Test: Water or Oil?
Never guess. A quick test saves your favorite shirt from a cleaning disaster.
Find a discreet spot on the stained item, like an inside seam or a hidden corner. Always test here first.
Grab a clean eyedropper or spoon. Place one small drop of plain water on the stain’s edge.
Watch closely. If the water droplet beads up on top, you have an oil-based stain. If it soaks into the fabric quickly, it is likely water-based.
This simple water test is your first and most reliable clue.
For confirmation, try the dawn dish soap test. My mom Martha taught me this one.
Put a tiny dot of clear dish soap, like Dawn Original, on another hidden spot. Gently rub it in with a cotton swab.
If the stain begins to break up and the fabric looks clearer, you are dealing with grease or oil. Dish soap is designed to cut through grease.
I learned the hard way why testing matters. Last fall, Peeta dragged in a muddy, chocolatey mess from the yard.
Was it plain mud (water-based) or did it have grease from something he found (oil-based)? I assumed it was just mud and poured water on it. The stain set into a permanent, greasy shadow. I should have tested first.
Taking thirty seconds to identify the stain type makes every cleaning minute that follows ten times more effective.
Your First-Aid Kit for Any Fresh Stain
I heard a crash from the kitchen last week. My three-year-old Jessica had an unfortunate meeting with a chocolate milkshake. The first few seconds after a spill are everything. Your reaction decides if it becomes a simple clean-up or a permanent souvenir.
For any fresh stain, your first two moves are always the same, no matter what was spilled. First, gently blot. Use a clean, white cloth or paper towel. Press down and lift. Never scrub or rub. Rubbing grinds the stain deeper into the fibers. Second, if there’s anything solid, like mud or food chunks, gently scrape it off with a spoon or a dull knife. This is especially important when dealing with delicate fabrics like wool.
Now, here’s the fork in the road. You have to decide: is this a water-based or oil-based stain? The next step is completely different.
- For water-based stains (like juice, soda, or that milkshake), grab cool water. Flush it from the backside of the fabric. This pushes the stain out the way it came in, instead of driving it through.
- For oil-based stains (like gravy, butter, or makeup), reach for a dry powder. I keep a shaker of cornstarch in my laundry room. Sprinkle a generous amount on the stain to absorb the grease. Let it sit for 15 minutes, then brush it off.
What you do in the first three minutes matters more than what fancy product you own. My mom, Martha, taught me that. She’d say, “Moving fast with what you have is better than moving slow with the perfect thing.” She’s right. Act first, identify second.
How to Remove Water-Based Stains: The Soak-and-Lift Method
People often ask me, “What are the best methods for treating water-based stains?” The answer is simple. You need to dissolve them and wash them away. Think of sugar in your coffee. You wouldn’t use grease to clean it up. You’d use more water. That’s your strategy.
On Clothes and Washable Fabric
My son Jason’s soccer jerseys are a gallery of grass, mud, and sports drink stains. Here is my go-to routine for anything washable.
- Pre-soak the item in a basin or sink filled with cool water. Add a scoop of an oxygen-based bleach, like OxiClean. I use the Versatile Stain Remover variety. Let it soak for at least one hour, or even overnight for tough stains.
- Launder as usual with your regular detergent. This is where modern detergents shine. They contain enzymes, which are like microscopic Pac-Man characters. They “eat” the proteins in stains like milk, blood, or grass.
This next rule is non-negotiable: air dry the item until you are 100% sure the stain is gone. The heat from your dryer cooks the stain into the fabric. Once that happens, it’s often there for good. I hang nearly everything on a drying rack first for a final inspection.
For a quick DIY fix, my aunt Jessica in Arizona swears by salt for red wine. Cover the stain with a mountain of table salt to absorb the liquid, then rinse with cool water. For berry stains, a solution of one part white vinegar to two parts water can help break down the color before washing. These tricks also apply to removing red wine stains from fabrics, with fabric-specific tips to follow.
On Carpet and Upholstery
This is where you have to be careful. You can’t throw the living room rug in the washing machine. You need the “blot and flush” technique.
- Mix a teaspoon of clear, mild dish soap (like Dawn) with a cup of warm water.
- Dampen a clean white cloth with the solution. Blot the stain from the outside in, switching to a dry part of the cloth as it picks up the stain.
- Never pour liquid directly on the carpet. You want to dampen the stain, not flood the padding underneath.
After cleaning, I mix equal parts white vinegar and water in a spray bottle. A light mist over the area neutralizes any soapy residue and prevents that sour, damp smell. Let it air dry completely.
My pro-tip is to keep a second spray bottle filled with only plain water. After blotting with the soap solution, I do a final “rinse” by blotting with water on a clean cloth. This prevents any sticky detergent film from attracting more dirt later.
On Hard Surfaces (Driveways, Car Interiors)
My husband Roger tracks in all sorts of things from the garage to the driveway. For concrete, a simple paste of baking soda and water works wonders. Scrub it on with a stiff brush, let it sit, and rinse. For big messes, a garden hose or pressure washer on a low setting does the job.
Inside the car, water-based stains like spilled coffee or melted ice cream are actually the easier kind. For fabric seats, I use a dedicated upholstery cleaner. For leather, a leather-specific cleaner and conditioner is a must. Water-based spills on hard plastic or vinyl usually wipe right up with a damp microfiber cloth. It’s the grease from fast food bags that’s the real challenge in there when trying to remove stains from car upholstery.
How to Remove Oil-Based Stains: The Absorb-and-Dissolve Method
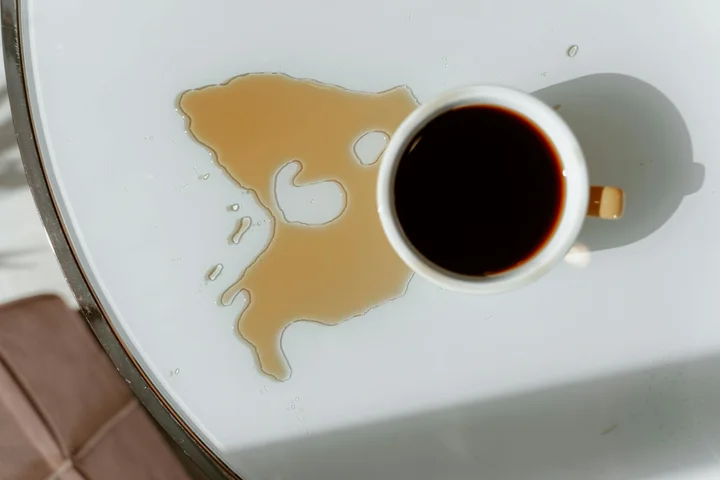
The best methods for treating oil-based stains involve two key actions. First, you absorb any excess grease. Second, you dissolve the remaining oil molecules so they can be rinsed away, especially when dealing with oil and grease stains on clothes.
This two-pronged attack is effective for everything from bacon grease to motor oil.
On Clothes and Fabric
Start by scraping off any solid grease with a dull knife. Then, grab your blue liquid dish soap, like Dawn.
I keep a small bottle in my laundry room for this exact reason.
Apply the soap directly to the stain, rubbing it in gently with your fingers to work it through the fibers.
Let it sit for at least 15 minutes, or even overnight for old stains. Dish soap contains surfactants that break the surface tension of the oil, suspending it in tiny droplets that water can wash away.
After it soaks, wash the garment in the hottest water the fabric care label allows.
For a safe DIY alternative, try cornstarch or baby powder on a fresh grease spot. Just sprinkle it on, let it sit for an hour to absorb the oil, then brush it off before washing. This method is especially useful when you’re dealing with grease stains on clothes.
My mom, Martha, taught me a trick for set-in stains on dark fabrics. Rub a piece of white chalk on the spot, let it sit, then brush it off. The chalk absorbs the residual oils surprisingly well. This method is especially useful for removing oil stains from clothing.
Always air-dry the item after washing to check your work, as heat from a dryer can bake in any leftover oil and create a permanent ghost stain.
If you see a faint shadow, just repeat the dish soap treatment. It often takes two rounds to fully lift a heavy grease stain.
On Carpet and Furniture
Grease on upholstery makes my heart sink. I learned this when Jessica spilled melted butter on the living room rug.
First, absorb as much as you can. Blot, don’t rub, with a paper towel. Then, cover the spot with a thick layer of cornstarch or baking soda.
Let it sit for several hours, even overnight, to pull the oil up from the padding. Vacuum it all up thoroughly.
Next, you need a solvent. Test any cleaner in a hidden spot first to ensure it won’t damage the color or texture of your carpet or couch.
Apply a small amount of a dry-cleaning solvent or a foam upholstery cleaner labeled for grease. Follow the product directions exactly.
Blot with a clean, damp cloth to rinse and then dry with a fan.
One time, an old cooking oil spot reappeared on our couch cushion. I was out of my usual cleaner. In a pinch, I used an enzyme-based pet stain remover, which is typically used for oil stains on fabric.
It worked because those enzymes break down organic matter, and cooking oil is organic. It’s a handy trick if you have it on hand.
On Driveways and Garage Floors
My husband Roger’s truck leaves drips, and summer barbecues create spills. For a fresh oil puddle, cover it immediately with cheap clay cat litter.
Crush it under your foot to grind it in. Let it sit for a day to soak up the liquid, then sweep it away.
For a set-in stain, you need more power. A commercial concrete degreaser works well. So does a paste made from trisodium phosphate (TSP) and water.
When using strong chemicals like TSP or industrial degreasers, always wear rubber gloves and safety glasses to protect your skin and eyes.
Scrub the paste into the stain with a stiff brush, let it sit, then rinse thoroughly with a hose.
When Stains Linger: Troubleshooting Set-In Spots
Don’t panic if your first attempt didn’t work. Set-in stains often need patience and a change of tactics.
Never mix different cleaning chemicals together, as this can create dangerous fumes or reactions.
If dish soap didn’t fully remove a grease stain from fabric, try a pre-wash stain remover spray or a paste of baking soda and water before the next wash.
For carpets, a second application of a different solvent might do the trick.
Sometimes, you need to call for backup. If a stain is on a valuable antique rug, a delicate silk blouse, or a large section of carpet, a professional cleaner is a wise investment.
They have tools and solutions we don’t. I called one for a red wine stain on a wool rug from a visit with my Aunt Jessica, and it was worth every penny.
Finally, let’s clear something up. When we talk about “oil-based stains” here, we mean spills you want to remove. On concrete, oil spills often require a degreasing step before cleaning. This ties into concrete stain removal for oil spills and will be explored further.
This isn’t about applying a protective finish to a wood deck. You would never put polyurethane on a spaghetti sauce stain. That would be a very different, and very sticky, problem.
Smart Habits to Prevent Future Stain Panic
I have learned this lesson the hard way, more than once. Last week, Jason tracked muddy paw prints from Peeta across our cream rug. I caught it an hour later. That extra time let the dirt and moisture settle deep into the fibers, turning a quick blot into a 20-minute scrub session.
Roger’s mechanic work leaves dark grease smudges on door handles. If I wipe them the same day, they vanish with a dab of Dawn. Left for a week, they bake into a stubborn film.
Treating a stain immediately is the single most powerful thing you can do.
Blot. Scrape. Rinse. Do not let it think it lives there now. Your future self will thank you.
Build Your First-Line Defense Kit
You do not need a closet full of chemicals. My go-to kit lives under the kitchen sink, ready for anything my crew throws at it. This is what I always have on hand.
- Dawn Dish Soap (the original blue): This is my hero for any oily, greasy stain. It cuts through cooking oil, bacon grease, and crayon wax like nothing else. I used it just yesterday on a butter stain from Jessica’s toast.
- OxiClean Versatile Stain Remover: This is my secret weapon for organic stains. It tackles juice, wine, chocolate, and muddy prints. I sprinkle it on Edward’s grass-stained soccer shorts before they go in the wash.
- White Distilled Vinegar: It’s a gentle acid that neutralizes odors and breaks up mineral deposits. I use it on hard water rings in the bathroom and to pretreat underarm perspiration stains.
- Cornstarch or Baking Soda: These are my dry absorbers. For a fresh oil spill on the carpet or driveway, I dump a pile on it. It soaks up the liquid base, making the next clean-up step much easier.
- Clean White Cloths and Old Towels: Color can transfer. I have a stack of worn-out white t-shirts cut into rags. They are perfect for blotting without adding dye to the mess.
This simple toolkit can handle about 90% of the household stains you will ever face.
My Aunt Jessica taught me the vinegar trick for wine. My mother-in-law Brianna swears by cornstarch for gravy spills. It’s tried and true.
You Have a Game Plan Now
Stains are not a sign of failure. They are proof of a life being lived fully. Spills happen in every home, from my chaotic one to my very tidy mom Martha’s house in North Texas.
Yesterday’s coffee splash or tonight’s spaghetti sauce accident is not a crisis. It is just a next step.
You know what type of stain you are dealing with, you have a method to treat it, and you have the simple tools to make it happen.
Take a breath. Grab your kit. You have got this.
FAQ about Treating Water-Based and Oil-Based Stains
I just got grease on my shirt. What’s the absolute first thing I should do?
Blot up any excess grease with a paper towel, then immediately cover the spot with cornstarch or baby powder to absorb the oil. Let it sit for 15 minutes before brushing it off and applying dish soap.
What should I try if dish soap doesn’t fully remove an old cooking oil stain from a cotton t-shirt?
Make a paste of baking soda and a little water, rub it into the stain, and let it dry before brushing it off and washing again. Always air-dry the shirt to check if the stain is gone before using the dryer.
Can I use the same blotting technique for juice on carpet as I do for salad dressing?
No. For juice (water-based), blot with a damp cloth of mild soapy water. For dressing (oil-based), you must first sprinkle the spot with baking soda to absorb the grease before using any liquid cleaner.
Why is there a faint ring left on the couch after I cleaned a water-based stain?
This is often from soap residue or from cleaning just the center of the stain. Always blot from the outside of the stain inward, and do a final “rinse” by blotting the area with a cloth dampened with plain water.
How can I quickly tell if a dried stain is too set-in for my home treatment?
If the stain feels stiff or has a distinct outline after your first treatment attempt, it’s likely set-in. For valuable items, stop and consider a professional cleaner to avoid causing permanent damage. To help you avoid common stain-removal mistakes, the next steps will cover what not to do.
Your Blueprint for Stain Success
Remember, the most powerful tool you have is knowing whether a stain is water-based or oil-based before you even blot. This fundamental step directs every safe, effective cleaning choice you make afterwards. I tackle new stain challenges every week with my crew, and I share all those real-world results right here on Stain Wiki for you. From oil stain removal for denim to tricky coffee blotches, careful treatment makes all the difference.
Written by Suzanne Rosi Beringer. Suzanne is an accomplished chemist, laundry expert and proud mom. She knows the science and chemistry of stains and has personally deal with all kinds of stains such as oil, grease, food and others. She brings her chemistry knowledge and degree expertise to explain and decode the science of stain removal, along with her decades long experience of stain removal. She has tried almost everything and is an expert on professional and DIY stain removal from clothes, fabric, carpet, leather and any other items dearest to you.