How to Remove Scratches from Hardwood and Vinyl Floors
That new scratch on your floor can make your heart sink. Good news: most everyday scratches are fixable with simple, non-toxic methods you can do right now.
Here’s exactly what I’ll walk you through:
- How to quickly assess the depth and type of scratch you’re dealing with.
- The best home remedies for minor hardwood floor scratches.
- Safe, effective techniques for repairing vinyl without harming it.
- When to use a professional filler or touch-up pen.
- How to protect your floors from future scuffs and scrapes.
I’ve honed these methods over years of dealing with everything from pet claws to moving-day mishaps in my own home.
First, Don’t Panic: Assessing Your Scratch Damage
Take a deep breath. I rate every floor mark with a “Panic-Level” from 1 to 10.
A 1 is a faint scuff you can barely see. A 10 is a deep gouge that makes your heart drop.
Scratches are different from stains. They don’t chemically bond or set in.
You have a “Golden Window” for repair because fixing scratches quickly stops dirt and grime from settling in and making them look darker and more permanent.
Look closely at the mark. Is it sitting on top, or did it cut deep? Identifying the depth tells you which fix to use.
- Surface Scuff: Only on the very top layer. It looks like a dull mark you might rub off.
- Finish Scratch: It cut through the shiny clear coat but didn’t reach the raw wood or vinyl underneath.
- Deep Wood or Vinyl Damage: You can see a different color or texture inside the scratch. It feels like a groove.
In my house, I know the usual suspects. Peeta’s happy tail wags leave claw marks. Jason’s toy truck races create scuff lines. Roger’s hunting boots have dragged more than one heavy box across the floor.
Your first step for any scratch repair is always the same: clean the area thoroughly with a damp microfiber cloth. This removes grit that could ruin your repair work. When you’re dealing with interior plastic trim, apply the same prep before attempting to remove scratches on that trim. The next steps will guide you through the best ways to remove scratches from interior plastic trim.
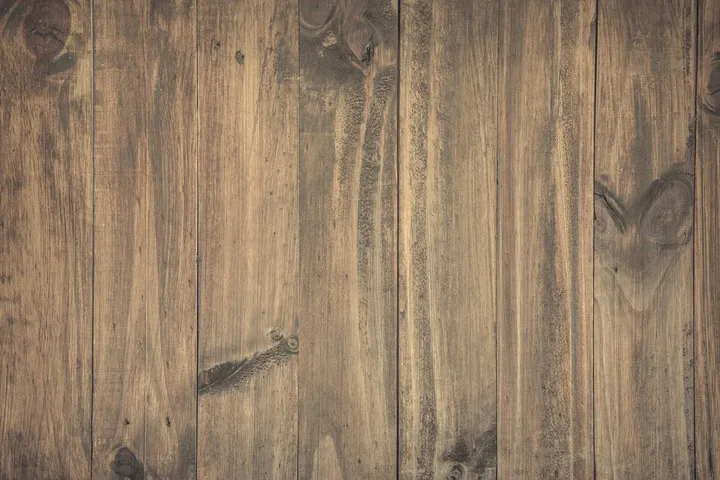
Your Hardwood Floor Rescue: From Scuffs to Deep Scratches
Let’s answer that common question: “How to Remove Scratches from Hardwood Floors?” I’ll guide you from the simplest fix to the most involved.
The Quick Buff-Out for Light Scuffs and Marks
For panic-level 1 or 2 marks, your kitchen might hold the solution. Use a clean microfiber cloth with a tiny dab of olive oil.
Rub the oil into the scuff using small circles. The oil fills microscopic gaps and adds shine, making the mark vanish. You can also use the meat from a walnut, but be careful when removing oil stains from leather or suede.
Always test any substance, even a natural one, in a hidden spot like inside a closet first. You need to be sure it won’t darken or damage your floor’s finish.
I used this last week on a scuff from Roger’s tool box. A quick buff with olive oil made that gray line disappear completely.
Fixing Minor Scratches in the Clear Coat Finish
When the scratch is in the clear protective layer, you need a more targeted approach. A hardwood floor repair marker or a colored wax stick is perfect.
This is exactly how do you get dog scratches out of hardwood floors from pets like my lab, Peeta. His nail marks usually sit right in the finish.
Follow these steps for a clean repair.
- Clean the scratch with your damp cloth and let it dry fully.
- Pick a repair marker or wax stick that closely matches your floor color.
- Apply it directly into the scratch, following the wood grain.
- Immediately buff the area with a clean cloth to remove any excess product.
- For durability, add a tiny dot of clear floor polish over the spot and buff it smooth.
The goal is to fill the scratch so light reflects evenly, making it invisible from a standing height.
How to Repair Deeper Scratches in the Wood
For scratches that expose the raw, lighter wood, you’re doing a full repair. You will need wood filler, a stain pen, and a fresh sealer like polyurethane. Even for minor repairs, it’s crucial to apply a proper stain coat for best results.
Clean the gouge well first. Use tweezers to pick out any tiny wood splinters.
Press a small amount of oil-based wood filler into the scratch. Use a putty knife to level it with the floor surface. Let it dry hard according to the package directions.
Once dry, sand the filler gently until it feels perfectly smooth with the surrounding floor.
Blending the color takes patience. Use a stain pen to color the filler. Apply it in very thin layers, letting each one dry, until it matches the wood around it.
Finish by sealing your work with a water-based polyurethane sealer. Apply one thin coat with a small brush, let it dry, and give it a light buff. This protects the repair from future wear.
I find oil-based wood fillers are durable for this job. Water-based polyurethane sealers are great for their low odor and fast drying time.
Your Vinyl Floor Fix: Erasing Scratches and Scuffs
Many people ask, “how to remove scratches from vinyl floors?” The good news is you often can. Unlike real wood, vinyl is a resilient plastic sheet. You can use tricks that would damage hardwood, like gentle heat. However, it’s a bit trickier removing stains from vinyl floors.
Vanishing Light Scratches with Simple Rubbing
For surface scuffs from shoes or a moved chair, start with a damp microfiber cloth. Rub firmly along the scratch. This often works. If it doesn’t, try a baking soda paste. Mix two parts baking soda with one part water to make a thick, non-gritty paste. For leather-specific scratches and scuffs, our leather scratches scuffs repair guide offers step-by-step tips. It covers assessment, appropriate products, and finishing touches to restore the look.
Apply it with a soft cloth and rub in a small circular motion. Wipe clean with a damp cloth. I tested this on a leftover plank from our kitchen reno. These quick, gentle techniques also translate well to car headliner stain removal on fabric or vinyl. Start with a small test patch before applying to the entire area. The baking soda gently polished the scuff away without leaving a dull spot. Avoid harsh abrasives like steel wool or gritty cleaners. They will permanently cloud the vinyl’s finish.
The Heat Trick for More Noticeable Scratches
This is the clever answer for how do you get scratches out of vinyl flooring when a simple rub fails. A hair dryer on a low heat setting can slightly melt the plastic surface, allowing it to flow and fill the scratch.
- Clean and dry the scratch first.
- Set your hair dryer to its lowest heat setting.
- Hold it 4-6 inches from the floor and keep it moving constantly. Do not let it focus on one spot.
- Heat for 15-30 seconds, then let the area cool for a full minute.
- Check the results. You may need 2-3 cycles.
The goal is warmth, not hot. If the vinyl feels hot to your touch, you’re too close. This worked on a deep drag mark from when Roger moved the refrigerator.
Dealing with Deep Gouges and Tears
For a cut or tear that goes through the vinyl layer, you need a filler. Vinyl repair kits with liquid seam sealer are made for this. You squeeze the colored compound into the gouge, let it cure, and buff it smooth.
For large damaged areas, replacing the plank or tile is the most durable fix. If a repair feels beyond your comfort, call a flooring pro. For a tiny, annoying nick, a drop of clear nail polish can act as a waterproof sealant to prevent dirt from getting stuck inside. It’s not a perfect fix, but it helps.
Beyond Floors: Fixing Scratches on Laminate, Furniture, and More
The principles change based on what’s under the surface. A method for real wood can ruin laminate. Here’s how to adapt.
How Do I Get Scratches Out of Laminate Flooring?
Laminate is more delicate than vinyl. It has a photographic layer under a clear wear coat. Moisture is its enemy. Never use a wet paste or liquid filler that can seep in and swell the core.
Your best tool is a dry, wax-based repair pencil or putty stick matched to your floor’s color. You rub it into the scratch, then buff off the excess with a dry cloth. This is very different from hardwood, where you can use liquid stains and sealers. For laminate flooring, stain removal relies on gentle, laminate-safe cleaners and quick blotting to prevent moisture damage. We’ll cover more on stain removal for laminate and hardwood in the next steps.
How Do I Get Scratches Out of Wood Furniture?
Treat finished wood furniture like a hardwood floor. Color-matching wax sticks are fantastic. You melt the wax into the scratch, let it harden, and buff it flush.
My Aunt Martha once showed me her old trick for a dark scratch on a table leg. She used a brown crayon of a similar shade, rubbed it in, and then buffed it with a soft cloth. It was a surprisingly good temporary fix until she got the proper wax.
Surface Compatibility Quick Guide
Use this list as your starting point. Always check your manufacturer’s care guide first.
- Hardwood Floors: Use wood filler, stain pens, and rejuvenating finishes. Sand for deep repairs.
- Vinyl/LVP Floors: Use rubbing, gentle heat, or vinyl-specific repair compounds.
- Laminate Floors: Use dry repair pencils or putty. Avoid liquids and sanding.
- Sealed Wood Furniture: Use color-matching wax sticks or crayons for quick cover-ups.
The Scratch Repair Toolkit: What Works and Why
Seeing a fresh scratch on your floor can feel like a punch to the gut. I felt that way when Peeta’s excited tail-wagging sent a heavy vase skidding across our oak floors last week.
But after years of dealing with kids, pets, and my own clumsy moments, I’ve learned a simple truth. Fixing scratches is less about magic and more about understanding two things: the right tool and the basic science behind it.
This section combines my recommended go-to products with a plain-English explanation of how they actually work.
Recommended Products for Your Cabinet
You don’t need a hardware store in your closet. With a few key items, you can handle 90% of the scratches life throws at you. I keep this kit in the laundry room, right next to the stain fighters.
- Floor Repair Markers: These look like fat, felt-tip markers. They are perfect for thin, superficial scuffs on both hardwood and vinyl. I use a walnut-colored one constantly for the tiny trails left by Jason’s soccer cleats.
- Wax Filling Sticks: For a slightly deeper groove that catches your fingernail, a wax stick is your friend. You melt it in, let it harden, and scrape it flat. My Aunt Jessica taught me this trick for her vinyl plank floors after a chair leg incident.
- Clear Polyurethane Topcoat: For sealed hardwood floors, a small bottle of the correct sheen (matte, satin, gloss) is a lifesaver. It’s for resealing an area after you’ve filled a scratch, blending the repair into the existing finish.
- Vinyl/Laminate Repair Kits: These are more advanced, often containing colored putties and sealants. I bought one after my mother-in-law, Brianna, showed me how she fixed a deep gash in her own flooring. They’re fantastic for color-matching tricky repairs.
Having just a marker and a wax stick on hand saves so much stress, especially in a home with kids or a dog like Peeta. You can tackle the damage before it starts collecting dirt and becomes more noticeable.
Chemistry Corner: How Scratch Hiders Work
Let’s demystify the process. A scratch is essentially a tiny canyon in your floor’s surface. Light hits the uneven sides of this canyon and scatters, which is why you see a dull white line.
For shallow scratches, products like markers and oils work by filling that microscopic gap with colored material, reducing how much light scatters. It’s like using a crayon to color in a line on paper so it blends with the background. The scratch is still there, but your eye can’t find it as easily.
Deeper scratches need a physical rebuild. This is where wax sticks or colored putties come in.
They physically fill the hole, much like using spackle to fill a nail hole in your wall. Once it’s leveled, you often need a clear topcoat (the “paint” in our wall analogy) to seal and protect the new surface, making it flush with the rest of the floor.
Final Safety and Testing Reminders
My golden rule for any cleaning or repair is simple. Always, always test your method in a hidden spot first. Try the marker in a closet corner. Dab the wax behind the refrigerator.
This tells you if the color is right and, more importantly, if the product reacts badly with your floor’s finish.
I need to warn you about a common “clean first” mistake. Never use vinegar, ammonia, or harsh general cleaners on your floors right before a repair. These can strip or damage the protective finish, causing your repair product to soak in unevenly or creating a cloudy ring around your fix. It’s especially important to be cautious when trying to remove dark stains from wood floors.
Just clean the scratch gently with a damp cloth and let it dry completely.
Take a deep breath. Most scratches are not permanent sentences. With the right tools and a little patience, you can make them virtually disappear.
FAQ about Removing Scratches from Hardwood and Vinyl Floors
1. Can I use furniture polish to hide a scratch on my hardwood floor?
No, avoid silicone-based polishes as they create a slippery film that interferes with proper repairs. For a quick shine on a light scuff, a tiny dab of olive oil on a cloth is a safer household alternative.
2. Will baking soda scratch my vinyl floor when I use it as a paste?
No, when mixed with water into a smooth, non-gritty paste, baking soda is a gentle abrasive that polishes the surface. Always test on a hidden area first and use a soft cloth with light pressure.
3. How long will a repair from a colored wax stick last on my floor?
It can last for years in low-traffic areas but may wear down faster in hallways or entryways. You can easily reapply the wax or add a protective topcoat of clear polish for greater durability.
4. What’s the first thing I should do if my dog’s claw leaves a fresh scratch?
Immediately clean the scratch with a damp microfiber cloth to prevent dirt from settling in and darkening it. Then, assess its depth to choose the correct fix, like a repair marker for the finish or filler for deep wood.
5. What if my repair marker leaves a dark, obvious spot on the scratch?
Act quickly and buff the area vigorously with a clean, dry cloth to remove excess product before it dries. If it has dried, you may need to carefully clean the area with a cloth dampened with mineral spirits and start over. For suede, stain removal should be approached with extra gentleness to protect the nap. See how to remove stains from suede.
Keeping Your Floors Looking Their Best
The single most important thing you can do is to match your scratch repair method to your specific floor type, starting with the gentlest option first. I learned this the hard way when a well-meaning relative used a wax meant for hardwood on my vinyl plank floor, leaving a cloudy patch I then had to carefully clean. For more tips like this and step-by-step guides for all kinds of household messes, I hope you’ll follow along right here on the blog.
Suzanne is an accomplished chemist, laundry expert and proud mom. She knows the science and chemistry of stains and has personally deal with all kinds of stains such as oil, grease, food and others. She brings her chemistry knowledge and degree expertise to explain and decode the science of stain removal, along with her decades long experience of stain removal. She has tried almost everything and is an expert on professional and DIY stain removal from clothes, fabric, carpet, leather and any other items dearest to you.