How Do Leather Stains Work? A Practical Guide to pH, Tannins, and Dyes
Seeing a new stain on your leather couch can make your heart sink. By learning the basic chemistry, you can often fix the stain and prevent permanent damage.
Here’s what we’ll cover to give you that control:
- How the pH of a spill-from soda to soap-changes leather’s surface.
- Why tannins in the leather itself can cause dark, blotchy stains with water.
- How common cleaners can strip or react with the leather’s protective dyes.
- My step-by-step approach for different spills, based on their chemistry.
I’ve learned this through years of hands-on cleanup, from Aunt Jessica’s wine spills to the mud Peeta tracks across our chairs.
Your First Move: What to Do When a Spill Hits the Leather
I still remember the sound of my son’s glass of grape juice hitting the floor next to our old leather ottoman. My heart sank. But years of dealing with my kids’ messes taught me one golden rule you must follow.
Your only job in that first moment is to blot, never rub, with a clean, white cloth. Rubbing is the enemy. It grinds the stain deeper into the leather’s pores like grinding dirt into a rug.
Speed matters most with two types of spills. Dyes, like red wine or ink, want to bond to the leather’s surface. Acids, like coffee or soda, can start to chemically alter it. Blotting quickly pulls the liquid away before it can do its worst.
Your blotting technique can shift slightly based on the spill. For a watery spill like juice, use a light, quick dabbing motion. For something oily, like salad dressing, press down more firmly and hold for a few seconds to help the cloth absorb the grease. The goal is always the same: lift, don’t spread.
Why Leather is a Stain Magnet: The Simple Science
To understand why stains set, you need to know what leather is. Think of it like a dense, tough sponge made of protein.
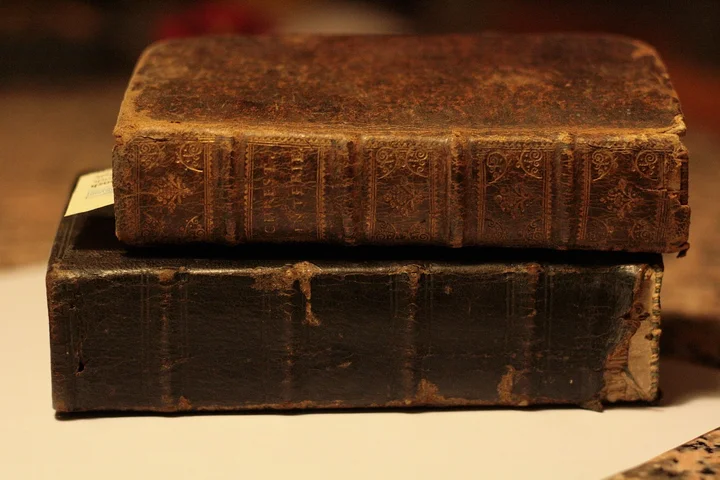
At its core, leather is a network of collagen fibers, which is a protein, and it’s naturally full of tiny pores. This is the “hide.” It’s not a sealed plastic coating. That porous, protein-based structure is why spills get sucked in so fast.
Then there are tannins. These are natural plant compounds used to preserve the hide and turn it into leather. They’re the reason leather doesn’t rot. But tannins are also reactive. They can darken or change color when they meet certain chemicals.
Finally, on top of all this, are the dyes and finishes that give your couch or jacket its color and sheen. A stain isn’t just interacting with the leather; it’s fighting through this topcoat to reach the thirsty hide beneath. Blood stains, especially on leather car seats, test the limits of both the dye and the finish. Understanding how to approach blood stain removal on leather car seats can help preserve that finish while lifting the stain.
The pH Factor: Acids, Bases, and Your Sofa
You don’t need to be a chemist, but knowing a little about pH saves furniture. The pH scale measures how acidic or alkaline something is. Leather likes to be right in the middle, neutral.
Most common spills are acidic. Think cola, wine, coffee, or fruit juice. An acidic spill can act like a mild chemical burn on the leather’s surface and dyes. It can set a color stain instantly or, over time, make the leather brittle.
Alkaline spills are less common but just as tricky. Soap residue, baking soda paste, or some household cleaners are alkaline. These can strip the natural oils from leather, leaving it dry, cracked, and faded.
That’s why my go-to cleaner for unknown stains is always a pH-neutral leather cleaner. It cleans without starting a chemical war on your fabric or sofa’s surface.
Tannin Talk: When Leather Fights Back
Here’s the twist: sometimes the stain isn’t from the spill, but from the leather itself. Those preservative tannins I mentioned are sneaky.
When water or a water-based liquid soaks in, it can cause the tannins in the leather to rise and oxidize, leaving a dark, permanent ring. This is why a plain water spill can sometimes leave a worse mark than a juice spill. It’s the leather reacting, not the spill staining.
Acidic substances can trigger a similar reaction, darkening the tannins. This is often the “shadow” or discoloration that remains after you’ve cleaned the actual spill away. It’s not dirt you missed; it’s the leather’s chemistry changed.
Understanding this helps set realistic expectations. If a dark ring appears after cleaning a water-based stain, you’re likely seeing the tannins, and reversing that is a professional’s job.
A Closer Look at Common Spills and Their Chemistry
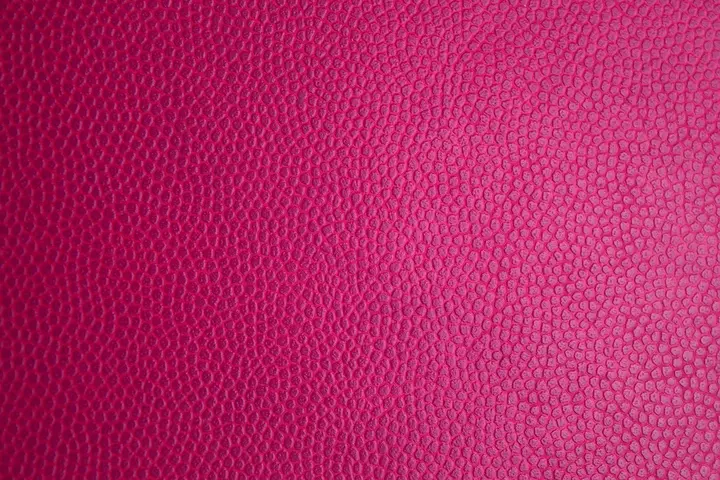
You can’t treat every mark the same way. I group them by how they attack the leather. A coffee spill and a berry juice smear are chemically two different battles.
Understanding the stain type helps you pick the right cleaner the first time, saving you from pushing the mess deeper into the hide.
Protein & Tannin Stains: Coffee, Tea, Red Wine
My morning coffee and my aunt Jessica’s pinot noir are in the same troublemaker club. They’re both acidic. More importantly, they’re loaded with dark-colored compounds called tannins.
On your skin, tannins from an oak leaf make your hands feel dry. On leather, they act like a sticky dye, binding tightly to the surface proteins.
The stain often looks like a dull brown ring. Blotting with water alone can sometimes set it.
These acidic stains need a gentle counterattack, which is why a slightly alkaline cleaner can neutralize and lift them without harsh scrubbing.
Chemistry Corner
These are tannin-based and acidic. The fix often involves a gentle, slightly alkaline agent to neutralize and lift the colored compounds.
Dye Stains: Ink, Berry Juice, Food Coloring
Remember the time my son Jason’s pen exploded in his pocket on the car seat? Or when my daughter Jessica painted her hands with blueberry yogurt? Those are pure dye jobs.
The colored particles in ink or berry juice are incredibly small. They don’t just sit on top. They physically migrate into the tiny pores and grain of the leather, like dust settling into carpet fibers.
Dye removal is a game of suspension, using the right cleaner to gently float those particles out of the leather’s pores before you blot them away. These same principles apply to removing dye stains from fabrics surfaces. With a suitable cleaner and a gentle blot, you can lift dye from textiles too.
Chemistry Corner
These are pigment-based. Removal is about suspending the dye particles in a cleaning solution so they can be lifted, not about scrubbing which drives them deeper.
Oil-Based Stains: Grease, Butter, Makeup
These are the sneaky ones. A dab of hand cream, a smudge of butter from a dinner roll, my foundation on a coat collar. Oil and water famously don’t mix.
On leather, oils don’t add color so much as they change how light reflects. They coat the fibers, creating a dark, slick spot that repels any water-based cleaner you try.
You’re left with a shadowy patch that feels different from the rest of the leather.
Oily stains need a surfactant, a molecule that breaks the oil into tiny droplets that can be surrounded and lifted away by water.
Chemistry Corner
These are non-polar. They require a surfactant (the active ingredient in mild dish soap) to emulsify the oil, breaking it into microscopic droplets that can be rinsed away.
Unexpected Acids: Vinegar, Lemon Juice, Soda
This is the scary category. We often think of acids like white vinegar as cleaners. On dyed leather, they can be permanent ruiners.
My mom Martha once spilled a bit of salad dressing with lemon juice on her favorite leather purse. It left a pale, bleached spot instantly. The acid didn’t stain it. It stripped the dye right off.
With these spills, blotting is your only real defense. Aggressive cleaning spreads the acid and makes the color loss worse.
You’re managing damage control, not stain removal.
Building Your Leather Cleaning Kit: Safe Tools & Cleaners
You don’t need a lab. My go-to kit lives under my sink. It’s built on items that are gentle, controlled, and effective.
A few reliable tools are far better than a cupboard full of harsh, specialized products you’ll use once.
- Microfiber Cloths: These are essential. They lift and trap grime without scratching. I use a stack of the cheap, colorful ones.
- Distilled Water: For mixing cleaners and final rinsing. It has no minerals that could leave a residue.
- Mild, Clear Dish Soap (like Dawn): My surfactant for oil-based stains. A drop goes a long way.
- White Vinegar: For gentle pH balancing on certain stains, but I use it with extreme caution on dyed pieces.
- Cotton Swabs & Soft-Bristled Toothbrushes: For precision work on stitching and seams.
For commercial cleaners, I look for ones labeled “pH balanced for leather.” Leather has a natural, slightly acidic pH. A good cleaner is formulated to match that, so it cleans without stripping the hide’s natural oils.
Leather conditioners are non-negotiable aftercare, especially after a cleaning. They replace the natural oils you’ve lifted, keeping the leather supple and preventing cracks.
My mother-in-law Brianna taught me this rule, and it’s saved countless items: Test any cleaner, homemade or store-bought, on a hidden spot first (like a back seam or underside). Wait for it to dry completely. You’re checking for color loss or texture change. Never skip this step.
The Step-by-Step Cleaning Process: A Framework for Any Stain
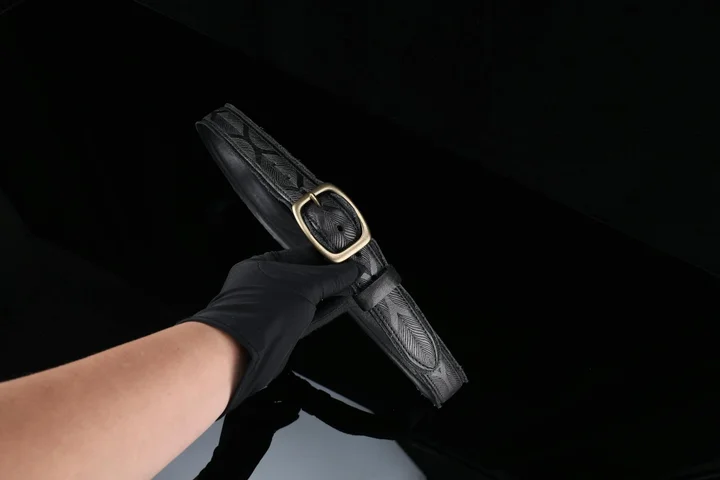
I rely on this seven-step method for every leather stain in my house. It works on Jason’s soccer bag, Roger’s work gloves, and even the living room sofa, especially after applying some leather stain-proofing techniques beforehand.
The key is to act fast and stay gentle. Leather is skin, after all.
- Blot. Grab a clean, white cloth and press it onto the spill. Soak up every drop you can. Rubbing grinds the stain deeper.
- Test cleaner. Pick your cleaner, then dab a tiny bit on a hidden seam. Wait a minute. Look for color bleed or a dull patch.
- Apply gently in circles. Use a soft microfiber cloth. Start at the stain’s edge and work inward with light, circular motions.
- Blot residue. As the stain lifts, use a dry part of your cloth to blot up the dirty cleaner. You’ll see the transfer.
- Rinse with damp cloth. Dampen a new cloth with water and wring it until it’s barely wet. Wipe the area to remove any leftover cleaning film.
- Air dry flat. Let it dry naturally, away from heaters and sun. I once rushed a bag with a hairdryer and made the leather stiff.
- Condition. After it’s fully dry, massage in a leather conditioner. This replaces the oils you cleaned away and keeps it supple.
You need to tweak this for oil-based and dye-based spills. The chemistry matters.
For oil like grease or butter, start with a dry cornstarch or talc powder. Sprinkle it on, let it sit for an hour to absorb the oil, then brush it off before treating for grease stains on fabric. My Aunt Jessica’s butter stain on a leather stool came right out this way.
For dye-based stains like red wine or ink, your first cleaner should be pH-neutral. Acidic wine and alkaline ink can both set dyes. A mild, pH-balanced leather cleaner is your best bet to avoid a color shift. If red wine, coffee, or ketchup has stained leather, starting with a pH-neutral cleaner helps keep colors true.
When Home Treatment Can Go Wrong: Limitations and Professional Help

I love a good DIY fix, but leather has its limits. My mom Martha always says to know when to step back.
Home treatment is too risky in a few clear scenarios. If you see any of these, pause.
- Old, dried stains: A stain that’s set for weeks has bonded with the tannins and dyes. You can often make it worse by re-wetting it.
- Aniline or delicate leather: This leather has a very thin, porous finish. A spill from my Aunt Brianna’s tea cup on an aniline chair soaked right in, and my cleaning just spread it.
- Large stains: A big area is hard to clean evenly. You might end up with a clean spot that looks worse than the original stain.
- Color loss: If the stain itself has removed the leather’s color, you’re dealing with dye replacement, not just cleaning.
Common mistakes can cause permanent harm. I’ve seen it happen.
Harsh solvents like acetone or rubbing alcohol are a disaster. They strip the protective topcoat and can dissolve the dyes underneath, leaving a bleached, blotchy patch.
Abrasive pads, even the “soft” scrubbing side of a sponge, will scratch the surface. Those scratches catch dirt and never go away.
Excessive water is a silent killer. It can seep into the backing, causing the leather to stiffen, warp, or even grow mildew. Peeta’s water bowl splash taught me that lesson.
Call a professional leather restorer when the leather is valuable, the stain is complex, or you’ve already tried once and failed. They have tools and dyes we don’t. For my son’s classmate Edward’s massive juice spill on a vintage jacket, the pro was the only answer. If you want to remove stains from leather yourself, be cautious as it can cause more damage.
How to Stop Stains Before They Start: Preventive Chemistry
My husband Roger loves his worn-in leather armchair. It’s his throne. Peeta the dog loves it too, especially after a muddy walk. I learned early on that reactive cleaning wasn’t enough. I had to get proactive with the leather’s chemistry.
What preventive treatments alter leather’s chemistry to make it more stain-resistant?
Think of a leather protector like an invisible raincoat. It doesn’t make the leather bulletproof or “stain-proof”-that’s a myth. Instead, it creates a sacrificial barrier.
Most quality protectors are silicone or fluoropolymer-based. They don’t soak into the leather’s fibers. They sit on top, causing liquid spills to bead up and sit on the surface, giving you precious minutes to blot them away before the pH or dyes can penetrate.
Applying a protector changes the surface energy of the leather, making it hydrophobic so common spills like wine or soda can’t immediately grab on.
I treat our car interiors and Roger’s chair with a spray-on protector every six months. It’s not magic, but it turns a potential disaster into a simple cleanup job.
Conditioning is Not Optional Maintenance
Dry, thirsty leather is a sponge waiting to happen. As leather loses its natural oils, the fibers tighten and then crack, creating perfect little channels for spills to dive deep into.
Conditioning is the opposite of protecting. Here, you want the product to absorb. A good conditioner replaces lost oils and fats, keeping the leather supple.
Supple leather has plump, closed fibers. This makes it less absorbent on its own. A conditioned surface gives your protective spray a better, smoother base to adhere to as well.
Regular conditioning keeps the leather’s structure intact, so spills meet a resilient, non-porous surface first, not a dry, cracked one.
My mom Martha taught me to condition good leather like I moisturize my skin. Do it consistently, and it stays healthier and more resistant to damage. For frequently used items, I condition every three to four months.
Simple Habits Are Your First Defense
Chemistry happens fast. The moment red wine hits your sofa, the clock starts. When stains happen, knowing how to remove red wine stains from fabrics can save the day. Your daily habits are the cheapest, most effective stain prevention plan.
- Act Immediately: The single biggest factor isn’t a fancy product; it’s time. Blotting a spill within seconds prevents the chemical reaction-whether it’s an acid etching the dye or a tannin binding-from ever starting.
- Mind the Sun: Direct sunlight is brutal. It bakes out moisture and oils (drying the leather) and can cause dyes to fade or become unstable. An unstable dye layer stains more easily. Keep leather furniture out of direct sunbeams.
- Clean Before You Protect: Never apply a conditioner or protector to dirty leather. You’ll just trap the dirt and grime against the surface, sealing in potential stain-causing particles.
- Blot, Don’t Rub: This is the golden rule my aunt Jessica taught me after a wine party incident. Rubbing a spill pushes it deeper into the fibers and can distort the leather’s grain. Always use a clean, white cloth and press straight down to lift the liquid away.
Prevention is about creating layers of defense: good habits maintain the leather, conditioning fortifies it, and a protector gives you a final, crucial buffer against accidents.
It turned my mindset from “Oh no, another stain to tackle” to “I’m ready for whatever my family (and dog) can dish out.” It’s practical chemistry you can use every day.
FAQ About Removing Stains from Leather
1. I cleaned a water spill but a dark ring appeared. What went wrong and can I fix it?
This is a tannin stain from the leather itself, not the spill. Blot the area immediately with a dry cloth and let it air dry completely away from heat; applying more liquid will worsen it. For existing rings, a professional leather restorer is often needed, as home treatments can set the discoloration permanently.
2. Can I use dish soap on any leather stain?
Only use a tiny amount of clear, mild dish soap for fresh oil-based stains like grease or makeup, as it acts as a surfactant. For all other stains like wine, ink, or coffee, avoid it, as soap can leave a residue that attracts more dirt and may dry out the leather.
3. Why is a pH-balanced cleaner recommended, and when is it crucial?
Leather has a natural pH, and a balanced cleaner cleans without causing the chemical damage that acidic or alkaline products can. It’s absolutely crucial for unknown stains or on delicate, dyed leather to prevent bleaching, color loss, or hardening of the hide.
4. What’s a safe, immediate home remedy for a fresh grease stain?
Immediately cover the spot with cornstarch or talcum powder to absorb the oil. Let it sit for an hour, then gently brush it off before lightly cleaning the area with a damp microfiber cloth. This pulls the oil out without pushing it deeper.
5. How do I stop dye from my new jeans from transferring onto my light leather car seats?
This is dye migration, and prevention is key. Apply a quality leather protector to create a barrier. For existing transfer, gently dab with a microfiber cloth dampened with a pH-neutral leather cleaner-never rub, as you risk transferring the dye further into the leather’s pores.
Your Practical Leather Stain Playbook
The most important step is to let a spill’s pH guide your response-using a mild, alkaline solution for acidic wine or coffee, and a gentle, acidic one for alkaline milk or soda, keeps your leather’s chemistry in balance. Always test your chosen cleaner on a hidden spot first, like inside a seam, because tannins and dyes can react unpredictably. That same approach applies to removing stains from leather bags and purses. I’m constantly putting these principles to the test on Roger’s well-worn hunting boots and during visits from Aunt Jessica, and I share all those real-life results over on the Stain Wiki blog.
Written by Suzanne Rosi Beringer. Suzanne is an accomplished chemist, laundry expert and proud mom. She knows the science and chemistry of stains and has personally deal with all kinds of stains such as oil, grease, food and others. She brings her chemistry knowledge and degree expertise to explain and decode the science of stain removal, along with her decades long experience of stain removal. She has tried almost everything and is an expert on professional and DIY stain removal from clothes, fabric, carpet, leather and any other items dearest to you.