Is Toothpaste Really a Secret Stain Remover?
You’ve probably heard the hack: a dab of toothpaste can magically erase a stain. I’m here to tell you to put that tube down before you cause more damage. While it might seem to work in a pinch, using toothpaste as a cleaner is a risky shortcut that often leads to permanent damage.
In this article, I’ll clear up the confusion for good. We’ll cover:
- Why the toothpaste “trick” seems to work on some stains.
- The real risks of abrasives and additives on your surfaces and fabrics.
- My tested, safer alternatives for the stains people commonly use toothpaste on.
- When you should (and definitely should not) ever consider reaching for the paste.
My advice comes from years of hands-on testing, including failed experiments on my own countertops and fabrics that taught me what truly works.
Panic-Level: How Urgent Is This “Fix”?
I give this a panic rating of 3 out of 10.
The stain isn’t the emergency. Your reaction is.
The real urgency is to stop yourself from causing permanent damage. You have what I call a “Golden Window.” This is time to blot up excess, identify the stain, and grab the right tool. Rushing to smear on toothpaste wastes that window and often creates a bigger problem.
Toothpaste can lock a stain in by grinding its ingredients deep into the fibers or finish. Once those mild abrasives or chemicals set, they’re nearly impossible to fully extract.
I learned this with Jason and a ballpoint pen. He was drawing on the kitchen table. A quick scribble, right on the laminate. My mom, Martha, visiting from Texas, immediately said, “Toothpaste! It’ll scrub that right off.”
It did seem to fade the ink a bit. But it left a huge, cloudy, scratched patch where the paste had been. The ink was now mixed with micro-scratches, making it a permanent, dull mark. We had traded a small ink stain for a large, visibly damaged surface. The stain was secondary to the harm we did trying to fix it.
Toothpaste Ingredients: The Stain-Fighting Claims vs. Reality
Let’s look inside the tube. Why do people think this works? The claims hinge on three main ingredients.
The Usual Suspects
- Mild Abrasives: Hydrated silica or calcium carbonate. These are fine powders meant to scrub plaque off teeth.
- Detergents: Sodium lauryl sulfate (SLS). This creates the foam to suspend debris in your mouth.
- Whiteners: Some pastes contain a low concentration of hydrogen peroxide or similar agents to bleach tooth enamel.
What Does the Science Say?
At a molecular level, these are tools for a very specific job: cleaning hard, non-porous enamel. They are mismatched for the complex chemistry of stains on fabric, carpet, or finished surfaces.
A dedicated carpet cleaner uses surfactants designed to surround and lift oily soil, while an enzyme-based stain remoter breaks apart protein chains at a specific pH. Toothpaste detergents are general-purpose and weak by comparison. They foam but don’t necessarily lift.
Gel vs. Paste: A Lose-Lose Choice
You might think, “I’ll use a clear gel! No abrasives!” That’s not safer.
Gels often replace abrasives with alcohols or other solvents to create that texture. These can be disastrous. On a fabric dye, they can cause bleeding or fading. On a polished table or car interior, they can strip the finish, leaving a sticky or bleached spot.
Whether it’s the physical scrub of a paste or the chemical action of a gel, you’re using a product engineered for teeth on a material it wasn’t designed for.
Chemistry Corner: Why It’s a Mismatch
Stains have types. Toothpaste ingredients don’t target them correctly.
- Oily/Greasy Stain (pizza, makeup): Needs a solvent or a strong surfactant. Toothpaste SLS is too mild and can smear the oil.
- Protein Stain (blood, dairy): Needs enzymatic action to break it down. Toothpaste does nothing here.
- Tannin Stain (coffee, wine): Needs immediate flushing and a specific treatment to prevent setting. The abrasives in toothpaste can grind the tannin deeper.
Using toothpaste is like trying to hammer in a screw. You might make some progress, but you’ll likely damage the material. My aunt Jessica learned this with a red wine splash on her linen tablecloth. The gel toothpaste she tried set the dye, creating a pink-tinted, stiff patch we couldn’t salvage.
Common Stains People Try to Clean with Toothpaste (And What Really Happens)
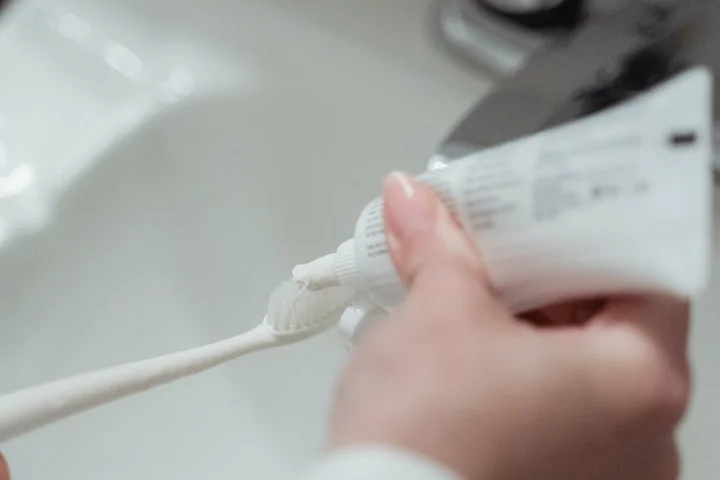
I see this advice everywhere online. In a moment of desperation, it makes sense. You have a stain and you have a tube of something that cleans.
I tested this myself on a ballpoint pen stain on Roger’s work shirt cuff. It was a classic “just-got-home-from-the-office” mark. I applied a white, non-gel toothpaste, gently rubbed, and rinsed. The result was a larger, fainter, but very smudgy blue-grey shadow. The stain was worse, not better.
Here’s what happens with the most common stains people try to tackle.
Ink and Pen Marks
Toothpaste doesn’t dissolve ink. It acts like a gritty paste that pushes the liquid dye around.
You’ll spread the stain into a larger, blurry mess and leave a crusty, whitish residue in the fabric fibers. That residue can attract more dirt later. To prevent this, learn the stain-removal mistakes to avoid.
Grease and Oil
Yes, toothpaste has mild detergents. But they are formulated for the thin film in your mouth, not a deep grease stain.
The abrasives in the paste, like hydrated silica, can actually grind the grease particles deeper into the material.
You end up with a greasy stain that now has a gritty texture, making it even harder for a proper cleaner to penetrate later.
Food and Drink Stains
This is where the myth gets traction. The whitening agents or mild peroxides in some toothpastes can lighten a coffee or wine stain slightly, but they aren’t effective on red wine or coffee stains on skin.
But they don’t lift the stain out. They just bleach it a little in a very uneven way.
You’re often left with a faint, discolored ring where the paste dried, which is sometimes more noticeable than the original spill. My aunt Jessica learned this the hard way with a splash of red wine on her linen tablecloth.
The Hidden Damage: Why Toothpaste is a Risky Abrasive
Why is toothpaste considered an abrasive cleaner? Look at the ingredients list. Many include baking soda, hydrated silica, or alumina.
These are fine, polishing abrasives meant for tooth enamel. On softer surfaces, they act like very fine sandpaper.
The risks go far beyond just not cleaning the stain.
- Scratching Polished Surfaces: On a glossy countertop, phone screen, or stainless steel appliance, those tiny abrasives can create a network of fine scratches. This leaves a permanent cloudy haze.
- Dulling Fabrics: On cotton or polyester, the abrasives can fray and break the individual fibers. This gives the fabric a worn-out, pilled look right at the stain site.
- Leaving a Stubborn Film: The binding agents and fluoride in toothpaste are meant to stay on teeth. On other surfaces, they dry into a clear, sticky film that’s difficult to rinse away completely, attracting more grime.
Material Red Flags
Some materials will be ruined on contact. I treat this list as an absolute no-go zone.
- Delicate Fibers: Silk, wool, and acetate. The abrasives will shred them.
- Polished or Painted Surfaces: Polished wood, lacquered furniture, and car paint. The scratches are instant and permanent.
- Sensitive Coatings: Glossy plastics (like on a TV remote) and non-stick cookware coatings. You will permanently mar the finish.
Here is my critical warning: never, ever use toothpaste on leather, suede, or antique items of any kind.
The paste will seep into the porous material, the abrasives will rough up the delicate surface, and the chemicals can cause permanent discoloration. The cost to repair a leather jacket or an antique vase far outweighs any perceived convenience. Trust me, my mother Martha would have my head if I tried it on her heirlooms.
Surface-by-Surface Safer Alternatives (Safe DIY & Proven Methods)
Forget the toothpaste. You have better, safer options already at home. This chart shows what works where.
| Surface | Safe, Proven Method | For These Common Stains |
|---|---|---|
| Clothing & Fabric | Enzyme detergent, Oxygen bleach | Food, Grass, Blood, Sweat |
| Carpet & Upholstery | Dish soap solution, Vinegar rinse | Wine, Mud, Pet accidents |
| Hard Surfaces | Baking soda paste, Dedicated cleaner | Grease, Rust, Dirt |
The key is to match the cleaner to the stain’s chemistry, not to scrub with abrasive paste. Here are the alternatives I trust.
For Clothing and Fabric
My laundry room is a battlefield. Jason’s soccer jerseys get grass and mud. Jessica paints with ketchup. I skip the gimmicks.
For protein-based stains like blood, sweat, or baby food, an enzyme-based laundry detergent is your first line of defense. Apply it directly to the stain, rub it in gently, and let it sit for 15 minutes before washing. The enzymes break down the proteins, making it effective for protein-based stains such as blood.
For colorful stains from berries, wine, or grass, an oxygen bleach soak is incredibly effective. I fill a basin with cool water, add a scoop of oxygen bleach powder, and let the item soak for a few hours or overnight. It lifts the stain without damaging the dyes in most colored fabrics. It’s especially useful for berry stains on fabric.
My Aunt Jessica in Arizona taught me a good wine-stain trick for cotton. Pour a little table salt directly on the fresh spill. It absorbs the liquid fast, giving you time to get it to the sink for a cold water rinse before the soak.
For Carpets and Upholstery
Peeta the dog and three kids mean my carpet sees a lot of action. The golden rule is to blot, never scrub.
Start with a simple solution of a few drops of clear dish soap in a cup of warm water. Apply it with a clean cloth, blotting from the outside of the stain inward. Then, blot with a cloth dampened with plain water to rinse. Keep blotting with dry towels to pull the moisture up. These steps can help with many fabrics, including suede. The next steps cover suede-specific stain removal tips.
For old stains or odors, a light vinegar and water rinse (1 part white vinegar to 2 parts water) can help neutralize smells after the initial clean. My mother-in-law Brianna swears by this for pet accidents. She always says, “The smell has to go, or they’ll come back to the spot.” Blot it on, then blot with plain water to rinse.
For Hard Surfaces and Driveways
Roger’s garage floor gets oil stains. The patio gets rust from old furniture. Hard surfaces need different tactics.
For fresh grease or oil on concrete, cover the stain with an absorbent material like cat litter or baking soda to pull the oil up. For a set-in stain, make a poultice. Mix baking soda or a dedicated concrete cleaner for oil stains with water to form a thick paste, spread it over the stain, and let it dry completely. As it dries, it draws the stain out.
For rust on patio stones or driveways, a commercial rust remover designed for concrete is the safest bet for consistent results. They contain acids that dissolve the rust without the harsh abrasives found in toothpaste that can etch the surface. This is a solid option when you need to remove rust stains from concrete surfaces.
If You Already Used Toothpaste: Immediate Damage Control
So you tried the toothpaste trick. It happens. Don’t panic. You can fix this. The goal is to remove the paste before it sets.
Follow these steps to undo the mess.
- Gently Scrape: Use a dull knife, a spoon, or a plastic card to lift off any globs of toothpaste. Do not rub.
- Flush with Cool Water: Rinse the area thoroughly with cool water. For fabric, run it under the tap from the back of the stain to push the residue out.
- Apply a Proper Cleaner: Now treat what’s left as a normal stain. Use dish soap for grease or an enzyme detergent for organic stains. Blot or gently agitate.
- Rinse Again: Rinse completely with cool water to remove any cleaning solution.
My pro-tip: A butter knife is perfect for lifting dried paste globs from carpet fibers without cutting them. I’ve done this more than once after a well-meaning babysitter tried to “help” with a juice spill on the rug.
Post-Treatment Recovery
How you dry the item is just as important as how you clean it.
Always air dry fabrics flat and out of direct sunlight or heat. Heat from a dryer can bake in any leftover residue, making the stain permanent. Check the spot once it’s fully dry. If you see a faint ring or feel a stiff area, there’s still residue. Repeat the rinsing step before you consider the job done.
On-the-Go Emergency Fix
You’re at a restaurant and Jessica spills grape juice on her white shirt. No toothpaste, no fancy cleaners. What do you do?
Ask the waiter for salt and club soda. Pour salt on the stain to absorb the liquid. Then, pour a little club soda over it and blot with a napkin. The carbonation can help lift the stain. If it’s an ink stain, a dab of clear hand sanitizer (the alcohol-based kind) can break it down in a pinch. Blot, don’t rub. It’s a temporary hold until you can do a proper wash, but it works.
Building Your Real Stain-Fighting Kit (And When to Call It)
Forget the toothpaste tube. After years of testing, my real stain-fighting arsenal fits in a small caddy under my sink. I built it to handle everything from Jason’s grass-stained soccer socks to Aunt Jessica’s merlot spills.
A focused kit with the right tools stops you from grabbing random products and hoping for the best.
Your Core Stain-Fighting Squad
These are the categories I swear by. Specific brands can vary, but the function is what matters.
- Enzyme Pre-Treaters (The Biological Cleaners): These are my first line of defense for organic stains. Think grass, blood, food, pet accidents. They use enzymes to actually digest the stain proteins. I keep a spray bottle handy for treating stains before they go in the hamper. It worked on the mystery goo Edward got on his shirt last week.
- Oxygen-Based Bleaches (The Color-Safe Whitener): This is my go-to for dinginess and color-safe brightening. Unlike chlorine bleach, it’s safe for most colors. I use it to revive Roger’s faded work shirts and soak Jessica’s stained art smocks. It works wonders on coffee mugs, too.
- Concentrated Dish Soap (The Grease Assassin): The blue dawn dish soap on my sink isn’t just for pans. Its degreasing power is unmatched for cooking oil, butter, or makeup stains on clothes. A single drop, rubbed in before washing, lifts grease better than any laundry detergent I’ve tried.
- Absorbent Powders (The Moisture Pullers): For fresh, wet stains, you need to pull the liquid out. I use plain cornstarch or baking soda. When Peeta tracked in mud, I let it dry, then brushed off the crust. For a fresh oil spill on the driveway, I cover it with cat litter to soak it up before scrubbing.
When NOT to Try This at Home
Knowing when to stop is as important as knowing how to start. My rule of thumb comes from a mistake I made on a vintage rug from my mother-in-law, Brianna.
Do not experiment with DIY methods on large, old, or set-in stains you’ve already tried to fix. You risk setting it permanently or damaging the fibers.
Do not use any product, even a “safe” one, on an unknown fabric. That “silk” blouse might be a delicate synthetic. If you don’t know, find a hidden seam and test first.
Never mix chemicals. And always, always call a professional for hazardous materials like mold, chemical spills, or biohazards. Your safety isn’t worth the experiment.
Knowing Your Limits is a Strength
There’s no shame in calling for backup. I have a fantastic local cleaner I trust.
I hire a pro for heirloom items, expensive upholstery, and any stain that has survived two careful, targeted treatments from my kit.
They have industrial equipment, specialized solvents, and expertise I don’t. Paying them to save my wedding dress or the living room sofa is an investment, not a failure. It beats the heartbreak of ruining something irreplaceable.
The Right Tool for the Right Job
This brings us back to the toothpaste myth. Toothpaste is designed for your teeth. My stain kit is designed for stains.
Using a product designed for the task is always safer, more effective, and more respectful of your belongings than using a convenient substitute.
It means Jason gets a clean jersey for his next game, and I don’t spend my afternoon scrubbing a new stain into the carpet. That’s the real win.
FAQ about Using Toothpaste on Stains
Is a clear gel toothpaste a safer choice for stains than a white paste?
No, both are problematic. Gels often contain solvents that can damage finishes or dyes, while pastes contain physical abrasives that scratch surfaces.
I already rubbed toothpaste into a fabric stain. What’s the first thing I should do?
Immediately stop and gently scrape off any excess paste with a spoon. Then, thoroughly rinse the area from the back with cool water to flush the paste out before it dries.
What’s one safe, all-purpose alternative I can use on most common stains right now?
For a vast majority of stains, a few drops of clear dish soap in warm water is your safest and most effective first step. It lifts grease and many other soils without the risk of abrasion or chemical damage.
What is the one type of material where toothpaste will cause irreversible damage?
Never use toothpaste on leather or suede. The paste and its chemicals will seep in and discolor the material, while the abrasives will permanently rough up the delicate surface.
Are there any stains where toothpaste might be somewhat effective without causing harm?
While the mild abrasives might *appear* to clean a fresh ink mark on a very hard, non-porous surface like a ceramic mug, it’s not recommended. You risk creating fine scratches, and dedicated cleaners are always more effective and safer.
A Better Way to Approach Stains
The most important takeaway is simple: save the toothpaste for your smile and keep it away from your fabrics and surfaces. For reliable, safe cleaning, you’re always better off using a method designed for the specific stain and material you’re treating.
For next time, your first step should always be to check the fabric care label. That small piece of information is your best guide and has saved many of my own family’s clothes from Jason’s grass stains to Roger’s work pants.
When a new stain appears, come back to Stain Wiki for a proven solution you can trust.
Written by Suzanne Rosi Beringer. Suzanne is an accomplished chemist, laundry expert and proud mom. She knows the science and chemistry of stains and has personally deal with all kinds of stains such as oil, grease, food and others. She brings her chemistry knowledge and degree expertise to explain and decode the science of stain removal, along with her decades long experience of stain removal. She has tried almost everything and is an expert on professional and DIY stain removal from clothes, fabric, carpet, leather and any other items dearest to you.