How Do You Remove Tough Stains from Porcelain and Ceramic Sinks?
Staring at a stubborn stain in your bathroom or kitchen sink can feel hopeless, but I promise it’s usually fixable. For most common stains, a simple paste of baking soda and hydrogen peroxide applied with a soft cloth will lift the discoloration safely and effectively.
In this guide, I’ll walk you through my proven process:
- How to correctly identify what kind of stain you’re dealing with
- My favorite non-toxic recipes for paste cleaners and soaks
- The right way to scrub without leaving micro-scratches
- Smart habits to prevent stains from coming back
I’ve spent years tackling every stain imaginable, from the hard water rings in my own home to the tea stains in my mom Martha’s vintage farmhouse sink.
First, Figure Out What You’re Dealing With: Stain Identification
You have to know your enemy before you attack it. Jumping in with a random cleaner is how I ended up with a slightly faded spot on my bathroom sink years ago.
Look at the stain like a detective. Start with color and location.
- Is it a white, chalky ring around the drain? That’s classic hard water or limescale.
- A stubborn orange or reddish-brown spot near a metal fixture? That’s rust.
- Pink or black splotches in damp corners? That’s likely mold or mildew.
- A blue or green tint? Think toothpaste, mouthwash, or hair dye.
- A general yellowing or brown film? That’s often a mix of soap scum and minerals.
Texture is your next clue. Run a fingernail over it gently.
Hard water deposits feel rough and gritty. Organic gunk like soap scum feels slimy. Dye stains have no texture; they’ve just soaked into the microscopic pores of the glaze.
A Quick Stain Detective Guide
- Rust (Orange/Brown): Caused by iron in water or from a metal object sitting in the sink.
- Hard Water/Limescale (White/Gray, Chalky): From mineral deposits in your water, especially around drains and faucets.
- Organic Stains (Yellow, Brown, Pink): Soap, body oils, toothpaste, food, mold, and mildew.
- Dye Stains (Blue, Green, Red): Hair dye, nail polish, brightly colored toothpaste, or food coloring.
- General Soap Scum: A sticky, dull film that traps dirt and other stains.
Before you try anything on the main stain, always do a test patch in an inconspicuous spot, like under the rim or near the back of the basin. This saved my kitchen sink when I wanted to try a new rust remover; the product was fine on the porcelain but dulled the chrome drain ring.
Your Safe Cleaning Toolkit: Essentials, Warnings, and Stain Science
You don’t need a cabinet full of specialty products. My most-used tools are simple and cheap.
- Soft microfiber cloths or old, clean cotton rags.
- A dedicated soft-bristled toothbrush or nail brush.
- Non-abrasive sponges (the white, melamine “magic eraser” type is great for some stains, but use it carefully).
- A small spray bottle for applying solutions.
Critical Warnings: What Not to Do
Porcelain and ceramic have a glass-like glaze. Scratch that, and you create a rough surface that stains faster and holds dirt.
Never use steel wool, harsh scouring powders, or green abrasive scrub pads on a glazed surface. I learned this the hard way on an old apartment sink, leaving tiny scratches that always looked dirty.
Be very careful with bleach around colored grout, sealants, and metal fittings. It can cause discoloration and corrosion. My Aunt Jessica once bleached her Arizona guest bathroom sink and permanently faded the beautiful dark grout around it.
Safe DIY Alternatives from the Pantry
If you’re out of commercial cleaners, you likely have these.
Baking Soda: This is my first line of defense. It’s a mild, non-scratching abrasive that helps lift gunk. I make a paste with water and scrub with a soft cloth.
White Vinegar or Lemon Juice: These mild acids are perfect for dissolving mineral stains (limescale, hard water rings). Just don’t let them sit on natural stone countertops nearby.
Hydrogen Peroxide (3%): A gentle oxidizer that’s fantastic for organic stains and some dyes. It’s my go-to for that pink mildew film. It just bubbles it away.
Chemistry Corner: Why Cleaners Work
Stains fall into categories, and each category is defeated by a different type of chemistry.
Mineral Stains (Limescale, Hard Water): These are alkaline deposits. A mild acid, like vinegar, dissolves them through a simple chemical reaction. You’ll see it fizz when applied to limescale or hard water stains.
Organic Stains (Grease, Food, Mold, Soap Scum): These are broken down by alkaline cleaners or surfactants. Dish soap is a classic surfactant; it surrounds grease molecules so they can rinse away. Baking soda’s mild alkalinity helps here too.
Metallic Stains (Rust): Rust is iron oxide. Specialty rust removers use acids or other chemicals to convert the rust into a soluble compound that can be wiped off. For a mild case, a paste of baking soda and hydrogen peroxide can sometimes help lift it. For rust stain removal on metal surfaces, consider the finish and test a small area first to avoid damage.
Surface Compatibility: Taking These Methods Elsewhere
The same gentle principles apply to other hard surfaces in your home.
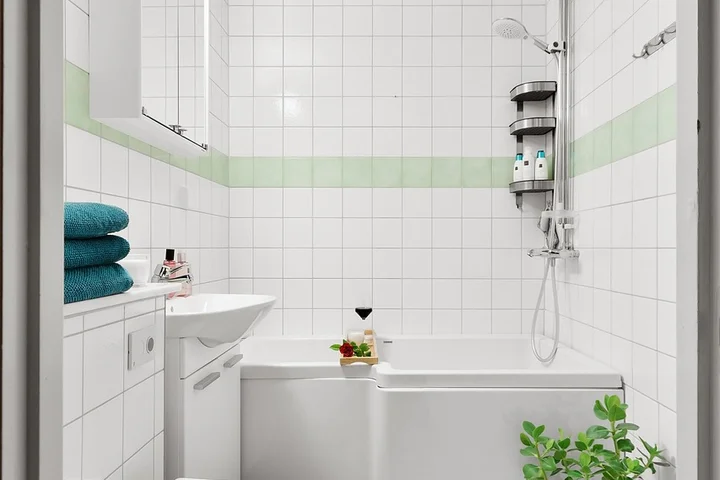
- Bathtubs & Shower Tiles: All the same methods work. Be extra gentle on acrylic or fiberglass tubs; stick to soft cloths and non-abrasive pastes.
- Ceramic or Porcelain Tile Countertops: Treat them exactly like your sink. The grout between tiles is more porous, so it may need a dedicated grout brush and a bit more soaking time.
- Vitreous China (Toilets): Porcelain methods are perfect here. The bowl often has both mineral and organic stains, so a two-step approach (acid for minerals, then scrub for organics) works well.
- Stainless Steel Sinks: You can use baking soda paste, but avoid acids like vinegar for general cleaning as they can dull the finish. Always scrub with the grain of the steel.
The Golden Rule of Scrubbing: How to Clean Without Damaging the Surface
I learned this rule after Roger scrubbed our kitchen sink with an old scouring pad. It left a web of fine scratches that still catch the light. Scrubbing is about lifting the stain, not attacking the surface underneath.
Always use a gentle, circular motion with light pressure. Think of it like polishing a precious stone, not sanding a piece of wood. This motion helps work the cleaner into the stain without concentrating force in one spot.
Push down just enough to feel the bristles flex. If your knuckles are turning white, you’re pressing too hard. My mom Martha taught me to hum a tune while I scrub to keep my rhythm slow and even.
Choosing Your Tool: Soft Brush vs. Steel Wool
My aunt Jessica loved steel wool for her Arizona patio furniture, but it’s a nightmare for porcelain. Steel wool is made of, well, steel. It’s harder than the glazed surface of your sink.
Those tiny metal fibers act like miniature knives. They will score the glaze, creating tiny grooves. Dirt and future stains will hide in those scratches, making your sink look perpetually dirty.
A soft-bristled brush, like a dedicated nail brush or a dishwashing brush, is perfect. The bristles are firm enough to agitate the cleaner but flexible enough to protect the finish. For a porcelain or ceramic sink, a soft brush cleans effectively without leaving a permanent record of your effort.
Your Scrubbing Technique, Step-by-Step
If you’re asking, “What is the proper technique for scrubbing?” here is my exact method. I use it on our bathroom sink after Jason’s muddy soccer gear leaves a ring.
- Apply your chosen cleaner and let it sit for a few minutes to break down the stain.
- Wet your soft-bristled brush with warm water.
- Start at the edge of the stain and scrub in small, overlapping circles. Work your way inward.
- Keep the brush flat and use only the weight of your hand. Let the cleaner do the chemical work.
- Check your progress frequently by rinsing a small area with water.
This patient approach gets rid of the stain without creating a bigger problem. It’s the same principle I use on a car interior stain with Peeta’s help, gentle agitation over brute force. That same logic applies to car interiors. The car stain removal myths debunked will separate fact from fiction.
The Final, Critical Step: Rinse Everything Away
I’ve seen sinks with a dull, hazy film because someone skipped this part. Cleaner residue left behind can dry into a new stain or attract more grime. Rinsing thoroughly is what locks in your clean and protects the surface.
After scrubbing, run warm water over the entire basin for a full 30 seconds. Use your hand to wipe away any lingering suds or gritty feeling.
For a spotless finish, wipe the sink dry with a clean microfiber cloth. This prevents water spots and lets you inspect your work. You should see a uniform, shiny surface with no tacky residue.
Conquering Hard Water Stains and Stubborn Limescale
Those chalky white rings and crusty spots around your faucet? That’s hard water at work.
It’s mineral buildup, mostly calcium and magnesium, left behind when water evaporates. Over time, it bonds to your sink’s surface, creating a rough, dull film. My mom Martha in North Texas deals with this constantly. Her faucets always have that gritty feel.
These deposits are alkaline, so you need a gentle acid to dissolve them without scratching the porcelain.
The Simple Vinegar Soak Method
Plain white vinegar is my first line of defense. It’s cheap, non-toxic, and works beautifully for moderate buildup.
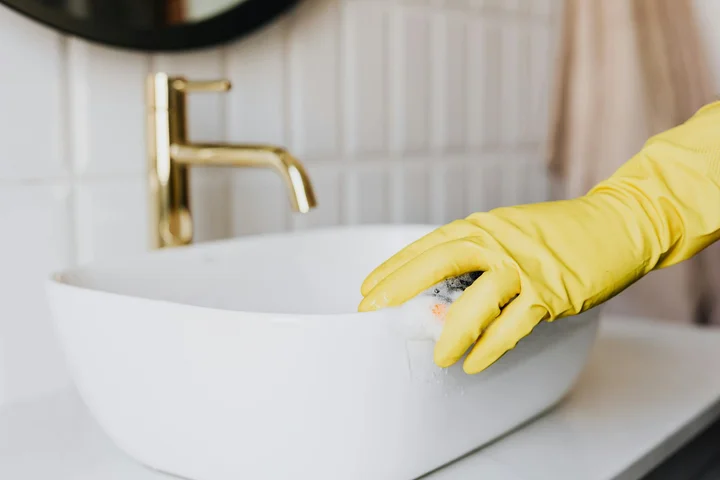
- Pull on some rubber gloves. Vinegar is mild, but you don’t want it on your skin for a long time.
- Heat a cup of vinegar in the microwave for about 45 seconds. Warm vinegar works faster.
- Saturate several paper towels or a few rags with the warm vinegar.
- Press the wet towels directly onto the stained areas, especially around the drain flange and faucet base. You want full contact.
- Let the vinegar sit for at least 30 minutes. For really stubborn rings, I leave it overnight.
- Remove the towels and scrub the area with a non-abrasive sponge or an old toothbrush. The scale should slough off easily.
- Rinse thoroughly with warm water and dry with a microfiber cloth to prevent new spots.
This exact method works for bathtubs, too. If you’re searching for “how do you remove hard water stains from a bathtub,” the answer is the same vinegar treatment. The principles of dissolving alkaline deposits with a mild acid apply to all porcelain and ceramic surfaces, including showers and sinks.
When You Need More Power: Citric Acid Paste
For thicker, more stubborn limescale that vinegar can’t budge, I reach for citric acid powder. You can find it in the canning section of most stores.
It’s a stronger acid than vinegar but still safe for porcelain. My aunt Jessica in Arizona swears by this for her wine glass stains, and it works miracles on faucets.
- Mix citric acid powder with just enough water to form a thick, spreadable paste.
- Wearing gloves, apply the paste directly to the worst crusty spots. I use a butter knife or my finger for precision.
- Let it sit for 15-20 minutes. You might see it fizz slightly as it attacks the minerals.
- Scrub with a brush and rinse clean. The result is a brilliantly shiny surface.
When Home Remedies Aren’t Enough
Sometimes, the buildup is years old and incredibly dense. If vinegar or citric acid doesn’t make a dent after two tries, it’s time for a commercial descaler.
Look for a liquid descaler formulated for bathrooms, as they are designed to be safe for porcelain finishes and plumbing.
I keep a bottle of CLR or a similar brand for these extreme cases. Follow the product instructions to the letter, always work in a ventilated area, and never, ever mix it with other cleaners, especially bleach.
This step solves the “how to clean a bathtub with hard water stains” problem when the stains look more like concrete than water spots. A professional descaler cuts through what natural acids cannot.
Lifting Organic Stains: Coffee, Tea, and Food Spills
I find coffee rings the most stubborn. Tea leaves a similar mark. These stains come from tannins, natural compounds in plants that leave a dull brown or yellow film.
Sauces like tomato or curry deposit dyes. The key is to break down that organic matter without scratching your sink.
Your Two Best Weapons: Baking Soda or Hydrogen Peroxide
You don’t need harsh chemicals. For most organic stains, one of these two gentle methods works perfectly.
Method 1: The Baking Soda Scrub
This is my first choice for fresh stains or light discoloration. Baking soda is a mild abrasive that polishes as it cleans. However, it’s not one of those abrasive cleaners that damage surfaces.
- Make a thick paste. Mix three parts baking soda with one part warm water in a small bowl.
- Apply the paste directly onto the stained areas. Use your fingers or a soft cloth to spread it. You want a layer about the thickness of pancake batter.
- Let it sit for 15-20 minutes. This gives it time to work on the stain.
- Scrub gently with a non-abrasive sponge or a soft-bristled brush. Use small circles. You’ll feel the paste turning gritty.
- Rinse thoroughly with warm water. Buff dry with a clean microfiber cloth to check your work.
The baking soda paste method is perfect for tackling that morning coffee ring before it sets in for good.
Method 2: The Hydrogen Peroxide Soak
For set-in, darker stains, I reach for hydrogen peroxide. It’s a gentle oxidizing agent that lifts stains by breaking them down.
Always use the standard 3% solution from the first aid aisle.
- Wet the stained area with a little water.
- Sprinkle a light dusting of baking soda over the stain. This creates a reactive paste when the peroxide hits it.
- Slowly pour the 3% hydrogen peroxide directly onto the baking soda. You’ll see it fizz. That’s the stain-fighting action.
- Let this fizzy mixture sit for up to an hour for tough stains. For a light tea stain, 15 minutes might be enough.
- Scrub lightly with a soft brush or sponge, then rinse completely.
Hydrogen peroxide is a powerful ally for older, neglected stains that need a bit more chemical help. It’s crucial to understand the safety aspects compared to other stain removers.
Avoid using it with vinegar or bleach. It can create irritating fumes.
FAQ: How can you remove organic stains, like coffee or tea, from a white sink?
White porcelain shows every shadow of a stain. The goal is to lift the stain, not just cover it.
For a white sink, I start with the baking soda paste scrub. If a faint shadow remains, I follow up with the hydrogen peroxide soak.
The bright white surface of your sink is a clue; it tells you the stain is sitting on top, not in the material, so it can be lifted.
Always rinse and dry thoroughly. This prevents any mineral residue from your water from dulling that bright white finish.
A Lesson from Aunt Jessica’s Visit
My Aunt Jessica loves a deep red wine. During a visit, she rinsed her glass in my white kitchen sink. A vivid purple splash stained the basin.
I acted fast. I blotted the wet area, then made a thick paste of baking soda and a tiny drop of dish soap. I coated the purple mark and let it sit while we had dessert.
Twenty minutes later, I scrubbed it gently. The purple was gone. The wine’s tannins and dyes lifted away without a trace.
The trick with organic stains is speed and the right mild abrasive or oxidizer; you rarely need to resort to harsh, store-bought cleaners.
Her trick for red wine on fabric (salt and cold water) doesn’t work on porcelain. But her visit reminded me that simple pantry items are often the best solution.
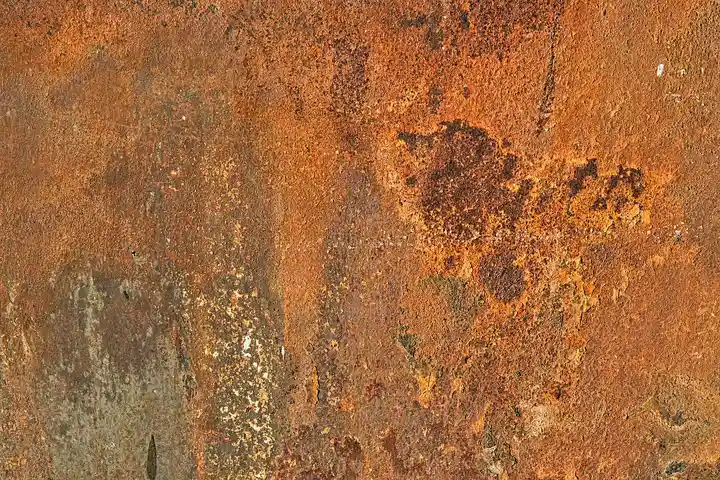
Eradicating Rust, Dye, and Ink Marks
These are the stubborn guests who overstay their welcome. Rust comes from metal objects, dye from hair color or crafts, and ink from pens left in pockets. They each need a different eviction notice.
How do you remove rust stains from a porcelain or ceramic sink?
Rust stains look like ugly orange-brown drips or spots. They happen when a wet metal can, tool, or shaving kit sits in the basin. My husband Roger’s hunting gear leaves these marks in our mudroom sink every season.
A mild acid is the key here. It dissolves the iron oxide without harming the ceramic glaze.
For a small stain, I grab a lemon. Cut it in half and rub the cut side directly onto the stain. Let the lemon juice sit for 15-20 minutes.
The citric acid works slowly to break the rust bond, so patience is your best tool here.
After it sits, scrub gently with the lemon rind or a soft brush. Rinse thoroughly. For tougher stains, you can make a paste with lemon juice and baking soda or salt for extra abrasion.
If the lemon trick doesn’t cut it, a commercial rust remover is your next step. I keep a can of a powdered oxalic acid cleaner, like Bar Keepers Friend, for this. It’s stronger.
- Wet the stained area.
- Sprinkle the powder to form a thin paste.
- Let it sit for just a minute-don’t let it dry out.
- Gently scrub with a non-abrasive pad and rinse completely.
Always test a hidden spot first, especially on colored ceramic. And wear gloves. These acids are safe for surfaces but can dry out your skin.
Tackling Dye and Ink Stains
My daughter Jessica loves “art projects,” which sometimes involve hair chalk. My aunt Jessica (the one in Arizona) is a red wine enthusiast. Dye and ink spills are a fact of life.
Your first move is always to blot and rinse with cool water immediately to dilute the pigment. Do not rub, as this can spread it.
For Dye Stains (Hair Color, Food Coloring, etc.)
On white porcelain, a bleach-based gel is very effective. The thick gel clings to vertical surfaces. I use a product like Clorox Bleach Gel Pen.
- Squeeze a generous amount directly onto the stain.
- Let it sit for 5-10 minutes.
- Wipe and rinse well. The stain should fade or disappear.
For colored sinks or if you avoid bleach, isopropyl alcohol (rubbing alcohol) is a great alternative. Soak a cloth or cotton ball and lay it over the stain. Let it sit for 10 minutes, then wipe. The alcohol helps break down the dye molecules. That same approach can help remove dye stains from fabrics and other surfaces. When applying to textiles, test a small hidden area first and follow fabric care labels.
For Ink Stains (Pen, Marker)
Rubbing alcohol is the champion here, too. It dissolves the ink quickly.
- Dampen a clean white cloth with 70% or higher isopropyl alcohol.
- Blot the stain firmly. You’ll see the ink transfer to the cloth.
- Use a fresh part of the cloth as it gets dirty.
- Once the ink is gone, wash the area with soapy water to remove any alcohol residue.
For permanent marker, you may need to repeat the process. Hairspray (because of its alcohol content) can work in a pinch, but I find pure rubbing alcohol more reliable and less sticky.
A Critical Safety Reminder
Never, ever mix cleaning chemicals. This is non-negotiable.
Mixing bleach with anything containing ammonia (like some glass cleaners) or an acid (like vinegar or rust removers) creates toxic, dangerous gases.
Always work in a well-ventilated area. Rinse the sink thoroughly between using different products. I keep my bleach products and my acid-based products in completely separate cabinets to avoid any accidental mix-ups.
Powerful Homemade Solutions: Simple Recipes That Work
You don’t always need a specialty cleaner. I’ve spent years testing pantry staples in my own home. My mom, Martha, swears by them. These are the best homemade cleaning solutions for porcelain and ceramic sinks because they’re safe, effective, and already in your cupboard.
The Universal Baking Soda Paste: For General Grime & Discoloration
This is my go-to for weekly maintenance. Think of baking soda as millions of tiny, gentle scrubbers. They lift away surface dirt without scratching.
It works on everything from toothpaste splatter to the dull film left behind by soap. For this, I use plain old baking soda and my blue Dawn dish soap. The soap helps break down oils.
- Sprinkle a generous amount of baking soda directly onto the damp sink surface.
- Add a few drops of dish soap on top.
- Use your fingers or a damp cloth to mix it into a spreadable paste right on the stain.
- Let it sit for 5-10 minutes. For my kids’ bathroom, I often let it sit while I clean the mirror.
- Scrub gently with a soft cloth or non-scratch sponge, then rinse thoroughly with warm water.
This paste is perfect for overall brightening and tackling mixed messes from daily use.
The Vinegar Spray: For Hard Water & Mineral Stains
Those white, chalky rings around the drain? That’s limescale. Vinegar, which is a mild acid, dissolves mineral deposits just like hot water dissolves sugar in your tea.
This is Roger’s sink savior. His shaving cream leaves a ring, and our hard Texas water doesn’t help.
- Mix equal parts white vinegar and water in a spray bottle.
- Spray the solution liberally over the stained areas, especially faucet bases and drain rims.
- Let it work for 15-20 minutes. You might see it fizzing on tough spots.
- Wipe with a cloth. For stubborn crust, use an old toothbrush to agitate the area after spraying.
- Rinse well. The vinegar smell disappears as it dries.
This method specifically targets the crusty, white mineral buildup that other cleaners just gloss over.
The Hydrogen Peroxide & Baking Soda Boost: For Organic Stains
Some stains need a bit of oxidation. Hydrogen peroxide is a gentle bleach that breaks down stain molecules. Combined with baking soda, it makes a powerful paste for organic stains like tea, coffee, or even berry juice drips from the kitchen.
My aunt Jessica once spilled red wine while washing a glass. This was our fix.
- In a small bowl, mix hydrogen peroxide (the standard 3% solution from the pharmacy) with enough baking soda to form a thick paste.
- Apply the paste directly to the stain. It will probably bubble a little.
- Allow it to sit for 30 minutes to an hour. Don’t let it dry out completely.
- Scrub lightly with a soft brush, then rinse away completely.
Use this targeted treatment for darker, set-in stains from beverages or food, but always test it in an inconspicuous area first.
The Baking Soda & Salt Scrub: For Rust or Tough, Ground-In Marks
For a bit more abrasive power without damage, I turn to salt. Its coarse crystals provide extra scrubbing action when mixed with baking soda’s cleaning power.
This works on those mysterious orange rust spots or a stubborn ring from a metal can that sat in the sink.
- Make a paste with baking soda, a tablespoon of table salt, and a little water.
- Rub the paste onto the stain using a soft cloth, applying firm pressure in a circular motion.
- The salt crystals will do the scrubbing work for you. You’ll feel the grit.
- Rinse thoroughly. You may need to repeat this for very old rust spots.
This scrub gives you more mechanical cleaning power for stains that seem etched onto the surface.
Stopping Stains Before They Start: Smart Daily Habits
I learned this lesson the hard way after my son Jason left his soccer shin guards in the sink. The grime baked onto the porcelain in the Texas heat. I spend less time scrubbing now because I focus on simple habits.
These small acts keep your sink’s finish looking like new.
The Two-Second Rinse Rule
Make this your new mantra. After brushing your teeth, shaving, or washing your face, give the basin a quick splash of water. My Aunt Jessica taught me this trick to combat her red wine mouthwash residue.
It flushes away the daily stuff before it can dry and stick.
A fast rinse removes soap scum, toothpaste splatter, and hair dye drips before they become a project.
The Power of a Dry Cloth
This is my mother-in-law Brianna’s golden rule. She visits from Southern Texas and always dries her guest bathroom sink after use. I thought it was quirky until I tried it.
Hard water spots form when mineral-filled water evaporates. A soft microfiber cloth prevents that chalky white film.
I keep a dedicated cloth under the sink. It takes ten seconds.
Mind What Touches the Surface
Porcelain and ceramic are tough, but their glossy finish is vulnerable. I treat my sink like my favorite shirt.
- Never pour hot cooking grease or bacon fat down the drain. It can coat the sides and trap other stains.
- Avoid leaving metal cans, bottles, or tools in the basin. They can leave tiny rust rings or scratches.
- Use a drain catcher for food scraps. Tomato sauce and coffee grounds stain as they sit.
My husband Roger knows to rinse his hands from garden work over a bucket, not the clean kitchen sink.
When Your Water is the Problem: Dealing with Hard Water
If you see a persistent white or rust-colored crust around the drain, your water is likely the culprit. We have hard water, and it’s a constant battle.
Spotting Hard Water Stains
These stains look chalky or crusty. They feel rough to the touch, not slick like soap scum. You’ll see them where water sits or drips-around the faucet base and the drain.
Hard water deposits are mineral buildup, so you need an acid to dissolve them, not just soap.
The Water Softener Solution
If stains reappear weekly, a water softener is a life-changer. It removes the calcium and magnesium that cause scale. My mom Martha in North Texas swears by hers.
It’s an investment, but it protects every faucet, showerhead, and appliance in your home.
Simple Daily Countermeasures
Not ready for a softener? You can fight back with routine care.
- Once a week, spray pure white vinegar on faucet and drain areas. Let it sit for five minutes, then wipe.
- Use a squeegee on the sink walls after the final rinse of the day. It removes water droplets before they dry and spot.
- For a quick shine, buff the dry sink with a cloth spritzed with a little rubbing alcohol.
Your Preventative Care Questions, Answered
I get questions from friends all the time. Here are the most common ones, with answers tested in my own home.
“My kids are messy. How do I keep up?”
I have Jason and little Jessica. I feel this deeply. I made sink cleanup part of their routine. After crafts, they help wipe down the sink with a damp cloth.
It’s not perfect, but it builds the habit. I also use a clear, plastic craft mat in the sink for extra-messy projects.
“What’s the one product I should always have?”
White vinegar. It’s cheap, non-toxic, and dissolves mineral deposits. My family uses it for everything. Brianna uses it with lemon peels for a fresh scent.
Keep a spray bottle under the sink. It’s your first line of defense against hard water film.
“Can I use the same cleaner on my porcelain sink and ceramic tile?”
Usually, yes. Both are glazed, non-porous surfaces. A mild, non-abrasive cleaner is safe for both. Always check a hidden spot first.
Never use a gritty scrubber or powdered cleaner on either surface. You will scratch the glossy finish, making it stain faster next time.
Treating Your Sink with Lasting Respect
Think of your sink’s glaze like the clear coat on a car. Once it’s scratched or worn, the surface underneath stains easily. Gentle care preserves that protective layer for years.
Avoid steel wool pads, harsh scrubbing brushes, and abrasive cleansers. They create microscopic grooves.
Stick with soft cloths, sponges, and plastic scrapers for dried-on gunk. Your future self will thank you.
The goal isn’t a sterile laboratory. It’s a clean, welcoming home. A few smart habits keep your sink bright without the weekend scrubbing sessions.
FAQ about Removing Tough Stains from Porcelain and Ceramic Sinks
How can I quickly figure out what kind of stain I have?
Examine the stain’s color and texture: orange-brown spots indicate rust, white chalky rings are hard water, and slimy films suggest organic gunk. Always test any cleaner in an inconspicuous area first to avoid surface damage.
What store-bought cleaners work best when home remedies fail?
For persistent mineral deposits, use a liquid descaler like CLR, following label instructions for safety. For rust, a powdered oxalic acid cleaner such as Bar Keepers Friend is effective-apply briefly and rinse well to protect the glaze.
What’s the right way to scrub without scratching my sink?
Use a soft-bristled brush with gentle circular motions and light pressure, allowing the cleaner to break down the stain. Always rinse thoroughly with warm water afterward to prevent residue from attracting new dirt. For suede, adjust the technique to protect the nap and avoid over-wetting. Learn how to remove stains from suede in the next step.
What’s a fast fix for rust stains from a metal can?
Rub the stain with a cut lemon, letting the juice sit for 15 minutes before scrubbing. For tougher rust, apply a paste of baking soda and hydrogen peroxide, wait 30 minutes, then rinse-avoid abrasive pads to prevent scratches. This technique is particularly effective on concrete surfaces.
What daily habit prevents most stains from setting in?
Rinse the sink with water after each use to flush away debris, then dry it with a microfiber cloth to stop water spots and mineral buildup. This simple routine keeps the surface shiny and stain-resistant.
Your Go-To Plan for a Lastingly Clean Sink
Always tackle sink stains with the gentlest method first, like a baking soda paste, to safely lift grime without scratching the delicate surface. I rely on this after messy projects with Roger or Jessica’s art sessions, and it consistently restores the shine. For more reliable, home-tested advice on handling every household mess, follow along with me right here on Stain Wiki.
Suzanne is an accomplished chemist, laundry expert and proud mom. She knows the science and chemistry of stains and has personally deal with all kinds of stains such as oil, grease, food and others. She brings her chemistry knowledge and degree expertise to explain and decode the science of stain removal, along with her decades long experience of stain removal. She has tried almost everything and is an expert on professional and DIY stain removal from clothes, fabric, carpet, leather and any other items dearest to you.