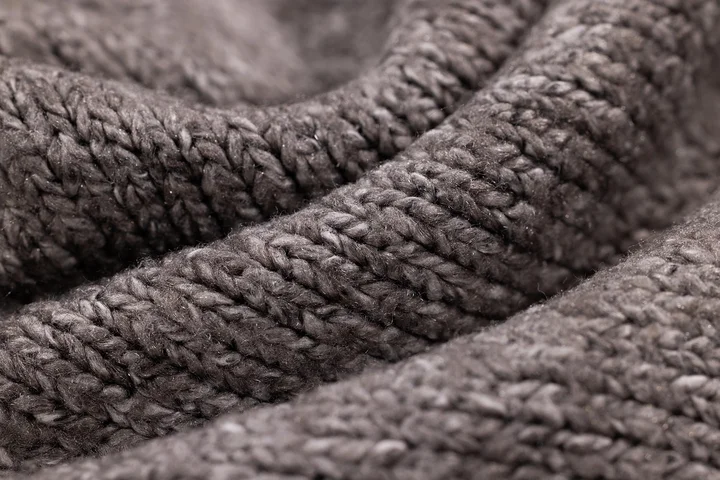
How Do You Remove Glue from Clothes? A Step-by-Step Guide for Every Adhesive
That moment when glue smears on your favorite shirt is so frustrating. Take a deep breath-whether it’s school glue or something stronger, you can likely lift it with simple items like cooking oil or rubbing alcohol.
This guide will give you clear steps for any glue stain, covering:
- How to quickly identify the type of glue on your fabric.
- Specific methods for common adhesives like craft glue and super glue.
- Safe techniques for delicate materials like silk or wool.
- Which household products are most effective and why.
My advice comes from years of professional stain removal and personal tests on everything from my son Jason’s soccer jerseys to my own crafting accidents.
First, Stop and Ask Yourself These Four Questions
I know that feeling. You see the glue and your heart sinks. My Jason once tried to “repair” his soccer shorts with a whole glue stick. Take a breath. Before you do anything, we need to play detective. Rushing often makes the stain permanent.
Ask yourself these four questions. The answers will tell you exactly what to do next.
1. What Type of Glue Is It?
Look at it. Touch it carefully. Is it a clear, brittle film? That’s super glue (cyanoacrylate). Stringy, rubbery blobs are hot glue from a craft gun. White and paste-like is school glue or wood glue. A sticky, honey-like gel is probably a permanent fabric adhesive.
Identifying the glue is 90% of the battle. The wrong solvent can set the stain forever.
2. Is It Wet or Dry?
This changes everything. Wet school glue is a simple wash. Dry super glue is a whole different project. For wet glue, gently scrape off the excess with a dull knife or spoon. Don’t rub it in.
My Aunt Jessica once spilled wine and nail glue simultaneously (a story for another day). We dealt with the wet wine first, then tackled the cured glue.
3. What Is the Fabric?
Is it sturdy cotton, like Jason’s jeans? Or is it delicate silk, a wool blend, or a synthetic like polyester? Your fabric dictates your weapons.
A quick, hidden test patch with your chosen cleaner is non-negotiable. Dab a tiny bit inside a seam or on a hem. Wait five minutes. Check for color loss or damage.
What works on my husband Roger’s work shirt could ruin my favorite blouse. I always check.
4. Have You Already Tried Something?
Be honest. Did you rub it with a wet towel? Pour nail polish remover on it? This matters. Some failed attempts, like using heat on super glue, can seal the stain into the fibers, especially when dealing with delicate fabrics like suede.
Tell me what happened. It helps me guide you out of the mess.
The Glue Stain Panic-Level Assessment
Let’s rate your panic on a scale from 1 (a deep sigh) to 10 (full-blown alarm). This sets realistic expectations.
| Glue & Fabric Scenario | Panic Level | The “Golden Window” |
|---|---|---|
| Wet School Glue on Cotton | 2 | Long. Just let it dry completely, then scrape and wash. Easy. |
| Dry Super Glue on Denim or Cotton | 5 | Closed. It’s cured. But acetone (nail polish remover) on cotton is very effective. No panic needed. |
| Super Glue on Silk, Rayon, or Acetate | 9 | Closed. Acetone will melt these fabrics. This is a job for a professional cleaner. Call them first. |
| Hot Glue on Most Fabrics | 3 | Flexible. Let it cool and harden. You can often peel it off in one rubbery piece. Any residue responds to rubbing alcohol. |
| Fabric Glue or Permanent Adhesive | 7 | Very Short. You must act while it’s still wet. Once dry, it’s designed to survive the washing machine. |
The “Golden Window” is that ideal time to act for the easiest removal. For wet, water-based glues, the window is wide open. For instant-bonding super glue, it slams shut in seconds.
Here is the reassuring truth. With patience and the right solvent, most glue stains on common fabrics are fixable.
I’ve saved Roger’s hunting shirt from tree sap (a natural adhesive) and Jason’s team jersey from sticker goo. We can figure this out together.
Start with the gentlest method first. Often, a little patience and isopropyl alcohol work wonders. Save the heavy chemicals for the toughest jobs on the sturdiest fabrics. Even then, be cautious when dealing with delicate materials like polyester. Sometimes, it’s best to use specialized techniques for polyester stains to avoid damage.
Critical Warnings and Material Red Flags
Before you attack that sticky mess, stop for a moment. I’ve learned this the hard way. Getting glue out is a puzzle, and the first piece is knowing what you’re working with. I ruined a beautiful rayon blouse once by being too eager. It taught me to always check the fabric tag and think first.
Handle These Fabrics With Extreme Caution
Some materials are just too delicate for a chemical battle. Their fibers can dissolve, shrink, or become permanently damaged. My Aunt Jessica has a silk scarf with a tiny adhesive dot from a price tag she’ll never get out, and that’s okay. Knowing when to stop is part of the skill.
- Silk & Delicate Wool: These are protein-based fibers. Many strong solvents and even some oils can strip their natural sheen or cause discoloration. They often need professional care.
- Acetate & Rayon: These are made from cellulose. They can be surprisingly fragile when wet and are often “dry clean only” for a reason. Acetate can actually melt or go limp with certain chemicals.
- Fabrics with Special Coatings: Think waterproof jackets or some performance wear. Aggressive rubbing or solvents can destroy the coating, leaving a permanent dull spot.
Your best move with any of these is to take the garment to a professional cleaner, pointing out the stain clearly. If you must try something at home, your first and last step should be a spot test on an inside seam. For set stains from fabric clothing, a gentle, targeted pre-treatment can help before professional cleaning.
Actions That Can Make the Problem Much Worse
Our instincts can lead us astray. We think heat sets stains, but with glue, it’s a special kind of trouble. My husband Roger once tried to iron a pair of work pants with some unknown gunk on them. It baked the adhesive right into the fibers. We had to retire those pants to yard-work duty.
- Never Use Heat First: Do not put the item in the dryer. Do not iron over the stain. Heat can set many adhesives permanently, turning a surface spot into a bonded, impossible mess.
- Beware of Acetone (Nail Polish Remover): This is a powerful solvent. It works wonders on super glue, but it will melt or fog plastics. Never use acetone on fabrics containing plastic-based fibers (like many athletic blends), on foam, or on anything with a plastic coating. It can also strip dye.
- Avoid Scrubbing: Aggressive scrubbing, especially on a dried glue, can fray fibers and grind the adhesive deeper into the fabric weave. Gentle dabbing and patience work better.
Non-Negotiable Safety Steps
This isn’t just about saving your shirt. It’s about protecting you and your home. I keep all my stain fighters on a high shelf in the laundry room, far from my curious three-year-old Jessica and my dog Peeta, who thinks every bottle is a toy.
Always work in a well-ventilated area. Open a window or turn on a fan. Many adhesive removers, oils, and even rubbing alcohol give off fumes you shouldn’t breathe in for long.
Wear gloves. Simple disposable nitrile or rubber gloves protect your skin from drying chemicals and from any adhesive residue itself. I keep a box right with my cleaning supplies.
Treat every stain remover, even household ones like cooking oil or rubbing alcohol, with the same caution you’d use with a store-bought chemical. Being mindful of the common stain-removal mistakes to avoid helps you protect fabrics. Keep them sealed and stored safely immediately after use. A moment of prevention saves a lot of worry.
Chemistry Corner: How Glue Sticks and How to Break Its Grip
You might think glue is just glue. I used to.
After cleaning up Jason’s model airplane disasters and Jessica’s glitter-bombed art projects, I learned they act very differently. Knowing the type you’re dealing with is your first, best weapon.
The Three Glue Families in Your Home
Most household glues fall into one of three categories. Think of them like different kinds of locks. You need the right key for each one.
| Glue Type | Common Example | How It Sticks | Your “Key” |
| Solvent-Based | Super Glue (Cyanoacrylate) | Forms unbreakable chains with moisture. | A solvent like acetone. |
| Thermoplastic | Hot Glue | Melts when hot, hardens as it cools. | Heat to re-melt it. |
| Water-Based | White School Glue, Craft Glue | Water evaporates, leaving plastic particles behind. | Soap, water, and patience. |
1. Solvent-Based Glues: The Super Glue Cage
This is the tough one. Super glue forms a cage of molecules when it meets the tiny bit of moisture in air or fabric. It bonds to itself and the fibers.
Plain water or soap can’t break into that cage.
Think of super glue like a cage of molecules. Acetone is the key that picks the lock.
Acetone, found in most nail polish removers, can dissolve that cage. But it’s powerful. You must test it on a hidden seam first, as it can melt some synthetic fabrics.
2. Thermoplastic Glues: The Melt-and-Stick
Hot glue from a glue gun is the classic here. It’s solid at room temperature but turns gooey with heat.
My husband Roger uses it for everything in his workshop. I find little dried blobs on his jeans all the time.
Since heat made it sticky, controlled heat can make it pliable again for removal.
You can gently re-melt it with a hair dryer or by applying ice to make it brittle and pop off. Never use extreme heat that could scorch the fabric.
3. Water-Based Glues: The Dried-Up Puddle
This is the kid-craft special. Elmer’s Glue, slime base, papier-mâché paste. These are mostly water and plastic (PVA).
The water soaks in or evaporates, leaving a flexible plastic film on the surface. It feels rubbery when dry.
Because water carried it there, you can often use water to carry it away.
Soaking in warm, soapy water rehydrates the plastic, turning it back into a slippery gel you can wipe or roll away.
A Quick Note on Sticky Residue (Like from Tape)
That gummy leftover from a price tag or duct tape is a pressure-sensitive adhesive. It’s designed to grip on contact.
Oils can break its bond. My Aunt Jessica taught me this trick with cooking spray on a wine glass label.
Oils work by getting between the sticky glue and the fabric, lifting it without a harsh chemical fight.
A dab of vegetable oil, peanut butter, or even hand lotion can gently loosen the grip so you can wipe it clean with dish soap.
How to Remove Super Glue and Nail Glue from Clothes
Can you get super glue out of clothes? Yes, you can. This is one of those moments where a specific chemical is the clear, and often only, answer.
I learned this the hard way when my husband Roger tried to fix his favorite hunting hat in the laundry room. A spilled bottle meant I had a hardened, plastic-like spot on a cotton work shirt to deal with.
Your main weapon here is acetone, the active ingredient in most nail polish removers. Acetone dissolves the cyanoacrylate polymer in super glue, turning it back into a goo you can wipe away. It’s effective for removing adhesive residue from various surfaces, including car dashboards.
Step-by-Step: Using Acetone Safely
First, check your fabric care label. Acetone can damage acetate, triacetate, and modacrylic fibers. It can also remove dyes and dissolve some plastic details. Test it on a hidden seam first.
Gather your tools: pure acetone or non-oily nail polish remover, cotton swabs or balls, a dull knife or spoon, and paper towels.
- Scrape gently. Use the dull edge to lift off any thick, excess glue beads. Don’t dig into the fibers.
- Apply acetone from the outside in. This is the crucial step. Soak a cotton swab in acetone. Start dabbing at the very outer edge of the stain. Work in tiny circles toward the center. Pouring acetone directly in the middle will just spread the dissolved glue outward, making the stain bigger.
- Watch for the change. You’ll see the clear, hard film turn cloudy and gummy. It’s a satisfying little shift. Use a clean part of your swab or a paper towel to blot and lift the gunk away as it softens.
- Repeat patiently. You may need several swabs. Reapply acetone to the remaining stain, always from the edges, and keep blotting.
- Wash immediately. Once the glue is gone, wash the garment normally with detergent. This removes any last traces of acetone and glue residue.
The Delicate Fabric Alternative
For silks, delicate synthetics, or any fabric that flunks the acetone test, use a commercial cyanoacrylate remover or “debonder.”
My Aunt Jessica used one on a silk blouse after a nail glue incident. These products are formulated to be less harsh. Follow the bottle’s instructions exactly, as they often involve applying, waiting, and then gently peeling the glue away.
No matter the method, act quickly. Fresh glue is always easier to manage than glue that’s sat through multiple washes and dries.
How to Remove Hot Glue from Fabric
Can you wash hot glue out of fabric? My short answer is no, not effectively. Trying to launder the glue blob first just makes a bigger, stickier mess in your machine.
You have to physically remove the solid mass before any washing happens. This is one of the easier glue stains to handle if you use the right first step.
The Freeze-and-Shatter Method
Your best tool here is cold. Extreme cold makes hot glue brittle, so you can pop it right off.
I keep a dedicated bag of frozen peas in my freezer for two reasons: treating Jason’s soccer bumps and tackling glue stains. It molds to the fabric perfectly.
Here is how you do it:
- Place the stained fabric section flat, glue-side up, on a hard surface like a counter.
- Rest the bag of frozen peas (or corn, or an ice pack) directly on top of the glue blob.
- Leave it there for 15 to 20 minutes. Go set a timer.
- Check if the glue is hard and opaque. Use a blunt tool, like a butter knife handle, to gently flex the fabric. The glue should crack and pop off in pieces.
This method works because you’re reversing the glue’s property-turning a flexible plastic back into a brittle solid you can break.
When Freezing Leaves a Residue
Sometimes, a thin, clear film of adhesive stays behind after you shatter the main blob. Don’t panic. This is where a solvent helps.
I reach for isopropyl alcohol (rubbing alcohol, 70% or higher). It breaks down the adhesive without harming most fabrics.
Dab a small amount on a clean white cloth. Gently rub the sticky spot in a circular motion. You will see the residue start to dissolve and transfer onto your cloth. This method is especially effective for removing sticky residue from electronic cases.
Flip the fabric over and dab from the backside to push any dissolved glue out. Once the tackiness is gone, launder the garment as usual. This follow-up step ensures you get every last bit.
A Crucial Warning: Avoid Heat
Your first instinct might be to re-melt the glue with a hairdryer or hot water. Please resist it.
Applying heat re-liquifies the glue, allowing it to soak deeper into the fibers and spread, creating a much larger, more permanent stain.
I learned this the hard way on a tablecloth after a craft project with Jessica. Heat sets you back, not forward. Always start with cold.
How to Remove School Glue, Glue Stick, and Other Water-Based Adhesives
Take a deep breath. This is the stain you want to deal with. My son Jason brought home a shirt that looked like a glittery, sticky abstract art project last month. I didn’t panic. School glue, glue sticks, and basic white craft glue are designed to be water-soluble.
Your number one rule here is to use cold water first, always. Hot water can actually set the proteins in some glues, turning a soft blob into a hard, permanent plastic-like spot.
Your Step-by-Step Action Plan
Follow these steps and you’ll likely see the glue dissolve before your eyes.
- Scrape Gently. Use the dull edge of a butter knife or a spoon to lift off any big, globby bits. Don’t rub it into the fabric.
- Soak in Cold Water. Turn the garment inside out. Hold the stained area under cold, running water from the backside to push the glue out, not deeper in. For set stains, submerge the spot in a bowl of cold water for 30 minutes.
- Rub from the Back. After soaking, place the stain face down on an old towel. Gently rub the fabric against itself from the back with your thumb. You’ll feel the glue loosen and transfer to the towel.
- Wash as Normal. Toss the item into the washing machine with your regular detergent. Use the warm or cold water setting, not hot. Let it air dry until you confirm the stain is gone.
When the Glue Has Already Dried and Set
Found an old craft project stuck to a sweater? Don’t worry. A little acid can help re-activate that dried glue. I learned this trick from my mom, Martha.
For stubborn, dried-on water-based glue, a white vinegar soak softens it right up. Mix one part white vinegar with two parts cool water in a bowl. Soak just the stained area for up to an hour. The vinegar breaks the glue’s bond without harming the fabric. After soaking, go back to step 3 and gently rub from the back.
Check the care label first, especially on delicate silks or wools. When in doubt, test your vinegar solution on an inside seam.
One last tip: never use nail polish remover (acetone) on these. It’s too harsh and can melt synthetic fabrics. Stick with water and vinegar. You’ve got this. If nail polish ever ends up on clothing, there are gentler fabric-safe removal options. We’ll cover those steps next.
How to Remove Sticky Tape and Duct Tape Residue
That gummy, grayish film left on fabric isn’t just dirt. It’s an oily, pressure-sensitive adhesive. You need to treat this residue like a grease stain, not just scrub it. The adhesive is designed to stick under pressure, so you have to break its bond gently.
I see this all the time. Jason’s soccer name tags leave gunk on his jersey, and Roger’s hunting gear always has tape residue. The key is matching your method to the fabric.
Comparing Your Two Best Options
You have two main paths: oil-based or alcohol-based solvents. Each has its place in your cleaning toolkit.
Oil-Based Methods: The Gentle Dissolvers
Think of these as using oil to loosen oil. They’re great for most colored cottons and blends.
- Cooking Oil (like vegetable or canola): Apply a few drops directly to the residue. Let it sit for 10-15 minutes to soften the glue.
- Peanut Butter (creamy): The oils work the same way. Spread a thin layer, wait, then wipe. I always check for nut allergies first, especially after Edward’s visits.
My husband Roger uses this trick on his work shirts. A dab of olive oil, let it sit while he finishes his coffee, then he scrubs the spot with a drop of dish soap before tossing it in the wash. It works every time.
Alcohol-Based Methods: The Fast Evaporators
Rubbing alcohol cuts through the glue quickly. I use this on synthetics or when I need speed.
- Isopropyl Alcohol (70% or higher): Dab a cotton ball with alcohol and gently blot the stain. Always test this on a hidden seam first, as it can dull some fabrics.
For a delicate blouse, I’ll use alcohol. For Roger’s tough canvas work shirt, I reach for the olive oil. The method depends on what you’re cleaning.
Why the Oil and Soap Combo Works
Let me explain Roger’s trick. The adhesive is oil-based. Adding more oil (like olive oil) dissolves it, breaking its grip on the shirt fibers. The dish soap then emulsifies that oily mixture, allowing water to wash it all away. It’s a one-two punch: oil to break the bond, soap to clean it up.
You can feel the change. The tacky residue turns slick with oil, then disappears with soap. It’s satisfying, like getting a sticker off a window.
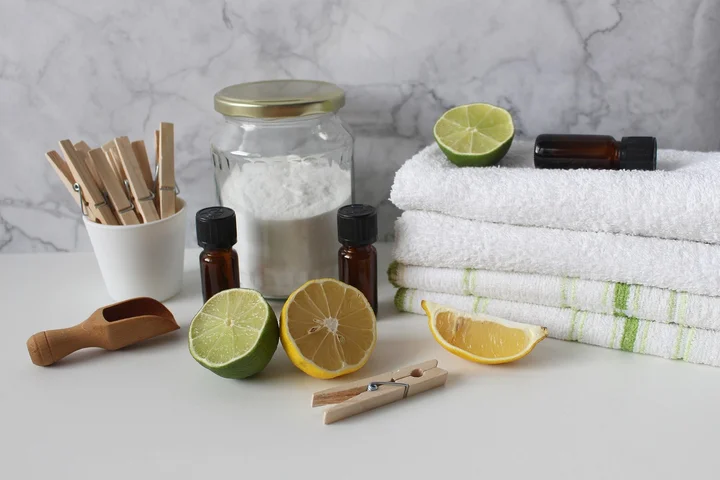
Safe DIY Alternatives When You’re Out of Specialty Products

I keep a well-stocked stain kit, but life happens. You might be out of your go-to product or just need a quick fix. These kitchen and bathroom standbys have saved me more than once.
When Super Glue Attacks Your Fabric
Super glue dries fast and hard. My husband Roger learned this the hard way fixing his hunting gear, leaving a shiny, rigid spot on his work shirt. Panic is normal, but don’t scrub.
For a safe start, reach for acetone-free nail polish remover containing ethyl acetate, which can soften the bond without harming many synthetic fibers.
First, always test it on an inside seam. Soak a cotton ball and hold it on the glue for a minute to let it penetrate. The glue should start to feel gummy.
- Gently scrape the softened glue with the dull edge of a butter knife or your fingernail.
- Wash the garment as usual. This method works well for polyester blends Roger often wears.
For delicate fabrics like silk, skip the remover. I use warm, soapy water instead.
Soak the stain in a bowl of warm water with a squirt of dish soap, then use constant, gentle scraping with your nail over 10-15 minutes.
It requires patience, but it prevents the harsh chemicals from dissolving the delicate fibers. I used this on a blouse after a similar mishap.
Banishing Stubborn Tape Residue
That sticky, gummy film from price tags or packing tape is frustrating. My Aunt Jessica in Arizona, who loves her wine and quirky fixes, taught me her favorite trick years ago.
Common cooking oils like vegetable or canola oil are fantastic for breaking down adhesive bonds safely.
Apply a small amount directly to the residue. Let it sit for 5-10 minutes; you’ll see it start to lose its tackiness.
- Rub gently with an old toothbrush or cloth in a circular motion.
- Follow up by washing the area with dish soap to cut through the oily film before a regular wash.
Aunt Jessica’s other remedy is mayonnaise. Yes, really.
Spread a thin layer of full-fat mayo over the residue, wait 15 minutes, then wipe it away with a warm, soapy cloth.
The oils in the mayo work just like cooking oil, and the emulsifiers help lift the gunk. It sounds strange, but it saved a linen tablecloth after a holiday gift-wrapping session.
Solving Water-Based Glue Messes
School glue, craft glue, or paste stains are common in my house. My daughter Jessica and her friend Edward often come home from arts and crafts with stiff patches on their sleeves.
For sturdy fabrics like denim or cotton twill, a simple paste of baking soda and water provides gentle abrasion.
This method is too rough for knits or delicates. Mix two parts baking soda with one part water to make a thick, spreadable paste.
- Apply the paste directly to the dried glue spot and let it sit for 20-30 minutes.
- Once the paste is dry, brush it off. You’ll notice the glue film has become brittle and starts to flake away.
- Give the fabric a good shake outside, then launder as normal. It’s a mild, non-toxic scrubber I use often.
For a fresh, wet stain, just rinsing thoroughly with cool water often does the trick before it sets.
The Surface Compatibility Chart: From T-Shirts to Car Seats
Adhesive doesn’t respect boundaries. What works on my husband Roger’s work shirt might wreck Aunt Jessica’s silk blouse. Here’s how to adapt your approach for whatever got stuck.
| Surface Type | Best First Method | Key Tool/Tip | Caution |
|---|---|---|---|
| Clothing (Cotton, Polyester, Denim) | Freeze & Scrape, then Isopropyl Alcohol or Goo Gone. | A butter knife or old credit card. Test any solvent on an inside seam first. | Wash the item immediately after the glue is gone to remove all residue from the cleaner itself. |
| Clothing (Delicate: Silk, Wool, Rayon) | White Vinegar soak or a dab of mild dish soap. | Your fingertip and extreme patience. Gently roll the glue off. | Skip harsh solvents. Heat can set stains. I learned this the hard way with a favorite blouse. |
| Upholstery & Car Interior | Dish Soap solution or a dedicated automotive adhesive remover. | White microfiber cloths. You must blot, never rub, to avoid driving glue deeper into the foam. | Always check the manufacturer’s cleaning code first. A hidden label under the seat saved my car’s headliner. |
| Carpet | Freeze & Shatter, then vacuum. Follow with a Vinegar/Warm water blot. | Your vacuum’s crevice tool and a pile of clean, dry towels for pressing. | Blotting is your religion here. Rubbing will fray the fibers and make the stain permanent. |
| Hard Surfaces (Countertop, Glass, Plastic) | Olive or Coconut Oil, or Goo Gone. | A plastic paint scraper or old loyalty card. Plastic won’t scratch. | Wipe clean with soapy water after. Oils can leave a slippery film. |
Putting the Chart Into Practice
This table is a starting point. Your real-world move is to combine its advice with what you know about the glue type.
Jason got super glue on the car seat? That’s a hard surface (plastic/vinyl) with a cyanoacrylate glue. My move is acetone-based nail polish remover, but only on a cotton swab. I dab it precisely on the glue, let it loosen for 60 seconds, then gently lift it with that plastic scraper. I follow up with a soapy water wipe down.
Peeta stepped in carpet tape? That’s a carpet with a pressure-sensitive adhesive. I reach for the cooking oil. I massage a little canola oil into the residue with my fingers to break it down, then blot it up with a dish soap solution. The oil dissolves the glue, and the soap washes the oily mess away.
The golden rule is to work from gentle to strong. Always test. And for anything you can’t replace, consider calling a pro. I’ve made that call for my mom Martha’s antique rug and never regretted it.
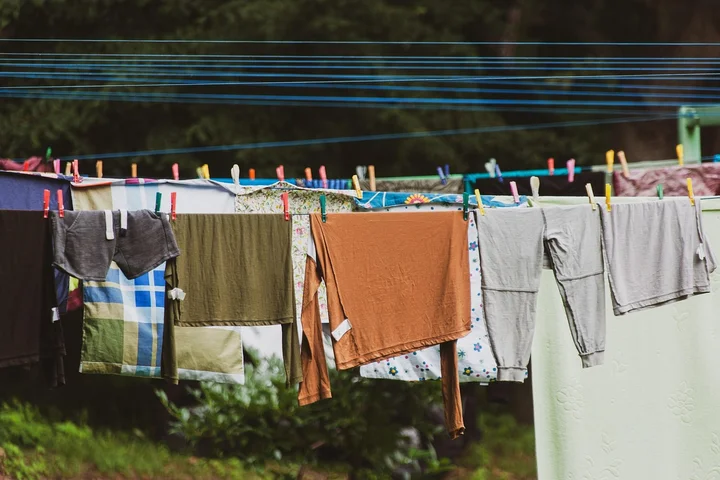
Post-Treatment Recovery: How to Dry and Check Your Work
This step is what separates a success from a forever stain. I hammer this home every time: the dryer is your enemy until you’re sure. Heat will set any remaining glue, locking it into the fabric for good.
I learned this the hard way with one of Jason’s school shirts. I was in a hurry and tossed it in the dryer. What was a faint shadow became a permanent, crispy patch.
You must let the item air dry completely. Lay it flat on a clean towel or hang it in a well-ventilated room, away from direct sunlight. Sunlight can heat and set some synthetic residues, as my aunt Jessica in Arizona found with a patio umbrella glue spot.
Once it’s dry, the real check begins. Pick up the garment and examine the spot from multiple angles-under a bright light, against a window, even from the inside out. A stubborn adhesive might leave a dull ring or a slight color change you only see from the side.
Next, use your sense of touch. Gently run your finger over the area, feeling for any leftover tackiness or a stiff, crusty texture. If it feels perfectly soft and smooth, like the rest of the fabric, you’re likely in the clear.
If you see any shadow or feel any stickiness, do not pass go. This is your signal to immediately repeat the treatment cycle with the same method. My mother-in-law Brianna’s tablecloth needed two rounds of her vinegar solution for a label glue stain. Patience here saves the garment.
Field Note from a Stain Editor: The Hidden Tool You Already Own
My laundry room toolbox doesn’t hold anything fancy. My most used items are a plastic gift card from last year’s holiday and a worn-out toothbrush. The right technique with these everyday objects makes all the difference.
Glue can feel permanent, but it doesn’t have to be. I treat these stains like a puzzle where patience is the first piece.
Your Safe Scraper: The Humble Gift Card
Before you ever touch a solvent, grab an expired gift card or a dull butter knife. I keep one tucked behind my detergent.
Gently scraping the surface of a dried glue blob can lift a huge amount of it away without forcing it deeper into the fibers.
Hold the card at a shallow angle and push away from yourself. I used this on Jason’s soccer shorts after a craft project mishap. It took off the big, rubbery bits of white school glue instantly, making the next steps much easier.
Never use a sharp knife. You’ll risk cutting the threads of the fabric.
The Flicking Brush Technique
For glue that’s seeped into seams or textured fabric, a soft-bristled toothbrush is your best friend. My method is all about control.
- Dip just the tips of the bristles into your chosen solvent (like rubbing alcohol for craft glue).
- Start at the outer edge of the stain. Flick or dab the bristles toward the stain’s center.
- Work your way around the entire stain, always moving inward.
This “flicking” motion pulls the dissolved adhesive into the middle instead of pushing a wet, stained ring out into clean fabric.
I learned this the hard way on a knit hat. I scrubbed in circles and made a tiny glue spot into a huge, sticky halo.
A Bonus Tip: The Power of Oil for Residue
Sometimes you get the glue off but a weird, tacky residue remains. My go-to fix is probably in your kitchen.
Rub a tiny drop of olive oil or coconut oil into that sticky spot. Let it sit for a minute. The oil breaks the bond of the leftover adhesive.
Then, wash the area with dish soap to cut the oil before a normal wash. My aunt Jessica taught me this trick for removing price tag gunk from wine glasses, and it works wonders on fabric too, especially when trying to remove oil stains from clothing and textiles.
Recommended Product Categories to Keep on Hand
Over years of tackling glue disasters, I’ve built a simple arsenal. You only need a few key players to handle most sticky situations.
This isn’t about buying every product on the shelf. It’s about having the right tools for the job.
-
Acetone-based nail polish remover tackles tough synthetic glues and adhesives. I learned this after Aunt Jessica spilled nail polish on a tablecloth during a visit. It works on super glue or model cement. Always test on an inside seam first, as acetone can damage fabrics like acetate or rayon.
It has a strong, chemical scent. Use it in a well-ventilated area.
-
Rubbing alcohol (70%+ isopropyl) is my first-response tool for unknown sticky spots. I keep a bottle in the laundry room for quick access. It’s perfect for tape residue or price tag gunk.
Just last week, it removed glue from a bandage Jason left on his pajamas. The alcohol dissolves the stickiness and evaporates cleanly.
-
A good enzyme laundry pre-treat breaks down organic, dried-on messes. This is for glue-like stains from food, mud, or even craft paste. When Edward and Jason made a “slime” that dried on a shirt, an enzyme spray saved the day.
Enzymes eat through proteins and starches. Apply, wait ten minutes, then wash. It turns a hard mess into a soft one.
-
Dish soap (like Dawn) cuts through greasy adhesive backings. Its grease-fighting power makes it ideal for sticker residue or glue gun blobs. I used a drop on a sponge to clean glue from a Halloween costume.
It creates a rich lather that lifts the sticky film. Rinse with cool water afterwards.
-
White vinegar gently loosens water-based adhesives and is safe for most fabrics. My mom Martha in North Texas taught me this for old paste or school glue. Mix equal parts vinegar and water on a cloth.
The slight sour smell disappears as it dries. It’s a gentle, non-toxic option I trust for delicate items.
With these five items, you’re prepared for almost any glue stain. They are simple, effective, and won’t break the bank.
When Not to Try This: Limitations and Calling a Professional
I’m all for a good DIY fix. But part of being good at this is knowing when to stop.
You can cause more harm than good if you push a method too far.
Recognizing a DIY Red Flag
Some stains and fabrics need a pro’s touch from the start.
If the glue covers a huge area, or the fabric is delicate, your home arsenal likely isn’t the right tool. I learned this after a glitter-glue craft disaster with Jessica covered half of a linen tablecloth.
Here are clear signs to hold back:
- Antique or Vintage Fabric: My mom Martha has a dress from the 50s. The fibers are fragile. A modern solvent could dissolve them. If it’s irreplaceable, don’t experiment.
- Leather or Suede: My husband Roger’s hunting jacket got a glue spot once. These materials are finished and tanned. Harsh chemicals strip that finish, leaving a permanent, discolored patch.
- Large, Saturating Stains: If an entire sleeve is fused with school glue or adhesive, home methods struggle to penetrate and remove it all evenly.
- Previous Damage: If you’ve already tried nail polish remover or a harsh degreaser and the stain is now a crispy, melted spot, stop. You risk making a hole.
When to Dial the Cleaner
Calling a professional cleaner isn’t a failure. It’s a smart investment.
I consider two things: the garment’s value and my own progress.
For expensive suits, silk blouses, or heirloom items, a professional is my first call, not my last. They have industrial solvents and techniques I don’t.
My aunt Jessica sent me a wine-stained silk scarf. I knew my usual tricks could set the stain. I sent it out, and it came back perfect.
For other items, I use a simple rule. If I’ve gone through two full, careful treatment cycles with zero progress, I pick up the phone.
Pounding the same spot repeatedly just wears out the fabric. A pro can assess it with fresh eyes and better tools.
The “Painting Shirt” Promotion
Let’s be real. Some battles aren’t worth fighting.
It is perfectly okay to admit defeat and give an item a new, messy purpose. This is a core principle in my house.
An old t-shirt with a stubborn, greasy adhesive ring from a label? That’s Jason’s new painting shirt.
A comfy sweatshirt with a weird, yellowed patch from a failed super glue experiment? It’s now my garage-cleaning top.
My mom Brianna from Texas always says, “Don’t pour good effort after bad.” She’s right. Sometimes, the win is freeing up your time and accepting a stain’s second act.
How to Prevent Glue Stains Before They Happen
I treat messy projects like a science experiment. I prep my workspace and my people. This mindset saves so many shirts and sofas.
Wear an Apron or Old Clothes
This seems obvious, but I still see my husband Roger start fixing a hunting decoy in his good jeans. I keep a stack of old, soft t-shirts in the laundry room just for this.
I call them our “project shirts.” Anyone doing anything with glue, paint, or outdoor gear puts one on first. An old cotton shirt is a sacrificial barrier that spares your favorite clothes from permanent damage.
Keep a Damp Cloth Handy
My three-year-old, Jessica, loves glitter and glue. The moment she’s done, her hands are a sticky, sparkly mess.
I keep a small bowl of warm water and a washcloth on the table during any craft time. A quick wipe of fingers and the work surface stops glue from being smeared onto pants, furniture, or hair. It’s a simple habit that prevents big problems.
Store Glue Properly
My mom, Martha, is a genius with home organization. She taught me to never trust a glue bottle’s cap.
I store every bottle of school glue, super glue, or wood glue upright inside its own quart-sized zip-top bag. This double containment system catches any slow leaks or cap failures before they ruin a drawer or a backpack. It saved Jason’s soccer bag when a tube of model glue decided to give up.
FAQ About Removing Glue Stains from Clothing
What should I do the very second I notice a glue stain?
Gently scrape off any excess blobs with a dull knife, then identify the glue type and fabric. Do not rub, apply heat, or put the item in the washer until you know the correct removal method.
What can I use if I don’t have rubbing alcohol or a specialty adhesive remover?
For sticky residue, a dab of cooking oil or creamy peanut butter can break the bond, followed by dish soap to wash the oil away. For dried school glue, try soaking the spot in a solution of equal parts white vinegar and cool water.
I followed the steps but a faint stain or sticky feel remains. What now?
Do not dry the garment-repeat the treatment cycle focusing on the specific residue. For a sticky feel, massage in a drop of dish soap or oil, let it sit, then rinse and air dry completely before checking again.
How do I handle glue stains on clothes safely around children or pets?
Always work in a well-ventilated area and store all products, including household items like oils and acetone, securely out of reach. Wear gloves to protect your skin and prevent transferring any chemicals.
When is it time to give up and take the item to a professional cleaner?
Call a pro immediately for expensive, delicate, or antique fabrics, or if the stain is very large. If you’ve completed two careful treatment attempts at home with no progress, further DIY effort risks damaging the fabric, especially when dealing with delicate fabrics or stubborn stains on outerwear.
Smart Habits After Glue Removal
From my years tackling everything from Jessica’s school glue to Roger’s epoxy spills, I know identifying the adhesive first makes all the difference. Always test your chosen method on an inside seam to protect the fabric’s color and texture. I share more real-life stain solutions from our home on the Stain Wiki blog, especially about understanding stain chemistry for bonding with fabric fibers.
Suzanne is an accomplished chemist, laundry expert and proud mom. She knows the science and chemistry of stains and has personally deal with all kinds of stains such as oil, grease, food and others. She brings her chemistry knowledge and degree expertise to explain and decode the science of stain removal, along with her decades long experience of stain removal. She has tried almost everything and is an expert on professional and DIY stain removal from clothes, fabric, carpet, leather and any other items dearest to you.