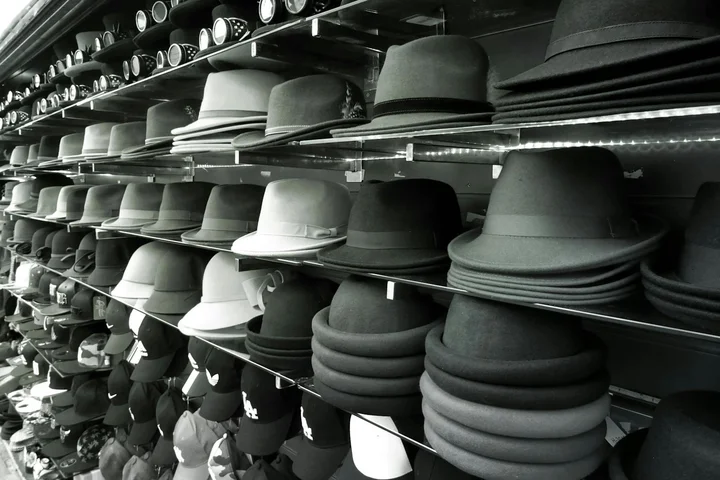
How to Remove Sweat Stains and Odor from Baseball Caps and Hats?
Is your trusted hat looking discolored and holding onto last season’s sweat? You can fix both the stains and the smell with some simple, non-toxic steps I use at home.
This article will cover my tested methods, including:
- A gentle hand-wash technique that keeps your cap’s shape intact.
- How to lift yellow stains with pantry staples like baking soda.
- Spot-cleaning solutions for hats that shouldn’t get fully wet.
- The right way to dry any hat to prevent warping or mildew.
I’ve perfected these methods through years of cleaning everything from my son Jason’s soccer caps to my husband Roger’s work hats.
First, Don’t Panic: Assess Your Hat and the Stain
Take a deep breath. Sweat stains on a hat might look grim, but they are very manageable.
On my personal panic scale, I rate hat sweat stains a 3 out of 10.
The real key is catching them before they set in with repeated wear, a period I call the “Golden Window.”
First, you need to know what you’re working with. Turn the hat inside out and feel the material.
Is it a rough, sturdy cotton twill like Jason’s baseball cap? A soft wool beanie? A stiff straw sun hat?
Run your fingers along the inside of the brim. You’re checking for a stiff, papery feel (cardboard) or a flexible, plastic one.
This step is non-negotiable. It decides everything you do next.
I often get asked, “How do you clean a white hat without turning it yellow?” or “How do you clean a colored hat without fading?”
The answer starts with a simple colorfastness test.
- Mix a small amount of your chosen cleaner (like a drop of mild detergent in water).
- Dip a cotton swab or a hidden corner of a white cloth into the solution.
- Blot it on a discreet area inside the hat, like under the sweatband.
- Wait a few minutes and press with a dry white cloth. If no color transfers, you’re likely safe to proceed.
My Aunt Jessica learned this the hard way with a favorite wine-colored beret. A quick test saves heartache.
The Panic-Level and Golden Window for Hat Sweat Stains
That 3/10 rating means don’t ignore it, but don’t freak out either.
Old, set-in stains with a dull brown or yellow ring are tougher, but I’ve revived many from the brink.
The golden window is right after you take the hat off. The salts and oils are fresh and haven’t bonded deeply with the fibers yet.
If you treat it quickly, you can often prevent permanent discoloration and that sour, locked-in odor.
Material Red Flags: Hats That Need Extra Caution
Some hats need a gentler touch. Treat these materials like delicate heirlooms.
- Wool or felt (can shrink or become misshapen)
- Straw or raffia (can become brittle and break)
- Leather or suede (water can cause permanent spotting)
- Any hat with a cardboard brim (it will warp and ruin if soaked)
My mom, Martha, has a strict “Never-Use” list for hats that I follow to this day.
Never use chlorine bleach on colored fabrics. It will cause fading and damage.
Never submerge a hat with a cardboard brim in water. The brim will lose its shape forever.
Avoid hot water on wool. It causes felting and shrinkage, which I learned after a favorite knit cap became doll-sized.
Your First Move: Immediate Sweat Stain First-Aid
Right after a sweaty game or a long day in the sun, here is how you get rid of sweat stains on hats before they become a bigger problem.
Grab a clean, absorbent towel. Gently blot the inside sweatband to soak up any dampness.
Do not rub. Rubbing grinds the salt and oils deeper into the fabric.
Then, find a well-ventilated spot. I use a hook on my patio. Let the hat air out completely, shaping the brim as it dries.
This simple airing does wonders for stopping odor before it starts.
What helped me most is a trick with a clean, dry toothbrush.
Once the hat is dry, I gently flick the brush across the inner sweatband. This loosens and removes dried salt crystals that act as a stain magnet for the next wear.
It’s a little thing, but it makes the deep clean much easier. I do this for Roger’s work hats all the time.
The Safe, Core Method: How to Hand Wash a Baseball Cap

You asked, “What is the best way to hand wash a hat?” My answer is always the same. The best method is gentle, controlled, and uses what you already have at home. I learned this after a long summer watching my son Jason’s beloved soccer cap get grimier each week.
You cannot simply throw a structured cap in the washing machine. The agitation and spin cycle will crush the brim and misshape the crown. Hand washing gives you complete control.
You only need a few safe items from your kitchen and bathroom. These are my go-to solutions for almost every hat I rescue.
- Mild Dish Soap: This is your primary cleaner. It cuts through the body oils and greasy sweat that cause most stains.
- Baking Soda: This is your odor neutralizer. It’s fantastic for absorbing and eliminating that sour smell trapped in fabric.
- White Distilled Vinegar: This is your disinfectant and fabric softener. It kills odor-causing bacteria and helps rinse away soap residue.
Mix these based on the hat’s condition. For a lightly soiled cap, a few drops of dish soap in a sink of cool water is perfect. For a heavily stained, smelly hat like Roger’s old lawn-mowing cap, I make a stronger pre-treatment paste.
My heavy-duty pre-treatment is three parts baking soda to one part dish soap, mixed into a thick paste.
This paste clings to the worst stains on the brim and sweatband. It gives the cleaning agents time to work before the main wash.
Step-by-Step Hand Washing Guide
Gather your hat, a soft-bristled brush (an old toothbrush is ideal), and your chosen cleaning solutions. Fill a clean sink or basin with cool water.
The entire process should be a gentle, patient swirl, not a vigorous scrub that warps the fabric.
- Pre-Treat Stains: Apply your dish soap or baking soda paste directly to any visible stains on the brim, crown, or especially the sweatband. Let it sit for 10-15 minutes.
- Submerge and Swirl: Add a few drops of dish soap to the cool water. Submerge the hat and gently swirl it with your hands. Let it soak for another 15-20 minutes.
- Gentle Agitation: Use your soft brush to lightly scrub the pre-treated areas. Focus on the textured areas where grime hides. Be very gentle over any embroidered logos.
- The Rinse: Drain the soapy water. Refill the sink with fresh, cool water and submerge the hat again. Swirl and gently press to rinse. You may need to do this 2-3 times until the water runs completely clear.
Never wring or twist the hat to remove water. This destroys its shape instantly. Instead, gently press it against the side of the sink to squeeze out excess moisture.
Focus on the Trouble Zone: How to Clean the Sweatband Inside a Cap
This is where the battle is truly won or lost. The inner sweatband absorbs pure salt and oil. That dull brown stain and persistent odor live here.
To answer “How to use baking soda to clean a hat?” specifically for odor, this is my move. I make a slightly wetter baking soda paste and use my finger to work it deeply into every inch of the inner band. I let it sit while the rest of the cap soaks.
Scrub the entire inner band, front to back, with your soft brush. Pay extra attention to the front where your forehead makes the most contact.
After the final soap rinse, I use a vinegar solution to tackle any lingering bacteria and smells. This answers “How to use vinegar to remove hat odors?”
My mom, Martha, taught me this trick. I mix one part white vinegar with three parts cool water in a spray bottle or bowl.
I either lightly spray the entire inner sweatband or use a clean cloth dipped in the solution to wipe it down thoroughly. I do not rinse it again. This same approach can help remove bad smells from clothes. The mild vinegar smell will disappear completely as the hat dries, taking any last traces of odor with it.
Can You Wash a Baseball Cap in the Washing Machine?
Yes, you can wash a baseball cap in the washing machine, but you must be careful. I hear this question all the time from my son Jason and his soccer buddy Edward, whose caps get caked with dirt and sweat.
Machine washing works well for sturdy, structured caps made of materials like cotton twill or sturdy polyester.
Think of your average baseball cap with a firm, plastic-lined brim. Those can usually handle it.
But you cannot just toss any hat in the wash. My Aunt Jessica has a beautiful, floppy sun hat from Arizona that would be destroyed in a machine.
Always check the material of the brim before you even think about the washer.
My Strict Machine-Washing Protocol
I use this method for Roger’s work caps and Jason’s team hats. It has never failed me.
- Protect the shape. Place the cap inside a hat cage or a tied pillowcase. I use an old pillowcase; it keeps the cap from getting crushed.
- Use cold water only. Set your washing machine to the gentlest cycle, like “delicate” or “hand wash.” Hot water can melt glue and warp plastic.
- Skip the harsh stuff. Add a small amount of mild liquid detergent. Do not use bleach or fabric softener.
- Air dry, always. After the cycle, reshape the cap by hand and let it dry on a clean bottle or a hat form. Never use the dryer.
This cold, gentle wash inside a pillowcase is the only way I trust a machine with a favorite hat.
When You Must Avoid the Washing Machine
Some hats will be ruined by a machine cycle. I learned this from my mom, Martha, who has saved many a hat from disaster.
Hats with cardboard brims, like many older baseball caps, will disintegrate. The water turns the cardboard into a pulpy, irreparable mess.
If your hat has a cardboard brim, fragile straw, delicate wool, or valuable decorations, do not put it in the washer.
My golden retriever Peeta once knocked my nice wool cap into a mud puddle. I hand-washed it carefully instead of risking the machine.
For those hats, hand washing is your only safe bet.
Material-Specific Cleaning Guides: Wool, Straw, Leather and More
Think of your hat’s material like skin. You wouldn’t wash leather the same way you wash wool. I learned this the hard way with one of Roger’s old felt hats. A quick soak ruined its shape forever.
This chart gives you a safety-first starting point.
| Material | Quick-Reference Method | Key Warning |
|---|---|---|
| Wool / Felt | Spot clean with a barely damp cloth and mild soap. Always air dry. | Never soak or machine wash. Heat and agitation cause severe shrinking and felting. |
| Straw | Dry brush for dust. Use a slightly damp cloth *only* on sturdy woven areas for spots. | Avoid water. It makes straw brittle, causes swelling, and can lead to permanent cracks. |
| Leather / Suede | Use a cleaner made for that specific material. Condition leather after. | Water can stain leather and destroy suede’s nap. Never use universal household cleaners. |
| Cotton / Polyester (Fabric Caps) | Most forgiving. Hand wash in cool water with detergent. Air dry on a hat form or bottle. | Check for a cardboard brim first! If present, spot clean only (see below). |
How to Clean a Wool or Felt Hat?
My mom Martha saved a wool beret of mine using this method. Wool and felt are delicate. Full immersion is a disaster.
Start by gently brushing off any dry dirt with a soft brush. For sweat stains on the inner band, mix a drop of clear dish soap or wool wash in a cup of cool water.
Dip a clean white cloth in the solution and wring it out until it’s just damp. Gently dab at the stained area, working from the outside of the stain inward to prevent rings. Never scrub.
Use a second cloth dipped in plain water to dab and rinse the soap away. Press a dry towel against the area to absorb moisture. Let it air dry away from heat or sun. Stuff the crown with a clean towel to help it keep its shape as it dries.
How to Clean a Straw Hat?
My aunt Jessica in Arizona taught me this. Sun and sweat are tough on straw. Water is its worst enemy.
First, always use a soft bristle brush to remove dust and loose particles. For a sticky spot or light stain, barely dampen the corner of a microfiber cloth with water.
Blot the spot lightly. Immediately follow with a dry part of the cloth to soak up any moisture. Let it dry completely in a well-ventilated area, but not in direct sunlight which can bleach and dry it out. For blood stains on fabric, especially underwear, extra care is needed.
For odor, place the hat in a large bag with an open box of baking soda overnight. The baking soda will pull out the smells without any moisture risk. This method is particularly effective compared to other techniques that do not require moisture.
How to Clean a Leather or Suede Hat?
Roger’s hunting hats get this treatment. These materials need specific potions, not kitchen concoctions.
For leather, use a leather cleaner and a soft cloth. Apply a small amount and wipe in a circular motion. After cleaning and drying, use a leather conditioner to restore oils and prevent cracking. For future stain protection, see our leather stain proofing guide for quick tips.
Suede is trickier. Use a suede brush or dry sponge to lift the nap and brush out dirt. For stains, a dedicated suede eraser or cleaner is your only safe bet. Test it on a small, hidden area first. Never get suede wet.
I keep a small suede kit in the hall closet just for these moments. It saves a lot of panic when Peeta decides to play with a hat.
How to Clean a Hat with a Cardboard Brim
This is the most common reason a favorite cap gets ruined. That brim inside most baseball caps is cardboard. I learned this after nearly drowning Jason’s lucky hat.
You must never, ever submerge a hat with a cardboard brim in water. The cardboard will warp, soften, and disintegrate.
Your goal is to clean the fabric crown without letting water seep into the brim seam. Mix a small amount of enzyme-based laundry detergent or oxygen cleaner with cool water in a bowl. Use a soft-bristled toothbrush dedicated to cleaning.
Dip only the bristles in your solution. Gently scrub the stained fabric, focusing on the sweatband and front panel. Keep the hat angled so any drips run away from the brim, not into it, especially when dealing with delicate fabrics or outerwear.
Use a clean, damp cloth to wipe away the soapy residue. Immediately pat the entire area dry with a towel. Let it air dry completely, preferably in front of a fan.
How to Clean a Hat with a Plastic Brim
These are much more forgiving. Many modern caps and visors have a plastic brim, which can handle a careful wash.
You can gently hand wash the entire hat in a sink of cool water with a spoonful of laundry detergent. Swish it around for a few minutes, then rinse thoroughly under cool running water until no soap remains.
The critical part is drying. Do not twist or wring the hat. Gently press out excess water with your hands or against the side of the sink.
Reshape the cap on your head or a hat form immediately. Let it air dry completely, keeping it out of direct heat which can warp even the plastic brim. I dry Jason’s team caps this way after every muddy game, and they hold up season after season.
Drying and Reshaping: How to Dry a Baseball Cap Properly

This step is just as important as the cleaning. How you dry your cap decides if it comes out looking like new or like a sad, misshapen rag.
Post-treatment recovery means being patient and letting your hat air dry away from any direct sun or heat. Heat is the enemy of shape and color.
Never put a baseball cap in the clothes dryer. The high heat and tumbling will absolutely warp the brim, shrink the fabric, and melt any internal stiffness.
I learned this the hard way with one of Roger’s favorite work caps years ago. It came out looking like a soup bowl with a bent noodle for a brim. He still gives me grief about it.
Instead, find a spot with good air circulation. A room-temperature room or a shady spot on a patio is perfect. Avoid that windowsill where sunlight beats down all afternoon.
What Helped Me: The Shape-Saver Trick
The biggest challenge is keeping the crown from collapsing as it dries. My go-to method is simple.
I stuff the crown of the damp cap with something that mimics a head’s shape.
- A clean, 1-pound coffee can works perfectly.
- Balled-up white towels or a t-shirt also do the job.
Just push your chosen former gently into the crown until the fabric is smooth and holds its curve. Let it sit until it’s completely dry to the touch, which can take a full day.
How to Reshape a Hat After Washing
If your cap feels a little limp or off-form after washing, you can fix it while it’s still slightly damp.
Gently mold the hat with your hands to remind it of its original shape. Run your fingers along the seam of the brim to re-sharpen any crease.
Cup the crown in your palms and press it back into a rounded form. For the bill, you can gently bend it back to your preferred curve or leave it flat on a table to set.
My son Jason is picky about the curve of his baseball cap bills. I often reshape them over the edge of the kitchen counter while we chat, getting the perfect arc he wants before it dries completely.
The Science of Sweat Stains: Why Your Method Works

Chemistry Corner: What You’re Really Dealing With
Sweat isn’t just salty water. It’s a stubborn mix.
Your body releases proteins, salts from minerals, and skin oils. Think of Jason’s baseball cap after a double-header. That dark ring isn’t just dirt.
It’s a baked-in layer of protein, crystalized salt, and body oil acting like glue on the fabric. This combo causes both the yellowish stain and that sour, persistent odor.
Why Your Kitchen Cabinet is a Cleaning Powerhouse
You don’t need harsh chemicals. Basic items work with simple science.
I learned this from my mom, Martha. Her home remedies always made sense once I understood the why.
Let’s break down each hero.
Dish soap, like Dawn or Palmolive, is a degreaser. Its job is to surround and break down oils. The oils in sweat bind the stain to your hat’s fabric. Dish soap lifts that oily glue away.
Baking soda is a natural deodorizer. It neutralizes odors by balancing pH levels.
That funky hat smell is often acidic, and baking soda absorbs and cancels it out. I keep an open box in my laundry room just for this.
White vinegar is a mild acid. It’s brilliant at dissolving mineral deposits.
The salts in sweat leave behind crusty residue; vinegar gently breaks those crystals apart. My aunt Jessica in Arizona uses it on everything, and now I see why.
Together, they tackle every part of the stain: oil, odor, and mineral build-up.
Prevention and Products: Keeping Hats Fresh Longer
You can wash a hat, but let’s be honest, it’s a chore. The real win is stopping the stain and smell before they sink in.
I learned this from my husband, Roger. He wears a hat for every outdoor project. His old favorites used to get a stiff, salty crust around the band.
Now, he swears by a simple trick. It changed his hat game completely.
How to Prevent Sweat Stains on Hats in the Future
The goal is to create a barrier between your forehead and the fabric. This simple step catches the sweat before it can soak in and cause damage.
I recommend starting with a simple cotton bandana or a moisture-wicking headband-it’s the easiest and cheapest line of defense. My son Jason wears one under his soccer cap, and it soaks up a shocking amount of moisture.
For a more seamless look, consider dedicated hat liners or “sweatbands for hats.” These are thin, absorbent strips that adhere to the inside front of the cap.
You peel off the backing and stick them right onto the sweatband. They absorb the moisture and are disposable or washable.
My mom, Martha, taught me another old-school trick for lighter wear. Simply sprinkle a little bit of cornstarch or baby powder on your forehead before putting the hat on.
It helps absorb light moisture. Just be careful not to use too much, or you’ll have a white dusting on your eyebrows.
Finally, give your hat a break. Don’t wear the same one multiple days in a row, especially in summer.
Let it air out completely between wears. Hang it on a hook, not stuffed in a dark closet or gym bag.
Recommended Products
Sometimes you need a little help from a good product. I keep a few staples on hand for maintenance and pre-treatment.
Enzyme-Based Stain Removers
These are my first line of attack for any organic stain, including sweat. Enzymes break down the proteins and oils in sweat that cause both stains and odors. This is the science behind enzyme cleaners in action, breaking stains down at the molecular level. Knowing this helps tailor how I tackle stains.
I keep a spray bottle of an enzyme cleaner in my laundry room. A quick spritz on the sweatband after a hot day lets the enzymes start working before the hat even hits the laundry basket.
My favorite brand for this is Biokleen Bac-Out. It uses live enzyme cultures and works on smells, too. For a stick format you can throw in a gym bag, the OxiClean MaxForce Gel Stick is fantastic.
Hat Cleaning & Deodorizing Sprays
These are perfect for a quick refresh between deep cleans. They won’t remove a set-in stain, but they are great for odor control.
Look for ones labeled as disinfecting or deodorizing. Many use a light fragrance and alcohol to kill odor-causing bacteria.
I’ve had good results with the Resolve Hat & Cap Cleaner spray. It’s easy to use. Just spray the interior, let it dry, and the hat smells fresh again.
Moisture-Wicking Sweatbands & Liners
As mentioned, these are a prevention powerhouse. Not all are created equal.
For active use, I always choose synthetic, moisture-wicking fabrics like CoolMax over cotton. Cotton gets saturated and stays wet against your skin.
Brands like Halo and Headsweats make excellent, durable headbands. For adhesive liners, “No Sweat” liners are widely available and do the job well for everyday caps.
Are There Any Products Specifically Made for Cleaning Hats?
Yes, there are! You can find commercial hat cleaning kits, usually near the shoe care or laundry aisle. They typically include a small brush, a cleaning solution, and sometimes a plastic form to maintain the hat’s shape during cleaning.
The main pro is convenience. Everything you need is in one box, and the forms are helpful for structured caps.
The cleaning solution is usually a gentle, all-purpose cleaner. The con is that it’s often a small amount of product for the price.
For most people, a DIY approach with a soft brush, mild detergent, and a bowl of water is just as effective and far more economical. The kits are great if you feel unsure about the process and want guided tools.
I bought one once to test it. It worked fine, but honestly, I now just use my soft-bristled toothbrush and a drop of dish soap. The plastic form was useful, though. I still use it for drying.
If you have several prized caps and want dedicated tools, a kit is a fine purchase. For cleaning your family’s everyday wear, your own supplies will serve you better in the long run.
FAQ about Removing Sweat Stains and Odor from Hats
What’s the best way to clean just the sweatband inside my cap?
Use a soft toothbrush dipped in a mix of cool water and a drop of dish soap. Gently scrub the entire band, then wipe with a cloth dampened with a 1:3 vinegar-water solution to disinfect and deodorize without a full rinse.
How do I clean a white hat without it turning yellow?
Always use cool water and a clear, mild detergent-never chlorine bleach. The key is to air-dry the hat away from direct sunlight, as heat and sun can cause the fibers to yellow.
Can I use household items on a leather or suede hat?
No, avoid water and DIY cleaners. If you ever need to remove water stains from leather, there are safe, proven steps to do it without harming the finish. For leather, use a dedicated leather cleaner and conditioner. For suede, use a dry suede brush or eraser only, and never get the material wet.
My hat’s brim got warped. Can I fix it?
If the brim is plastic, you can gently reshape it while it’s slightly damp and let it dry on a flat surface. If it’s cardboard, the warp is likely permanent, which is why you should never soak these hats.
What’s the easiest way to prevent sweat stains in the future?
Use a disposable adhesive hat liner or a moisture-wicking headband as a barrier. After wearing, always air out your hat in a well-ventilated area to let moisture evaporate before storing it.
Smart Habits for Hat Hygiene
The single most important step is to never let sweat dry into your cap; a prompt rinse with cool water can stop stains and odor before they start. For caps that need a deeper clean, a gentle, non-toxic soak is always safer than harsh scrubbing, a rule that saved Jason’s tournament hat last season. I share all my real-life stain battles and fabric-care wins over on Stain Wiki, and I’d love for you to follow along for more.
Suzanne is an accomplished chemist, laundry expert and proud mom. She knows the science and chemistry of stains and has personally deal with all kinds of stains such as oil, grease, food and others. She brings her chemistry knowledge and degree expertise to explain and decode the science of stain removal, along with her decades long experience of stain removal. She has tried almost everything and is an expert on professional and DIY stain removal from clothes, fabric, carpet, leather and any other items dearest to you.