How Do You Remove Stains from Clothes, Carpets, and Surfaces with Stuff at Home?
Seeing a fresh stain can make your heart sink, but please don’t worry. You can successfully handle most stains with simple household products, careful techniques, and the right water temperature.
This article walks you through the methods I trust, covering:
- Using pantry staples like vinegar and baking soda for safe, non-toxic cleaning.
- How and when to use hydrogen peroxide effectively on different fabrics.
- Deciding if a stain is a job for professional dry cleaning.
- Why water temperature matters more than you think for setting or lifting stains.
- Tailored steps for clothing, carpets, and various home surfaces.
I’ve spent years testing these methods on everything from my son Jason’s muddy soccer kits to my aunt Jessica’s red wine spills.
Your Stain-Fighting First Aid Kit: Household Heroes
You don’t need a closet full of mystery chemicals. The most reliable stain fighters are probably in your kitchen or pantry right now. I built my whole approach around a simple, non-toxic arsenal.
These are my everyday go-tos. I keep them handy for the instant a spill happens.
My recommended product categories are simple: oxygen-based bleaches for brightening, enzymatic cleaners for protein-based messes, and plant-based dish soaps for cutting grease gently.
The Absorbers: Baking Soda, Cornstarch, and Salt
These powders work by pulling oils and liquids up and out of fabric fibers. Think of them like tiny sponges.
Yes, baking soda can get stains out of clothes, especially greasy ones. Baking powder is different; it contains baking soda plus an acid, so it’s less reliable for pure absorption.
- For a fresh bacon grease spot on a t-shirt, I make a thick paste of baking soda and a few drops of water. I pat it on, let it dry into a crust, then brush it off.
- Cornstarch is my secret for lipstick on a collar. I dust it on, let it sit for 10 minutes to absorb the oils, then brush it away before laundering.
The Degreasers: Dish Soap and Rubbing Alcohol
Dish soap is engineered to break down oil and grease. It’s my first grab for cooking oil, butter, or salad dressing spills.
I used it just yesterday on Roger’s work shirt after he brushed against some machinery grease. A dab of blue dish soap, a gentle rub, and a cold water rinse worked wonders.
For synthetic fabrics, rubbing alcohol can remove oil stains beautifully because it breaks down the oil without soaking too far into the fiber. This is especially useful for delicate materials that might be damaged by regular oil stain removal methods.
The golden rule for any oil stain: blot first. Use a clean paper towel to soak up as much as you can. Rubbing just grinds it deeper.
The Acidic Allies: White Vinegar and Lemon Juice
Acids are fantastic for dissolving mineral deposits. They tackle rust, hard water rings, and even some berry stains.
Can apple cider vinegar remove stains? It can, but its amber color makes me nervous on light fabrics. I stick with clear white vinegar.
My mom, Martha, taught me to add half a cup of white vinegar to the laundry’s rinse cycle. It acts as a natural fabric softener and helps wipe out any leftover detergent that can attract dirt.
For a rust stain on a cotton towel, I’ll soak the spot in lemon juice, then lay it in the sun. The acid and sunlight often work together to fade it. This same lemon-and-sun trick can be used to remove rust stains from clothes fabrics, like shirts and jeans.
The Stain-Lifting Team: Club Soda and Hydrogen Peroxide
Keep a small bottle of club soda in the fridge. Its gentle fizz can help lift a fresh red wine or juice spill from the carpet if you blot with it immediately.
Then there’s hydrogen peroxide, the quiet powerhouse of my kit. It deserves its own spotlight next.
Hydrogen Peroxide: Your Secret Weapon for Tough Stains
Think of 3% hydrogen peroxide as a mild, oxygen-based bleach. It’s incredibly versatile, but you must respect it. Always, always test it on a hidden seam or corner first.
People ask me the proper way to use it all the time. The answer depends on the stain and the fabric.
| Stain Type | Panic Level (1-10) | The “Golden Window” |
| Fresh Blood | 10 | Immediately, while still wet. |
| Red Wine on Carpet | 9 | Within 10 minutes. |
| Grass on Whites | 7 | Before the wash cycle. |
| Underarm Yellowing | 4 | Anytime, with a pre-soak. |
What Stains Does Hydrogen Peroxide Beat?
It excels at organic stains. This includes blood, red wine, grass, fruit juice, and that dingy underarm yellowing on white shirts.
Can baking soda remove blood stains? It can help absorb a fresh spill, but hydrogen peroxide chemically breaks down the proteins in blood, often making it the more effective choice.
I keep a spray bottle of diluted peroxide in my laundry room. When Edward came over with a grass-stained knee from soccer, I sprayed his white jersey, watched it bubble for five minutes, then tossed it in a cold wash. The stain vanished.
How to Use Hydrogen Peroxide Safely on Any Surface
- Test it. Apply a drop to a hidden area, wait 5 minutes, then blot dry to check for color change.
- For most fabrics, use the standard 3% solution straight from the brown bottle. You can apply it with an eyedropper for precision or a spray bottle for larger areas.
- Let it dwell. You’ll see it fizz and bubble as it works. Give it 5-15 minutes on the stain.
- Rinse thoroughly with cold water. For clothes, follow with a normal wash cycle.
Be extra cautious with dark or brightly colored fabrics. A test spot is non-negotiable to avoid lightening the dye.
The Critical “Don’ts” of Hydrogen Peroxide
This tool has limits. Knowing them prevents disaster.
- Never use it on protein-based fibers like silk or wool. It can damage them.
- Never use it on leather, suede, or antique quilts and linens.
Also, never mix hydrogen peroxide with vinegar. It creates peracetic acid, which is irritating and useless for home stain removal. Use them separately, with a rinse in between.
The Temperature Tango: Hot vs. Cold Water Rules

Picking the wrong water temperature is the easiest way to make a stain permanent. I learned this the hard way years ago. My son Jason’s white soccer jersey came home with a grass stain, and I thought hot water would clean it best. The stain set into a dull green shadow, a reminder I still have. That moment taught me to test whether hot or cold water will lift a stain before washing. It’s a simple principle behind hot cold water stain removal. Think of water temperature as a chemical switch that either lifts a stain or bakes it in place.
Hot water can cook proteins like egg or blood right into fabric fibers, just like an egg white solidifies in a pan. For grease, that same heat is magic, melting the gunk so soap can grab it. Here’s a quick guide I keep in my laundry room:
| Reach for Cold Water For: | Reach for Hot Water For: | Always Check First: |
|---|---|---|
| Blood, Dairy, Egg | Grease, Cooking Oil, Butter | The Fabric Care Label |
| Grass, Mud, Wine | Sweat, Dirt, Motor Oil | Colorfastness (test a hidden seam) |
| Ink (some types) | Pet Urine (after enzyme treatment) | Stain Type |
Cold Water Champions: These Stains Need a Chill
When my aunt Jessica spills her cabernet on the tablecloth, we grab ice water immediately. The golden rule for protein and tannin-based stains is to keep them cold from pretreating through the wash cycle. Heat causes the proteins in these substances to coagulate and bind to the fibers.
- Blood: Cold water keeps the proteins soluble so they can rinse away. Hot water turns a fresh spot into a rusty, set-in stain.
- Dairy & Egg: Think of spoiled milk. That sour scent is proteins breaking down. Hot water cooks them on, creating a foul, set stain.
- Grass & Mud: Cold water helps loosen the chlorophyll and dirt without setting any natural dyes.
- Wine: Cold water dilutes the tannins and pigments, giving you time to blot them up.
My method is simple. For Jason’s grass stains now, I rinse the back of the fabric under cold tap water first, pushing the stain out, not rubbing it in. This is especially important for biological stains.
Hot Water Heroes: When Heat is Your Friend
For grease, heat is your best tool. My husband Roger works on the car, and his shirts get splattered with motor oil. Hot water (130°F and above) melts fats and oils, turning them liquid so detergent can surround and remove them.
- Cooking Oil & Butter: Hot water dissolves the grease. I pretreat with a bit of dish soap (a degreaser), then wash in the hottest water the fabric allows.
- Sweat & Body Oil: Heat helps break down the salty, oily residue that can yellow white fabrics over time.
- Dirt & Ground-In Soil: Warm to hot water helps suspend and flush away gritty particles.
This works best on sturdy, colorfast fabrics like cotton towels, denim, or white linens. I wouldn’t use hot water on a silk blouse with a butter stain. For that, I’d use a solvent or dish soap with a cool water rinse.
The Fabric Factor: Matching Temperature to Material
Your washing machine’s settings are not just suggestions. That care label is your first line of defense. Ignoring the fabric care label is a surefire way to shrink a sweater or fade a favorite dress.
Here’s how I match them up:
- Cold/Cool Water: Use this for delicates (lace, silk, wool), synthetic fabrics (polyester, nylon, spandex), and anything with dark or bright colors to prevent fading. This is my default for almost all mixed loads.
- Warm/Hot Water: Reserve this for white or colorfast cotton items, heavily soiled work clothes, linens, and towels where sanitization is a goal.
My personal rule, honed from many laundry mishaps, is simple. When I can’t identify the stain or I’m unsure about the fabric, I always choose cold water. It might not be the most powerful cleaner for every job, but it’s the safest bet to prevent a permanent disaster. My mom Martha always said, “You can always rewash with hot, but you can’t uncook a stain.” She was right. Unlike some of the laundry myths that can lead to more harm than good.
When to Call in the Pros: The Dry Cleaning Decision
I think a lot of us picture dry cleaning as just a fancy, expensive wash. It’s not. It’s a completely different process that uses chemical solvents, not water, to get things clean.
Water can swell and damage certain fibers. It can also set stains like oil, making them a permanent part of the fabric. The solvents used in dry cleaning are brilliant at dissolving oils and grease without harming delicate materials.
So when should you opt for it? If you’re staring at a delicate, expensive, or complicated item with a stain, that’s your signal. Can a dry cleaner remove oil stains? Absolutely, and they’ll often do it better than any home method because their entire process is designed for it.
Here are specific times to make the professional call your first choice:
- The care label clearly says “Dry Clean Only.” This isn’t a suggestion.
- The fabric is delicate, expensive, or you simply don’t know what it is.
- The stain is old, set-in, or you’ve already tried a home remedy that didn’t work.
- You’re dealing with a large or valuable item like a suit, formal gown, or heirloom piece.
Stains and Fabrics That Need a Professional
Some materials are just too finicky for the kitchen sink. My rule is simple: if I’d be heartbroken if it was ruined, it goes to the pro.
These fabrics often need the dry cleaner’s touch: silk, wool, suede, leather, velvet, and anything with ornate beading or delicate structure. Water can shrink wool, leave rings on silk, and utterly destroy suede’s texture.
Stain types matter too. Set-in cooking oil or grease, nail polish, ink on a nice shirt, and mysterious “what-is-that” stains are all prime candidates. I learned this with a favorite silk blouse. My aunt Jessica visited, her red wine sloshed, and that beautiful peach fabric was in peril. I knew my usual tricks risked a water ring or color loss. To the cleaner it went, and it came back perfect.
What to Tell Your Dry Cleaner for Best Results
Your job isn’t to fix the stain before you go. Your job is to give the expert the information they need.
When you hand over the item, point directly to the stain. Be specific. Say, “This is red wine from last night,” or, “I got driveway grease here.” The most helpful thing you can do is tell them what caused the stain, if you know. Different stains require different pretreatment solutions.
Do not try to pretreat it yourself first. Many home products can react with professional solvents and make the stain permanent. A good cleaner will perform their own spot tests in a hidden area to choose the safest, most effective method. You’re paying for their expertise, so let them use it.
Step-by-Step Stain Removal for Common Spills
Spills happen fast. I see the glass tip over, and my brain shouts “not the sofa!” But years of cleaning up after my crew have taught me one thing. The best first step is to stop and take one calm breath.
This is your universal, calm-down-first action plan. It works for ketchup on a tee-shirt, coffee on the carpet, or mystery glop on the kitchen counter. I use this same logic every time, and it keeps me from making a bigger mess.
Field Note: The mantra “blot, don’t rub” was a painful lesson from my golden lab, Peeta. Rubbing his muddy paw print on the light carpet just pushed the dirt deeper into the fibers. Blotting with a towel soaked up the moisture and lifted the dirt away.
The Golden Window: Your First 5 Minutes
Your first five minutes set the stage for success. The goal is simple: remove the excess spill without letting it spread or settle in.
For liquids like juice or milk, grab a stack of clean, white paper towels. Press down firmly and lift straight up. Work from the outer edge of the stain toward the center. For solids like spaghetti sauce or mud, use the dull edge of a butter knife to gently scrape the bulk into a trash can.
This is where your Panic-Level matters. A fresh red wine stain is a high-panic, high-urgency situation. A blob of butter on denim is low-panic. Your immediate action changes based on that.
The Universal Treatment Flowchart
After the initial crisis, follow this straightforward sequence. I think of it as my cleaning flowchart for almost any fresh stain.
- Blot and Scrape. Get rid of every bit of the spill you can physically remove. This step alone can solve minor messes.
- Identify the Stain. If you know it’s grease, fruit, or blood, you can pick the perfect weapon. If it’s a mystery goo, default to a cold water rinse.
- Pretreat with Precision. Match your product to the problem. A drop of blue dawn dish soap works on oily stains. Pouring cool club soda on a wine spill can help lift the color. For proteins like egg or blood, cool salt water is my first try.
- Wash with the Right Temperature. Heat sets stains. Cold water is safest for unknown stains, blood, or dyes. Hot water is for greasy, dirty soil. Always check the fabric care label first.
- Air Dry and Inspect. This is the most important rule. Never, ever put an item in the dryer if you suspect a stain remains. The heat will bake it in forever. Let it air dry completely, then check your work.
You might wonder, can baking soda and vinegar remove stains? They can, but not as a mixed paste. Baking soda is a mild abrasive that’s great for scrubbing out odors and surface grime from fabrics. White vinegar is an acid that breaks down mineral deposits and can help with some old, set stains. Using them together just makes a fun fizz that neutralizes both. I keep them separate in my toolkit for specific jobs, like using baking soda on a stinky laundry load or vinegar in the rinse cycle for towels. It’s crucial to know when to use them individually for stains.
Surface-Specific Strategies: From Carpet to Countertop
I learned early on with kids and a dog that a universal fix for stains is a myth.
What works on Jason’s soccer jersey can ruin my living room rug. You must tailor your method to the surface.
Blotting a carpet and scrubbing a countertop require different tools and techniques to avoid permanent damage.
Readers often ask me, “How do I remove stains from carpets with household items?” or “What are the key steps for various home surfaces?” I built this guide from my own trial and error to answer those exact questions.
Clothing and Washable Fabrics
My laundry room staple is a pretreatment stick. It’s my first strike against Jessica’s berry smoothie drips or Edward’s grass stains.
For older stains, I fill a sink with cool water and a tablespoon of detergent for a thirty-minute soak. This loosens the stain before the wash cycle, but sometimes even the best methods don’t remove them completely.
Always check the care label first; it tells you the maximum safe water temperature and whether to avoid bleach.
Can baking soda remove stains from clothing? Yes, in two ways. For fresh grease, I make a paste with baking soda and water, dab it on, and let it dry before brushing off.
For yellowing armpits on whites, I use a baking soda soak, a trick from my mom Martha. It gently lifts the dullness.
The Surface Compatibility Chart
Use this chart as your quick-glance guide. It summarizes the core approach for each common surface in your home.
| Surface | Best Approach | Biggest Caution |
|---|---|---|
| Carpet & Rugs | Blot, dilute with gentle cleaners, rinse, dry fast. | Overwetting causes mold and mildew in the pad. |
| Clothing & Fabrics | Pretreat, soak if needed, wash with correct water temperature. | Hot water can set protein-based stains like blood or milk. |
| Upholstery & Sofas | Blot, check fabric code, test cleaner, apply minimally. | Using water on a “S” (solvent only) code can cause rings. |
| Hard Surfaces | Wipe, scrub with pastes, disinfect, rinse clean. | Abrasive scrubs can scratch granite or glass cooktops. |
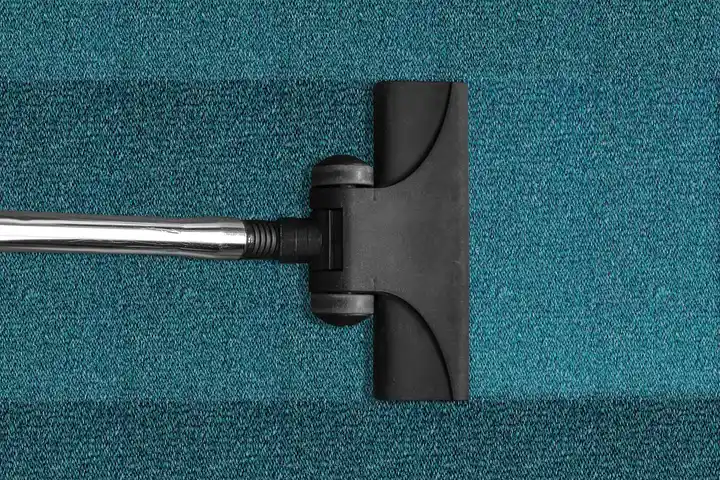
Carpets and Rugs
Act fast. When Peeta brings in mud, I grab a white cloth and press down firmly to absorb the mess. Rubbing grinds the dirt deeper.
For most food or drink spills, I mix a drop of clear dish soap into a cup of warm water. I dab this on, then blot with a water-dampened cloth to rinse.
Weighing down the damp area with a dry towel speeds drying and stops moisture from seeping down.
My mother-in-law Brianna once saved a rug by placing a fan nearby. Good airflow prevents that sour, damp smell from taking hold.
I never pour cleaner directly onto the carpet. It saturates the fibers and backing too quickly.
Upholstery and Sofas
Flip over a cushion and find the fabric code. W means you can use water-based cleaners. S means dry-cleaning solvent only. WS is for both, and X means just vacuum it.
I tested this on our old couch. A hidden seam is the perfect spot to check for color bleeding or texture change.
Even a mild dish soap solution can leave a ring on some fabrics if you don’t test it first.
For a code “W” spot, I use the same diluted dish soap method as for carpets. I apply it with a nearly dry cloth to minimize moisture.
For “S” fabrics, I use a store-bought upholstery dry-cleaning spray. I let it dry completely, then vacuum up the residue.
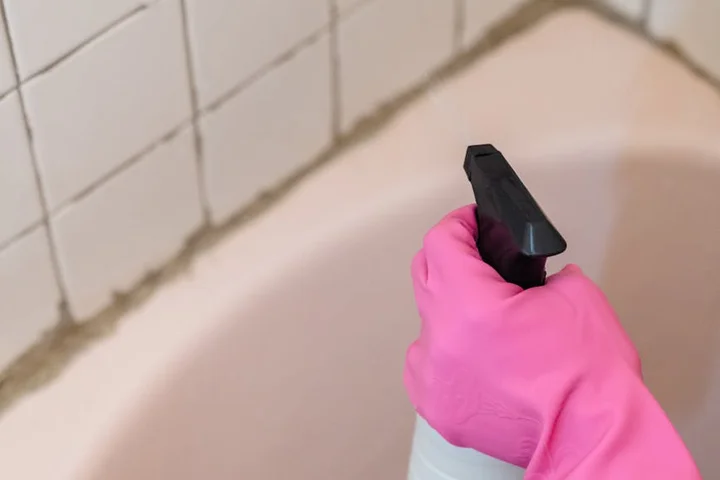
Hard Surfaces: Counters, Tile, and Driveways
On laminate or tile counters, a baking soda paste is my gentle abrasive. I sprinkle it, add water to make a sludge, and scrub with a soft sponge.
For disinfecting after handling chicken, I spray 3% hydrogen peroxide. It fizzes as it works and doesn’t leave a chemical scent.
White vinegar dissolves hard water spots on shower doors. The mild acid breaks down the chalky white film.
Our driveway sees oil from Roger’s truck. For fresh drips, I cover them with cat litter to soak up the grease overnight.
For set-in stains, I start with hot water, dish soap, and a stiff push broom. If that fails, a specialized concrete degreaser is my last resort.
After the Battle: Drying and Checking for Success

You’ve applied your cleaner, you’ve blotted and rinsed. Now comes the moment of truth. This post-treatment step is where I’ve seen so many people, including my past self, undo all their hard work. Proper drying and inspection are non-negotiable.
Think of this as the recovery room for your fabric. Rushing it can lead to a relapse. Air drying is your safest bet because it gives you a clear, final look at the stain site before applying any heat.
Here is how I methodically check any item before I call it clean.
How to Dry Without Setting the Stain
Never, ever grab that dryer right away. Heat is the enemy of an uncertain stain. I air dry everything first, without exception.
Lay the item flat on a clean, dry towel or a drying rack. This prevents water from wicking into clean areas and creating a “tide line.” For Jason’s soccer jersey or a nice blouse, I smooth it out to keep its shape.
Avoid direct, hot sunlight for colored fabrics. My Aunt Jessica in Arizona learned this the hard way with a favorite red top-sun-bleached spots are a different kind of stain. Bright, indirect light is perfect.
For carpets or upholstery, speed up air circulation. I point a fan at the damp area or open a window. For Peeta’s slobber spot on the rug, I’ll even gently blot with a dry towel to pull more moisture out before letting the fan do its work.
The Final Check: Is the Stain Really Gone?
Once the item is bone-dry, the real inspection begins. Do this under the best light you have. I often go right under the kitchen ceiling light.
Look at the spot from different angles. Sometimes a shadow reveals a faint ring you can’t see head-on. Next, feel it. Run your fingers over the area.
Is there any stiffness or a crispy ring? That’s leftover residue. Does it feel slightly tacky or sticky? That’s often oils or sugars hanging on. If you see or feel anything, the stain is not gone.
This is the single most important rule I follow: The dryer only touches items where the stain is 100% invisible and undetectable by touch. My mom, Martha, taught me this decades ago. Heat from the dryer will cook any lingering residue into the fibers, making it permanent. A second treatment is always easier than dealing with a heat-set stain.
If you’re unsure, do a “stress test.” Mist the spot lightly with plain water from a spray bottle. If a yellowish or brownish tint appears as it dampens, the stain is still there. Time for another gentle round of treatment.
For stubborn items I’m nervous about, I sometimes use a cool hairdryer from a distance to speed the air-dry process, or I’ll iron it on a low, no-steam setting with a pressing cloth (a thin, clean towel) between the iron and the fabric. This applies gentle heat with a buffer.
Stain Removal Troubleshooting and Pro Tips
Even with the best methods, stains sometimes laugh at our efforts. I’ve been there, staring at a faint ring after treating a spill.
Take a deep breath. First, blot any excess moisture with a clean cloth. Then, recheck the stain type and fabric care label.
When a stain resists, it usually means the wrong cleaner or temperature was used, not that you’ve failed. Let’s go over the critical don’ts and my family-tested tricks to get back on track.
Critical Warnings: Materials and Methods to Avoid
Safety and fabric care come first. Here is my absolute list of red flags.
- Never use chlorine bleach on silk, wool, or spandex. It dissolves these delicate fibers. I ruined a wool sweater years ago and still regret it.
- Never use hot water on blood or protein stains like egg, milk, or gravy. Heat cooks the protein into the fabric. Always start with cold.
- Never mix ammonia and bleach. This creates toxic, dangerous fumes. Store them in separate cabinets.
- Use vinegar with caution on natural stone like marble or on waxed wood floors. Its acidity can cause dull etching or strip the finish. My mom Martha in North Texas drilled this into me.
Following these rules prevents most cleaning disasters before they start.
Pro Tips From the Stain Wiki Editor
These are my field notes from life with kids, a dog, and a messy husband.
Keep an old, soft-bristled toothbrush for gentle agitation. I use it to work dish soap into grass stains on Jason’s soccer shorts before washing.
For dried gum on carpets or shoes, hold an ice cube directly on it until it’s rock hard. Then, gently pick or scrape it off. It worked on Peeta’s paw last week.
Ballpoint ink on a cotton shirt? Dab a little rubbing alcohol on a cotton swab. Always test on an inside seam first. It blots the ink right up.
My mother-in-law Brianna taught me a great grout trick during a visit. She saw my dingy kitchen tiles and said, “Mix baking soda and hydrogen peroxide into a thick paste.” We applied it, let it sit for ten minutes, then scrubbed with a toothbrush. The grout brightened up immediately. I use her method every spring now.
Everyday items and a little patience often solve the trickiest problems.
When the Stain Won’t Budge: Your Next Moves
If the stain remains after treatment, don’t despair. You have options.
Repeat the process, letting the cleaner sit for a longer time, like 30 minutes. For very old, set-in stains, they might be permanent. I have a tablecloth from a dinner with Aunt Jessica that still has a faint wine shadow.
Consider dyeing the entire item a darker color or using a decorative patch. Roger’s favorite canvas work jacket got a permanent oil stain, so we dyed it navy and he loves it even more.
For delicate silks, heirloom items, or large carpet spills, professional dry cleaning or restoration services are a smart investment. They have tools and solvents we can’t access at home.
Knowing when to step back and call for help is a sign of a savvy cleaner, not a defeat.
FAQ about Removing Stains with Household Products and More
What is the most versatile household product I should grab first for a mystery stain?
Reach for clear dish soap-it effectively cuts grease and is safe on most fabrics when dabbed on and rinsed with cool water. For non-greasy spills, a cold water rinse is your safest initial step to prevent setting the stain.
Can I use hydrogen peroxide on colored clothing without risking damage?
Always test hydrogen peroxide on a hidden seam first, as it can bleach dyes. If safe, apply the 3% solution sparingly, let it bubble for a few minutes, then rinse thoroughly with cold water to minimize color loss.
How do I know if a stain is too tough for home remedies and needs a dry cleaner?
If the item is labeled “dry clean only,” made of delicate fabric like silk, or the stain is old and set-in, take it to a professional. Home attempts on these can often set the stain or damage the material.
Why should I never use hot water on a fresh blood stain?
Hot water cooks the proteins in blood, binding them permanently to fabric fibers. Always rinse and soak blood stains in cold water first to dissolve and lift the proteins away effectively.
What’s the first thing I should do when I spill red wine on my carpet?
Immediately blot-don’t rub-with a clean, white cloth to absorb as much liquid as possible. Then, dab with club soda or a mix of water and a drop of dish soap to help lift the stain before it sets.
Building Your Confidence with Stain Removal
After years of testing methods on everything from Roger’s hunting gear to Edward’s soccer uniforms, I know that your best tool is always a moment of patience to match the stain type and fabric before choosing a treatment. For more trusted, step-by-step guides using what you already have at home, follow along with all our practical tips right here on Stain Wiki.
Suzanne is an accomplished chemist, laundry expert and proud mom. She knows the science and chemistry of stains and has personally deal with all kinds of stains such as oil, grease, food and others. She brings her chemistry knowledge and degree expertise to explain and decode the science of stain removal, along with her decades long experience of stain removal. She has tried almost everything and is an expert on professional and DIY stain removal from clothes, fabric, carpet, leather and any other items dearest to you.