How to Clean Vomit and Puke Stains from Carpets and Remove Dog Vomit
That sudden sight and smell on your carpet is overwhelming, but you can fix this. Grab plain white paper towels or a clean cloth immediately to gently blot up the liquid-this is your most critical step.
This article gives you my tested, step-by-step plan to fully restore your carpet:
- How to safely remove solid debris and liquid without spreading the stain.
- Mixing a simple, effective cleaning solution from common pantry items.
- Neutralizing odors so your room doesn’t smell like a sickbay.
- Final rinsing and drying tips to prevent any lingering residue or mold.
I’ve cleaned countless vomit stains from my Labrador Peeta and my kids, so I know what actually works.
Assess the Panic: Your First Moves When Vomit Hits the Carpet
I get it. That sudden, sour smell hits your nose and your brain screams. My golden lab, Peeta, has gifted our beige carpet with more than a few of these surprises. Your first instinct might be to panic. Take a breath. We can handle this.
Let’s do a quick Panic-Level Assessment. For vomit on carpet, I rate this an 8 out of 10 for urgency because the clock starts ticking the moment it lands.
You have a Golden Window of about 30 minutes. After that, the proteins and acids bond with the fibers. The stain sets. The smell becomes a permanent, sour guest. Act fast, but don’t rush and make it worse.
Your universal first-aid steps are simple. I keep a dedicated “ick kit” under the sink for moments like this.
- Grab gloves and a plastic bag. Scoop up any solid bits with a spoon or dull knife.
- Blot the liquid. Use a stack of clean, white towels or paper towels. Press down firmly and lift. Never rub. Rubbing grinds the mess deeper into the carpet pad.
- Work from the outside edge of the stain toward the center. This contains the spill instead of spreading it.
Panic-Level Assessment: Vomit on Carpet
Why the high panic score? It’s the triple threat. My son Jason’s stomach bug aftermath taught me this. You’re dealing with a stain that can set quickly, smell awful, and attract bacteria. Immediate action is your best weapon.
Surface Compatibility: Carpet vs. Upholstery vs. Clothing vs. Hard Floors
The first steps are similar, but you must adapt your pressure and tools. My aunt Jessica’s wine-spill on her silk blouse is a different beast than Peeta’s mess on the rug.
| Surface | Key Adaptation |
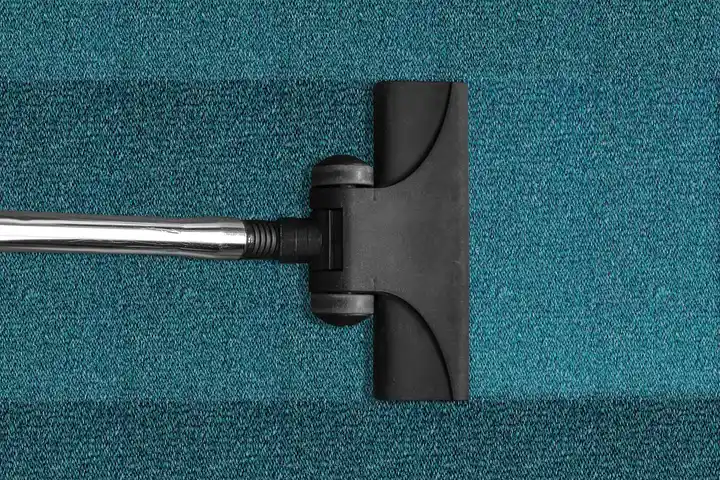
| Carpet | Blot deeply. You’re fighting the pad underneath. A wet/dry vacuum is a huge help after blotting. |
| Upholstery | Blot gently to avoid pushing moisture into the cushion. Check the manufacturer’s tag first. |
| Clothing | Scrape, then rinse the stain from the backside under cold water. This pushes the stain out, not through the fabric. |
| Hard Floors | Scoop and wipe. The priority here is stopping the acidic liquid from damaging sealants or grout. |
The Science Behind the Stain: Why Vomit is So Tough
Knowing what you’re fighting takes the fear away. Vomit isn’t one thing. It’s a complex cocktail, and each part attacks your carpet in a different way.
Chemistry Corner: Protein, Acid, and Bile
Think of vomit in three layers. The first is undigested food, a protein-based stain. Heat sets protein, like an egg on a pan. The body’s warmth starts this process instantly.
The second layer is stomach acid. This is why vomit smells sour and can slightly bleach or discolor dyes. The third is bile, a yellowish-green fluid that adds a stubborn, oily component. This combination of protein, acid, and oil is what makes vomit a champion stain-maker.
Enzymes in cleaners break apart the protein chains. A mild acid like white vinegar helps neutralize the stomach acid. Dish soap cuts through the oily bile. It’s a targeted approach.
Material Red Flags and “Never-Use” Chemicals
Some materials need a professional. My mom Martha’s antique Oriental rug? I wouldn’t touch a vomit stain on that myself. Silk, antique fibers, and some delicate wool blends are red flags.
Your chemical choice matters. Never use chlorine bleach or straight ammonia on a vomit stain. Bleach can react with the proteins and set a permanent yellow stain. Ammonia can create dangerous fumes when mixed with other cleaners. Harsh chemicals can also destroy carpet fibers, leaving a rough, damaged spot.
Stick to the gentle, targeted cleaners. They work with the stain’s chemistry, not against your carpet.
Step-by-Step: How to Clean Fresh Vomit from Carpet
I’ve cleaned up more than my share of messes, from Peeta’s doggy disasters to my daughter Jessica’s midnight tummy troubles. Acting fast on a fresh stain is your biggest advantage. The goal here is to remove the material, neutralize the odor, and lift the stain without driving it deeper. Odors from urine and feces can linger in carpet fibers even after the stain is gone. For those moments, prioritizing odor removal is just as important as stain lifting in carpet care. Always do a hidden test patch with any cleaner on a small, unseen corner of your carpet first to check for colorfastness.
Step 1: Contain and Remove the Solids
Grab an old spoon, a plastic scraper, or a stiff piece of cardboard. Your mission is to scoop up the chunky bits without mashing them into the carpet fibers. Work gently from the edges toward the center.
Think of it like cleaning up spilled oatmeal. You wouldn’t rub it in. You’d carefully lift it out. This step prevents you from spreading stomach acids and food particles that can permanently damage the carpet backing.
Step 2: Blot and Flush with Cool Water
Now, pour a small amount of cool, clean water directly onto the stain. Let it sit for just a moment to dilute what’s left. Use a stack of clean, white towels or paper towels and press down firmly to blot, absorbing the diluted mess. Do not scrub or rub. Make sure to blot berry stains on fabric gently.
Replace your towels often as they get dirty. Keep blotting until the liquid you’re pulling up is mostly clear. Warm or hot water can set protein-based stains, so cool is your friend here. My aunt Jessica’s wine trick taught me this: cold water first for organic stains.
Step 3: Apply Your Chosen Cleaning Solution
After flushing with water, you need a cleaner to tackle the stain and odor. For me, the choice depends on the culprit.
For pet messes (like from Peeta), I reach for an enzymatic cleaner specifically made for pet stains and odors. It uses natural bacteria to “eat” the organic matter. Follow the bottle’s instructions precisely.
For a human mess or if I don’t have a commercial cleaner, I make my own. My mom Martha swears by a mix of 2 cups cool water, 1 tablespoon clear dish soap (like Dawn), and 1 tablespoon white vinegar. The soap lifts grease, and the vinegar cuts odor.
Apply your solution to a clean cloth first, then dab it onto the stain. Always work from the outside edge of the stain toward the center to prevent it from spreading into a larger, more noticeable ring.
Step 4: Rinse Thoroughly and Blot Dry
This is the step most people skip, and it leads to a sticky, dirt-attracting residue. After your cleaning solution has done its job (about 5-10 minutes), you must rinse it out.
Pour a small amount of cool water over the area. Blot it up with a fresh, dry towel. Repeat this rinse-and-blot cycle once or twice. Your final blot should be with a perfectly dry towel, pressing hard to wick up as much moisture as possible and speed drying.
Let the area air dry completely. You can point a fan at it or open a window. Avoid walking on it until it’s dry to keep fibers from getting crushed.
Field Note: What Helped Me – The Toothbrush Maneuver for Fibers
After a bad episode with Peeta, I was left with a matted-down spot in our plush carpet. Everything was clean, but the fibers were stuck together in a crusty clump.
I took an old, soft-bristled toothbrush, dipped it in cool water, and very gently brushed the fibers in a circular motion right at their base. This was after the stain was fully treated and rinsed.
This gentle “fluffing” action helps separate the carpet fibers from the backing where residue can hide, lifting them up so air can circulate and they can dry properly. It prevented that one spot from looking permanently flattened and different from the rest of the rug. Just be incredibly gentle to avoid damaging the carpet weave.
Special Cases: How to Get Dried Dog Vomit Out of Carpet Fibers
I know that panicked feeling. You find a dry, crusty patch on the carpet and think, “How do I get dog vomit out of carpet fibers now?”
My dog Peeta has left me a few of these surprises. The method changes when the stain is dry.
For a dried stain, you can’t just blot-you have to gently rehydrate it first to avoid grinding it deeper into the fibers.
Fresh vomit is about quick containment. Dried vomit is about careful softening.
Both need enzyme cleaners to break down the proteins, but the starting point is different.
This same patience applies to any set-in puke stain, whether from a person or a pet.
Similar rules apply for other organic messes like dog diarrhea, which I’ll touch on later.
Rehydrating a Dried Vomit Stain: Patience is Key
Do not pour liquid directly onto the crust. This can force particles down.
I use a clean white cloth or a few paper towels soaked in cool water. I wring it out so it’s just damp, not dripping.
Lay the damp cloth over the stain and let it sit for 10-15 minutes to slowly soften the mess.
Think of it like softening dried clay. My son Jason’s old play-doh taught me that rushing just makes a bigger mess.
Check it. If it’s still hard, re-wet the cloth and wait again. This might take a couple of cycles.
Once it’s soft, use a dull knife or a spoon to gently lift off the bulk of the material. Scrape carefully toward the center.
Now, apply your enzyme cleaner directly to the damp area. I keep a spray bottle of a commercial pet stain remover for this.
Let the enzyme solution dwell for the time listed on the bottle-usually 10 to 15 minutes. This lets it break down what’s left.
Deep Cleaning for Embedded Dog Vomit in Fibers
Even after scraping and enzyme treatment, odors and discoloration can linger deep down.
This is where a deeper clean happens. My go-to is my carpet shampooer. I use the upholstery tool for small spots.
If you don’t have a machine, you can make a cleaning solution. I learned this from my mom Martha in North Texas.
Mix one tablespoon of clear dish soap (like Dawn) and one tablespoon of white vinegar into two cups of warm water.
Work this solution into the stain with a soft-bristled brush, using gentle circular motions from the outside in.
Blot, don’t rub, with a dry towel to lift the soapy residue. You might need to rinse with a cloth dampened with plain water and blot dry again.
For persistent stains, a paste of baking soda and a little hydrogen peroxide (3%) can help. Test for colorfastness in a hidden spot first.
Let the area air dry completely. I sometimes point a fan at it to speed things up.
A dry, clean towel laid over the spot with a heavy book on top can also wick out last bits of moisture as it dries.
Quick Note on Dog Diarrhea and Poop Stains
The initial cleanup for dog diarrhea or solid waste is very similar to vomit.
You’re still dealing with a protein-based, organic stain. Always remove any solid material first with gloves and a bag.
Blot, don’t wipe, any liquid residue and hit it immediately with an enzyme cleaner to break down the stains and odors.
The key difference is that diarrhea can have stronger bile stains. My aunt Jessica in Arizona swears by a bit of borax in her rinse water for tough spots.
For any bio-stain, an enzyme cleaner is your best first defense. It targets what causes the smell and the lasting color, unlike bleach, which often fails with biological stains.
Banishing the Smell: How to Get Rid of Dog Vomit Odor After Cleaning

Getting the stain out is only half the battle. The smell can linger like a bad memory, and it needs a targeted approach.
I learned this the hard way with Peeta. I cleaned a spot perfectly, but a week later, a faint sour scent returned every time the room got warm.
Why the Smell Lingers and How to Stop It
That stubborn smell isn’t just a memory. It’s often live bacteria or acidic stomach contents left deep in the carpet pad.
Heat and humidity reactivate them, causing the odor to “bloom” again. To truly stop the smell, you must neutralize the source, not just cover it with perfume.
Think of it like cleaning a blender. If you just rinse it, old smoothie bits stuck under the blade will start to stink. You have to disassemble and scrub.
Will Baking Soda or Vinegar Remove Dog Vomit Smell?
My Aunt Jessica swears by white vinegar for wine smells. My mom, Martha, is a baking soda devotee. For dog vomit, their usefulness is limited but specific.
Baking soda is a mild deodorizer. Sprinkling it on a dry, cleaned area can help absorb ambient odors as it sits. It’s a good final polish, not a primary cleaner, especially when compared to vinegar for tougher smells.
White vinegar is a weak acid that can help neutralize the alkaline components of bile, which is a key source of the lingering sour smell.
Here is how I use them safely:
- After the stain is gone and the carpet is rinsed, mix a solution of 1 part white vinegar to 2 parts cool water in a spray bottle.
- Lightly mist the entire affected area. Do not soak it.
- Blot firmly with a clean, dry towel to lift the solution and any residual acidity.
- Once the area is just damp, you can sprinkle a thin layer of baking soda over it. Let it sit for several hours, then vacuum thoroughly.
For strong, recurring odors, you likely need an enzymatic cleaner. These contain live bacteria that actually digest the organic waste causing the smell. They are a game-changer for pet accidents. Bio enzymatic cleaners are designed specifically for odor elimination at the source. They break down the organic residues that feed odors, making your space smell fresh again.
Post-Treatment Recovery: Drying and the Final Check
How you dry the spot is critical. Heat can set any remaining stain proteins, making them permanent.
I never use a hairdryer or space heater. Instead, I create maximum airflow.
- Open windows in the room.
- Point a fan directly at the cleaned area.
- Place a dry, white towel over the damp spot and weigh it down with a heavy book. This wicks moisture up from the base of the fibers.
The final check is simple: get down on your hands and knees and use your senses.
First, look for any discoloration in bright, natural light. Next, press your nose close to the carpet and take a sniff. Does it smell clean, or is there a faint chemical or sour note?
Finally, feel the fibers. They should be fluffy and dry, not crunchy, stiff, or tacky. A crunchy texture means cleaning residue was left behind, which will attract dirt.
If you fail any part of this check, go back and rinse the area with plain cool water and blot dry again. Patience here saves you from a permanent stain or a smell that comes back to haunt you.
Your Cleaning Arsenal: Solutions, Tools, and DIY Alternatives
You cannot will a vomit stain away. I have tried. You need the right weapons for the job. My dog Peeta, with his sensitive stomach, has given me a crash course in emergency response.
This section is your pre-game strategy, your list of what to grab when the moment hits.
Safe DIY Alternatives: What to Use If You Have No Commercial Cleaner
Your kitchen or laundry room holds powerful cleaners. My Aunt Jessica, a fan of natural methods, swears by these for small, fresh messes.
Always test any solution on a hidden corner of your carpet first, like inside a closet. Colors and fibers can react unpredictably.
For a simple, general cleaner, mix equal parts white vinegar and cool water in a spray bottle. Vinegar cuts through the mess and neutralizes odors. My mom, Martha, taught me this one. It is great for a first pass.
Do not use hot water, as it can set proteins in the vomit, making the stain permanent.
After blotting with vinegar solution, sprinkle baking soda liberally over the damp area. Let it dry completely into a crusty white powder. This will absorb leftover moisture and lingering smells. Vacuum it up thoroughly.
For tougher stains and mild bleaching, a 3% hydrogen peroxide solution is an option. Spray it on, let it bubble for 5-10 minutes, then blot.
Hydrogen peroxide can lighten some colored carpets, so that hidden spot test is non-negotiable here. I learned this the hard way on a dark blue rug runner.
I need to be very clear about one thing. Do not, under any circumstances, mix vinegar or any acid with bleach. The fumes are toxic and dangerous. Just pick one path and stick with it.
Recommended Products: Enzyme Cleaners, Oxygen Boosters, and Carpet Shampoos
For serious, set-in stains or odors, DIY mixes often are not enough. This is where specialized products earn their keep.
Enzymatic cleaners are my first recommendation for any biological stain, including vomit or spit-up stains. They use natural bacteria to “eat” the proteins and organic matter in vomit. Peeta’s mishaps taught me to always have a bottle ready. You spray it on, let it dwell as directed, and it breaks down the stain at a molecular level.
Oxygen-based boosters, like powder additives you mix with water, are fantastic for lifting discoloration. They work by oxidizing the stain, similar to hydrogen peroxide but often in a more carpet-safe formula.
They are excellent for tackling the dull yellow or brown ring that can be left behind after cleaning. I use these when my son Jason tracks in mud that looks suspiciously like something else.
Carpet shampoos are for the final, deep-cleaning phase. I use my machine every few months, and it always pulls up grime I cannot see.
A good carpet shampooer with hot water can flush out the last traces of a stain and restore the carpet’s pile. It is the ultimate reset button for your floors.
Essential Tools for Removing Vomit Stains
Your tools are as important as your cleaners. Trying to clean a mess without the right gear is a frustrating exercise.
- Disposable Gloves: This is non-negotiable. Protect your hands. Keep a box under the kitchen sink.
- A Dull Knife or Plastic Scraper: For gently lifting away solid chunks. Be careful not to grind them in.
- Plain White Paper Towels or Microfiber Cloths: You need absorbent, lint-free material. Colored towels can transfer dye. Microfiber is incredibly grabby and effective for blotting.
- A Large Bowl of Cool Water: For rinsing your cloth and the carpet. Change it often.
- Spray Bottles: For applying your DIY or commercial solutions with control, not a damaging deluge.
- A Wet/Dry Vacuum: This is a game-changer. It is the best tool for pulling cleaning solution and dissolved gunk out of the carpet base. My husband Roger uses ours for his workshop, so I have to claim it fast when needed.
Having these tools in one designated spot saves precious minutes when you are facing a messy situation. Trust me, you do not want to be searching for a scraper while the stain sets.
Prevention and Care: Keeping Puke Off Your Carpet

After years of scrubbing carpets, I shifted my focus to prevention.
It saves time and keeps your home smelling fresh.
A little planning makes cleanup much less stressful when accidents happen.
Start with simple strategies. In high-risk areas, I use washable rugs or mats.
My mom, Martha, from North Texas, always had a cheap cotton rug near the back door for muddy paws.
When my dog Peeta gets sick, I just toss that rug in the washing machine.
For pets, gentle prevention helps. Frequent vomiting can signal a diet issue or illness.
Peeta used to vomit after eating too fast. We switched to a slow-feeder bowl, and it helped a lot.
Observing your pet’s habits can prevent many carpet emergencies.
Remember, every stain teaches you something. My son Jason’s friend Edward once got car sick on our rug.
Now, I keep a stack of old towels in the car. You learn as you go.
Practical Tips for Pet Owners and Parents
Here are my tried-and-true tips from living with kids and a Labrador.
Keep a cleanup kit ready. Mine has microfiber cloths, a spray bottle with plain water, and a box of baking soda.
Being prepared turns a messy crisis into a quick cleanup job.
- For pets: Watch for warning signs. Peeta paces and whines before he vomits, so I can quickly lay down a plastic sheet or newspaper.
- For kids: Teach them to use a bowl or bucket. My daughter Jessica is only three, but she knows to shout for help when she feels sick.
- Use protective layers. Place a waterproof pad under pet beds or high chairs. My aunt Jessica in Arizona does this to protect her floors from wine spills.
- Manage meal times. Don’t let pets or kids eat right before vigorous activity. Roger, my husband, feeds Peeta after his morning walk, not before.
My mother-in-law, Brianna, visits from Southern Texas and always reminds me that simple habits prevent big messes.
Her advice saved our living room carpet more than once.
When to Call a Professional Cleaner
DIY methods work most of the time, but not always.
Know when to hand the job to a pro.
Call a professional if the vomit has soaked deep into the carpet padding or underlay.
Home cleaners can’t always extract that much moisture. I learned this after Peeta’s major upset on our bedroom rug.
The stain seemed gone, but a sour smell lingered for days.
- Persistent odors mean bacteria or residue remains deep in the fibers.
- Large, old stains that have set may require industrial-strength solutions.
- If the carpet is antique or very delicate, professional care avoids damage.
- Allergy concerns are another reason. Pros can sanitize and remove allergens more thoroughly.
Don’t see calling for help as a failure. It’s a smart choice to save your carpet and your peace of mind.
I’ve done it, and it let me focus on taking care of my family instead of scrubbing.
FAQ About Cleaning Vomit from Carpets
What’s the one thing I should never do when I first see the stain?
Never rub or scrub the mess. This grinds the stomach acids and proteins deeper into the carpet fibers and pad, making the stain and odor permanent. Always blot by pressing straight down with a clean, absorbent cloth.
I don’t have vinegar or baking soda. What’s a safe, effective alternative I can mix right now?
Mix a solution of cool water and a few drops of clear dish soap (like Dawn). The dish soap will cut through the oily bile component. Blot it on, then thoroughly rinse the area with plain water to prevent a soapy residue.
How can I tell if the vomit has damaged my carpet fibers or dye?
After the area is completely dry, inspect it in bright light. Look for bleaching or discoloration, which is caused by stomach acid, and feel for crunchy or stiff fibers, which indicate leftover cleaning residue. Damage to dye is often permanent, but residue can be rinsed out.
The stain looks gone but the smell came back days later. What does this mean?
A returning odor means organic matter or bacteria remains deep in the carpet pad. You need an enzymatic cleaner designed for pet odors, as the enzymes will digest the remaining source of the smell. Covering it with deodorizer will not work. That’s a key step in removing pet odors from living spaces. Consider a thorough room-wide cleaning for lasting freshness.
How can I dry the carpet quickly to prevent mold without using heat?
After your final rinse, press firmly with dry towels, then place a dry, clean towel over the spot and weigh it down with a heavy book to wick moisture up. Use a fan to circulate air in the room; avoid heaters or hair dryers as heat can set any remaining stain.
Protecting Your Carpet After Treatment
Act fast when vomit hits your carpet—blot it up quickly to prevent set-in stains and odors. I always follow with a gentle, enzymatic cleaner to break down what’s left without harming the fibers. For more real-world tips from our life with Peeta and the kids, keep reading right here on Stain Wiki.
Suzanne is an accomplished chemist, laundry expert and proud mom. She knows the science and chemistry of stains and has personally deal with all kinds of stains such as oil, grease, food and others. She brings her chemistry knowledge and degree expertise to explain and decode the science of stain removal, along with her decades long experience of stain removal. She has tried almost everything and is an expert on professional and DIY stain removal from clothes, fabric, carpet, leather and any other items dearest to you.