How to Remove Urine Stains and Odor from Toilet Seats: Plastic, Wood, and Cushioned
Noticed a stubborn yellow ring or a faint smell on your toilet seat? You can completely remove both urine stains and odors using simple, safe methods tailored to your seat’s material.
- The specific cleaners and tools that work best on plastic, wood, and cushioned seats without harming them.
- Clear, step-by-step instructions to lift even set-in stains effectively.
- How to neutralize odors at the source for a truly fresh bathroom.
- Easy habits to prevent future buildup and maintain a clean seat.
I’m a stain-removal specialist who has tested these techniques on every seat type, from my own home with active kids and pets to helping friends solve their toughest bathroom messes.
Panic-Level Assessment: Is This a True Emergency?
Take a deep breath. This isn’t a red-alert crisis.
For most toilet seats, I give this a low 2 out of 10 on the panic scale. Plastic and sealed wooden seats are designed to handle moisture. The real urgency kicks in with cushioned or very old, unsealed wooden seats.
The real clock you’re racing is the “Golden Window” for odor, not the stain.
Urine odor sets into porous materials much faster than a visible stain appears. The longer it sits, the more that sour, ammonia-like scent binds. On a plastic seat, you might just see a dull, yellowish ring. On a cushion, it soaks deep into the foam core. For upholstery, removing cat urine stains and odors is crucial, and practical steps will follow. The next section walks you through simple, effective methods to restore fabric and cushions.
I also watch for limescale. My Aunt Jessica in Arizona has incredibly hard water. I noticed that the mineral buildup around her seat hinges acted like a sponge, trapping urine and amplifying the smell over time. Tackling both the stain and any scale is key for a lasting clean.
Your First Move: The Universal First Aid Steps
Before you touch anything, put on a pair of disposable gloves. It’s a simple habit that keeps things hygienic.
Your best move is to remove the entire seat from the toilet bowl for cleaning. It lets you reach every nook. To do this, locate the plastic bolt covers at the back of the seat. Pry them open with a flathead screwdriver. Underneath, you’ll find nuts (usually plastic) holding the seat on. Unscrew these by hand or with pliers, and lift the seat away.
Gather these supplies for all seat types:
- Several clean microfiber cloths
- A soft-bristled brush (an old toothbrush is perfect)
- A bottle of mild, clear dish soap (like Dawn or Seventh Generation)
Here is my non-negotiable rule. Never, ever mix cleaning chemicals, especially bleach and ammonia. Urine contains ammonia. Adding bleach creates toxic chloramine gas. I stick to one cleaner at a time, always in a well-ventilated room.
How Do I Remove Urine Stains and Odor from a Plastic Toilet Seat?
Plastic seats are the most forgiving. Start with a basin of warm water and a good squirt of your mild dish soap.
Dip a microfiber cloth in the soapy water, wring it out well, and wipe down the entire seat. Pay special attention to the underside and the top rim where stains collect. For a textured seat, use your soft brush to agitate the soap into the grooves. For specific techniques on treating water stains, especially on fabric upholstery, refer to this car seat water stain removal guide.
Rinse the seat thoroughly with a cloth dipped in clean water. If the stain or a faint odor remains, you have two great options, especially for water stains on leather.
- Baking Soda Paste: Make a thick paste with baking soda and a little water. Spread it over the stained area and let it sit for 15-20 minutes. The baking soda is a gentle abrasive and a brilliant odor absorber. Scrub lightly with your damp cloth and rinse.
- Vinegar Solution: Mix equal parts white vinegar and water in a spray bottle. Mist it on the seat, let it sit for 5-10 minutes (it will neutralize ammonia odors), then wipe and rinse clean.
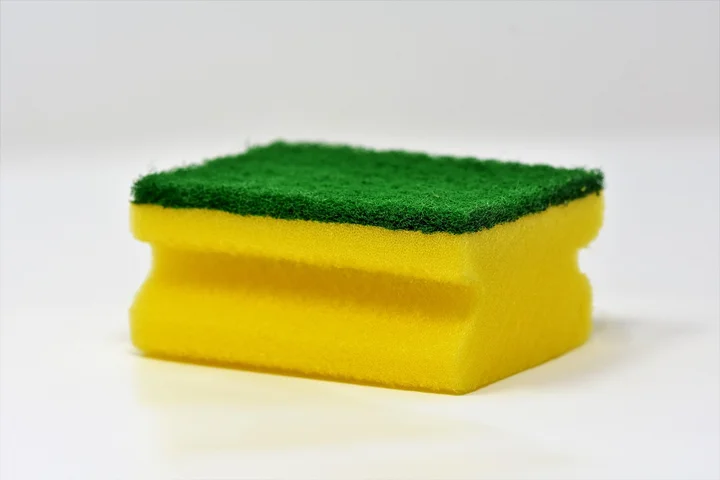
Avoid green Scotch-Brite pads or powdered cleaners with large granules, as they will leave fine scratches in the plastic where future grime will stick. A melamine foam eraser (like a Mr. Clean Magic Eraser) can be used very gently for stubborn mineral rings, but test it on a hidden spot first.
Field Note: The hinge area is a grime magnet. This is where my old, designated cleaning toothbrush earns its keep. A few drops of dish soap and a quick scrub in those tight spaces works wonders.
How Do I Remove Urine Stains and Odor from a Wooden Toilet Seat?
Wood needs a gentle touch. My first warning is crucial. Never soak a wooden seat or use harsh chemicals like bleach, ammonia, or all-purpose cleaners, as they will strip the finish and warp the wood.
Start with a microfiber cloth dampened (not dripping) with warm water. Add just one small drop of mild dish soap. Wipe the seat down thoroughly, following the wood grain.
Immediately follow with a second cloth dampened with only water to rinse off any soap residue. Dry the seat completely with a clean, dry towel.
If a urine odor lingers, dampen a cloth with a 50/50 mix of white vinegar and water. Wipe the surface quickly and then dry it even faster with your towel. Vinegar neutralizes odor but you don’t want it sitting on the wood. This helps remove urine smell from wood floors. If it lingers, follow with a wood-safe deodorizer.
After cleaning and once the seat is bone-dry, I condition the wood. I apply a light coat of food-safe mineral oil with a soft cloth, let it soak in for 15 minutes, then buff off the excess. This replenishes the wood’s natural moisture and helps protect it. My mom, Martha, taught me this trick for her antique home.
How Do I Remove Urine Stains and Odor from a Cushioned Toilet Seat?
Be honest with yourself. Cushioned seats are the most challenging because the vinyl cover is just a barrier over absorbent foam. If the urine has saturated the foam core, complete odor removal is very difficult and replacement might be the most sanitary option.
For a fresh spill or a surface stain, act fast. Never rub. Always blot.
Mix a small amount of mild dish soap with cool water. Using a white cloth (to avoid dye transfer), dab the solution onto the stain. Blot constantly with a dry part of the cloth to pull the moisture back out. Be careful not to use this method on suede or other delicate fabrics.
For older odors, an enzyme cleaner meant for pet accidents is a good choice. These break down the uric acid crystals that cause smell. Apply it according to the bottle’s directions, letting it dwell, then blot repeatedly with a water-dampened cloth to rinse. It is especially helpful in removing pet odors from living spaces where the smell tends to linger.
Thorough rinsing and absolute, complete air drying are non-negotiable to prevent mold and mildew inside the cushion. Prop the seat up in a breezy, dry area for at least 24 hours. I might even point a fan at it.
Manage your expectations. A slight discoloration or a faint smell might remain if the urine penetrated deeply. The foam can hold odor like a sponge. If that’s the case, a new seat is a fresh start for your bathroom.
Chemistry Corner: Why Does This Happen?
Think of a urine stain as a two-part problem. First, you have the visible mark. Second, you have the smell that just won’t quit.
The stain itself is protein-based. It’s similar to the ring left by a splash of milk or egg. This is why it can leave a faint, sometimes sticky, yellow or brown discoloration on porous surfaces.
The real culprit behind that stubborn smell is a chemical change happening right under your nose.
Urine contains urea. When urea breaks down, it turns into ammonia. You know that sharp, eye-watering scent in a poorly kept litter box or a toddler’s accident? That’s ammonia gas being released.
This ammonia makes the residue alkaline. An acidic cleaner, like distilled white vinegar, works by neutralizing that alkalinity. It chemically cancels out the odor source and helps dissolve any gritty mineral deposits left behind.
For the deep-down biological odor, enzyme cleaners are your best friend. I use them on my dog Peeta’s occasional mishaps on the carpet. They contain live bacteria that literally eat the urine proteins, eliminating the food source for the ammonia smell. It’s a slower process, but it’s a permanent fix. That is where bio enzymatic cleaners for odor elimination come in. They use beneficial bacteria to digest organic residues at the source.
Recommended Products & Safe DIY Swaps
You don’t need a cabinet full of harsh chemicals. A few trusted items handle most situations.
Products to Keep On Hand
- Enzyme-Based Cleaners: Look for sprays labeled for “pet stains” or “biological odors.” Brands like Nature’s Miracle or Rocco & Roxie are staples in my house.
- Mild Dish Soap: A simple, clear soap like Dawn is fantastic for cutting through the initial grime without damaging finishes.
- Distilled White Vinegar: This is my workhorse for odor neutralization. It’s cheap, effective, and non-toxic.
- Baking Soda: A gentle abrasive and fantastic odor absorber. It’s perfect for making a paste for tougher stains.
My Go-To DIY Recipes
For a quick, all-purpose cleaner and odor neutralizer, I make a vinegar spray. My mom, Martha, taught me this one.
Mix equal parts distilled white vinegar and warm water in a spray bottle. That’s it. Shake it up before each use. The warmth helps the vinegar work faster.
For a set-in stain that needs a little scrubbing power, a baking soda paste is my first move.
In a small bowl, mix baking soda with just enough water to form a thick, spreadable paste, like the consistency of toothpaste. This paste gently abrades the stain and absorbs odors as it sits.
Homemade vs. Store-Bought: My Take
For fresh spills and general odor, my DIY vinegar spray works wonders. It’s my first line of defense.
If the smell has set in or I’m dealing with a old, recurring problem, I reach for a commercial enzyme cleaner. They are simply more powerful at breaking down the organic matter causing the smell. It’s like the difference between airing out a room and removing the rotten apple under the couch.
Critical Warnings: What Never to Do
I’ve learned some of these the hard way. Protecting your seat is just as important as cleaning it.
Never use chlorine bleach on a wooden toilet seat. Full stop. I ruined the finish on a beautiful oak seat years ago. Bleach breaks down the wood’s sealant and can cause whitening, cracking, and warping.
Scouring pads or steel wool are too aggressive. They will scratch glossy plastic, leaving dull marks, and can tear the vinyl covering on a cushioned seat. A soft cloth or soft-bristled brush is all you need.
Wood and cushioned seats hate being wet. After cleaning, always take an extra minute to dry them thoroughly with a clean, dry towel. Lingering moisture can warp wood and seep into cushioning, creating a musty smell.
Always, always test your cleaner on a hidden spot first, like the underside of the seat or the back hinge cover. I do this even with “safe” products. Wait a few minutes to ensure it doesn’t discolor or damage the surface. This simple step has saved me from many disasters.
Keeping It Clean: How to Prevent Future Stains and Odors
Cleaning up a big mess is one thing. Stopping it from happening again is the real goal. A little routine care saves you from a major scrub-down later.
The Daily Dash
This takes 30 seconds. I keep a canister of disinfecting wipes in each bathroom cabinet. After my boys, Jason and Edward, use the bathroom in the morning, I give the seat top and bottom a quick once-over.
A daily wipe catches the drips before they dry into a crusty, smelly stain.
If you don’t like wipes, a spritz of all-purpose cleaner and a dedicated microfiber cloth works just as well.
The Weekly Weekly Weekly
Life gets busy. I get it. But once a week, make it a habit. This is the clean that gets under the hinges and around the bolts.
Lift the seat and lid. Spray everything-the seat, the porcelain rim, the hinges, the bolts-with your cleaner. Let it sit for five minutes to break down any hidden grime. Then scrub and wipe dry.
In a house with young boys, this weekly deep clean is non-negotiable for odor control.
Check the Seals
Here’s a tip many forget. Over time, the bolts holding the seat to the toilet can loosen. This creates tiny gaps where liquid can seep down and become a hidden, stinky problem.
Every few months, lift the plastic caps on the hinge bolts and use a screwdriver to give them a gentle tighten. Don’t overtighten, or you might crack the porcelain.
Field Note: My Behind-the-Toilet Bottle
My aunt Jessica, who loves her white wine and a clean house, taught me this. I keep a spray bottle of my own mix behind each toilet.
- Half distilled white vinegar
- Half water
- 10 drops of tea tree or lavender essential oil (for scent and extra cleaning power)
It’s always there for a quick spray. The vinegar cuts through urine residue and neutralizes odors on contact. It’s my first line of defense.
When Cleaning Isn’t Enough: Time for a Replacement?
We’ve all been there. You’ve scrubbed, soaked, and treated, but the seat just doesn’t feel clean anymore. Knowing when to surrender and buy a new one is a form of self-care.
The Signs Are There
Different materials have different breaking points.
Plastic Seats: Look for deep, stained cracks or a permanent yellowed, brittle feeling. Once cracks form, bacteria live deep inside where you can’t reach.
Wood Seats: If the wood is warped, splintering, or the finish is completely worn away, it’s absorbing moisture constantly. It will never truly be sanitary again.
A foul odor that returns hours after cleaning a cushioned seat means it’s soaked through to the inner foam. That smell is there for good.
The Cushioned Seat Reality
I have to be blunt here. A heavily soiled, old cushioned seat is often a lost cause. The vinyl cover might clean up, but if urine has penetrated the seam and saturated the padding underneath, the odor is permanent, and no amount of cleaning will remove the smell.
You can mask it for a day, but it will come back. My mother-in-law, Brianna, insisted on trying to save an old one. We spent an afternoon on it. A week later, the faint sour scent was back.
The Final Check
Close your eyes. Run your hand over the surface. Does it feel slick, gritty, or just…unclean, no matter what you do? Trust that instinct.
If the surface feels fundamentally unsanitary to you after all your efforts, it is. That’s your sign it’s time for a fresh start.
A new seat is an inexpensive upgrade for your peace of mind. Sometimes, the best cleaning method is a trip to the home store.
FAQ About Removing Urine Stains from Toilet Seats
1. Can I use hydrogen peroxide on a plastic seat for a tough stain?
Yes, 3% hydrogen peroxide is a safe, effective bleach alternative for plastic. Apply it, let it bubble for 5-10 minutes, then scrub and rinse thoroughly to lift set-in discoloration.
2. Is vinegar safe for all wooden seats, and if not, what should I use instead?
Only use diluted vinegar briefly on sealed wood; avoid it entirely on unsealed or waxed finishes as it can damage them. For these, stick to a damp cloth with a drop of dish soap and dry immediately.
3. What’s the fastest first-aid for a fresh urine spill on a cushioned seat?
Immediately blot-don’t rub-the area with a cool, water-dampened cloth to dilute and lift the urine. Then, blot dry with a towel and place the seat in a well-ventilated area to air dry completely.
4. The odor on my plastic seat keeps returning. What am I missing?
You’re likely missing the hidden grime in the hinge assembly and bolt areas. Remove the seat and scrub these components with a brush and soapy water to eliminate the odor reservoir.
5. Can I use a steam cleaner on any toilet seat material?
Do not use a steam cleaner on wooden or cushioned seats, as the heat and moisture can warp wood and drive moisture into cushion foam. It can be used cautiously on plastic, but test on a hidden area first.
Keeping Your Toilet Seat Clean for the Long Haul
No matter what your seat is made of, the single best move is to wipe up urine spills right away with a damp cloth and a bit of mild soap. This simple habit stops stains from bonding and odors from taking hold, protecting the material underneath. For step-by-step fixes on every mess you can imagine-from Jessica’s art projects to Roger’s muddy boots-follow along with me on the blog.
Written by Suzanne Rosi Beringer. Suzanne is an accomplished chemist, laundry expert and proud mom. She knows the science and chemistry of stains and has personally deal with all kinds of stains such as oil, grease, food and others. She brings her chemistry knowledge and degree expertise to explain and decode the science of stain removal, along with her decades long experience of stain removal. She has tried almost everything and is an expert on professional and DIY stain removal from clothes, fabric, carpet, leather and any other items dearest to you.