How Do You Remove Tree Sap and Bird Droppings from Car Paint Safely?
That blob of sap or bird dropping on your car isn’t just ugly-it can etch into the clear coat if ignored. You can remove both safely with isopropyl alcohol, a microfiber cloth, and plenty of patience.
This guide will walk you through the entire process, from why these messes are so damaging to how to protect your paint afterward. Here’s what I’ll cover:
- Why tree sap and bird droppings are a clear coat emergency.
- The simple, safe products you need (most are in your house).
- A step-by-step removal method that prevents swirls and scratches.
- How to wash and seal the area to keep it shining.
- Real-life lessons from cleaning my family’s cars after soccer games and park trips.
I’ve tested these methods for years on everything from my minivan to my husband Roger’s truck, using knowledge passed down from my mom Martha.
First, Don’t Panic (But Do Act Fast)
Let’s rate the urgency right now. Tree sap is a 4 out of 10 on the panic scale. It’s a sticky nuisance, but it won’t ruin your paint in a day. Bird droppings are a solid 9.
I learned this from my son Jason’s soccer buddy, Edward. A bird targeted his mom’s car after a game, and the stain set in fast.
The acidity in bird waste acts like a slow battery acid, and sunlight speeds up the chemical reaction that etches the clear coat.
This creates your “golden window.” You have just a few hours, ideally two or three, to remove bird mess before it can cause a permanent dull spot.
Your immediate first-aid is simple. For fresh bird droppings, use a clean microfiber cloth lightly dampened with water. Gently blot to lift the bulk of it.
For dry, hardened tree sap, do absolutely nothing at first.
Trying to wipe it dry is a mistake. I made it once on my own car, and it just smeared the sap into a wider, tackier mess.
Never scrub or use abrasive cloths on dry contaminants. This rule is non-negotiable.
Scrubbing grinds the sap or dried waste into the paint, creating fine scratches called swirl marks. My husband Roger almost used an old shop rag on some sap. I had to intervene.
Your Toolkit: Safe and Effective Options
Gather these items before you start. Having them ready makes the whole process smoother.
Your core materials should include:
- Plenty of clean, soft microfiber cloths
- A spray bottle filled with plain water
- Your regular car wash soap (the pH-balanced kind)
- 70% isopropyl alcohol in a small bottle
- A quick detailer or detailing spray
- A clay bar and its dedicated lubricant spray
- A commercial bug and tar remover
For safe DIY alternatives, look no further than your house. 70% isopropyl alcohol is a champion for dissolving tree sap.
A small dab of olive oil can also soften sap for easy wiping. My aunt Jessica in Arizona taught me that trick years ago.
Now, know what to avoid. These are material red flags:
- Steel wool or any metal brushes
- Kitchen scrubbers like the green abrasive pads
- Harsh solvents like acetone, nail polish remover, or gasoline
These harsh tools and chemicals will strip your clear coat, leaving a foggy, damaged finish that requires professional repair.
My favorite tool is a clay bar kit. I keep one in Roger’s truck for sap emergencies after his hunting trips.
When used with plenty of lubricant, it glides over the paint and literally pulls the bonded contaminants out. You can feel the surface get smooth.
How to Remove Tree Sap Without Hurting the Paint
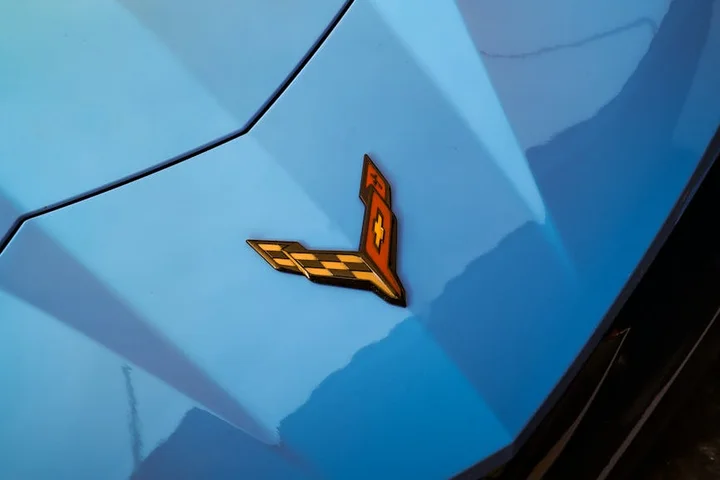
The safest and most effective method uses isopropyl alcohol (rubbing alcohol) or a commercial tar and sap remover. These products dissolve the sap without damaging your car’s clear coat. I keep a bottle of 70% isopropyl in my garage for this exact reason.
If you only have a tiny spot, dedicated hand sanitizer gel can also work in a pinch. More on that in a moment.
The Isopropyl Alcohol Method
This is my go-to for sticky, fresh sap. It’s simple and works fast.
- Test first. Dab a tiny amount of isopropyl alcohol on a clean microfiber cloth and rub it in a hidden spot, like the edge of a door frame. Check for any dulling or discoloration after a minute.
- Apply to the sap. Soak a small corner of a clean microfiber cloth with the alcohol. Gently press it onto the sap spot and hold it there for 30-60 seconds. This softens the resin.
- Wipe gently. Using a light, circular motion, wipe the softened sap away. Switch to a fresh part of the cloth as it gets dirty. Do not scrub hard.
- Repeat if needed. For thicker sap, you may need to apply and hold the cloth a second time.
Chemistry Corner: Sap is a natural plant resin, and isopropyl alcohol is a solvent that breaks down its sticky bonds, letting you lift it away without abrasive force.
The Clay Bar Technique
Use a detailing clay bar for widespread, fine sap mist or for bits of sap that feel rough and don’t fully dissolve with alcohol.
My mom, Martha, taught me this trick after her car sat under a pine tree for a week.
- Knead your clay bar until it’s soft and pliable.
- Spray a generous amount of clay lubricant or a soapy water mixture onto the painted surface.
- Glide the flat clay bar back and forth over the lubricated area. You’ll feel and hear it grabbing the contaminants.
- Frequently fold the clay to expose a clean surface. Stop if you drop the bar on the ground (it will pick up grit and scratch your paint).
For household products, yes, olive oil or peanut butter can work. The oils can soften sap. But they leave a greasy film you must degrease with soap afterwards, which is an extra step. I don’t recommend them for large areas.
Last summer, I found a clear, tacky blob of sap on my passenger door. My purse only had hand sanitizer. I squeezed a dollop onto a napkin, held it on the sap for a minute, and it wiped right off. It was a perfect quick fix. I still washed and waxed the spot when I got home.
Post-Treatment Recovery is non-negotiable. Any solvent, even alcohol, can strip the protective wax from that spot. If melted wax ends up on the floor, knowing how to remove melted wax from floors is essential.
- Rinse the treated area thoroughly with clean water.
- Wash the entire panel with car wash soap and a clean mitt.
- Dry completely and apply a fresh coat of spray wax or sealant to restore protection. This seals the paint and makes future cleanups easier.
How to Remove Bird Droppings Before They Etch the Clear Coat
Bird droppings are acidic. They can etch a permanent dull spot into your clear coat in hours, especially in hot sun.
Time is your enemy here. I learned this the hard way when a dropping sat on my hood over a weekend. It left a faint, permanent shadow I had to polish out. Don’t be like me.
The Gentle Soak-and-Lift
This is your first move. Never wipe a dry dropping.
- Spray the dropping liberally with a quick detailer spray or a soapy water mixture in a spray bottle.
- Place a soaked, folded microfiber cloth over the spot. Let it sit for 5-10 minutes. This neutralizes the acids and rehydrates the mess.
- Gently lift the cloth, rolling the softened dropping onto it. Rinse the area immediately.
Let the liquid do the work. Your goal is to lift it away, not grind it into the paint.
Can vinegar remove bird droppings? Technically, yes, its acidity can break it down. But vinegar is also acidic, so you’re trading one acid for another. It’s not the best first choice for your paint’s delicate surface.
For Stubborn, Dried-On Messes
If the dropping is baked on and won’t lift with a soak, escalate carefully.
- Spray a safe tar and sap remover directly onto the spot and let it dwell for the time listed on the bottle.
- You can also use your isopropyl alcohol method, diluted 1:1 with water for a milder approach.
- Apply with a microfiber cloth, let it soften the crust, then attempt the soak-and-lift again.
My final warning: never, ever pick at a dried dropping with your fingernail or a sharp tool. You will microscratch the clear coat, and those scratches catch the light forever.
After removal, wash the area gently with car soap. Dry it and inspect closely in bright light. If you see a dull etched ring, a light polishing compound may be needed, but that’s a topic for another day. For now, a good coat of wax will protect the area.
Side-by-Side: Which Method Should You Choose?
Different messes need different plans. Here’s how I break it down for my own car after parking under our big oak tree.
| Stain | Best First Try | Stronger Option | Household Substitute | When to Use This |
|---|---|---|---|---|
| Tree Sap | Rubbing Alcohol (70% Isopropyl) | Commercial Bug & Tar Remover | Hand Sanitizer | For fresh, tacky sap. Works fast with minimal fuss. |
| Bird Droppings | Water & Car Wash Soak | Diluted White Vinegar | Baking Soda Paste | Always start here. It’s the gentlest way to loosen the deposit. |
The safest way for tree sap is a cotton ball soaked in rubbing alcohol. Dab it on, let it sit for 30 seconds, and wipe. The alcohol dissolves the sap without the harshness of stronger solvents, which can damage delicate finishes like those used in wood stain.
The safest way for bird poop is a pre-soak with water and car shampoo. Cover the spot with a wet, soapy microfiber cloth for 5-10 minutes. This softens it so it wipes away without grinding abrasive grit into your paint.
Is It Safe to Use Bug and Tar Remover on Car Paint?
Yes, but you must follow the rules. I keep a bottle in my garage for the really stubborn, baked-on tar spots Roger’s truck picks up on back roads.
These products are powerful solvents designed for automotive paint. That’s their strength and their risk.
My usage rules are non-negotiable: test on a hidden spot first, apply only to the stain, never let it dry, and wipe it off completely within the time listed on the bottle.
I treat it like a targeted medicine, not a general cleaner. For most sap, alcohol does the job without needing this step.
How to Protect Your Paint When Removing Stains
Removing the stain is only half the job, especially when it comes to removing hard water stains from car paint. Protecting your clear coat is the other. These rules have saved my paint from my own mistakes.
- Always Test First. Dab your chosen cleaner (alcohol, vinegar, commercial remover) on a small spot in the door jamb or under the trunk lid. Wait a few minutes. If the paint looks fine, you’re clear to proceed.
- Work in the Shade. Heat bakes stains into the paint and makes solvents evaporate too fast. This can leave a concentrated residue that damages the finish. I always pull the car into the garage.
- Use Ample Lubricant. Your best friend is a layer of protection. For bird droppings, that’s soapy water. For sap or tar removers, I spray a light mist of quick detailer on the area first. This provides a slight buffer between the chemical and your paint.
The golden rule: if the stain doesn’t wipe away easily with solvent, reapply it and wait longer. Never scrub with pressure. Pressing hard grinds contaminants, creating micro-scratches. Patience protects the clear coat.
My mother-in-law Brianna swears by baby oil for tree sap. It works because oil can dissolve the sap. I tried it once. While it removed the sap, the oily film it left behind was a pain to fully degrease, and it attracted more dust. I prefer rubbing alcohol because it evaporates cleanly, leaving nothing behind to wipe up (unlike when you use baby oil on clothes or hair).
Did the Stain Already Cause Damage? How to Tell
First, don’t panic. A small sap blob or a bird dropping from this morning likely hasn’t done permanent harm. The real trouble starts when these sticky messes bake in the sun for days or weeks. I learned this the hard way when Roger’s truck sat under a pine tree for a weekend fishing trip.
Inspect the spot closely in good light. Tilt your head to see the reflection. Look for a dull, cloudy shadow in the paint’s shine where the stain was-that’s a sign the clear coat is compromised. Sometimes it looks like a faint ring or halo.
Next, use your sense of touch. Gently run a clean fingertip over the area. Does it feel perfectly smooth like the surrounding paint? If you feel a slight roughness, a tiny pit, or a texture change, that’s etching. The acids or sap have started to eat into the clear coat’s surface.
Your Action Plan if You Find Damage
You found a dull spot or felt some etching. This is fixable. For very light cloudiness or minor roughness, you can often correct it at home. I keep a tube of non-abrasive polish and a soft microfiber applicator pad in my kit for this exact reason.
Apply a dime-sized amount of polish and work it in a small, gentle circular motion over the damaged spot. Wipe it away and check. This mild abrasion can often level out the damaged clear coat, restoring the shine and smoothness. It’s like gently buffing a shallow scratch out of a plastic lens.
If the etching is deep enough to catch your fingernail, or if polishing doesn’t bring the shine back, it’s time to call a professional detailer. They have the tools and compounds to safely cut deeper without burning through the clear coat. Trying to aggressively fix a deep etch yourself risks making it worse.
A Quick Note of Reassurance
Cleaning tree sap or bird poop the right way almost never causes the damage itself. The damage comes from leaving it there. I’ve cleaned hundreds of these spots off our family minivan (thanks, Peeta and park trees) with no ill effects.
Etching is a result of neglect, not careful removal. My neighbor learned this after a seagull’s gift sat on his hood for a month. The stain came off, but a permanent, milky mark remained. Act quickly, use the right materials, and your paint will thank you.
FAQ about Removing Sap and Bird Droppings from Your Car
How quickly do I need to remove bird droppings?
Treat it as an emergency. Bird droppings can etch the clear coat in as little as 2-3 hours in hot sun, so remove them immediately to prevent permanent dull spots.
What common household items are safe to try first?
For sap, use 70% isopropyl alcohol on a microfiber cloth. For fresh bird droppings, start with a soak using water mixed with a dab of your pH-balanced car wash soap (make sure to rinse it out properly).
When should I use a clay bar versus a liquid solvent?
Use a solvent like alcohol for a concentrated blob of sap. Switch to a clay bar if the paint feels rough from widespread, fine sap mist or tiny, hardened specks that don’t dissolve.
What’s the most important rule to avoid scratches?
Never scrub a dry stain. Always soften the contaminant first with your chosen product and let the liquid do the work, lifting it away with gentle pressure. This is one of the mistakes to avoid when removing stains.
What should I do right after I’ve wiped the stain away?
Wash the area with car soap, dry it thoroughly, and immediately apply a spray wax or sealant. This replaces the protective layer that removal products can strip. Implementing proper techniques for paint stain removal ensures your car’s surface remains pristine.
Keeping Your Car’s Finish Spotless
Always tackle tree sap and bird droppings the moment you see them. Using a gentle, dedicated method like isopropyl alcohol for sap or a quick water rinse for droppings protects that precious clear coat from permanent harm. I learned this after a pine tree left a sticky gift on my hood, but a swift cleanup left no trace. These quick steps also work for removing biological stains from fabric. They help keep clothes and upholstery looking fresh. For more real-world advice on stains and surfaces, follow along right here on the blog.
Written by Suzanne Rosi Beringer. Suzanne is an accomplished chemist, laundry expert and proud mom. She knows the science and chemistry of stains and has personally deal with all kinds of stains such as oil, grease, food and others. She brings her chemistry knowledge and degree expertise to explain and decode the science of stain removal, along with her decades long experience of stain removal. She has tried almost everything and is an expert on professional and DIY stain removal from clothes, fabric, carpet, leather and any other items dearest to you.