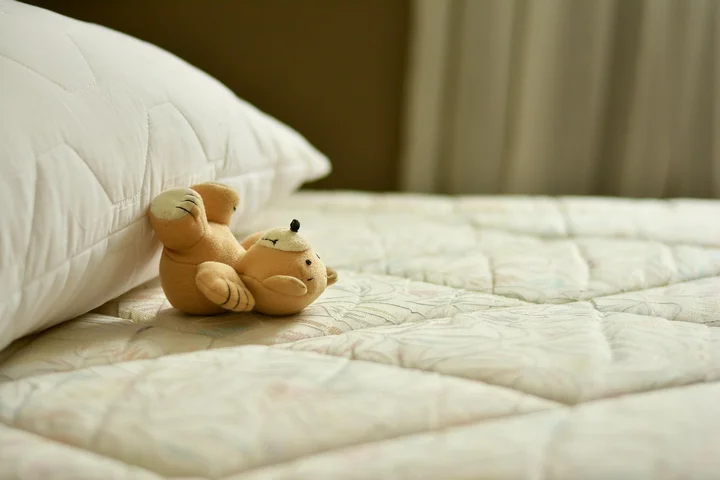
How to Remove Urine Stains from a Mattress: Fresh Spills and Old Stains
Urine on a mattress feels like a disaster, but take a breath. Whether it’s a fresh accident from my three-year-old Jessica or an old mystery stain, you can restore your mattress with a systematic approach.
This guide will walk you through:
- The immediate blot-and-soak technique for new wet stains
- Creating a highly effective enzyme cleaner from household staples
- Breaking down and lifting set-in, discolored old stains
- Ensuring your mattress dries completely to prevent odors
- Long-term protection strategies for peace of mind
I’ve tested every step here on mattresses marked by my kids, my dog Peeta, and life’s unexpected moments.
First, Assess the Pee Situation: Fresh Stain or Old Set-In Stain?
Walking into a room and smelling that sour, ammonia scent is a universal parenting and pet-owner moment. I’ve had my share with Peeta and my kids. Your first step is to figure out what you’re facing.
A fresh urine stain is still damp. It feels cool and looks like a dark, spreading blotch. The smell is sharp but contained to the wet area.
The age of the stain dictates your entire battle plan, so don’t skip this step.
An old, set-in stain is dry. You’ll see a yellowish-brown ring and smell a musty, persistent odor that seems to waft up on humid days. My mother-in-law Brianna once helped me tackle a set-in stain in a guest room that had been there for weeks.
I use a simple “Panic-Level” rating to keep my own stress in check. It helps me allocate time and effort realistically.
- Fresh Stain (Panic Level 3): You have a golden window of about 15-30 minutes. The urine is still liquid and hasn’t bonded deeply with the fibers. This is your best-case scenario.
- Old Set-In Stain (Panic Level 7): This requires patience and enzyme power. The urea has broken down into ammonia crystals, creating a stubborn stain and odor. It’s not hopeless, but it needs a strategic approach.
Acting fast on a fresh stain is the easiest path to success. When my daughter Jessica had an accident during a nap, I raced to blot it. That quick action meant no stain or smell remained by bedtime.
Your Urine Stain Removal Toolkit: What You’ll Need
You likely have most of what you need in your kitchen and laundry room. I keep this kit assembled for emergencies.
Here are the cleaning agents I always reach for.
- White Distilled Vinegar: Its acidity neutralizes the alkaline salts in urine and breaks down the stain. It’s my first line of defense for odor.
- Baking Soda: This is for absorbing odors after cleaning. It leaves the mattress smelling clean and neutral.
- Clear Liquid Dish Soap: A few drops help cut through the mild oils in urine. I use the same blue dawn dish soap I use for my dishes.
- 3% Hydrogen Peroxide: This is a gentle bleach alternative. It oxidizes and can lighten the discoloration from an old stain.
- Commercial Enzyme Cleaner: For old stains, this is non-negotiable. The enzymes digest the urine proteins that cause odor. I’ve tested several brands for Peeta’s mistakes.
Gather these simple tools. They make the process much smoother.
- Clean, white towels or paper towels (color can transfer)
- A spray bottle for applying vinegar or peroxide mixes
- A small bowl for making a baking soda paste
- A vacuum cleaner with an upholstery attachment
Safe DIY Alternatives
Out of a specific product? Don’t worry. You can improvise with what you have.
My aunt Jessica taught me a quick substitute for enzyme cleaner when I was out.
- Mix one cup of cold water, one cup of white vinegar, and two teaspoons of dish soap in a spray bottle. Shake it gently. It won’t digest proteins like enzymes, but it will clean and deodorize.
- For a drying absorbent, make a thick paste of baking soda and a little water. Spread it on the stain. It pulls moisture and odor like the store-bought powders.
- If you have no peroxide, stronger vinegar solutions can help. Just use equal parts vinegar and water.
Material Red Flags: What to Avoid
Mattresses are an investment. Some well-meaning fixes can ruin them.
Never mix bleach with ammonia or vinegar. The chemical reaction can create dangerous chlorine gas.
Avoid high heat. Never use a hairdryer, steam cleaner, or iron on a urine stain, especially on memory foam. Heat will cook the proteins into the fabric, setting the stain and smell permanently.
Always check your mattress care label first. Some waterproof covers can be degraded by acidic cleaners like vinegar. Do a spot test on a seam or corner first.
The Golden Window: How to Remove Fresh Urine from a Mattress

You found a warm, damp spot on the mattress. I’ve been there too, more times than I can count. Acting fast is your best weapon against stains and smells.
Your Step-by-Step Action Plan
Grab some old towels you don’t mind staining, a spray bottle, and your cleaning solution. Here is exactly what to do next.
- Blot, Never Rub. Press a dry, absorbent towel firmly into the spot. Lift, move to a dry section of towel, and press again. Rubbing pushes urine deeper into the mattress layers, making the stain permanent.
Field Note: After the initial blot, I place a completely dry, folded towel over the area and stack a heavy book on top. My son Jason’s old science textbook works perfectly. This presses out residual moisture the surface blotting missed. Leave it for 30 minutes while you mix your cleaner.
- Apply Your Cleaning Solution. Choose one of two reliable options. Do not mix them.
Your Cleaning Solution Options
Both methods work. I keep white vinegar under every sink, so it’s usually my first grab.
- The Vinegar Solution. Mix equal parts white distilled vinegar and cool water in a spray bottle. Vinegar is a mild acid that neutralizes the alkaline salts and ammonia in urine, killing the odor at the source. It’s my go-to, learned from my mom Martha.
- The Dish Soap Solution. Mix 1 teaspoon of clear, blue, or green dish soap (like Dawn or Palmolive) with 2 cups of cool water. Dish soap is a degreaser and surfactant, designed to break down and lift organic matter.
- Lightly Spray and Wait. Mist the stained area until it is damp, not soaking wet. Let the solution sit for 5-10 minutes to break down the stain. You might see it wicking back to the surface.
- Blot It All Back Up. Use a fresh, dry towel to blot the area firmly, lifting the cleaning solution and the dissolved stain. Repeat until the towel comes away mostly dry.
The Crucial Finale: Rinse and Dry
This step is non-negotiable. Leaving any cleaning residue behind can attract dirt or create a sticky spot.
- Rinse with Plain Water. Lightly mist the area with plain, cool water from a clean spray bottle. This rinses out the vinegar or soap.
- Blot Dry One Last Time. Press firmly with a dry towel to remove the rinse water.
- Air Dry Thoroughly. This is how you prevent mildew. Open a window, turn on a fan, or use a hairdryer on a cool setting to circulate air over the spot. Do not put sheets or a mattress pad back on until the mattress is completely dry to the touch, which can take several hours. I sometimes point a small fan at the area overnight for peace of mind.
Tackling the Tough Ones: How to Get Old Urine Stains Out of a Mattress
How do you remove old urine stains from a mattress? You treat them with more patience and a deeper cleaning action than a fresh spill. The stain has set, and the odor has become part of the mattress padding. It’s especially challenging compared to cat urine stains in bedding.
My Aunt Jessica’s guest room mattress taught me this lesson. A forgotten accident left a faint yellow map and a sour scent no airing could fix. Fresh stain methods just won’t cut it here.
For old stains, your goal is twofold: eliminate the lingering odor and lighten that stubborn discoloration. This requires breaking down the urea crystals that have dried and settled deep inside the padding.
Your Step-by-Step Battle Plan for Old Stains
This method works. I’ve used it on mattresses from my kids’ rooms and after my dog Peeta had a poorly-timed upset stomach.
- Vacuum the entire mattress surface thoroughly. You want to remove any loose dust or grit first.
- Mix a small amount of cool water with a few drops of mild dish soap. Using a clean white cloth, gently blot the old stain area to reactivate the surface. Don’t scrub. Just dampen it.
- Now, apply your main cleaner. You have two powerful, non-toxic options. The non-negotiable part is using one of them.
Option 1: Enzyme Cleaner (My First Choice)
Enzyme cleaners contain live bacteria that literally eat the urine crystals. They are the most effective odor eliminators. These bio enzymatic cleaners attack odors at the source by breaking down organic molecules. They’re especially effective for urine odors.
I keep a bottle of a commercial pet enzyme cleaner on hand. Saturate the stain area according to the product’s directions. You want the mattress padding to feel damp, not dripping wet.
This “soak and wait” strategy is critical for breaking down old urea crystals. The enzymes need time to work. Let the treated area air dry completely. This can take 24 hours or more.
Option 2: Hydrogen Peroxide Paste
For light-colored mattresses with bad discoloration, this is my go-to. Hydrogen peroxide is a gentle oxidizer that can bleach the stain away. It’s a reliable method for removing blood stains from mattresses. Just be sure to test on a hidden spot first.
In a bowl, mix 3 parts baking soda with 1 part 3% hydrogen peroxide. Add a small squirt of dish soap. Stir until it forms a spreadable paste.
Wear gloves. Spread a thick layer of this paste over the stain, going slightly beyond its edges. Let it sit and work for several hours, or even overnight.
Finishing the Job and Troubleshooting
After your chosen treatment has dried, vacuum up any baking soda residue. Inspect the area.
The smell should be gone. The stain should be significantly lighter or invisible. Air out the room.
For a truly stubborn old stain, a second treatment is often necessary. Don’t be discouraged. Just repeat the process. Staying mindful of common stain-removal mistakes can save you trouble later.
If a faint odor remains, my mom Martha’s trick is to lightly sprinkle the area with baking soda, let it sit for an hour, and vacuum it up. It absorbs any last traces of scent.
Always check for colorfastness in an inconspicuous corner first. And never use heat to dry the mattress, as it can set any remaining proteins permanently.
Why This Works: The Science of a Urine Stain

My dog Peeta is a good boy, but he once got spooked during a thunderstorm. We ended up with a classic “old and set” stain on the guest bed mattress. Understanding what I was dealing with made all the difference in fixing it for good.
That “fix it for good” part is key. You can’t just cover a urine stain. You have to dismantle it, piece by piece. Let’s break down what you’re really fighting.
Chemistry Corner: What’s in That Stain?
Think of a dried urine stain as a tiny, layered crime scene on your mattress. It’s not one thing, it’s several.
First, urine contains urea, a nitrogen-rich compound. When fresh, it’s slightly acidic. But as it sits, bacteria get to work. They feast on that urea and convert it into ammonia, which is strongly alkaline. This is why old pet accidents or toddler mattress stains smell so much sharper and more pungent than fresh ones.
The stain has two main phases: an acidic fresh phase and an alkaline, smelly old phase, and you need a strategy for both.
Second, urine is packed with salts, minerals, and, crucially, proteins and organic matter. These are what cause the visible yellowish or brownish stain. The proteins bind to fabric fibers as the liquid dries, setting the color in place.
Water alone won’t cut it. It might rinse away some salts, but it can actually “cook” the proteins into the fibers with heat, making the stain permanent. I learned this the hard way trying to steam-clean a spot on an area rug.
Your Cleaning Agents: A Targeted Strike
Knowing the enemy’s composition tells us exactly what weapons to use and in what order.
White Vinegar (The Acidic Neutralizer)
Plain white distilled vinegar is my go-to first responder for the odor. Remember how old urine turns alkaline and smelly? Vinegar is a mild acid.
When you apply vinegar, it chemically neutralizes that alkaline ammonia, cutting the stench off at the source. It’s like turning off a stinky faucet. It doesn’t “cover” the smell with perfume; it cancels it out. This is the trick my aunt Jessica swears by for her wine-spill accidents, though she uses it on fabrics, of course.
Vinegar is great for the odor, but it’s not a superstar on the protein-based stain itself. For that, we need reinforcements.
Enzyme Cleaners (The Protein Eaters)
This is the secret weapon for the visible stain. Enzymes are biological molecules that act like microscopic Pac-Men. They are designed to seek out and break down specific organic matter-like proteins, fats, and starches.
A good enzymatic cleaner for pet stains contains microbes that literally digest the urine proteins, breaking them into smaller, water-soluble pieces you can then blot away.
Think of enzyme cleaners as a targeted cleanup crew that eats the stain from the inside out, something a regular detergent just can’t do. Their effectiveness is rooted in a scientific process that breaks down stains at a molecular level.
A word of caution: never mix vinegar and an enzyme cleaner in the same step. The acid in the vinegar can kill the helpful enzymes. Always neutralize with vinegar first, rinse/blot, then apply the enzyme treatment.
Baking Soda (The Final Polish)
Baking soda is our multi-tool. After the stain is treated, we use it for two main jobs.
First, it’s a mild abrasive. A gentle scrub with a baking soda paste can help lift any remaining residue from the mattress surface. Second, and more importantly, it’s a brilliant absorbent and deodorizer.
Baking soda’s porous structure acts like a sponge, pulling out any lingering moisture and odor molecules as it dries, leaving the mattress fresh and dry. It’s the same principle as the open box in your fridge.
So there you have it. Vinegar tackles the chemical smell, enzymes dismantle the physical stain, and baking soda gives us a fresh, dry finish. It’s a team effort, with each player having a specific, science-backed role.
The Crucial Final Step: Drying Your Mattress Completely

Now, you’ve done the hard work of treating the stain. This next part is just as important. Think of your mattress as a patient that needs recovery time.
Rushing the drying process is the number one reason odors and mildew come back.
The “Post-Treatment Recovery” Process
Your goal is to move air over the damp area as fast as possible. Open windows in the room. If you have a fan, point it directly at the mattress.
I keep a small box fan in the hall closet for jobs like this. After Jessica’s last nighttime accident, I angled it at her mattress for the whole afternoon.
Sunlight is your secret weapon if you can use it. Carrying a twin mattress outside for a few hours is a workout, but it’s worth it.
The sun’s UV rays are natural disinfectants that help break down lingering odor molecules. It also provides warmth for faster drying. My mom, Martha, taught me this trick years ago with my old crib mattress.
Timeline and a Critical Warning
A mattress needs a minimum of 4 to 6 hours to dry completely in a well-ventilated room. In humid weather or for a deep soak, it can take a full day.
Do not, under any circumstances, put sheets or a mattress pad back on until it is 100% dry. I’ve made this mistake before.
I once covered a slightly damp spot after cleaning up after our dog, Peeta. Two days later, a faint musty smell told me I’d trapped moisture inside. I had to start the whole process over.
The Final Check: Is the Job Really Done?
Before you call it a victory, perform this two-part test. Wait until the mattress is totally dry to the touch, top and sides.
- The Nose Test: Get close and take a deep breath right over the treated area. If you smell anything sour, musty, or like ammonia, the odor is not gone.
- The Eyes Test: Look at the spot in bright, natural light. A faint shadow or ring might mean old stains remain, but the main spill odor should be gone.
If it passes, you’re done. If not, the area likely needs another targeted treatment. Sometimes an old, deep stain needs two rounds. That’s normal, especially for a mattress that’s seen years of use.
Choosing Your Cleaner: Enzyme Sprays, DIY Mixes, and What to Avoid
Finding the stain is the easy part. Choosing the right weapon to fight it is where you can win or lose the battle.
You have two main paths: a homemade mix or a commercial cleaner. I keep both in my arsenal, because different stains call for different tactics.
When a DIY Mix is Your Best Bet
For a fresh, still-damp accident, a simple homemade solution is often perfect. It’s cheap, fast, and uses items you already own.
My go-to formula is a 50/50 mix of white vinegar and cold water in a spray bottle. The mild acid in vinegar neutralizes the alkaline salts in urine, killing that sour scent. My son Jason’s soccer buddy, Edward, had a spill once, and this mix worked before the smell had a chance to set.
- White Vinegar & Cold Water: Great for fresh stains and odor neutralization.
- Dish Soap & Hydrogen Peroxide: Mix a tablespoon of clear dish soap with a cup of 3% hydrogen peroxide. The soap lifts the organic material, and the peroxide bleaches the stain. Test this on a hidden corner of your mattress first, as peroxide can have a light bleaching effect.
These DIY mixes are fantastic for surface-level, recent messes. They’re your first line of defense.
Why You Might Need a Commercial Enzyme Cleaner
If the stain is old, or if it was a, let’s say, “substantial” event from a larger pet or child, you need heavier artillery. This is where enzyme cleaners shine.
These sprays contain live bacteria or enzymes that literally eat the urine crystals and proteins deep in the mattress padding. They don’t just mask the smell. They digest the source. I learned this after our golden lab, Peeta, had a bout of tummy trouble as a puppy. Only an enzyme spray finally removed the stubborn odor we kept smelling on warm days.
For a mattress, a pet-specific enzyme spray is often the most powerful choice, as it’s formulated for the unique chemistry of animal urine.
Recommended Product Categories for Mattresses
When you’re shopping, look for these types of cleaners. I keep at least one of each on my shelf.
- Pet-Specific Enzyme Spray: This is your gold standard for old or pet-related stains. It works on human accidents too. The enzymes need time to work, so patience is key.
- Oxy-Based Powder or Stain Remover: Products with sodium percarbonate (the active in oxygen bleach) are brilliant for lifting discoloration. You can make a paste with water, apply it to the stain, let it sit, then blot away. It’s great for that dull yellow or brown ring.
- Foaming Carpet & Upholstery Cleaner: These are excellent for the initial extraction phase. The foam helps lift the stain to the surface so you can blot it away, without over-wetting the deep layers of your mattress.
Critical “Never-Use” Warnings for Mattresses
Some common cleaners can ruin your mattress and trap the smell forever. My Aunt Jessica learned this the hard way with a wool rug. That’s why many people look for ways to remove bad smells from bedsheets and mattresses. A gentler approach can protect both your sheets and your mattress from lingering odors.
Never use ammonia-based cleaners. Urine contains urea, which breaks down into ammonia. Cleaning with ammonia signals to any pet (or even a toddler) that this is a toilet spot. It can set the odor and encourage repeat accidents.
Avoid steam cleaners or excessive hot water. You will drive the urine deeper into the padding, and the heat will permanently set the proteins, making the stain and smell impossible to remove. For removing cat urine stains and odor from upholstery, use safer cleaning methods that lift the scent without soaking the padding. This protects fabric while effectively addressing the odor.
Skip traditional chlorine bleach. It will damage mattress fibers, can create dangerous fumes when mixed with other chemicals, and often leaves a worse yellow stain behind. It doesn’t address the odor source at all, especially when dealing with biological stains like vomit or feces.
Choosing the right cleaner sets the stage for everything that follows. Get this wrong, and you’re just pushing the problem deeper into the bed.
Keeping It Clean: How to Prevent Future Mattress Stains
Let’s shift gears from cleanup to prevention. I learned this the hard way after a series of incidents with Jessica and Peeta. A little foresight saves so much scrubbing later.
Your First Line of Defense: A Waterproof Protector
My number one tip is a high quality, waterproof mattress protector. Think of it as a raincoat for your bed. After Peeta had an accident on our guest bed, the protector we bought on a whim from Brianna’s advice contained everything. The mattress underneath was perfectly dry.
Look for a protector that is quietly waterproof, not the crinkly plastic kind. A good one has a cotton top for comfort and a membrane underneath that blocks liquids. I wash ours every other month with the sheets.
This single investment is the easiest way to stop urine from ever reaching the mattress foam and fabric.
A Simple Mattress Maintenance Routine
I keep my mattresses fresh with a quick, regular routine. It takes me 15 minutes every season.
- Strip all the bedding.
- Vacuum the entire mattress surface with an upholstery attachment. This pulls up dust and skin cells that can hold odors.
- Let the mattress air out by a window for an hour if you can. Sunlight is a gentle deodorizer.
For other spills, like when Jason brings up a glass of milk, I spot clean immediately. I keep a spray bottle with cool water and a drop of dish soap in the linen closet. A quick spray, a gentle blot with a white towel, and it’s done.
Regular airing and vacuuming prevent the slow buildup of smells and grime you don’t even see.
When to Call a Professional Cleaner
Sometimes, a stain is beyond a home fix. Call a professional for severe, repeated soaking, or very old, set in stains that your efforts can’t lift. If the mattress has a persistent sour scent after cleaning, pros have powerful truck mounted extractors.
I called one for a mattress in my mom Martha’s spare room. It had years of old stains and the smell was locked in. They saved it, but it was a job for their heavy duty equipment.
Using This Knowledge on Other Surfaces
The same basic principles work for urine stains elsewhere. For carpets or upholstery, the enzyme cleaner and blotting method is identical. Just check a hidden spot first for colorfastness.
In the car, after transporting Peeta from the vet, I used the same enzyme spray on the seat. I then used a handheld wet dry vac to extract the moisture, mimicking the blotting step. For delicate car fabrics, go even gentler with the liquid amount.
Whether it’s a mattress, couch, or car seat, the goal is to neutralize the urine and pull it out without oversaturating the padding.
FAQ About Urine Stain Removal from Mattresses
1. I just found a fresh urine stain. What’s the absolute first thing I should do?
Immediately blot the area with a dry, absorbent towel, pressing firmly to soak up as much liquid as possible. Never rub, as this pushes the urine deeper into the mattress fibers. Next, focus on removing dog urine from the mattress for a thorough clean. The following steps will guide you through that process.
2. I’ve tried cleaning an old stain, but the smell won’t go away. What did I miss?
You likely need an enzyme cleaner specifically designed for urine; it digests the proteins that cause odor, which regular cleaners can’t break down. Apply it generously, let it soak in fully, and allow the mattress to dry completely, which may take 24 hours. This is especially important when dealing with urine stains on memory foam mattresses, as they can be tricky to clean thoroughly.
3. Can I use white vinegar on any type of mattress?
Vinegar is safe for most fabrics, but you should always test it on a hidden seam or corner first, especially on memory foam or waterproof covers. Avoid using heat to dry the area afterward, as this can set any remaining residues.
4. I don’t have enzyme cleaner for an old stain. What’s a good household alternative?
Make a paste of 3 parts baking soda to 1 part 3% hydrogen peroxide, add a drop of dish soap, and spread it thickly over the stain. Let it dry completely overnight, then vacuum it up to lift both odor and discoloration.
5. How can I stop this from happening again after I clean it?
Invest in a high-quality, quietly waterproof mattress protector-it’s your best defense against future accidents. Ensure the mattress is 100% dry before remaking the bed, as lingering moisture can lead to mildew and persistent odors.
Keeping Your Mattress Clean and Odor-Free
Your most effective step is treating both old and fresh stains with an enzyme cleaner, as it breaks down the urine crystals that cause lingering smells and yellow marks. Always follow with a complete, air-assisted dry to protect the mattress padding from dampness and mold. I post regular, real-life cleanup stories and solutions from our busy household on the blog, so you can find trusted advice for your next stain challenge.
Suzanne is an accomplished chemist, laundry expert and proud mom. She knows the science and chemistry of stains and has personally deal with all kinds of stains such as oil, grease, food and others. She brings her chemistry knowledge and degree expertise to explain and decode the science of stain removal, along with her decades long experience of stain removal. She has tried almost everything and is an expert on professional and DIY stain removal from clothes, fabric, carpet, leather and any other items dearest to you.