How to Get Paper Out of a Jammed Printer: A Practical, Step-by-Step Fix
Hearing that awful grinding noise? A paper jam can feel like a major crisis, but don’t panic-your first move is always to power the printer off and gently pull the paper straight out if you can see it. Stopping the printer and avoiding a forceful tug are your best first steps to prevent damage.
This guide will walk you through the safe, methodical process I use, which covers:
- Why you must always unplug the printer first for safety.
- How to find hidden jams in different printer types.
- The gentle, pull-and-guide technique to remove torn pieces.
- Simple habits to stop jams from happening again.
- When the problem is bigger than a stuck sheet and needs a pro.
As someone who’s spent years carefully extracting everything from gum to red wine from fabrics, I approach printer jams with the same patient, hands-on care to avoid making the problem worse.
What You’re Working With: Understanding Your Printer’s Guts
Think of your printer as a precise paper highway. It has rollers that grab the sheet, a fuser that heats up to melt toner, and delicate sensors that track the paper’s journey.
Jams happen when this smooth process gets interrupted by a paper misfeed, a crinkled corner, or a tiny scrap left behind from a previous jam.
You can easily damage this system by using the wrong tools. Metal tweezers can scratch rollers. Yanking paper out backwards can tear it and leave fragments. Using compressed air can blow tiny paper bits deeper into the machine.
My golden rule for printers is the same as for stains. Always start with the gentlest method. Turn the printer off and let it cool down completely before you touch anything, especially when dealing with coffee, ink, or water stains on paper.
Find your printer’s manual or look up the model online to see a diagram of where the access panels are. It saves a lot of fumbling.
What Helped Me (Pro-Tip): “My Aunt Jessica, who prints a million wine labels for her club, told me to always use the paper type setting. Printing a photo on plain paper setting is a surefire way to gum up the works.”
The First Response: What to Do When You Hear That Grinding Sound
A strange noise or an error message pops up. Your heart sinks a little. I get it. This is your immediate action plan.
First, identify where the jam might be. Is the paper stuck at the front, in the back, or somewhere in the middle? Your printer’s display might give you a clue.
- Turn the printer OFF using the power button. Unplug it from the wall. This is for your safety and stops the rollers from moving.
- Open all the obvious doors. Look at the main input tray, the rear output tray, and any front or side access panels.
- Look, don’t just pull. Shine a flashlight in there. You’re looking for the edge of the stuck paper and any possible tears.
For a clean-looking jam where you can see a good portion of the paper, gently but firmly pull it out in the direction the paper normally travels. Pulling it straight out the way it was going minimizes tearing.
If you only see a tiny corner, or if the paper is clearly crumpled and shredded, stop. That’s when we move to the next, more careful steps. A rushed pull now can turn a simple jam into a half-hour surgery to remove a torn scrap from the fuser.
Your Gentle Cleaning Toolkit: What You Actually Need
Think of cleaning vinyl siding like treating a stubborn stain on your favorite shirt. You need the right tools to be effective without causing damage. I keep a simple caddy ready for these outdoor jobs.
You can tackle most vinyl siding stains with common household items and a few specific cleaners. Here’s what I always have on hand.
| Tool | Purpose |
| Soft-bristled brush | Agitate mold or dirt without scratching the vinyl surface. |
| Large bucket & gallon jug | Mix and hold your cleaning solutions safely. |
| Garden sprayer or pump sprayer | Apply cleaning solutions evenly over large areas. |
| Microfiber cloths | Wipe drips or test cleaners without leaving lint. |
| Plastic putty knife | Gently lift dried, caked-on stains like deck stain. |
For cleaners, I lean on safe starters. My mom, Martha, taught me this. Dish soap cuts through grease. White vinegar tackles mold. Oxygen-based bleach (like OxiClean) brightens without the risks of chlorine.
Never skip protective gear. I wear rubber gloves and safety glasses every time. A splash of vinegar in the eye is no joke.
Step-by-Step: Removing Specific Vinyl Siding Stains
Different stains need different approaches. Here’s how I handle the most common ones.
How to Clean Mold and Mildew from Vinyl Siding
Mold looks like black, green, or gray speckles. It loves shady, damp spots. I see it every spring on the side of the house where Peeta’s water bowl sits.
For a safe clean, skip the chlorine bleach and use white vinegar or oxygen bleach instead. Chlorine can damage the vinyl’s color and hurt your plants over time.
- Mix your solution. For vinegar, use one part white vinegar to one part water in a sprayer. For oxygen bleach, follow the package directions in a bucket.
- Spray or apply the solution to the moldy area. Let it sit for 10-15 minutes to break down the growth.
- Gently scrub with your soft-bristled brush. You’ll see the speckles start to loosen.
- Rinse the area thoroughly with a garden hose. Work from the top down to avoid streaking.
Thorough rinsing is key. Any leftover cleaner can attract more dirt.
How Do You Remove Rust Stains from Vinyl Siding?
These are those annoying orange or brown streaks. They often come from a forgotten metal flower pot or rusty sprinkler water, like from Roger’s old workshop tools.
Always test any cleaner on a hidden spot of siding first to check for discoloration. Vinyl can be sensitive.
Start gentle. Make a thick paste of baking soda and water. Smear it over the rust stain and let it sit for an hour. Scrub gently with a damp cloth and rinse. This often works for light stains, especially on metal surfaces.
If the stain remains, you can try a commercial rust remover made for plastics. Use it with extreme caution, following the label exactly. This approach can also be used to remove rust stains from sinks and other bathroom surfaces. Rinse the area for several minutes after to remove all chemical residue.
How Do You Get Deck Stain Off of Vinyl Siding?
During our last deck staining project, Roger got a few drips on the siding. Here’s how we handled it. Deck stain is made to soak in and last, so you need to act fast.
Removing deck stain is usually a two-step process: breaking down the stain and then washing the residue away. Depending on the type of stain, different wood stain removal and stripping methods may be required.
For a fresh, wet drip, grab a cloth immediately. If it’s an oil-based stain, dampen the cloth with a little mineral spirits and wipe. Then, wash the area with soapy water. For a water-based stain, just use soapy water right away. For wood surfaces, this quick routine is a solid first pass. For more thorough guidance, check the wood water stain removal guide.
For a dried stain, you need more care. First, use a plastic putty knife to very gently scrape off the bulk of the dried stain. Don’t use metal; it will gouge the vinyl. Be especially careful if you’re dealing with fabric or vinyl car headliners.
Then, apply a small amount of the appropriate stain thinner (mineral spirits for oil-based, warm soapy water for water-based) to a cloth and dab at the remaining spot. Rinse well. Be sure to avoid common stain removal mistakes to prevent further damage.
What Helped Me (Pro-Tip)
For a dried, stubborn deck stain drip, I used a plastic putty knife to very gently lift the bulk of it before cleaning. Metal can gouge the vinyl. This saved me from scrubbing too hard and risking damage when trying to remove stubborn vinyl floor stains.
How to Clean General Dirt and Environmental Stains on Vinyl Siding
This is for overall grime, pollen, and dirt that makes your house look dull. It’s like giving your home’s exterior a bath.
You can use a classic wash recipe. Mix one-third cup powdered laundry detergent, two-thirds cup powdered household cleaner (like Spic and Span), one quart of liquid bleach, and one gallon of water. For biological stains, enzyme detergents can be a gentler alternative to bleach. They work on proteins and organic matter, while bleach is more for whitening and disinfection and may affect colors. I use bleach only when absolutely needed and am very careful around plants and windows.
For a non-bleach alternative I prefer, mix oxygen bleach and a squirt of dish soap in a bucket of warm water. It’s safer and still very effective, especially when you want to avoid bleach stains on black clothing.
Work in small sections from the bottom up. This prevents dirty water from streaking down over clean areas. Apply your solution, let it dwell for a few minutes, then rinse completely with a hose before it dries.
Tackling Leftovers and Tough Spots
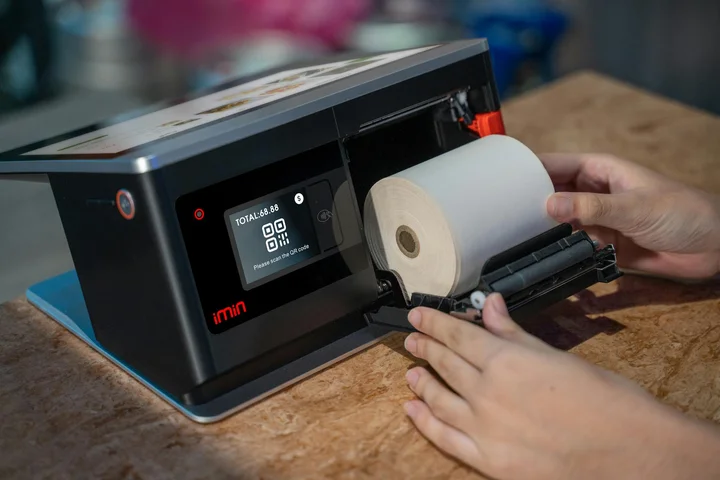
You’ve cleared the main jam, but the printer still grumbles. A tiny, stubborn piece of paper is still in there.
It reminds me of a grass stain on Jason’s soccer shorts. You treat it, wash it, and a faint green shadow remains.
That leftover fragment is your “stain remnant.” It needs a second, more focused approach.
What should I do if a small piece of paper gets stuck?
First, don’t just yank. You risk tearing it further.
Power off the printer completely. This is your safety step, just like testing a cleaner on a hidden seam.
Get a tool with a fine, non-metal tip. I keep a plastic spudger from an old electronics kit. A wooden chopstick or a pencil with a fresh, unused eraser works too.
Use your tool to gently tease the paper fragment along its natural path, following the rollers. Imagine you’re coaxing a thread out of a sweater, not pulling a weed.
For a truly stubborn shred, a piece of masking tape wrapped around your finger, sticky side out, can sometimes “lift” it free.
When should I seek professional help?
Some jams are like the red wine spill Aunt Jessica had on my light rug. You know your limits.
If you see torn paper deep inside where you can’t see or reach, stop. If the rollers feel damaged or won’t turn, stop.
If you’ve followed all steps twice and the error light stays on, it’s time to call for backup.
Call a professional if you hear a grinding noise, smell burning, or see obvious mechanical damage.
This is also the smart move for complex, multi-function office printers. My rule? If I’m considering taking a screwdriver to it, I should probably just call the technician.
Keeping It Clean: How to Prevent Future Stains
Think of printer jams like mud tracked in by Peeta. A little regular care prevents most of the mess.
The goal is to stop the “stain” before it happens.
What are common causes of jams and how can I prevent them?
Most jams start with the paper itself. It’s the number one culprit.
- Fan your paper. Before loading a ream, bend the stack into a “U” shape and let the sheets slide past each other. This separates pages that are stuck together from humidity.
- Store paper flat in its original wrapper, away from humidity. My husband Roger learned this after his hunting club flyers kept jamming from being in the damp garage.
- Use the correct paper type setting on your printer. Glossy photo paper is thicker and needs a different roller pressure.
- Don’t overfill the tray. That paper guide on the side isn’t a suggestion. It needs to fit snugly.
Dust is another enemy. It builds up on rollers, making them slick.
Once a month, with the power off, wipe the rubber rollers you can see with a lint-free cloth dampened with a little water. Let them dry completely. This gives them back their grip.
Make maintenance a simple habit.
I treat my printer like my washing machine. A quick check keeps everything running.
Every few months, do a visual check inside the paper path for stray bits or dust.
Stick to one brand and weight of paper for your everyday printing. Printers get used to a “diet.”
If you print infrequently, run a single test page every week or two. This keeps the ink heads clear and the rollers moving.
This regular, gentle care is your best defense. It keeps your printer running smoothly for years, saving you from the frustration of a major paper “stain” crisis.
FAQ About Clearing Printer Paper Jams
What household items can I use to clear a jam if I don’t have special tools?
A wooden chopstick or a pencil with a fresh, unused eraser works well to gently nudge paper. Avoid anything metal like tweezers, which can scratch the sensitive rollers inside your printer.
How do I make sure no tiny paper scraps are left inside after clearing the main jam?
With the printer unplugged, shine a flashlight into the paper path and look along all the rollers. Use a piece of masking tape wrapped around your finger, sticky side out, to lift out any clinging fragments you see.
What’s the correct way to reload paper to prevent another jam right away?
Always fan the stack of paper before loading it to separate any sheets stuck together by humidity. Then, make sure the paper guides in the tray are snug against the edges of the stack so the sheets feed in straight.
What’s the one most important habit to prevent future paper jams?
Store your paper flat in a cool, dry place inside its original wrapper. Damp or wrinkled paper is the most common culprit for misfeeds and jams.
What are the clear signs that a jam needs a professional repair?
Seek help if you smell burning, hear a persistent grinding noise, or if the printer displays a persistent jam error after you’ve thoroughly checked for and removed all paper. Visible damage to internal rollers also requires a technician.
Smart Printer Care After a Jam
From clearing jams caused by my son Jason’s thick soccer flyers, I know the best advice is to stay calm and follow the manual’s path for removal. Turning off the printer and gently pulling the paper in the direction it feeds prevents tears and protects those delicate inner rollers. I share more real-world fixes for home messes and surface care every week on Stain Wiki.
Written by Suzanne Rosi Beringer. Suzanne is an accomplished chemist, laundry expert and proud mom. She knows the science and chemistry of stains and has personally deal with all kinds of stains such as oil, grease, food and others. She brings her chemistry knowledge and degree expertise to explain and decode the science of stain removal, along with her decades long experience of stain removal. She has tried almost everything and is an expert on professional and DIY stain removal from clothes, fabric, carpet, leather and any other items dearest to you.