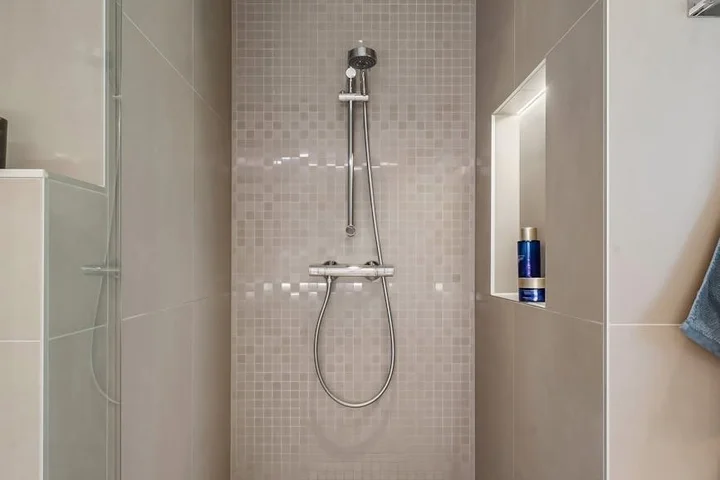
How Do You Remove Hard Water Stains from Shower Glass Doors and Windows?
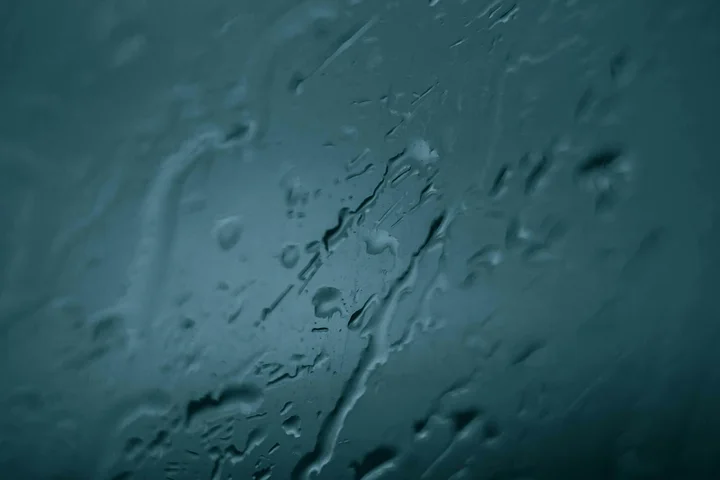
Those cloudy white rings and spots on your glass aren’t just an eyesore; left alone, they can become permanent. You can dissolve most fresh hard water stains with a simple mixture of white vinegar and water, applied with a soft cloth.
Here’s exactly what I’ll cover to get your glass sparkling again:
- Why hard water leaves those chalky marks and how to identify them
- My tested, non-toxic cleaning recipes using pantry staples
- A clear step-by-step process for shower doors and other glass
- Pro tips for tackling old, set-in mineral deposits
- How to keep spots from returning after your next shower
I’ve honed these methods over years of cleaning up after my family’s splashes and spills, from Jason’s post-soccer shower door to Aunt Jessica’s wine glass collection.
What Makes Those Cloudy Shower Stains So Stubborn?
Think of your tap water as a delivery truck. It’s not just carrying H2O. It’s often loaded with tiny passengers, minerals like calcium and magnesium. Every time water evaporates on your glass, it dumps its cargo.
These minerals aren’t just sitting on the surface. They bond to it, like super glue. Over days and weeks, layer upon layer builds up. That’s what you’re seeing and feeling.
The visual is usually a cloudy, white film. Sometimes, if the light hits it right, you might see faint rainbow colors. Run your finger across it. It won’t feel smooth. It feels rough and chalky, like very fine sandpaper.
The key difference is how long it’s been there. Fresh spots, from yesterday’s shower, wipe away with a damp cloth. Baked-on buildup, like in my Aunt Martha’s guest shower she only cleans once a year, is a different beast.
Heat from your shower steam helps those minerals bond even tighter. Soap scum then sticks to that rough mineral layer, creating a crusty, stubborn mess. That’s why old stains fight back, unlike soap stains on fabric that can be treated more easily.
Your First Line of Defense: The Daily Shower Squeegee
Preventing the stain is infinitely easier than removing it later. It’s like wiping up a juice spill before it turns into a sticky, permanent spot on the carpet. Even after washing, taking steps to prevent stains after washing—like a quick post-wash wipe and a light protective spray—can help keep stains from setting.
The single most effective tool for this is a simple, cheap squeegee. Get into the habit of giving your glass doors a quick 30-second swipe after every shower.
This simple action removes the water droplets before they can evaporate and leave their mineral cargo behind. You’re stopping the problem before it starts.
I keep a squeegee in every shower. My eight-year-old, Jason, thinks it’s fun. My three-year-old, Jessica, tries to “help” and mostly just makes wet streaks on the wall. But the habit sticks.
My husband Roger even swiped our bathroom squeegee for his truck windows after a muddy soccer game with Jason and his buddy Edward. It works on any glass surface!
For a whole-house approach, a water softening system can reduce the mineral load in your water. It’s an investment, but if you have severe hard water, it makes a world of difference for your skin, hair, dishes, and every surface in your home.
Gathering Your Battle Kit: Safe and Effective Tools
Let’s get your supplies together. Having the right gear turns a frustrating chore into a simple win.
I keep these items in a bucket under my sink. They work for shower doors, mirrors, and even the glass table Jessica loves to fingerprint.
- Microfiber cloths are my first choice. They absorb solution and lift grime without leaving fuzz or streaks behind.
- A non-scratch scrubbing pad, like a Dobie, is next. It has gentle abrasion for crusty spots but won’t harm the surface.
- Empty spray bottles are vital. I use them for homemade mixes and diluted store cleaners. Label them clearly.
- A good squeegee is the final tool. It clears water fast to stop new spots from forming. Roger uses ours on his truck after he washes it.
You must avoid abrasive scrubbers like steel wool or harsh powders on glass. They leave microscopic scratches that turn clear glass permanently cloudy. I saw this happen on a friend’s oven door, and the damage was irreversible.
Always perform a test in an unseen corner first. This quick check is essential for commercial products, which can sometimes interact badly with glass coatings or seals. I test every new bottle, a smart habit I learned from my aunt Jessica after a cleaner dulled her fancy wine glass.
The Gentle Power of Your Pantry: Vinegar and Lemon Solutions
My husband Roger once called our shower door glass “foggy history,” and he wasn’t wrong. The hard water here leaves a dull, white film that’s impossible to ignore.
You don’t need harsh chemicals to fight it. Your kitchen likely holds two powerful, food-safe acids that dissolve mineral deposits beautifully.
Your Two Key Household Players
White distilled vinegar is my absolute go-to for this job because its acetic acid breaks down calcium and lime scale on contact.
Think of the acid as a key that unlocks the mineral crust from the glass.
Fresh lemon juice works similarly. Its citric acid tackles the same minerals and leaves a fresh scent.
I keep both on hand, but vinegar is cheaper for a big spray-down.
Method 1: The Direct Vinegar Spray (For Regular Maintenance)
This is my weekly routine after my son Jason’s endless soccer practices. It keeps light spotting from ever becoming a real problem.
- Mix equal parts white vinegar and warm water in a spray bottle. I use an old glass cleaner bottle I’ve rinsed well.
- Spray the solution generously onto the dry glass door. You want it thoroughly wet.
- Let it sit for 5-10 minutes. You’ll see the white film start to dissolve and run down.
- Scrub gently with a non-scratch sponge or a microfiber cloth. No need for heavy pressure.
- Rinse completely with clean water. A squeegee finishes the job for a perfect streak-free shine.
Method 2: The Vinegar & Baking Soda Paste (For Stubborn, Thick Buildup)
For the crusty rings at the bottom of the door that have been there for months, you need more muscle.
Combine baking soda and just enough vinegar to make a spreadable paste – this creates a mildly abrasive scrub that clings to vertical surfaces and tackles heavy deposits.
- Turn off the bathroom fan. In a small bowl, mix baking soda and vinegar until you get a texture like thick toothpaste.
- Using a cloth or your fingers (wear gloves if you have cuts), spread the paste directly onto the problem areas.
- Let it sit for 15-20 minutes. The paste will dry and look a bit chalky.
- Scrub in small circles with a damp non-scratch sponge. You’ll feel the gritty texture working.
- Rinse everything away with warm water. You may need to wipe a few times to remove all paste residue.
A Quick Note on the Smell & Safety
The vinegar smell can be strong, I know. It always reminds me of my Aunt Jessica’s pickling weekends.
The odor disappears completely once you rinse the glass and the room airs out, leaving behind no chemical fumes.
These are safe for most standard shower and window glass. But do a spot check first if you have antique glass, certain etched finishes, or stone surfaces nearby, as acid can damage them.
Always test in a small, inconspicuous corner first. My mom Martha taught me that, and it’s saved me from a few disasters.
When to Bring in the Heavy Hitters: Commercial Cleaners
Are there any commercial products specifically recommended? Yes, and I rely on them when my homemade mixes fail.
If you see those dull, white spots even after scrubbing, it’s time for specialized help.
My Go-To Commercial Cleaners
I separate them into two categories based on strength. This helps me choose without guesswork.
First, citric acid-based products like BioClean. They are gentler and smell like citrus.
For routine films or light spotting, a citric acid cleaner is my safe and effective first choice.
I use it on our main shower door to combat Jessica’s bubbly bath residue. It cuts through without harsh fumes.
Second, stronger acidic cleaners like CLR. These tackle the crusty, chalky buildup that vinegar can’t touch.
Save products like CLR for the most stubborn, textured stains that feel rough to your fingernail.
My husband Roger used CLR on our patio glass after a summer of sprinkler water. It wiped away years of mineral deposits in minutes.
A Targeted Specialist: A-MAZ Water Stain Remover
Some stains need a sniper, not a shotgun. A-MAZ Water Stain Remover is exactly that.
It’s a gel formula made to stick to vertical glass. This lets it work on shower doors without dripping straight off.
A-MAZ clings to the stain, giving its active ingredients time to dissolve the hardest water rings.
My aunt Jessica in Arizona uses it for her wine glasses and shower enclosures. She says one bottle lasts her ages.
The Safety Talk You Can’t Skip
Commercial cleaners are powerful. Respect them like you would a hot stove.
Always wear rubber gloves. I learned this after a light chemical burn from a different cleaner.
Open a window or turn on the bathroom fan. Good ventilation is non-negotiable for your lungs.
Never, under any circumstances, mix different cleaning chemicals together.
Mixing can create dangerous gases you can’t see or smell. I store each product in its own spot.
Keep all bottles locked away from kids and pets. My dog Peeta chews everything, so my cleaners live on a high shelf.
Read the label every time. The instructions are there for your safety and the product’s effectiveness.
Your Step-by-Step Plan to a Spotless Shower Door
That rough, cloudy film on your glass is a mix of mineral deposits (mostly calcium and magnesium) from your water. You know it’s bad when you run your finger over it and it feels gritty, not smooth. I see it on my own shower door constantly, especially after my daughter Jessica’s epic bubble bath sessions.
What is the step-by-step process for cleaning a shower door?
Follow these steps in order. Skipping the drying part is what got me right back to square one the first few times I tried this.
- Prepare the Area
Open a window or turn on the bathroom fan. Put on some rubber gloves. I use the bright yellow ones I keep under the kitchen sink. This isn’t just for chemicals. Even vinegar can dry out your skin with prolonged contact.
- Spray and Let it Dwell
Generously spray your chosen cleaner over the entire glass surface, focusing on the worst spots. You want it fully wet, not just misted.
The key here is patience. Let the solution sit for 5-10 minutes. This dwell time lets the acids or chelators break the bond between the minerals and the glass. I set a timer and go fold a load of laundry.
- Gentle Scrubbing
Use a non-abrasive sponge or a dedicated glass scrubber. I prefer a simple white Scotch-Brite Dobie Pad. Scrub in small circles. For stubborn crusties in the track or corners, an old toothbrush is perfect.
Avoid steel wool or harsh green scrub pads at all costs. They will leave tiny scratches that make the glass look permanently foggy, especially when trying to remove stubborn stains from fibreglass surfaces.
- The Critical Rinse
This step is non-negotiable. Use warm water from your showerhead or a cup to rinse every inch of the glass.
You must rinse until all cleaner residue and loosened grit is completely gone. Any leftover cleaner will dry into new, streaky spots. I do a final “finger swipe” test. If my finger slides smoothly with no tacky feeling, it’s rinsed.
- Perfect Drying for a Spot-Free Finish
This is the secret to keeping glass clear. Immediately after rinsing, use a clean, dry microfiber cloth to wipe the entire surface dry.
Microfiber is essential because it absorbs water without leaving lint or streaks. A waffle-weave glass towel is my top choice. Dry from the top down in straight, overlapping strokes.
For a truly effortless shine, my Aunt Jessica taught me a final trick: a quick buff with a separate, perfectly dry microfiber cloth. It polishes away any last microscopic droplets.
For extremely heavy, neglected buildup, you might need to repeat the spray and dwell step. My mother-in-law Brianna’s shower door needed two treatments when she visited last year. Don’t force the scrub. If it’s not coming off, let the cleaner work longer.
For everyday spots between deep cleans, a simple wipe-down with a squeegee after every shower is the ultimate prevention. I finally got my husband Roger to do this, and it cut our deep cleaning in half.
Rescuing Glass You Thought Was Lost: Severe Buildup
My aunt Jessica’s shower door looked like a frosted window in a haunted house. That’s not cloudiness from steam. That’s years of hard Arizona water minerals crusted on like cement. I get it. When the daily spray-and-wipe fails, you feel defeated.
How do you tackle severe, built-up mineral deposits?
You need to change your strategy from cleaning to dissolving. For crusty, chalky, white or brown deposits, your best friend is patience and an acidic soak.
This is the “soak and scrape” method, and it saved my aunt’s doors.
Here is exactly what I did at her house.
- I saturated paper towels with pure, undiluted white vinegar. You can also use a commercial lime scale remover, but vinegar is my go-to for a first attempt.
- I pressed the soaked towels directly onto the dry glass, completely covering the stained areas.
- I left them there to work for at least 30 minutes, but for really bad spots, an hour or more is better. The goal is to re-wet and soften that rock-hard mineral crust.
- After soaking, I peeled the towels away. The stains were already softer. I used a non-scratch scrub pad with a bit more vinegar to wipe the surface clean.
The key is letting the acid break the bond between the mineral and the glass, which turns a scraping chore into a simple wipe-down.
When a Soak Isn’t Enough: The Razor Blade
Sometimes, even after a long soak, you’ll find a few stubborn spots that refuse to budge. This is where a glass scraper tool becomes essential.
My husband Roger, who uses similar tools for automotive work, showed me the right way.
- Always use a new, single-edge razor blade in a safety holder. A holder gives you control and protects your fingers.
- Hold the blade at a very flat angle to the glass, almost parallel. You are gently shaving the deposit off the surface, not digging into the glass.
- Keep the glass and the blade wet with your cleaning solution (vinegar or cleaner) to provide lubrication.
I must give one major caution here: do not use a razor blade on tempered glass if it has any chips, cracks, or deep scratches. The pressure on a flaw could cause the entire pane to shatter. If you’re unsure, skip the blade and opt for repeated soaking and scrubbing instead.
Can hard water stains damage the glass permanently?
This was my aunt’s biggest fear. She thought her glass was etched beyond repair.
Most of the time, that cloudy, white film is just a layer of minerals sitting on top of the glass. It looks terrible, but it comes off with the right chemicals and some elbow grease. What you’re seeing is almost always reversible surface buildup, not permanent damage.
True etching happens over many, many years if minerals are constantly left to bake onto hot, dry glass. My mom Martha has an old window in North Texas with slight etching from decades of sprinkler water. It has a faint, dull roughness you can feel with a fingernail.
The glass in your shower door is much newer and you’re dealing with it now. You are almost certainly not at the etching stage yet. Those stubborn spots are just very committed tenants, not owners. You can evict them.
Beyond the Shower: Car Windows, Mirrors, and Pool Glass
Once you’ve mastered the shower door, you’ll start seeing those same crusty spots everywhere. The good news? Your new skills travel well.
Your Car, Your Bathroom Mirror, and the Coffee Table
My husband Roger’s truck windows get coated in a fine, gritty film from our hard Texas water. The core principle is identical: dissolve the mineral deposit.
For car windows and bathroom mirrors, I avoid heavy abrasives. A simple vinegar spray works wonders. I use a 50/50 mix of white vinegar and water in a spray bottle. Soak a microfiber cloth, not the glass, to prevent liquid from seeping into your car’s door panels or mirror edges. This method is especially effective for cleaning water spots on glass surfaces.
Let the vinegar do the work for a minute before wiping with a dry part of the cloth for a perfect, streak-free finish.
For a glass coffee table or shelf, the same vinegar spray is my first call. If a sticky ring from a glass sits under the mineral crust, I add a drop of dish soap to my vinegar spray. The soap cuts the grease, and the vinegar handles the white spot.
The Pool Glass Problem
My Aunt Jessica in Arizona has a pool, and the glass doors leading to it are a special challenge. Pool water spots are often harder because they’re a mix of hard water minerals and dried chlorine or salt.
A plain vinegar solution might not cut it. You need something stronger to break that bond.
For persistent pool splash spots, I use a dedicated lime scale remover or a paste of baking soda and water, applied gently with a soft cloth.
Always rinse pool glass thoroughly with clean water after cleaning. You don’t want any cleaning residue mixing with the next pool splash.
Tempered vs. Regular Glass: The Razor Blade Rule
Is there a difference in cleaning them? Not really. The difference is in how you physically scrub them.
Most shower doors and car windows are made of tempered glass for safety. It’s incredibly strong, but its surface is more vulnerable. Using a metal razor blade on tempered glass can create tiny, invisible scratches. Over time, these scratches weaken the glass.
Regular, non-tempered glass (like in some old windows or picture frames) has a harder surface and can often handle a razor blade carefully. But why risk it?
My rule is simple: I never use a razor blade on any glass I’m not 100% sure about. A plastic scraper or even an old credit card is a much safer bet for scraping off a stubborn spot.
When in doubt, use the plastic tool. It takes a little more elbow grease, but it keeps your glass strong and scratch-free for the long haul.
Keeping the Sparkle: How to Win the Long Game
So, how do you stop those chalky rings from returning? After scrubbing my own shower door clean, I asked myself the same thing.
Stopping hard water stains is easier than removing them, but it demands a shift from reaction to routine. Think of it like brushing your teeth to avoid cavities.
The Daily Squeegee: Your Non-Negotiable Habit
This is the single most effective thing you can do. I keep a squeegee on a suction cup hook inside my shower.
After every shower, I take twenty seconds to pull the water down the glass. My son Jason does it too after his soccer practice rinse-offs.
Removing the water before it evaporates is the ultimate prevention, because the minerals never get a chance to stick. It’s the habit my husband Roger religiously follows, and it works.
The Weekly Vinegar Buffet for Buildup
Even with perfect squeegeeing, a faint haze can develop. I tackle this every Sunday.
I fill a spray bottle with a 50/50 mix of distilled white vinegar and warm water. My mom Martha in North Texas taught me to use distilled vinegar for a streak-free finish.
Spray the solution on the dry glass, let it dwell for two minutes to dissolve fresh deposits, then polish it off with a dry microfiber cloth. This weekly date with vinegar keeps the glass truly crystal clear.
Your After-Shower Defender Spray
For homes with very hard water, I recommend a second line of defense. I installed this routine after a visit from my aunt Jessica, who battles extreme water in Arizona.
My go-to preventative spray is simple: one part white vinegar to four parts water in a small spray bottle. Sometimes I add a single drop of blue Dawn dish soap to help it sheet over the glass.
After you squeegee and step out, give the glass one final light mist with this mix and just walk away. The thin acidic film dries clear and fights spot formation effortlessly. I keep the bottle right on the shower caddy so I never forget.
FAQ About Removing Hard Water Stains from Glass
What’s the best cloth to use for a streak-free, scratch-free finish?
Use a clean, lint-free microfiber cloth for both applying cleaner and for the final drying polish. Its fibers lift and trap mineral grit without leaving behind scratches or fuzz that cause streaks, especially when used on stainless steel surfaces.
What’s the one safety rule I should never break when using acidic cleaners?
Never mix different acidic cleaners, like vinegar and CLR, with each other or with bleach. This can create dangerous, toxic gases, and proper ventilation is always required when using any strong product—especially when dealing with potentially reactive substances.
How do I choose between a homemade vinegar solution and a commercial product?
Limescale from hard water stains can build up over time; dissolving it is easier when you follow a simple routine. Start with a 50/50 vinegar and water solution for regular maintenance and light films. Switch to a dedicated commercial lime scale remover only for thick, crusty, textured deposits that feel rough to your fingernail.
What should I do if the stains are still there after I scrub?
If scrubbing doesn’t work, the cleaner didn’t dwell long enough. Reapply your solution, cover the area with vinegar-soaked paper towels, and let it soak for 30-60 minutes to dissolve the bonds before wiping clean.
What’s a quick daily habit to keep stains from coming back?
Use a squeegee on the glass after every single shower or splash. This removes water droplets before they can evaporate and deposit minerals, which is the most effective long-term prevention strategy.
Keeping Glass Surfaces Sparkling for Good
Your most powerful move against hard water stains is regular prevention with a simple squeegee dry after each use. When spots do appear, a mild acid like distilled white vinegar breaks them down safely without etching the glass. I post all my real-world cleaning tests, from managing Jason’s shower splashes to Brianna’s trusted remedies, over on Stain Wiki to help you care for your home with confidence.
Suzanne is an accomplished chemist, laundry expert and proud mom. She knows the science and chemistry of stains and has personally deal with all kinds of stains such as oil, grease, food and others. She brings her chemistry knowledge and degree expertise to explain and decode the science of stain removal, along with her decades long experience of stain removal. She has tried almost everything and is an expert on professional and DIY stain removal from clothes, fabric, carpet, leather and any other items dearest to you.