How to Remove Oil Stains from Concrete Driveways, Garage Floors, and Cement Surfaces?
Seeing a fresh oil stain on your concrete can feel defeating, but I promise it’s fixable. For a fresh spill, immediately cover it with an absorbent like cat litter or baking soda to soak up the bulk of the oil before it sets.
This article will give you a clear plan of attack. Here’s what we’ll cover step by step:
- Why concrete acts like a sponge for oil and makes stains seem permanent.
- The exact paste and scrub method I used on my garage floor after Roger’s truck leaked.
- How to choose between DIY solutions and heavy-duty commercial degreasers.
- My routine for keeping our driveway clean from lawnmower drips and more.
I’ve been solving these exact problems for years, from my own driveway to helping neighbors tackle their garage floor messes.
Assess the Stain: Panic Level and Your Golden Window
I spotted a fresh, dark puddle under Roger’s truck last weekend. He’d changed the oil and missed a drip. A few hours later, Peeta’s paws tracked a faint, greasy smear across the garage floor. That moment is your first clue. It’s not a disaster, but it is your cue to move.
On a panic scale from 1 (a dust bunny) to 10 (a permanent tattoo), a fresh oil spill is a calm 3. An old, set-in stain? That’s a more serious 7. The difference is your “Golden Window,” the first 2 to 4 hours after the spill when the oil is still mostly on the surface.
So, does oil stain concrete? Absolutely. Concrete is porous and drinks it up. Can you get the oil stain out? Yes, you can, especially if you act within that golden window – just make sure to follow the right methods for removing oil stains from driveways and walkways.
Your immediate first-aid is all about absorption, not agitation. Here is what you do right now:
- Grab the closest dry, absorbent material. Clay-based cat litter is ideal, but baking soda, cornstarch, or even sawdust will work in a pinch.
- Cover the entire stain with a thick layer, at least half an inch deep.
- Let it sit. Give it 30 minutes for a small spot, or leave it overnight for a bigger spill. You’ll see the powder change color as it soaks up the oil.
- Sweep it up gently. This is where you prevent setting. Never rub or scrub a fresh spill, as that grinds the oil deeper into the concrete pores.
Your Concrete Stain First-Aid Kit: Household Heroes and What to Grab
You don’t need a chemistry degree or a shelf full of specialty products to handle a fresh spill. Some of the most effective tools are probably in your kitchen or laundry room right now.
For quick response, I rely on three household heroes:
- Dish Soap (Like Dawn or Palmolive): This is your degreaser. It’s designed to cut through frying pan grease, and it works the same magic on concrete. It breaks the oil into tiny droplets so water can rinse it away.
- Baking Soda: More than a fridge deodorizer, it’s a superb dry absorbent. It pulls oil up like a sponge and is mildly abrasive for gentle scrubbing. I use it dry for first aid and as a paste for scrubbing.
- Clay-Based Cat Litter: The cheap, non-clumping, unscented kind is perfect. It’s incredibly absorbent and inexpensive. I keep a bag of this in the garage just for this purpose, next to a stiff-bristled scrub brush I don’t use for anything else.
How do these compare to a commercial concrete cleaner? For a new spill, they are often just as effective. Commercial degreasers are powerful for heavy, old stains, but your kitchen staples are safe, non-toxic, and perfect for the early rescue mission.
Can Baking Soda and Vinegar Remove Oil Stains?
I hear this question all the time. My answer is yes, but think of them as a light cleanup crew, not a demolition team.
Baking soda absorbs surface oil. Vinegar, being acidic, helps cut through grease. For a fresh spill or a light sheen, a paste made from baking soda and a splash of vinegar can be very effective for a gentle scrub. I use this combo for routine cleanups on our driveway after Roger’s projects.
For an old, dark stain that’s had weeks to seep in, baking soda and vinegar alone usually aren’t enough. They work on the surface but struggle to pull oil from the concrete’s deep pores. That’s when you need to graduate to stronger methods, which we’ll discuss next.
The Step-by-Step Guide for Fresh Oil Spills
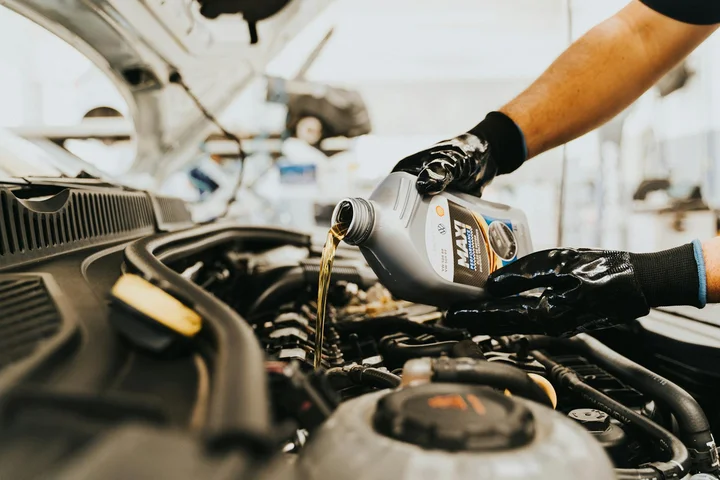
So your car just dripped a fresh black puddle, or a lawnmower tipped over. Take a breath. You can absolutely get fresh oil out of concrete if you act fast and use the right absorbents. My husband Roger’s old truck is a repeat offender in our garage, so I’ve had plenty of practice with this. The goal is to pull the liquid oil out of the concrete’s pores before it sets up and becomes a permanent stain. This approach also translates well to concrete stain removal on driveways, patios, and floors. With the right absorbents and quick action, you can save those surfaces from lasting marks.
Method 1: The Cat Litter (or Absorbent) Soak
This is my go-to for any substantial fresh spill. You’re not scrubbing yet; you’re letting a cheap, porous material do the heavy lifting by wicking the oil upward.
- Blot the Excess. Immediately use paper towels or rags you don’t mind ruining to soak up any standing oil. Press down-don’t wipe, or you’ll spread it.
- Cover the Stain Completely. Generously pour plain, non-clumping cat litter, sawdust, or a commercial oil absorbent over the entire spill. You want a layer about half an inch thick. I keep a bag of cheap clay litter in the garage just for this.
- Crush and Grind It In. This step is key. Use your foot to crush the litter into the spill, really grinding it into the concrete’s texture. You’re helping the absorbent make full contact with the oil.
- Let It Sit Overnight. Patience is your best tool here. Leave the litter on the stain for at least 8-12 hours. As it sits, you’ll often see the litter over the stain darken as it pulls the oil up.
- Sweep and Check. The next day, sweep up the used litter and dispose of it properly. Inspect the concrete. For a fresh spill, this often removes it completely. If a faint shadow remains, move to the scrubbing method below.
Method 2: The Dish Soap Scrub
This is perfect for smaller drips or the faint residue left after the cat litter method. Dish soap is designed to cut through grease and oil on contact.
When and how to use a scrub brush or broom: Use a stiff-bristled brush (a deck brush works great) or a push broom for larger areas. Don’t use a wire brush on smooth concrete, as it can scratch.
- Apply Degreaser. Pour a generous amount of liquid dish soap directly onto the stain. For a tougher stain, I make a paste from powdered laundry detergent or TSP (trisodium phosphate) and a little water.
- Scrub Vigorously. Using your brush, scrub the soap into the concrete. You need real elbow grease here to work the degreaser down into the pores. Think of it like scrubbing a greasy pan.
- Let It Dwell. Allow the soap to sit on the stain for 15-20 minutes. This gives it time to break the oil’s bond with the concrete.
- Rinse Thoroughly. Use a hose or bucket of hot water to rinse the area completely. You may need to scrub a little more while rinsing. The key is getting all the soap and suspended oil residue off the surface.
Always work in a well-ventilated area and wear durable gloves. Even natural products can dry out your skin, and you don’t want used oil and chemicals on your hands. If you’re in a closed garage, open the door.
So, can you get oil out of concrete when it’s fresh? My experience says a definitive yes. Between the absorbent soak and a good scrub, I’ve saved our driveway from countless drips from Roger’s projects and Jason’s bike chain lube messes. The concrete might look slightly darker when wet, but it should blend in once fully dry. Unlike stubborn silk grease stains, these fresh ones responded well to treatment.
Battling Old, Set-In Oil Stains on Your Driveway
You know the stain I’m talking about. It’s not the fresh, shiny spot from last week’s oil change. It’s that dark, grim shadow that’s been part of your garage floor for a year, or the permanent badge on your driveway where your dad’s old truck used to drip. My husband Roger’s truck left a few of these before we caught the leak. These stains have soaked deep into the concrete’s pores, and they demand a more serious conversation than dish soap.
A Quick, Realistic Note Before We Start
Manage your expectations if the concrete is already flaking, spalling, or if that stain is a decades-old family heirloom. You can lighten it significantly and improve the look, but complete removal might not be possible without resurfacing the concrete. That’s okay. Our goal is to make it so you don’t notice it unless you’re looking for it.
The Degreaser Deep Clean: Your First Line of Attack
For old stains, a dedicated concrete degreaser is your best friend. I keep a jug of a concentrated, citrus-based degreaser in the garage. It’s tough on oil but easier on the plants and my lungs than some harsh chemicals. The process is about patience and penetration; often, you need to brush and allow time for biodegradable cleaners to work.
- Apply Liberally: Pour the degreaser directly onto the dry stain, ensuring you cover the entire area and a little beyond its edges. You want to see a good pool of product sitting on top of that dark shadow.
- Agitate with a Brush: This is key. Use a stiff-bristled push broom or a deck brush and scrub the product into the stain. You’re not just cleaning the surface, you’re working the degreaser down into all those tiny pores where the oil is hiding.
- Let it Dwell: Walk away. Let the degreaser sit for at least 15-30 minutes, or as long as the product label recommends. Don’t let it dry out. You’ll see the stain start to change, with the cleaner turning the oil into a cloudy, milky solution on the surface.
- The Rinse: Use a strong stream from your garden hose to rinse the area thoroughly. For my worst stains, I use a pressure washer on a low, wide-fan setting. The water will run gray or brown as it lifts the emulsified oil away.
You will likely need to repeat this process two or three times, letting the area dry completely between applications, to see major progress on a set-in stain. Each round pulls more of that embedded oil to the surface.
Stepping It Up: Concrete Cleaners and Etching Products
If the degreaser alone isn’t cutting it after a few tries, you can move to a more aggressive concrete cleaner or a mild etching product. These are often acid-based (like phosphoric or muriatic acid) and actually micro-etch the surface to lift the stain. Safety is non-negotiable here: wear goggles, gloves, long sleeves, and pants.
My mom, Martha, taught me to always test any acid product in a small, inconspicuous spot first to check for discoloration. The process is similar but with more caution:
- Wet the surrounding concrete with plain water to prevent the cleaner from spreading.
- Apply the product according to its label directions-often with a plastic watering can or sprayer meant for chemicals.
- You’ll see it fizz as it works on the stain. Let it dwell only for the time specified, usually just a few minutes.
- Rinse it extensively with water until all fizzing stops. Any residue left behind can damage the concrete.
This method can be very effective, but it’s for stubborn stains on sound concrete. After using an etcher, the concrete’s surface will feel slightly more textured. It’s a trade-off for saying goodbye to that old, greasy shadow.
The Power of Pressure: When and How to Pressure Wash
I hear this question a lot. Can you pressure wash oil out of a driveway? The simple answer is no, not by itself. Think of fresh motor oil on concrete like red wine on a white shirt. If you just run it under the tap, you’re mostly spreading it around. A pressure washer is a very powerful tap. On its own, it will often blast the surface layer of oil deeper into the concrete’s pores, creating a wider, more stubborn stain. It’s a mistake I’ve seen my neighbor make, and it left a permanent, greasy shadow on his otherwise perfect driveway.
When Pressure Washing Works (And When It Makes Things Worse)
Pressure washing is your final rinse step, not your primary weapon. It works brilliantly after you’ve used a degreaser or absorbent to break down and pull up most of the oil. Trying to pressure wash a fresh spill is like trying to clean a muddy dog by spraying it with a hose from ten feet away. You’ll just make a bigger mess. For old, sun-baked stains that have already soaked in, pressure washing alone won’t touch them. You need chemistry first.
I learned this timing lesson from Roger’s old truck. It left a fresh, slick rainbow under the engine one afternoon. My first instinct was to grab the pressure washer. Thankfully, I remembered a past failure and stopped. Instead, I covered it with cat litter. The next day, after sweeping up the greasy grit, I applied a concrete degreaser, scrubbed it, and then used the pressure washer to rinse it all away. The spot vanished.
How to Pressure Wash Concrete the Right Way
When it’s time for the final rinse, doing it correctly protects your concrete and gets the best result. Here is my spring garage floor routine, step by step.
- Pre-treat, Always. This is non-negotiable. Whether you used a commercial degreaser, a paste of baking soda and dish soap, or a poultice, let that treatment do its work. The surface should look like the stain is gone or significantly faded before you even plug in the washer.
- Choose the Right Tip. Never use a zero-degree (red) tip on concrete for cleaning. It’s like a laser and can etch grooves into the surface. I always use a 40-degree (white) wide fan tip. It provides enough force to rinse without damage.
- Keep It Moving. Hold the nozzle at least 12 inches from the surface and use a steady, side-to-side sweeping motion. Lingering in one spot, especially on older concrete, can quickly cause pitting or etching.
- Work from the Outside In. Start rinsing the clean area around the treated stain, pushing the dirty runoff toward the center. This prevents you from just spreading oily water onto clean concrete.
Wear old boots and safety glasses. The force of the water can kick back tiny, hard pieces of grit from the driveway right at your shins and face. It’s a small precaution that saves a lot of pain.
My Spring Ritual: A Personal Tip
Every spring, when Roger does his big lawn equipment tune-up, the garage floor pays the price. Drips of bar and chain oil, old fuel, and general grime build up. My solution is a one-two punch. First, I sweep the floor completely. Then, I mix a strong solution of my favorite commercial concrete degreaser in a bucket and scrub the entire floor with a stiff bristle broom, focusing on the obvious stains. I let it dwell for 20 minutes. Only then do I bring out the pressure washer for the grand rinse. It transforms the space, lifting that lingering garage smell and leaving a clean, gray surface ready for another year of projects. The pressure washer is the star of the show, but it only shines because of the prep work.
Chemistry Corner: Why Oil Sticks and How Cleaners Work
I have cleaned more than my fair share of oil stains. Roger’s old truck left a classic drip pattern on our driveway for years. Understanding the “why” behind the stain makes the “how” of cleaning it much clearer and less frustrating.
The Science of the Stain
Oil and concrete have a strong, messy relationship. First, oil is hydrophobic. This is a fancy word that simply means it repels water. Think of how a raindrop beads up on a waxed car. That is oil’s nature.
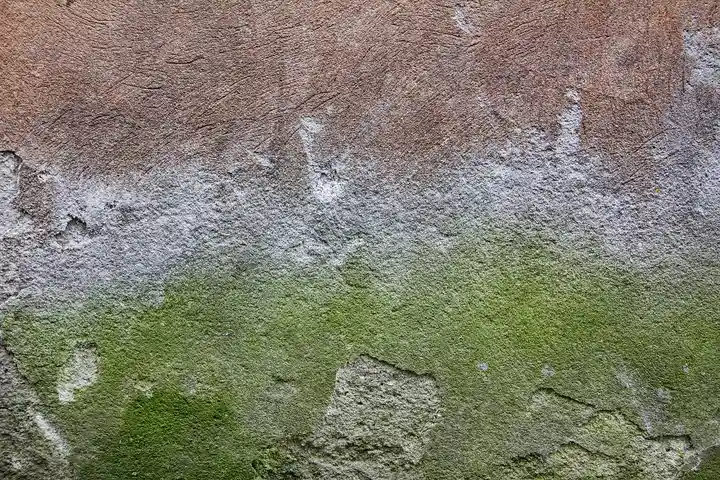
Concrete is not the solid slab it appears to be. Under a microscope, it looks more like a hard sponge, full of tiny pores and microscopic cracks. When oil spills, it does not pool politely on the surface for long. It gets sucked into those pores, clinging tightly to the rough interior walls.
This deep, physical bond is why hosing off an oil stain only removes the surface slick, leaving a dull, shadowy mark behind.
To get it out, you need to break that bond. This is where degreasers come in. Most contain special ingredients called surfactants. Their job is to emulsify the oil.
Imagine a surfactant molecule as a tiny magnet with two different ends. One end is attracted to water. The other end is attracted to oil. When you apply a degreaser, these molecules swarm the oil stain. The oil-loving ends latch onto the grease. The water-loving ends face outward.
Think of dish soap surrounding grease like a magnet picking up iron filings. It encapsulates the oil, breaking the large stain into millions of tiny droplets suspended in your cleaning solution.
This milky, suspended mixture is now emulsified. It can no longer cling to the concrete and can be rinsed away with water. I see this every time I wash a pan after Roger makes his famous fried eggs. The greasy film disappears into the soapy water.
What This Means for Your Cleaner Choice
This chemistry points you toward the most effective products. For common driveway oils like motor oil, cooking grease, or even the drips from a lawnmower, you want an alkaline-based cleaner.
Alkaline substances are great at tackling animal and vegetable fats through a process called saponification. It is a big word for turning fats into a soap-like substance that dissolves in water. My mother-in-law, Brianna, from Southern Texas, uses a strong lye soap for this reason, though I prefer modern formulas for safety.
Many commercial concrete degreasers use a high-alkaline formula paired with powerful surfactants. They are designed to quickly penetrate the pore, surround the oil, and lift it out for rinsing.
Knowing this, a simple dish soap can work for a fresh, small stain because it’s a mild surfactant, but for a set-in stain, a dedicated alkaline degreaser is often the right tool for the job.
Surface Compatibility and Critical Warnings
Before you grab a bottle of cleaner, you have to know what you’re working with. Treating the wrong concrete with the wrong solution can turn a simple stain into a permanent eyesore. No matter how careful you think you are, stain removal can be tricky.
I learned this the hard way with my husband Roger’s garage floor. He had an old oil leak spot from his truck, and I tried to be helpful with what I had on hand. Let’s just say the faint stain became a much more noticeable etched spot. Concrete is a living surface, and its condition dictates your entire approach, especially when dealing with oil stains that penetrate.
Chemicals to Avoid (The “Never-Use” List)
Some common household cleaners are concrete’s worst enemies.
- Chlorine Bleach: On unsealed, porous concrete, chlorine bleach doesn’t just whiten. It can actually break down the cement binder, causing the surface to become powdery and weak over time.
- Strong Acids (Muriatic/Hydrochloric, Phosphoric): These are often sold as concrete etchers or heavy-duty cleaners. They will aggressively eat away at the surface. Using them on a stain will likely create a deeper, cleaner pit exactly where the stain was, which looks worse.
- Vinegar (Acetic Acid): While it’s my go-to for many household cleans, straight vinegar is too acidic for regular use on concrete. It can dull the surface and etch unsealed concrete, especially over multiple applications.
Understanding Your Concrete Surface
Your method needs to match your material. Here’s a quick guide.
| Surface Type | Key Trait | Your Game Plan |
|---|---|---|
| Unsealed Driveway/Patio | Porous, absorbs liquids quickly | Speed is your friend. You need absorbent materials (clay, cat litter) to pull oil UP before it soaks in deep. Degreasers should be gentle and rinsed thoroughly. |
| Sealed Garage Floor | Non-porous, smooth, often glossy | The sealant protects the concrete, so the oil sits on top. This is easier! Focus on breaking down the oil with a dedicated degreaser; scrubbing is more effective here. |
| Colored or Stamped Concrete | Has a decorative, often delicate, top layer | Proceed with extreme caution. Harsh chemicals or aggressive scrubbing can strip color or damage the stamping. Always test cleaners in an inconspicuous area first and opt for pH-neutral formulas. |
Safety is Non-Negotiable
When I’m mixing up a paste or using a commercial degreaser, my rule is simple: if it can lift motor oil, it doesn’t belong on your skin.
I make sure Jason and Jessica are inside, and Peeta is safely in the backyard. You must treat chemical cleaners with respect, no matter how “natural” the brand claims to be.
- Gloves & Goggles: Wear them. Every time. A splash in the eye isn’t worth the risk.
- Ventilation: Work in an open garage with the door up, or outside. Fumes from degreasers and even baking soda pastes can be strong in an enclosed space.
- Kid & Pet Protocol: The work area is off-limits until the product is fully rinsed and dry. I lay down old towels as a wet, warning perimeter to keep curious paws and feet away.
A Special Note for Decorative Surfaces
My aunt Jessica has a beautiful stained concrete patio in Arizona. Her one cleaning commandment? “Never let anyone use their garage tricks on it!”
For colored, stained, or stamped concrete, your first call should be to the installer or the manufacturer of the sealant. They will have the best product recommendation. When in doubt, a pH-neutral, biodegradable concrete cleaner is the safest starting point for preserving decorative finishes. It might take a little more elbow grease, but it won’t ruin the aesthetic you paid for.
After the Clean: Drying, Sealing, and Responsible Disposal
You’ve put in the elbow grease and lifted that oily shadow. Now, the real test of patience begins. This isn’t just about waiting; it’s about setting up your concrete for a long, stain-free life. I learned this the hard way when Roger, in a hurry after changing the oil on his truck, tried to park over a spot I’d just cleaned. Let’s just say we had to start over.
Giving Your Concrete Time to Breathe
Post-treatment recovery is simple but non-negotiable. Your concrete needs to air dry completely, and that process can easily take 24 to 48 hours depending on the weather and how soaked it got. In my garage, I watch for the color to change from that dark, wet gray back to its normal, uniform shade. A slight damp scent is okay, but any slick or tacky feeling means it’s not ready. If my mom Martha is visiting from North Texas, she’ll tell you to let the sun do its work, but don’t rush it.
Sealing: Your Best Defense for Next Time
Can you seal over a cleaned oil stain? Yes, and you absolutely should. Once the concrete is bone-dry and visually stain-free, applying a concrete sealer is a fantastic way to prevent future stains from setting in so deeply. Pairing stain removal with sealing yields the best long-term results. This is the idea behind removing stains, then sealing concrete floors, for durable performance. It creates an invisible shield. We sealed the floor in Roger’s workshop area after a successful clean-up, and now when Peeta tracks in mud or a tool drips, a quick wipe is all it takes. Just ensure the surface is utterly dry, or the sealer will peel and look milky.
The Responsible Clean-Up of Your Clean-Up
Don’t ruin a good job with bad disposal. How you handle the oily leftovers matters.
For dry absorbents like cat litter or baking soda: Once the litter has fully absorbed the oil and is dry and crumbly, you can typically dispose of it in your regular household trash. I double-bag it to be safe.
For oily rinse water: This is where you need to be careful. Never pour oily water down a storm drain or your home’s sink. My aunt Jessica in Arizona, a stickler for rules, always reminds me to check local hazardous waste regulations. I collect the water in a bucket and take it to my community’s disposal day.
Here is my go-to tip from years of trial and error. I let the final rinsed area dry in the sun, which naturally helps, but if I used a strong chemical degreaser, I’ll give it one extra plain water rinse to prevent any filmy residue that could attract more dirt. It’s a small step that makes a big difference in keeping that clean look.
Stopping Stains Before They Start: Smart Prevention
The easiest stain to clean is the one that never gets a chance to set. I’ve learned this the hard way over the years, watching Roger tinker on his truck and seeing Jessica’s fascination with the “shiny puddles” in the garage. After washing, a quick prevention step can stop new stains from setting, making cleanup even easier. A little upfront effort saves you from a major scrub-down later.
Your Daily Defense Against Oil Stains
Think of your concrete like a favorite white t-shirt. You wouldn’t wear it while changing the car’s oil, right? A few simple habits create a protective layer.
- Use a drip pan. I keep a cheap, shallow plastic tray under the spot where Roger parks our oldest car. It catches those slow, mysterious leaks before they ever touch the driveway.
- Apply a concrete sealer. This is your stain-resistant force field. A good quality penetrating sealer soaks into the pores and makes the concrete repel oil and water. I reapply it to our garage floor every other year, and it makes cleanup a breeze.
- Clean spills immediately. This is the golden rule. Fresh oil wipes right up with a paper towel. Follow it with a spray of dish soap and water, a quick scrub with a stiff brush, and a rinse. The stain never forms.
Acting fast is always more effective than any chemical remover applied to a weeks-old stain.
Controlling a Catastrophe: Large or Repeat Spills
Sometimes, prevention fails. A quart of oil tips over, or an old engine decides to gift your driveway with its entire contents. Don’t panic. Your goal is containment.
- Contain it. Surround the spill with an absorbent sock or pads. I buy the universal spill kits from the auto parts store and keep one in the garage. For a huge mess, kitty litter or even sawdust from Roger’s workshop works in a pinch to dam the flow.
- Soak it up. Once contained, pile absorbent material directly onto the spill. Let it sit for at least an hour to soak up the bulk of the oil.
- Sweep and treat. Sweep up the soaked material, then treat the remaining slick spot exactly like a fresh stain. The smaller the area, the easier it is to lift.
For spots that see repeated drips, like under a lawnmower, a dedicated rubber mat or a section of interlocking garage tiles can be a lifesaver.
My garage is a hub of messy projects, from bike repairs to Halloween pumpkin carving. I’ve accepted that perfection isn’t the goal. The goal is control. A sealed floor, a drip pan, and a spill kit mean that when Roger’s latest project leaves a mark, we can handle it without it becoming a permanent part of our home’s history.
FAQ about Removing Oil Stains from Concrete
What’s the fastest thing I can do to stop a fresh oil stain from setting?
Immediately smother it with a thick layer of dry, absorbent material like clay-based cat litter or baking soda. This pulls the liquid oil to the surface, buying you crucial time before proper cleaning.
Can I really use baking soda and vinegar instead of a commercial degreaser?
Yes, for a fresh spill or light sheen, a paste of baking soda and a splash of vinegar makes an effective, gentle scrub. For old, set-in stains, a dedicated alkaline degreaser is necessary to pull oil from deep pores.
What are the absolute must-follow safety rules when using chemical cleaners?
Always wear durable gloves and safety goggles to protect your skin and eyes from splashes. Work in a well-ventilated area and keep kids and pets away until the product is fully rinsed and the surface is dry.
How do I properly dispose of the oily mess after cleaning?
Place fully absorbed, dry materials like used cat litter in a double-bagged trash bag for regular disposal. Never pour oily rinse water down a storm drain or sink; collect it and take it to a hazardous waste facility.
What should I do for a massive oil spill that covers a large area?
First, contain the spread using absorbent socks or a dam of kitty litter. Then, cover the entire spill with absorbent material to soak up the bulk before sweeping it up and treating the remaining residue.
Your Concrete Care Checklist
Acting quickly is the single most effective thing you can do to stop an oil stain from setting into concrete. Blot the spill with an absorbent like clay litter immediately, then apply a degreaser to break down the oily residue. I keep a dedicated kit in my garage for the drips from Roger’s truck, and it’s saved the floor more times than I can count. For more hands-on advice and stain-busting methods, join me on the Stain Wiki blog where I post regular updates.
Suzanne is an accomplished chemist, laundry expert and proud mom. She knows the science and chemistry of stains and has personally deal with all kinds of stains such as oil, grease, food and others. She brings her chemistry knowledge and degree expertise to explain and decode the science of stain removal, along with her decades long experience of stain removal. She has tried almost everything and is an expert on professional and DIY stain removal from clothes, fabric, carpet, leather and any other items dearest to you.