How Do You Remove Urine and Feces Odors from Carpets?
If a recent accident has left you worrying about a permanent, embarrassing smell, I get it. You can eliminate these odors by immediately blotting the area and applying a quality enzyme cleaner to break down the source.
- Why these odors linger and how to attack them at the molecular level.
- My proven, step-by-step method for both fresh messes and old, set-in stains.
- A comparison of homemade solutions and commercial enzyme cleaners I’ve tested.
- How to treat different carpet fibers and pads without causing damage.
- Practical tips to discourage future accidents from my dog Peeta and my kids.
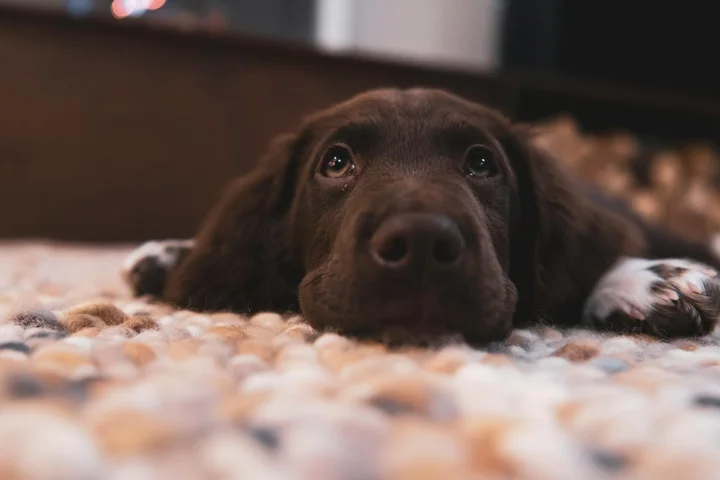
I’ve cleaned countless stains from my own carpets after incidents with my son Jason, my toddler Jessica, and our golden retriever Peeta.
First, Don’t Panic: Your Stain Removal Guide
Take a deep breath. This is one of the most common cleaning problems in any home. I’ve faced it more times than I can count, from toddler accidents to a sick puppy. It’s absolutely solvable if you have the right plan.
On our family’s unofficial “panic-level” scale, I rate this one a solid 6 out of 10. It’s not a permanent marker on white leather (that’s a 9), but it needs swift action. The real enemy here isn’t the mess itself, but time. The liquid soaks down, and as it dries, it forms stubborn uric salt crystals deep in the carpet pad. Those crystals are what cause that awful, recurring smell every time the air gets humid.
You have a “golden window” of about 15 to 30 minutes to tackle the liquid part perfectly. Miss that, and the stain sets. But here’s the good part: odor elimination can happen days, weeks, or even months later with the right enzymatic cleaners. This guide covers both scenarios-the fresh puddle you just found and those old, mysterious smells that make you wonder, “how can you get pet urine smell out of carpet?” for good. If you’re dealing with fabric-based items, this guide is your go-to for tackling stubborn urine odors.
The Smell Detective: Finding Every Source of the Odor
This step is non negotiable. You can’t win a battle if you don’t know where all the enemies are hiding. The smell you notice on the surface is often just a symptom. The real problem is in the padding, or even the subfloor underneath.
Start with what I call the “Kneel and Sniff” test. Get down on the floor near the obvious spot. Move your nose slowly across the carpet in a grid pattern. You’ll smell the sharp ammonia scent get stronger as you find the edges of the contamination. My Aunt Jessica, who loves her red wine, taught me this trick for finding spills. Mark each perimeter with a bit of blue painter’s tape.
For old, invisible stains-especially tricky cat urine-a blacklight is your best friend. You can get one cheap from a pet store. Wait until night, turn off all the lights, and slowly scan the room. Old urine will glow a pale yellow or greenish color. It’s a real eye opener. I once found a whole constellation of old spots near a plant my cat, well, didn’t like.
Here is a strong warning: if you press on the carpet and feel significant dampness, or if the blacklight reveals a huge, soaked area, the subfloor may be affected. This is exactly why people feel they “can’t get dog pee smell out of carpet.” At that point, pulling up the carpet and pad for professional cleaning or replacement might be the only permanent solution. It’s better to know now than to waste weeks treating just the surface.
Chemistry Corner: Why Pet and Human Accidents Smell So Bad
Okay, let’s get a little nerdy for a minute. This part is key because if you understand why the smell sticks around, you’ll know exactly how to attack it. These aren’t simple spills like juice. They’re a complex, nasty hybrid of three main things.
First, you have proteins. This includes urea from urine and a whole ecosystem of bacteria. Then, there’s uric acid. As urine dries, urea breaks down into ammonia and these sharp, salty uric acid crystals. Finally, from feces, you get strong organic dyes and more bacteria. Treating just one part of this triple threat is why most home remedies fail completely.
Why Your Mop Water Isn’t Enough
I learned this the hard way when Peeta, our lab, had an accident on the rug. I rushed with a wet towel, thinking I was solving the problem. All I did was make a bigger, fainter wet spot. Here’s why.
Plain water is great at dissolving and spreading the urea and water-soluble salts. It’s like stirring sugar into your tea. But those uric acid crystals? They don’t dissolve in plain water. They’re like tiny grains of sand glued to each carpet fiber. The water just washes over them, leaving them perfectly in place to re-activate the stench the next time the area gets damp from humidity or steam cleaning.
Using water or a basic carpet cleaner on its own often just dilutes the surface smell while driving the root cause deeper into the pad.
The “Pac-Man” Power of Enzymatic Cleaners
This is where the magic happens. I’m a big advocate for bio-based, enzymatic cleaners for this exact job. Think of them as a microscopic clean-up crew.
These formulas contain live, good bacteria and specific enzymes (like protease for proteins, urease for urea). When you apply them to the stain, they get to work “eating” the odor-causing proteins and bacteria. They don’t mask the smell. They digest the source of it. The uric acid crystals get broken down too, so nothing is left to smell later.
An enzymatic cleaner doesn’t just clean the spot, it removes the biological food source that causes the persistent odor. This is where bio enzymatic cleaners shine, offering odor elimination at the source by breaking down the organic matter. You have to let them work, often for several hours or overnight, but the result is permanent removal, not a cover-up.
A Quick Note on Vinegar
You’ve probably heard about using white vinegar. There’s some science here, but it has a very specific and limited use case. Fresh urine contains urea, which breaks down into alkaline ammonia. Vinegar is an acid.
For a fresh urine accident, a dilute vinegar solution (one part vinegar to three parts water) can help neutralize that initial ammonia smell through a simple acid-base reaction. My Aunt Jessica, who loves her white wine, compared it to how a squeeze of lemon balances a sauce.
However, never use vinegar on an old, set-in stain. The acid can actually “set” the uric acid crystals and any protein stains, bonding them to the fibers and making the odor nearly impossible to remove later. For anything beyond a few minutes old, skip straight to an enzymatic treatment.
Your Immediate Action Kit: What to Do in the First 5 Minutes
Speed is your best friend here. The faster you act, the less time urine and its odor-causing bacteria have to soak deep into the carpet fibers and the pad underneath. This kit is your battle plan for those frantic first moments.
Universal First Step: Solid Removal
For any solid waste, your goal is simple removal without pushing it deeper. I keep disposable vinyl gloves and a small supply of dog waste bags in the same closet as my cleaning supplies for this exact reason. It’s not glamorous, but it’s effective.
- Use a plastic bag (turned inside out over your gloved hand) or a flat piece of cardboard to gently scoop up the solid material.
- Never rub or smear. That just grinds the mess into the carpet fibers.
- Dispose of it immediately.
Think of this like picking up a fallen piece of food from a shag rug; you want to lift it straight up, not wipe it around.
For Fresh Liquids: The Blotting Doctrine
Scrubbing is the instinct, but it’s the enemy. It spreads the stain, frays the carpet fibers, and pushes the urine deeper into the padding where smell becomes a permanent tenant. Upholstery, in particular, benefits from a targeted approach to remove cat urine stains and odor. Brute scrubbing won’t do the job.
- Grab a tower of clean, dry, white towels or a whole roll of paper towels. White is key so you can see what you’re pulling out.
- Place the stack directly over the wet spot and press down firmly with your hand or step on it with your full weight.
- Lift, check the towel, and move to a dry section of the stack. Repeat until the towel comes back almost completely dry.
I learned this the hard way with a glass of grape juice. I scrubbed, and I had a permanent purple smudge. I blotted a later spill, and it vanished. Blotting lifts the liquid out, scrubbing just moves it around and mashes it in.
For Old, Dried Stains and Smells
Old accidents are a different beast. The liquid is gone, but the urine salts and crystals are cemented onto the carpet fibers. My son Jason’s old soccer bag left a forgotten water bottle that leaked, and the musty smell taught me this lesson.
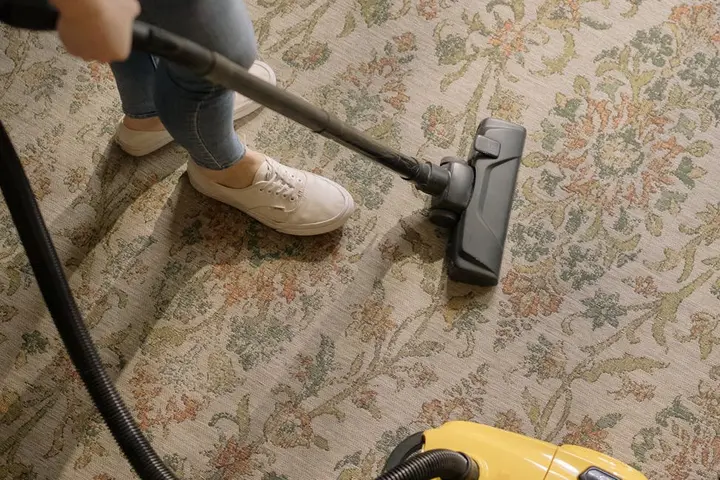
- Start with a thorough vacuuming over the entire area. Use a crevice tool to get along the baseboards.
- This removes the dried, crusted top layer of material so your cleaning solution can actually reach the stain.
- If the stain is visible, note its shape and size. You’ll be treating a wider area.
Vacuuming first is like sweeping the floor before you mop; you need to clear the debris for the cleaner to work properly.
Field Note from a Dog Owner
Life with Peeta, my golden retriever, means being prepared. After a rainy walk or if he’s feeling unwell, accidents happen. I don’t have time to run to the laundry room for supplies.
My solution is a dedicated basket by the back door. In it, I keep an old, thick bath towel and a spray bottle filled with plain water. If Peeta has an accident, I immediately spray the area lightly with water and then blot frantically with the towel. This simple water-blotting dilutes the urine and pulls a huge amount of it out immediately, preventing the stain from “setting” and buying me 10 minutes to mix my proper enzymatic cleaner. It’s the single most effective tip I have for managing fresh pet accidents without panic.
How to Remove New Human or Dog Urine from Carpet
You just found a fresh spot. Your heart sinks a little. I get it. My dog Peeta, even at five years old, will sometimes get startled by a loud truck and leave a puddle on the rug. My son Jason has had his share of late-night, half-asleep dashes that missed the mark. A fresh accident is actually your best-case scenario. The odor-causing bacteria haven’t had time to set up a permanent home deep in the carpet pad. If you act fast with this method, you can completely eliminate the stain and the smell.
The goal here isn’t just to clean the surface, it’s to break down the urine at a molecular level so it stops calling your pet or toddler back to the same spot. We’ll use a simple kitchen staple and a very specific type of cleaner to do the job right.
Step 1: The Vinegar Rinse
First, blot up every drop of liquid you can with old towels. Press down hard, don’t rub. Rubbing just pushes the urine deeper. Once you’ve blotted it as dry as possible, it’s time for the vinegar.
I keep a spray bottle of a 50/50 mix of white vinegar and cool water under every bathroom sink and in the laundry room. It’s my first line of defense for so many things. For urine, the acetic acid in the vinegar neutralizes the alkaline ammonia salts that cause that sharp, eye-watering odor.
- Mix one part white vinegar with one part cool water in a bowl or spray bottle.
- Pour or spray a generous amount over the blotted area. You want it to soak down into the carpet fibers and into the pad beneath.
- Let it sit for about 5 minutes. You might see a little bubbling, which is a good sign.
- Now, blot it all back up with dry, clean towels. Get it as dry as you can. This step prepares the area for the main event.
My aunt Jessica in Arizona swears by straight vinegar, but I find the diluted mix is gentler on carpet dyes. Always do a quick colorfastness test in a hidden corner first, like behind the sofa leg.
Step 2: The Enzyme Attack
This is the most important step. You cannot skip it if you want the odor gone for good. Regular cleaners, carpet shampoos, and even bleach just mask the smell. They don’t remove the organic waste proteins that bacteria feast on.
An enzymatic cleaner is different. It contains live bacteria or enzymes that literally eat the urine, feces, or vomit residue. They digest the waste, turning it into harmless carbon dioxide and water. Once the food source is gone, the smell-producing bacteria die off. This illustrates the stains-breakdown science behind enzyme cleaners. In the next steps, implicit links will guide you to deeper explanations of how enzymes tackle different messes.
For pet stains, I’ve had the best, most consistent results with a cleaner specifically labeled for urine, like Nature’s Miracle Urine Destroyer. Don’t just grab a generic “pet stain” spray. Look for the words “enzymatic” or “bio-enzymatic” on the label. Follow the bottle’s instructions exactly. Usually, this means soaking the area thoroughly so the solution penetrates all the way to the backing.
Step 3: The Long Soak
This is where patience pays off. Those enzymes are alive and they need time to work. They also need to stay wet. If the area dries out, the enzymes go dormant and the cleaning cycle stops.
After you’ve applied the enzymatic cleaner, cover the wet spot with a piece of plastic wrap. You can use the lid from a storage container, a plastic grocery bag, or even a small square cut from a trash bag. This creates a little greenhouse effect, keeping the enzymes active and wet.
Leave it alone. The label will give you a time frame, usually between 15 minutes for a very fresh spot to several hours or overnight for older or more stubborn ones. I often treat a spot before bed and let it work until morning. The plastic wrap trick is one I learned from my mom, Martha, who used it for her own homemade paste cleaners on upholstery.
Step 4: The Final Blot and Dry
Once the soak time is up, remove the plastic. You’ll likely see that the area is still very damp. Blot up all the excess enzymatic cleaner you can with fresh, dry, white towels. Using white towels helps you see if any discoloration is being lifted from the carpet.
Now, you must dry the carpet pad. This is critical. A wet pad can lead to mold and a whole new, musty odor problem. Place a stack of dry, white towels over the spot. Weigh them down with a heavy book, a brick, or a potted plant. This pressure wicks the deep moisture up into the towels.
Leave the weighted towels for at least a few hours, swapping them for fresh dry ones if they become soaked. Point a fan at the area to circulate air and speed up evaporation. Your carpet should feel completely dry to the touch, not just on the surface but down deep, before you consider the job finished.
How to Remove Old, Set-In Pet Urine (Cat or Dog) from Carpet
If you’re searching “can you get cat pee out of carpet,” or how can I get cat urine smell out of bedding, take a deep breath. I promise you can. That faint, sour ammonia scent from an old accident doesn’t have to be permanent. I learned this after Peeta, our lab, had a recurring spot behind the couch. Old urine is tricky because it crystallizes, but with the right steps, you can break it down for good.
Step 1: Rehydrate the Crystals
Old urine isn’t just a stain. It’s a layer of dried uric acid crystals deep in the carpet pad. You need to dissolve them first. Fill a spray bottle with plain, warm water. Mist the area lightly until it feels damp, not soaked. I aim for the texture of a morning dew on grass. Rehydrating those crystals turns the locked-in odor back into a liquid the cleaner can attack. For a set-in stain from my son Jason’s soccer buddy Edward’s visit (let’s just say aim was off), this step made the yellow ring visible again, which meant the treatment could start working. These same steps work on concrete floors too, helping remove urine stains and eliminate odors. If you ever tackle a concrete spill, you can use the same approach to keep it fresh.
Step 2: Apply an Enzymatic Soak
Now, grab a quality enzymatic cleaner. These are not just perfumes. They contain live bacteria that digest urine proteins. Pour a generous amount directly onto the spot. Use your fingers in a disposable glove or a soft-bristled brush to massage it deep into the pile, down to the backing. Think of enzymatic cleaner as a microscopic cleaning crew that eats the stain and smell from the inside out. My favorite is a simple, unscented brand I keep on hand for all pet messes. The key is to flood the zone so it soaks into every fiber where the urine traveled.
Step 3: The Extended Treatment
This is where patience pays off. If the product label says it’s safe, cover the soaked area tightly with plastic wrap. Press the edges down onto the dry carpet around it to seal in the moisture. Let it sit for a full 24 hours. The plastic wrap creates a little bioreactor, keeping the enzymes wet and active. For severe smells, like from a cat’s hidden spot, plan on a second full application after the first 24-hour soak. My mom Martha taught me this trick, and it’s the only thing that worked on a years-old odor in her North Texas home.
Step 4: Extract and Dry
After the soak, you must remove all that moisture. Use a wet/dry vacuum or a carpet cleaner’s extraction hose to suck the solution out. If you don’t have one, press down hard with a stack of old, clean towels. Stand on them to blot every bit of liquid you can. Then, force the area to dry completely. Set up a box fan and a dehumidifier if you have one. Rapid drying is non-negotiable to stop mold and prevent a musty smell from replacing the urine odor. My husband Roger is in charge of fan logistics, and we often leave them running overnight.
Safe DIY Alternative
Out of enzyme cleaner? You can make a reactive paste. Mix baking soda with enough 3% hydrogen peroxide to form a spreadable paste. First, test this mix on a hidden corner of your carpet to check for color bleaching. If it’s safe, spread a thick layer over the rehydrated stain. Let it fizz and dry for several hours. The baking soda absorbs, while the peroxide lifts stains. Finally, vacuum up the powder and rinse the area with a damp cloth to remove residue. This method can help with surface odor and discoloration, but it doesn’t biologically eliminate the urine like enzymes do. It’s a good backup plan for difficult stains when you run out of enzymatic solutions, especially for baking soda stain removal from carpets. My aunt Jessica in Arizona uses a similar mix for wine spills, and it’s a good backup plan.
How to Remove Feces (and Its Smell) from Carpet
This is the mess no one wants to deal with, but when you have pets or little kids, it happens. I’ve cleaned up after my golden retriever Peeta more times than I can count, and my three-year-old Jessica had a memorable incident with a stomach bug. The goal isn’t just to clean the spot, it’s to erase every trace of the smell so no one, especially the pet or child, is tempted to revisit it.
The smell lingers because feces contains digestive bacteria and enzymes that get trapped in the carpet fibers and pad. You have to break down that biological material completely, or a faint, sour odor will remain.
Step 1: Solid Removal
Your first job is to get the solid matter up without grinding it deeper. I keep a dedicated, dull putty knife and a roll of dog waste bags in my cleaning caddy for this exact reason. A plastic scraper or even an old credit card works too.
- Gently lift and scrape solids into a disposable bag. Work from the outside of the mess toward the center.
- Never rub or scrub, as this will force particles into the carpet base.
- Once the bulk is gone, use your vacuum cleaner on a dry setting to suck up any tiny, gritty remnants. This step is crucial for sandy cat litter or soiled diaper leaks.
Getting every solid particle up front makes the deep cleaning steps far more effective.
Step 2: The Detergent Flush
Now we tackle the oily, sticky residue. Clear dish soap, like the classic blue Dawn my mom Martha swears by, is perfect because it’s designed to cut through fats and oils.
- Mix 1 teaspoon of clear dish soap into 1 cup of warm water. You don’t need a mountain of suds.
- Slowly pour or spray the solution onto the stain, just enough to dampen the area thoroughly.
- Blot aggressively with a stack of clean, white towels. Press down hard and lift straight up. You’ll see the yellow-brown transfer onto the towel.
- Rinse the soap out. This is the step most people skip! Mix plain warm water in a spray bottle. Mist the area and blot with a fresh towel until the water you’re lifting comes back clear and no longer sudsy. Soap residue left behind will attract dirt.
Step 3: Tackle Stains and Odor
Even after the soap flush, a stain and a smell often persist. This is where an oxygenated cleaner, like OxiClean, becomes your best friend. It lifts stains and attacks odor molecules through oxidation, similar to hydrogen peroxide but formulated to be safer on colors.
I follow the carpet-safe instructions on the package exactly. Typically, you’ll dissolve a scoop in warm water. I always test this solution on a hidden corner of the carpet first, like in a closet, to check for colorfastness.
Apply the solution to the damp area, let it sit for 10-15 minutes (you might see a slight fizz), and then blot it dry with fresh towels. The stain should look significantly lighter. If it’s a very old or set-in stain, you may need to repeat this step.
Step 4: Enzyme Treatment for Lingering Smell
If you sniff the spot and still catch a whiff, you need an enzymatic cleaner. This isn’t a perfume to cover the smell. These cleaners contain live bacteria that actually digest the leftover proteins and bacteria from the waste, eliminating the odor source. Unlike regular detergents, enzymatic cleaners are specifically designed to remove bad smells from clothes.
I keep a bottle of pet-specific enzymatic spray on hand. After the OxiClean step is fully blotted, I soak the area according to the product’s directions.
The key with enzyme cleaners is patience; you must let the area dry completely, which can take a full day, and not use any other chemicals on top of it. For a severe smell, like from a repeated accident, I might apply a second round after the first dries.
Surface Compatibility Note
The same principles apply to car interiors or upholstery, but you have to be more careful with moisture. Use less liquid in each step. Blot even more aggressively to prevent water from soaking deep into the cushion. For my car seats or the living room armchair, I use a handheld carpet extractor after the enzyme treatment. It works like a tiny vacuum to pull the cleaning solution and dissolved grime back out, and it’s a game-changer for preventing a damp, musty smell later on. These techniques also translate well to removing stains from car upholstery. Use them to lift spots while keeping moisture in check.
The Post-Treatment Recovery: How to Know You Won
You’ve blotted, treated, and rinsed. The spot looks clean. Now comes the most critical part, the step my Aunt Jessica always rushes and regrets. You must let the carpet dry completely.
Patience here is everything, because a damp carpet pad is an invitation for mold, and trust me, that sour, musty smell is far more persistent and unpleasant than any pet accident. I learned this the hard way in a closet after a thorough cleaning of a Peeta incident. I shut the door, thinking it was done. The smell that greeted me two days later was a whole new problem.
The Waiting Game and How to Check
Your carpet surface may feel dry in a few hours, but the underlying pad holds moisture like a sponge. In a well-ventilated room, plan for this to take a full 24 to 48 hours.
My mom, Martha, taught me this simple, foolproof check. Grab a fresh, dry paper towel. Place it flat over the treated area. Now, step on it with your full weight for a few seconds. Lift the towel and feel it.
- If the towel feels cool or damp to the touch, the pad is still wet.
- If it’s perfectly dry and room-temperature, you’re likely in the clear.
Do this test in a few spots over the area. If there’s any doubt, keep the air moving. I leave a fan oscillating over the spot and sometimes crack a window.
The Final, Definitive Nose Test
After your paper towel passes the test, you need to do one last check. Get down on your hands and knees-I do this all the time-and put your nose right to the carpet fibers. Take a deep sniff right where the center of the accident was.
This is the true moment of truth. If you detect even a faint whisper of ammonia or that familiar funk, your enzymatic cleaner hasn’t finished its job and you need to re-treat the area. It doesn’t mean you failed. It just means there were deeper residues the first pass missed. Apply another round of enzyme cleaner, let it dwell, and start the drying process over.
A Critical Warning on Heat
I know the urge. The area is wet, and you want it gone now. You might eye your hair dryer or a small space heater. Do not do this.
Applying direct heat is one of the worst things you can do, as it can literally cook the remaining proteins and uric acid crystals into the fibers, setting the odor permanently. My husband Roger once tried to help dry a spot with a heat gun on low, and it created a small, stubbornly smelly patch I had to treat three times. Airflow is your friend. Heat is your enemy. Use fans, open windows, or a dehumidifier, but never a direct heat source.
When Home Remedies Aren’t Enough: Your Next Steps
You can do everything right with your homemade sprays and blotting sessions, and sometimes the smell still comes creeping back. I learned this the hard way with our old living room rug and Peeta, who had a favorite spot for “accidents” behind the sofa. If you’re nodding along, it’s time to level up your approach.
Signs You Need a Carpet Cleaner
Your nose and the weather will tell you. If you catch a whiff of that familiar, sharp odor every time a rainy day makes the air damp, you’re dealing with a deeper problem. Moisture reactivates the urine salts and proteins still trapped deep in the carpet pad or backing. That musty ghost of a smell returning with humidity is your biggest clue that surface cleaning won’t cut it. The other sign is pure size. If the soiled area is larger than a dinner plate, your spray bottle and cloth simply can’t deliver enough cleaning solution or extract enough of the mess from the depths.
Renting a Quality Carpet Extractor
This was my game-changer for Peeta’s favorite spot. Renting a machine like a Rug Doctor from your local hardware store isn’t as scary as it sounds. Think of it as a vacuum that injects cleaning solution and then sucks it all back out, pulling the dissolved mess with it. For urine and feces, you must use an enzymatic shampoo in the machine. The powerful spray and suction will drive those odor-eating enzymes down where they need to go.
Here’s my simple process:
- Pre-treat the area with your enzymatic cleaner and let it soak for 10 minutes.
- Fill the extractor’s tank with hot water and the enzymatic shampoo, following the rental shop’s ratios.
- Slowly go over the stain several times, making slow forward and backward passes to flush and extract.
- Empty the filthy wastewater tank and be prepared-it often looks and smells terrible, proving it’s working.
- Use fans to dry the area completely, as fast as you can.
When to Call a Professional
There’s no shame in calling for backup. If the accident was widespread, or if a pet or person had repeated issues in the same hidden area, the problem has likely reached the subfloor. DIY machines can’t reach that deep. You should also call a pro if you’ve run a rented extractor over the area twice and the odor still lingers when the carpet is fully dry. Professional cleaners have access to industrial-strength enzymatic treatments and powerful truck-mounted units that remove almost all the moisture, preventing mold and that damp smell.
Pro-Tip from Experience: The Final Freshness Boost
My mother-in-law Brianna, who’s from Southern Texas and has dealt with every kind of mess imaginable, taught me this old-school finisher. Once the carpet is completely and utterly dry after your deep clean, lightly sprinkle plain baking soda over the area. Let it sit for an hour to absorb any last vestiges of odor, then vacuum it up thoroughly. It’s a simple, non-toxic step that leaves the carpet smelling clean and neutral, not like chemicals. It’s the perfect period at the end of a very long sentence.
FAQ About Removing Urine and Feces Odors from Carpets
1. I don’t have an enzymatic cleaner yet. What’s the absolute best quick fix for a fresh urine accident?
Immediately blot up all liquid, then apply a 50/50 mix of white vinegar and cool water to neutralize ammonia. Blot that dry, but remember this is only a stopgap for fresh stains; you must follow up with an enzymatic cleaner to prevent the odor from returning.
2. Does the cleaning method differ between human urine and dog urine?
No, the core process is identical. Both contain urea and uric acid crystals, so the proven method of blotting, applying an enzymatic cleaner, and allowing a long soak works for all urine types to break down the odor at the source.
3. I’ve treated the spot, but the smell comes back when it’s humid. What now?
This signals that urine salts are still deep in the carpet pad. You need to re-treat the area with a generous enzymatic soak, cover it with plastic wrap for 24 hours, and then use a carpet extractor or professional service to fully remove the solution and moisture from the pad.
4. Are DIY solutions like baking soda and peroxide safe for all carpets?
Always test first. Mix a small amount of your DIY paste (e.g., baking soda and hydrogen peroxide) and apply it to an inconspicuous area to check for color bleaching or texture damage before using it on the visible stain.
5. How can I stop my pet from soiling the same carpet spot again?
After a thorough enzymatic cleaning, the biological scent markers are gone. To further discourage revisits, you can place a piece of furniture or a double-sided tape mat over the area temporarily, as pets are deterred by the changed texture and layout.
Keeping Your Home Fresh and Odor-Free
The most important thing you can do is act fast and use the right cleaner for the job. Blotting up liquids immediately and applying a quality enzyme cleaner breaks the cycle of odor that draws pets back to the same spot. I’ve learned from cleaning up after my own crew that this consistent, targeted approach saves carpets and sanity.
For more step-by-step guides on handling everything from red wine spills to muddy paw prints, the tried-and-true methods are always waiting for you right here on the blog.
Suzanne is an accomplished chemist, laundry expert and proud mom. She knows the science and chemistry of stains and has personally deal with all kinds of stains such as oil, grease, food and others. She brings her chemistry knowledge and degree expertise to explain and decode the science of stain removal, along with her decades long experience of stain removal. She has tried almost everything and is an expert on professional and DIY stain removal from clothes, fabric, carpet, leather and any other items dearest to you.